Note: You can access the full tutorial on Azure/ MS Teams configuration below. It also explains the SSO configuration process:
HOW-TO: MS Teams Channel with SSO
Step 1. Create Azure Bot Service
Step 1.1 Make sure you have a working Azure account.
Go to Microsoft Azure portal https://portal.azure.com/#home.
Navigate to the Bot Services and create a new one of Azure Bot type.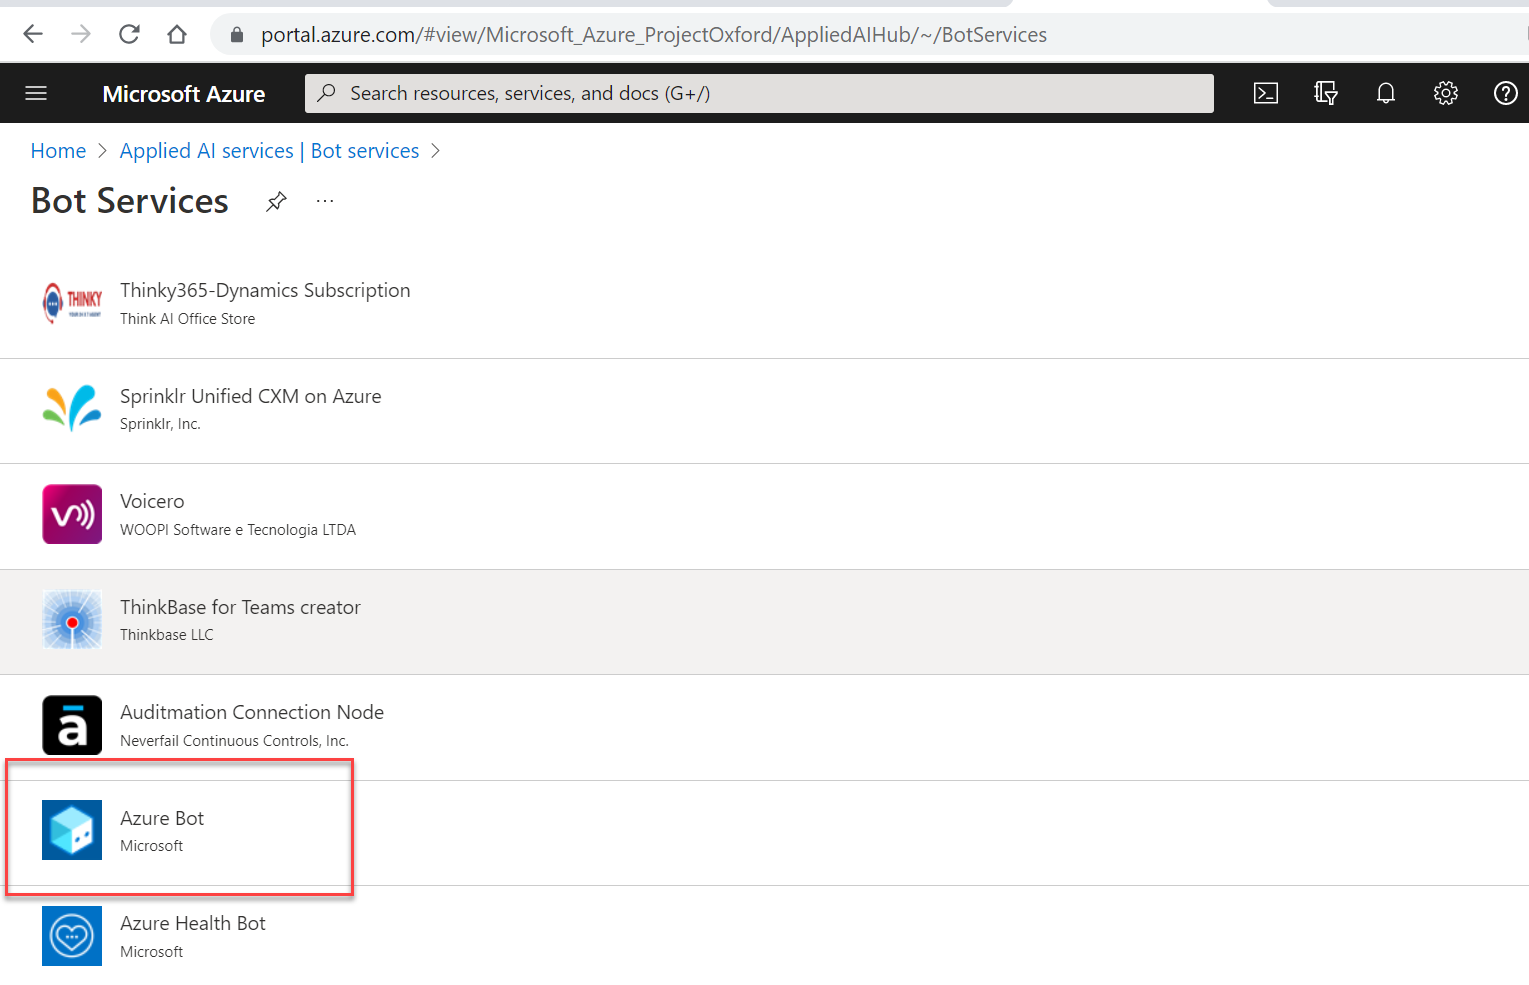
Step 1.2. Select and click Create.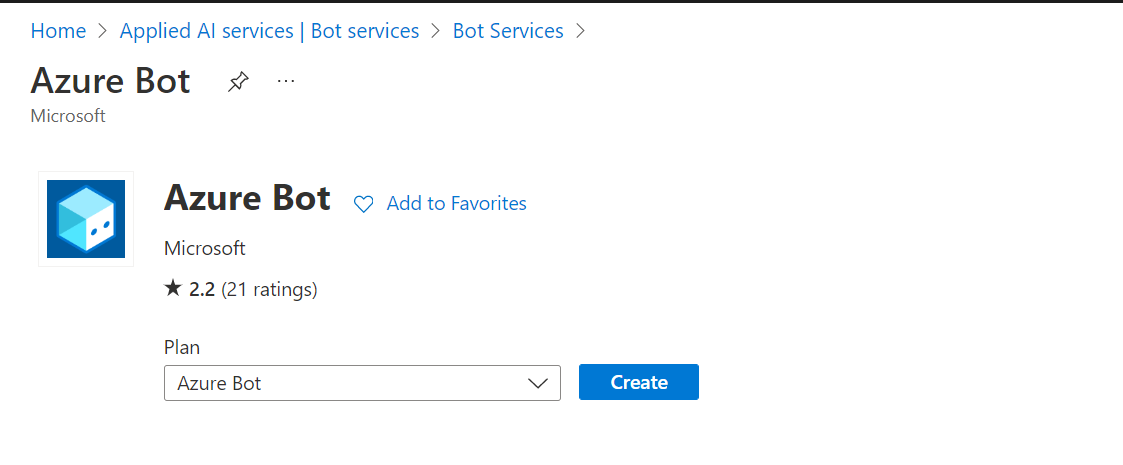
Step 1.3. Fill in the registration form:
Step 1.4. Make sure that you select the multi-tenant option for the bot (only this option is supported for now)
Step 1.5. Press Create

Step 2. In this step, we are configuring the connection between the Azure Bot Service application and our backend Node.js application (Docker Container).
Step 2.1. Go to the Microsoft Azure portal, and open the bot service created in the previous step: Now you need to generate a secret to be used for SSO integration
Step 2.2. Click Settings and scroll down.
Step 2.3. Generate a Client Secret by clicking Manage, then New Client Secret, then Add.
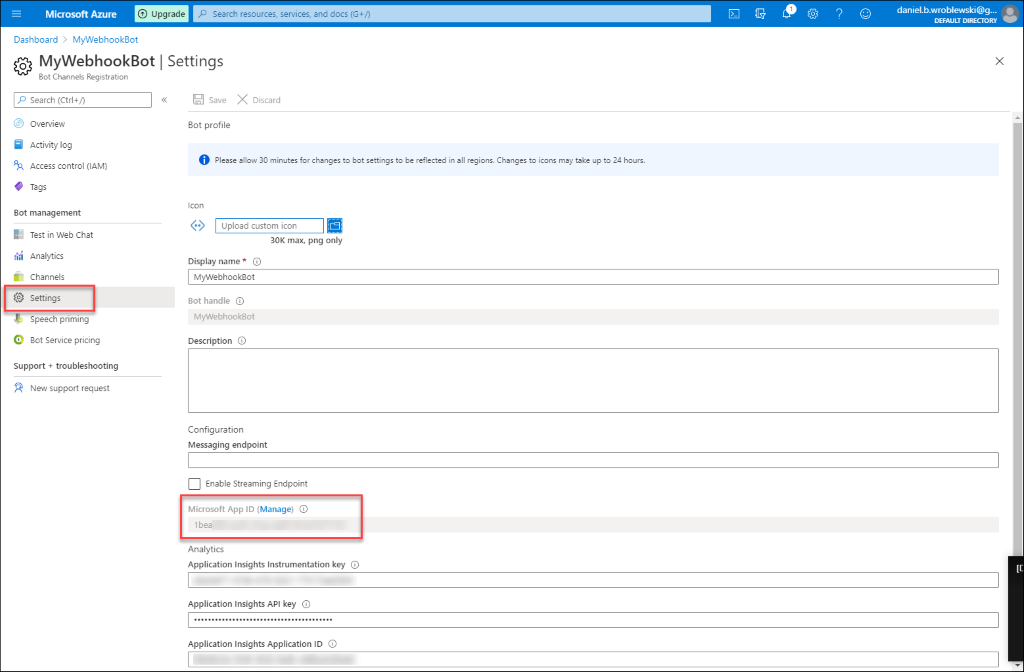
Step 2.4. Copy the Microsoft App ID and the Client Secret.
Step 2.5. In the field of Messaging Endpoint, you need to paste your application URL.
Url format is https://<nodejs hostname>/<organization>/<bot name>/v1/api/messages,
Where <organization> is your organization name on SAP CAI, and <bot name> is the name of the bot to be connected. Please, consult the implementation team should you happen to be uncertain.
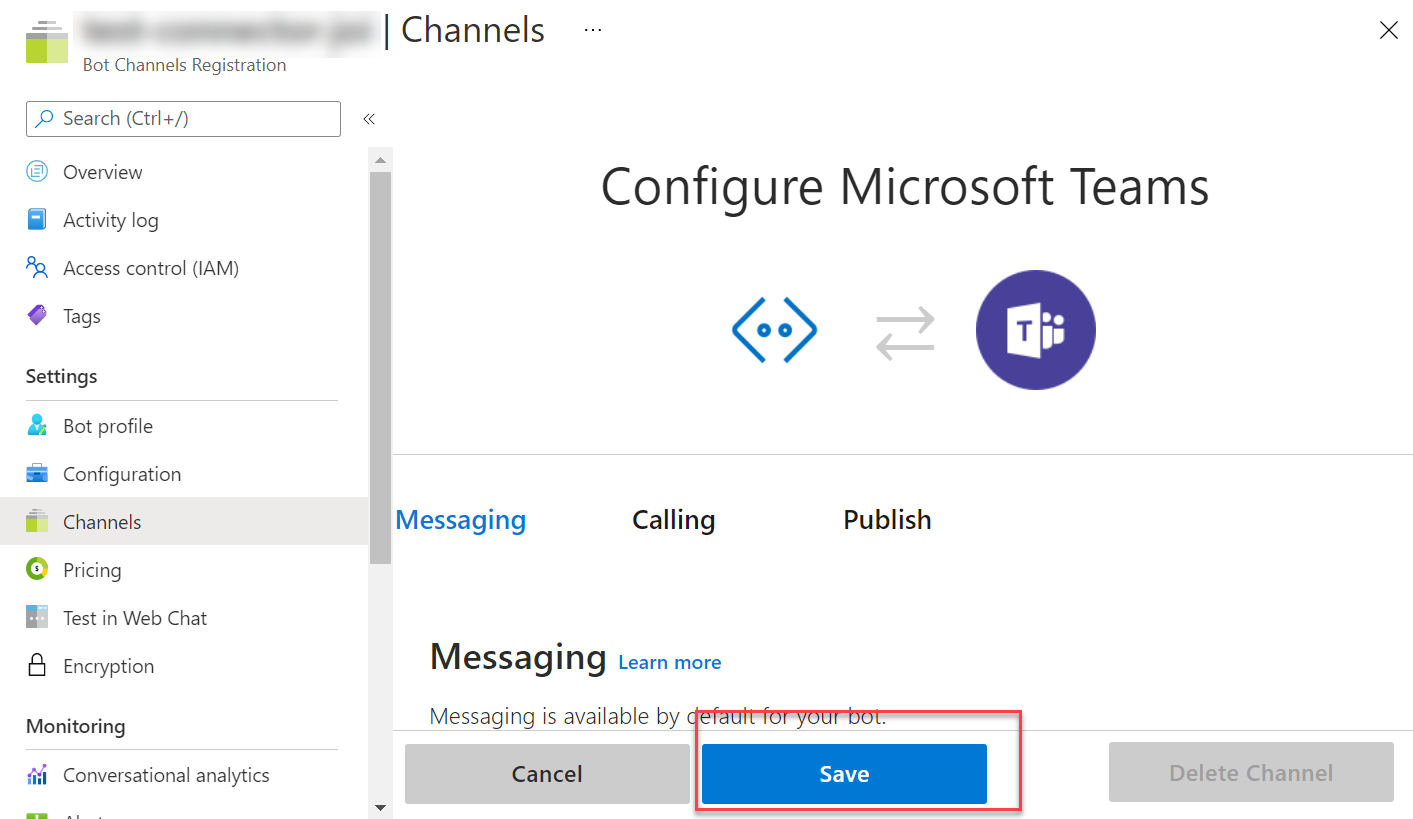
Step 2.6. Go to the Channels, and add Teams channel 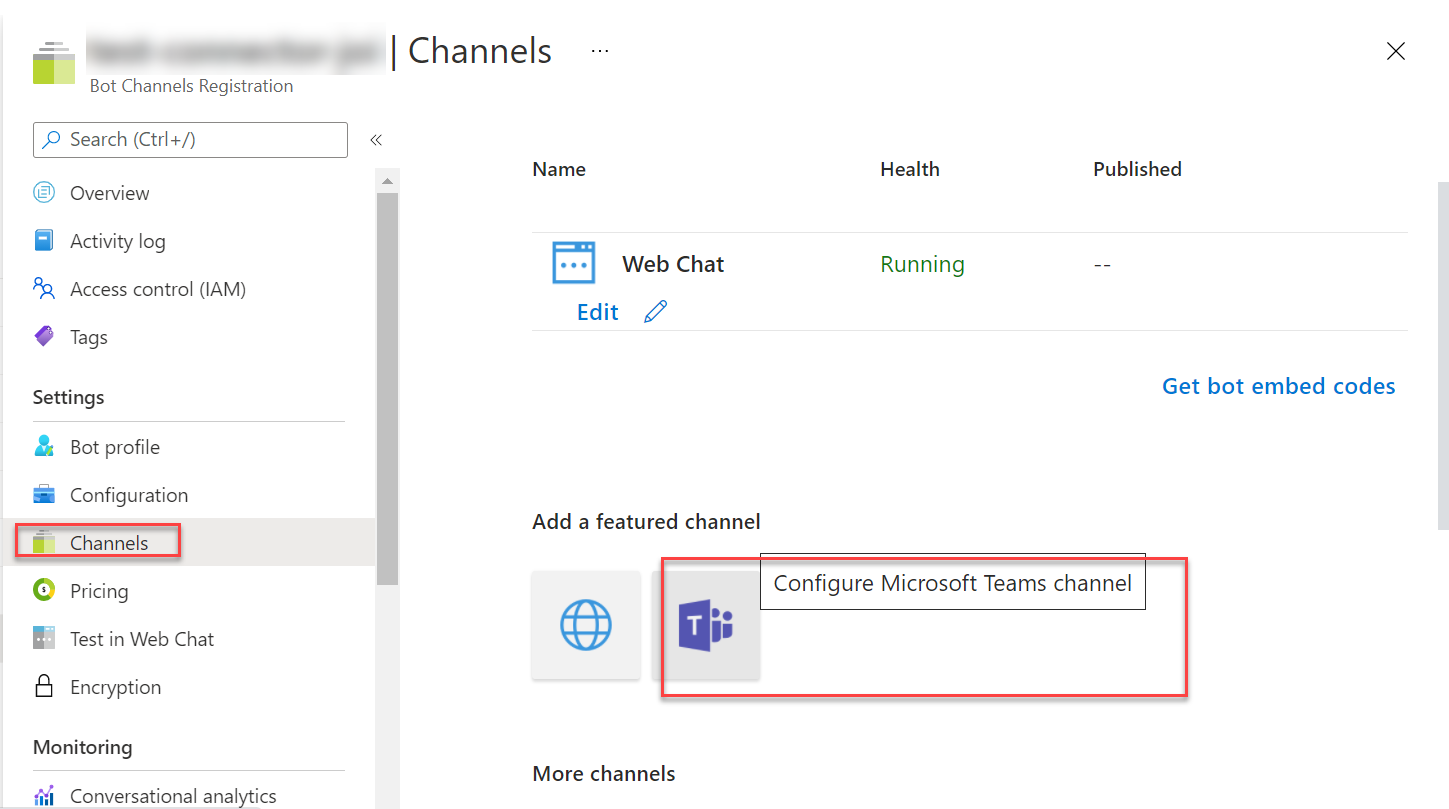
Step 2.7. Keep the default settings and press Save
Step 2.8. Under the Bot Management applications, open the Chatbot Channel configuration, select your tenant and create a new channel of the Microsoft type.
Paste your copied App ID and Client Secret from Step 2.4. into the fields of Azure Bot ID and Azure Bot Password.

Step 3. Add the new app to MS Teams.
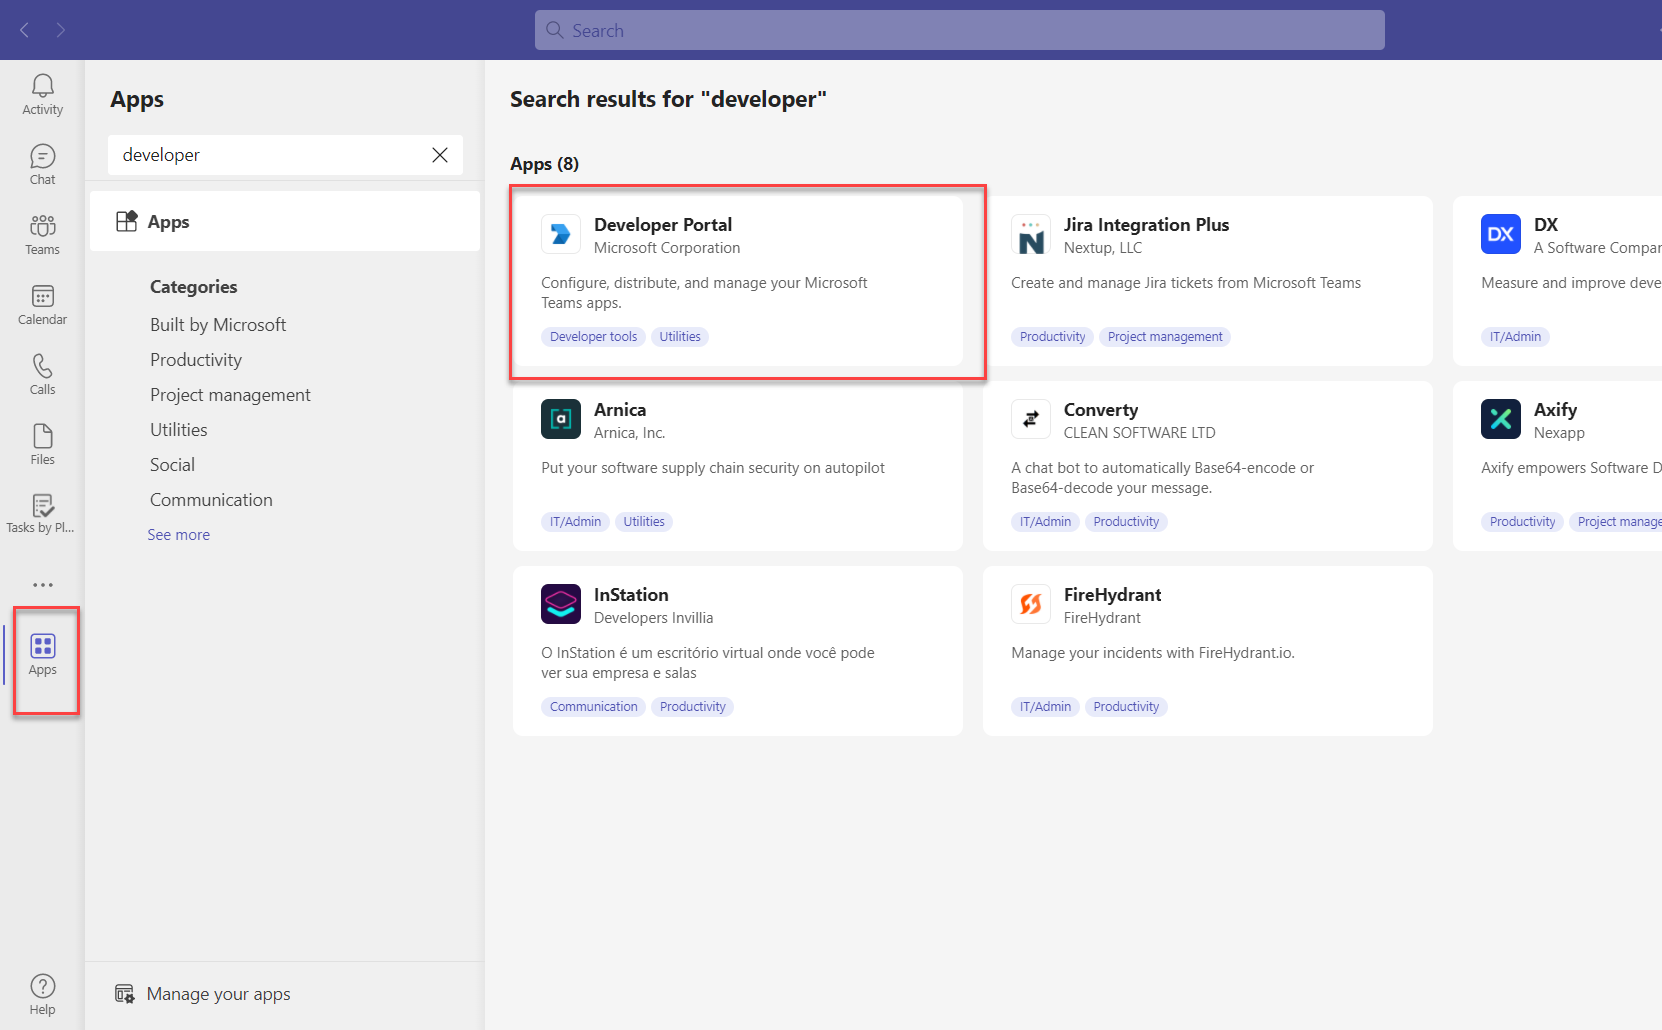
Step 3.1. Open MS Teams, navigate to the Apps tab, and search for the Developer Portal app. Open the app.
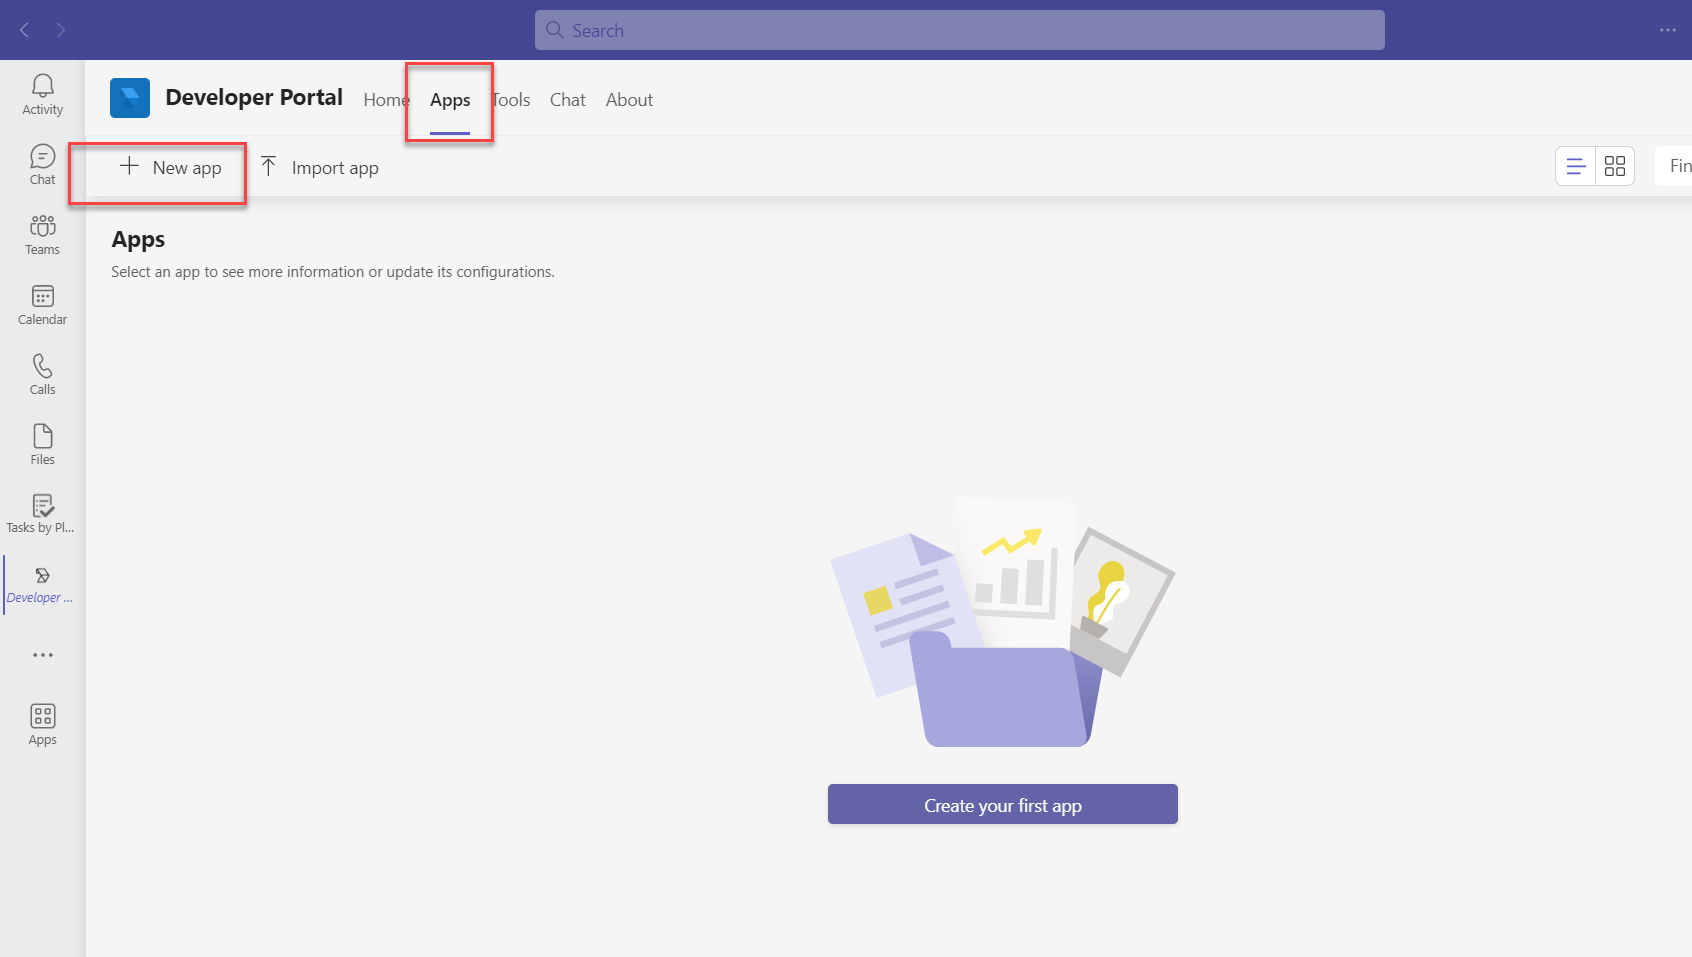
Step 3.2. Open the Apps tab inside the Developer Portal. There are two options to add a new app. You can import an existing app with the help of manifest, or create a new app.
For this tutorial, let’s use New App option:
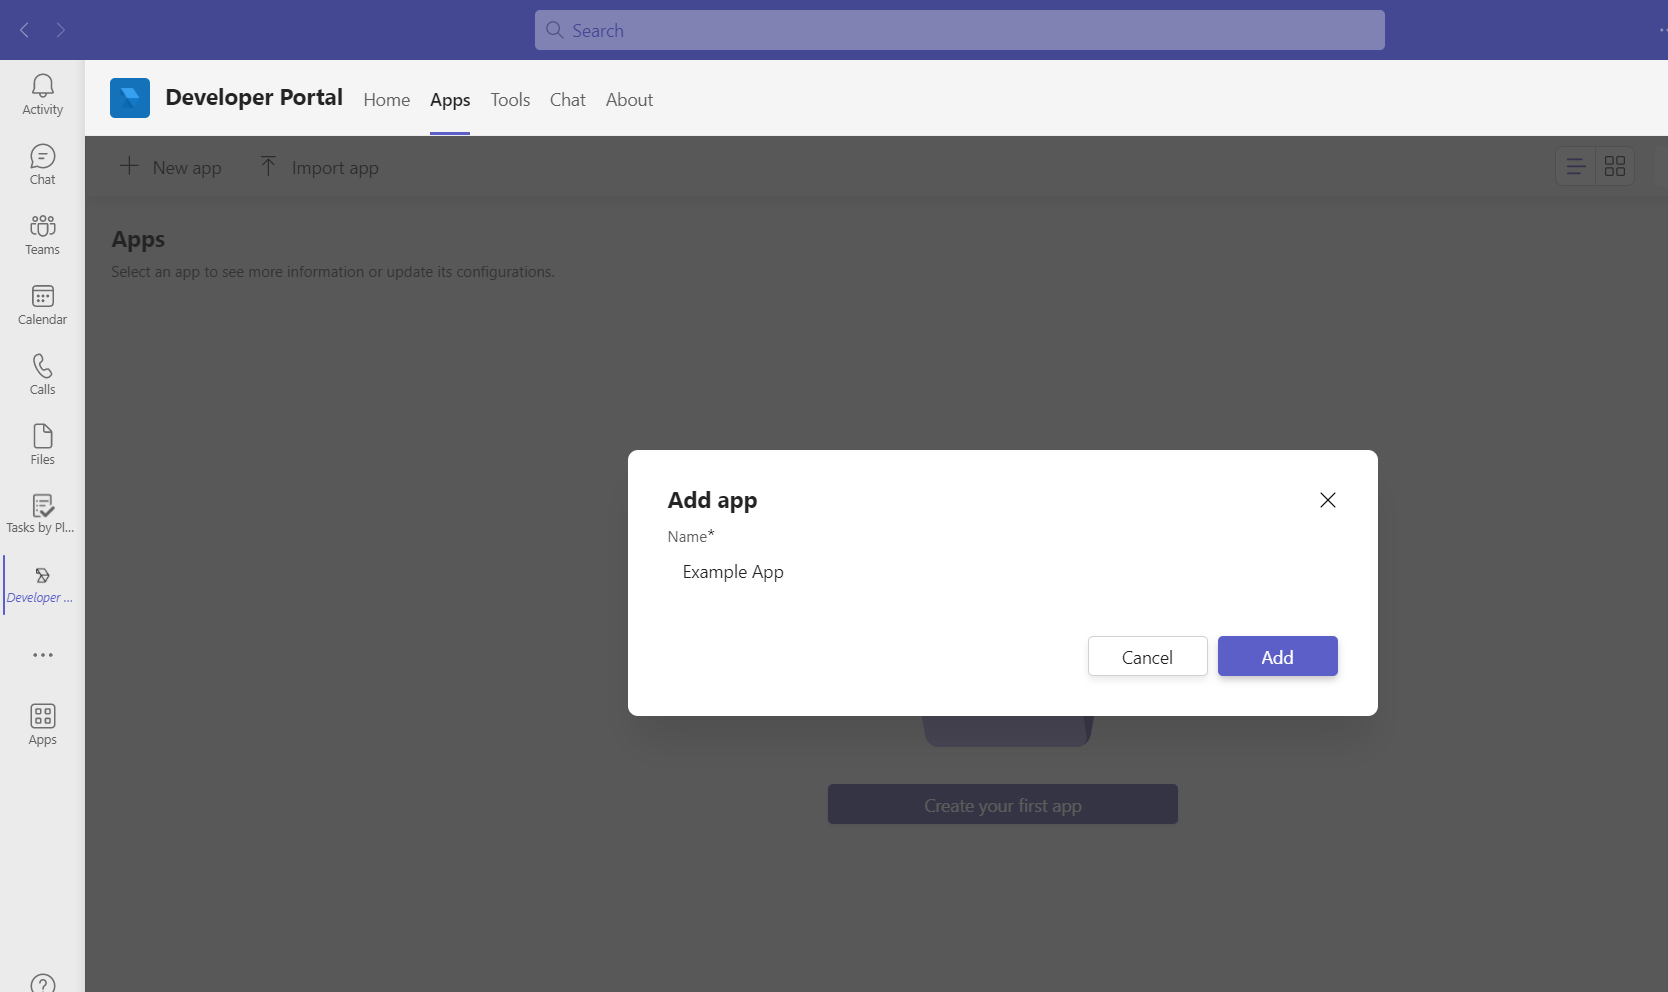
Step 3.3. Name the app:
Step 3.4. Fill in the application details – page url, descriptions (optional step).
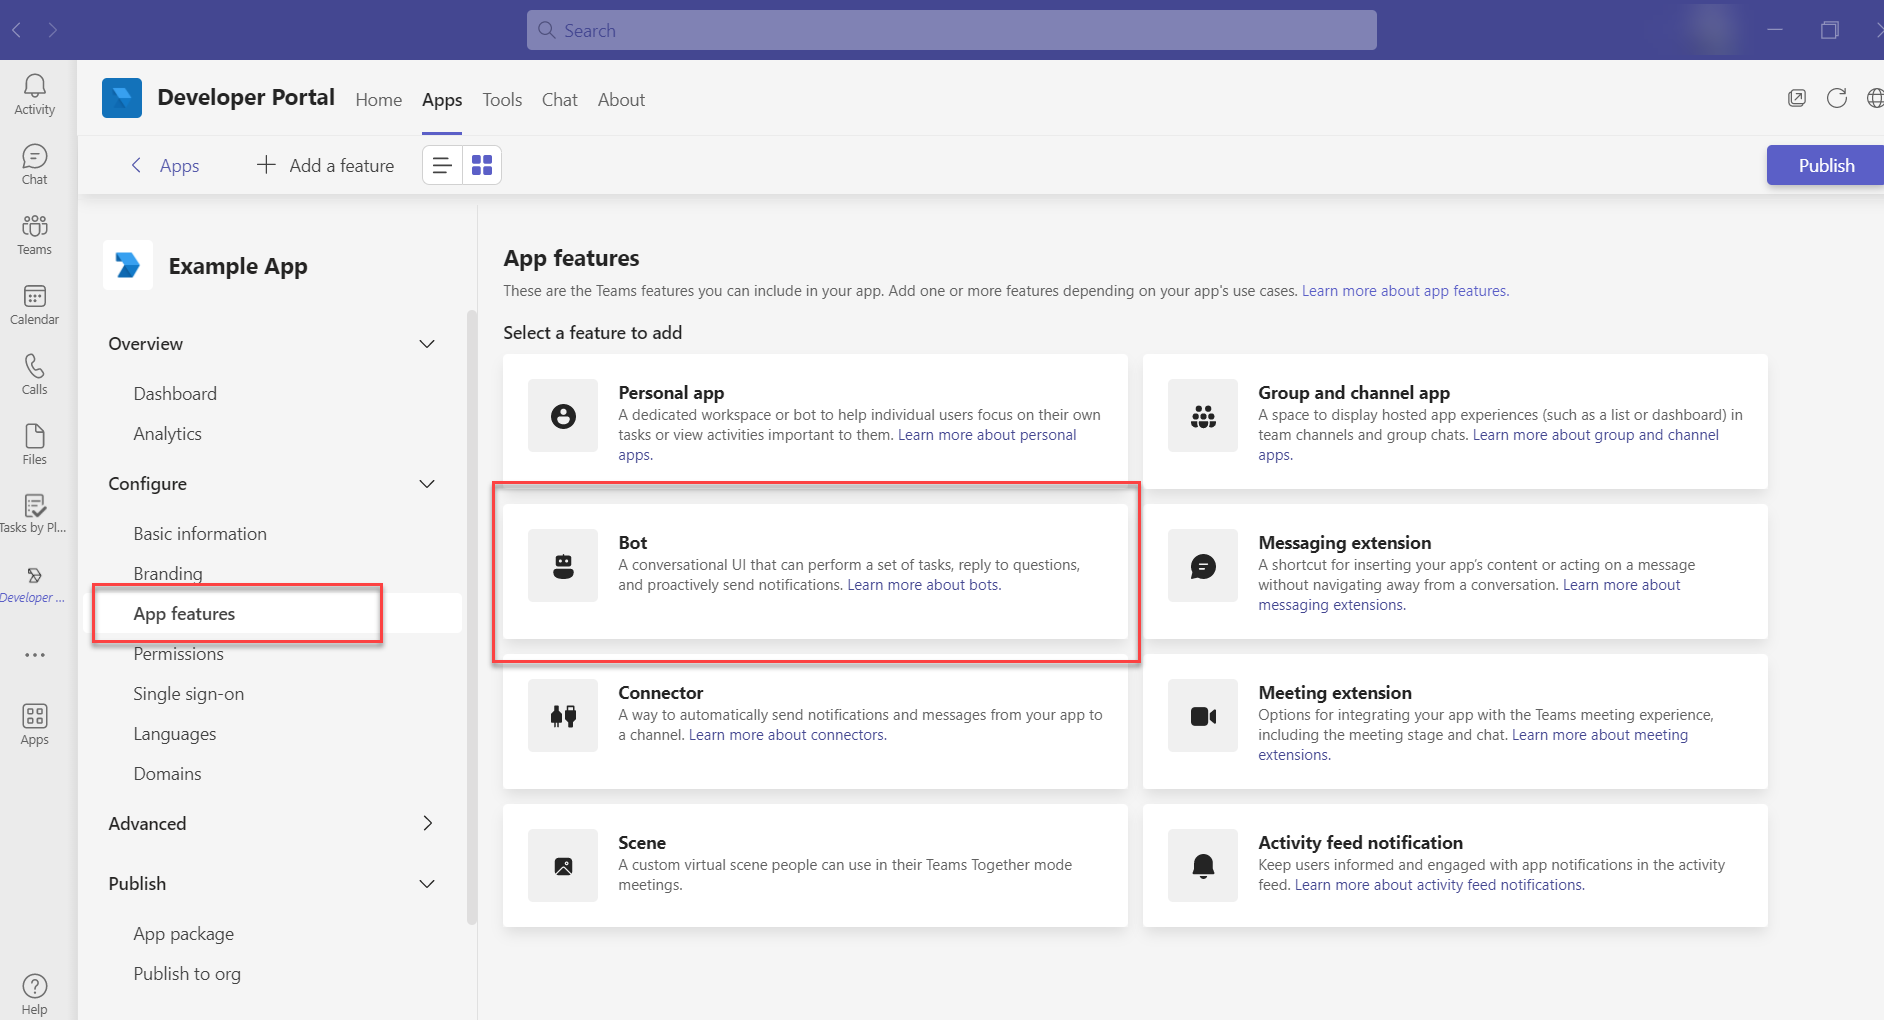
Step 3.5. Add the Bot feature.
Navigate to Configure > App features. Select new Bot feature.
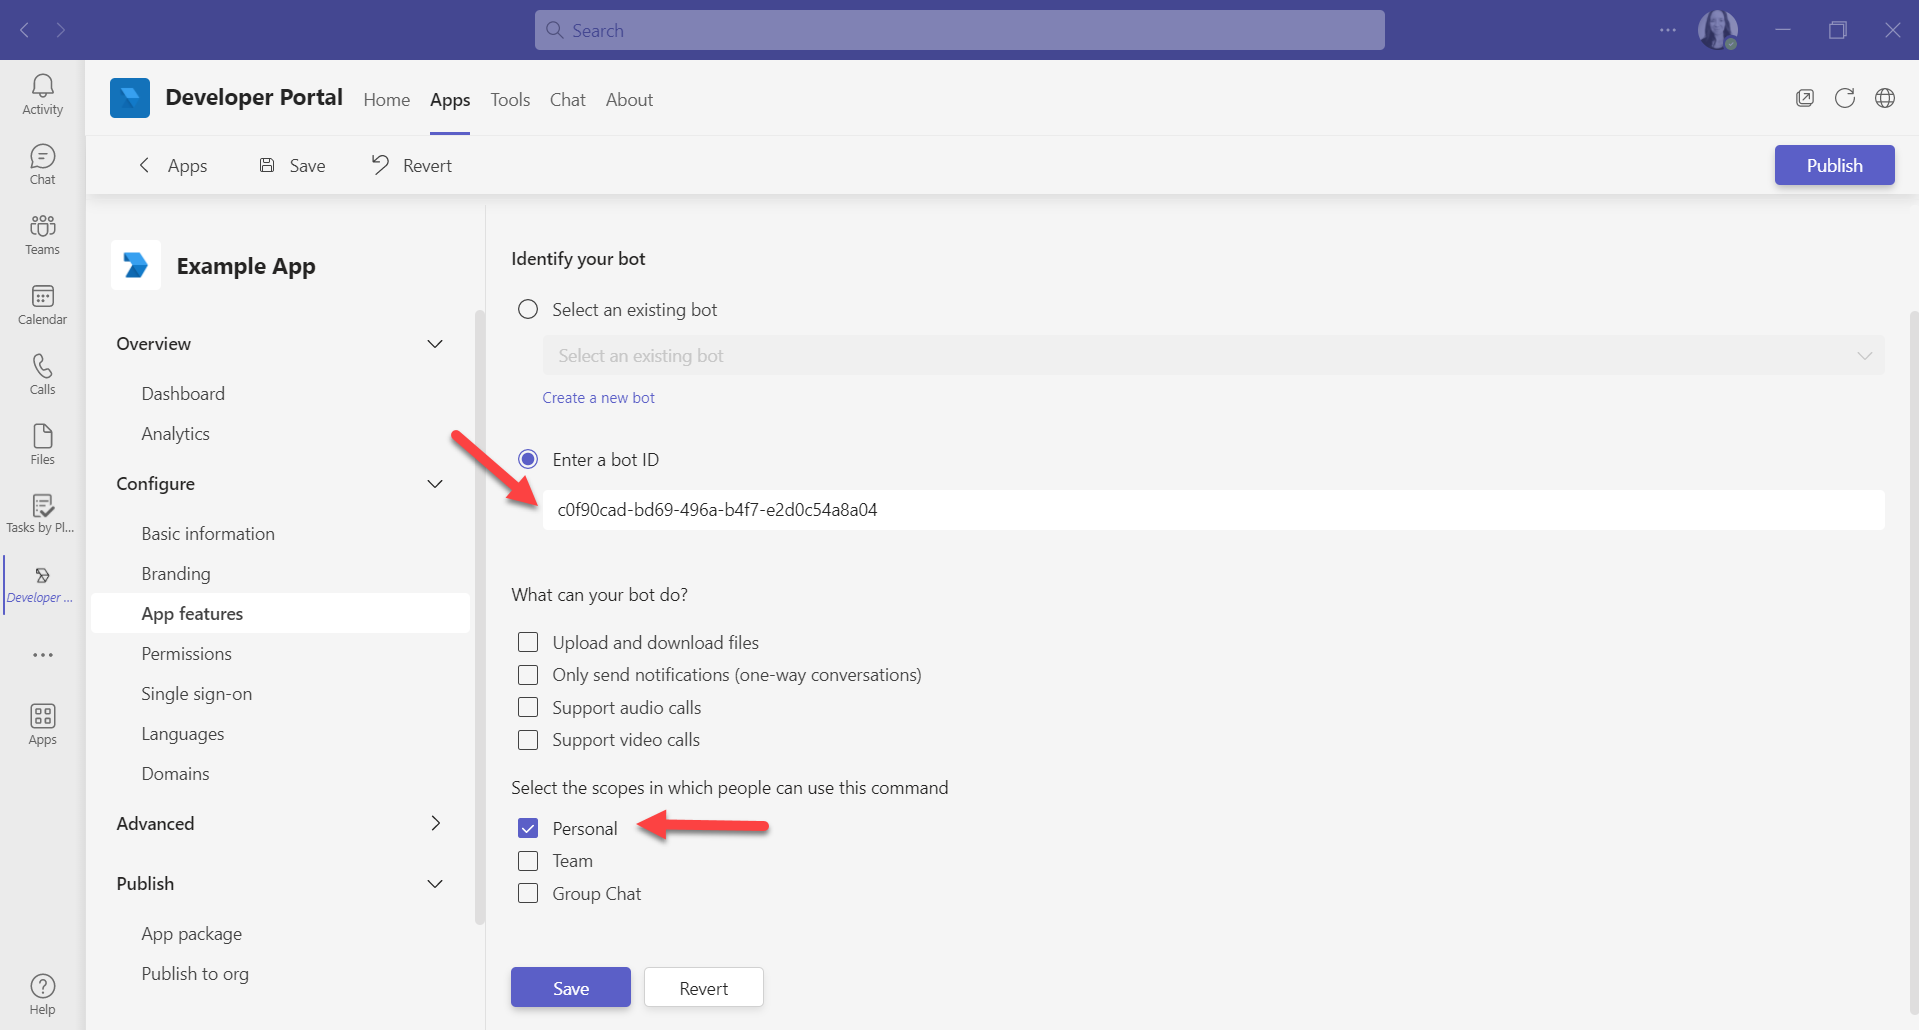
Step 3.6. Fill in the bot details.
field of Enter a bot ID – enter the Application ID from Azure. (Step 2.3)
field of Scope – select personal.
Save the new bot.
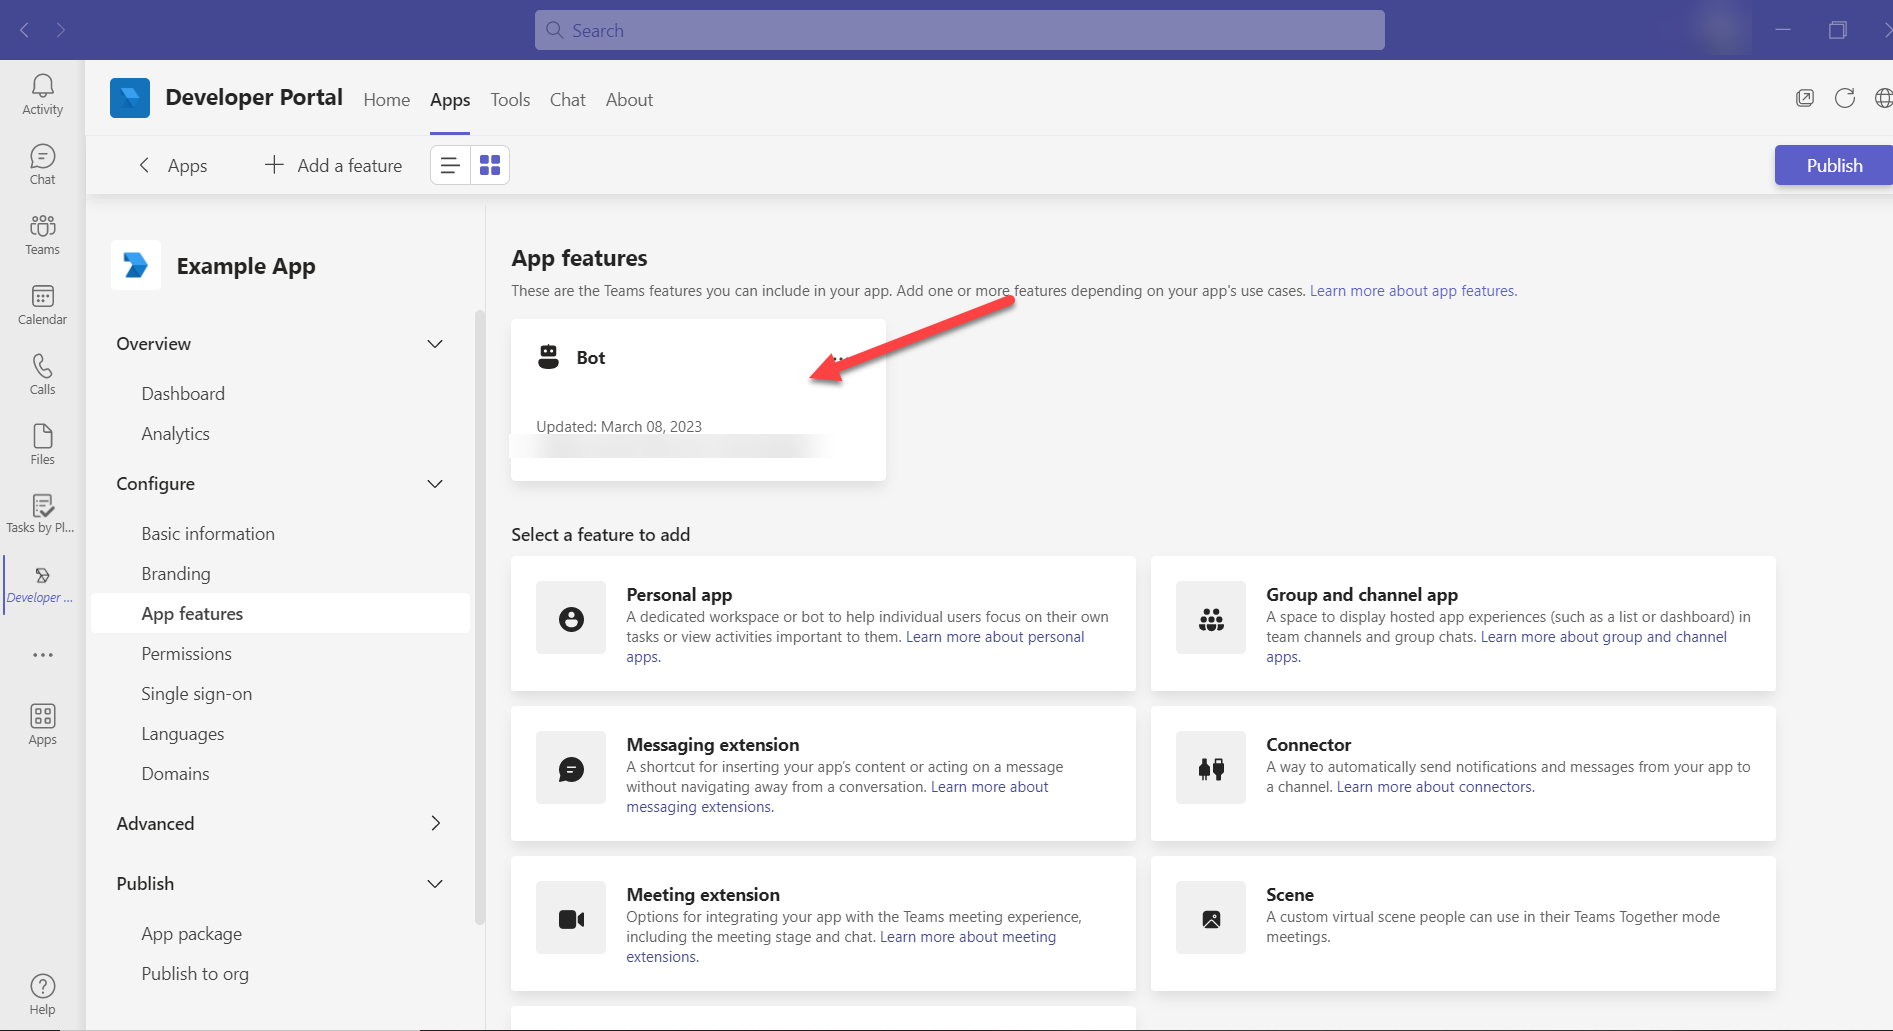
Step 3.7. The newly created bot feature should be now visible:
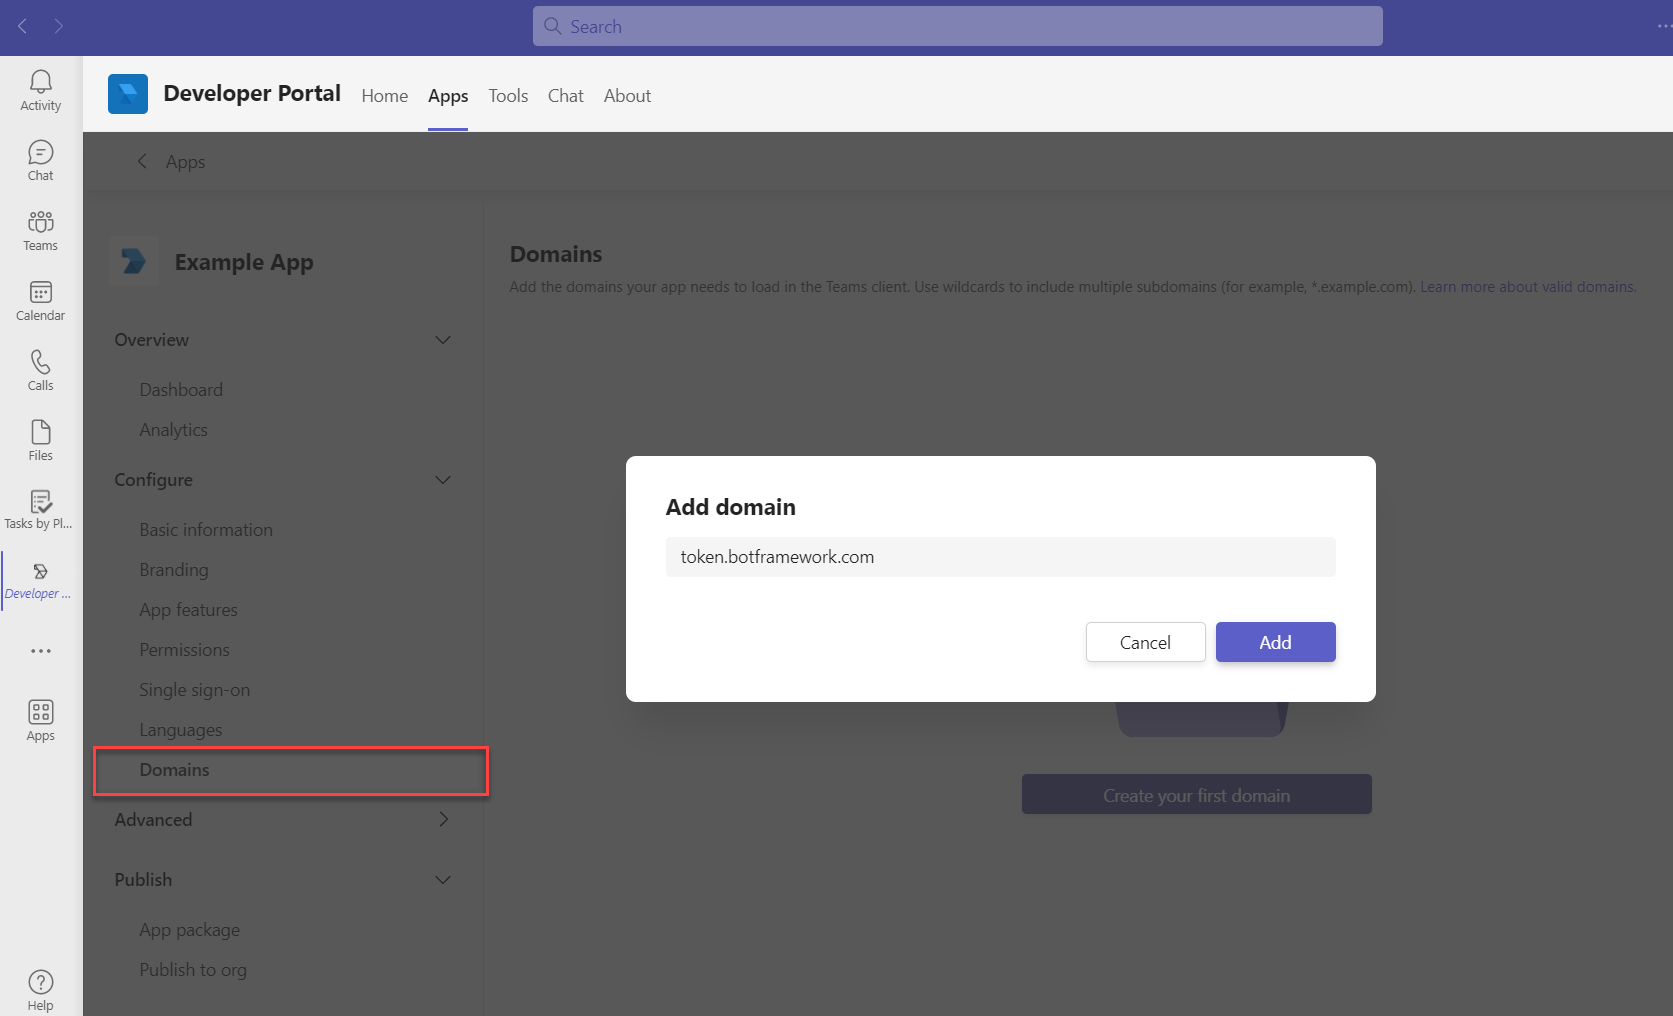
Step 3.8. Add new domain.
Navigate to Configure > Domains . Add the new domain token.botframework.com.
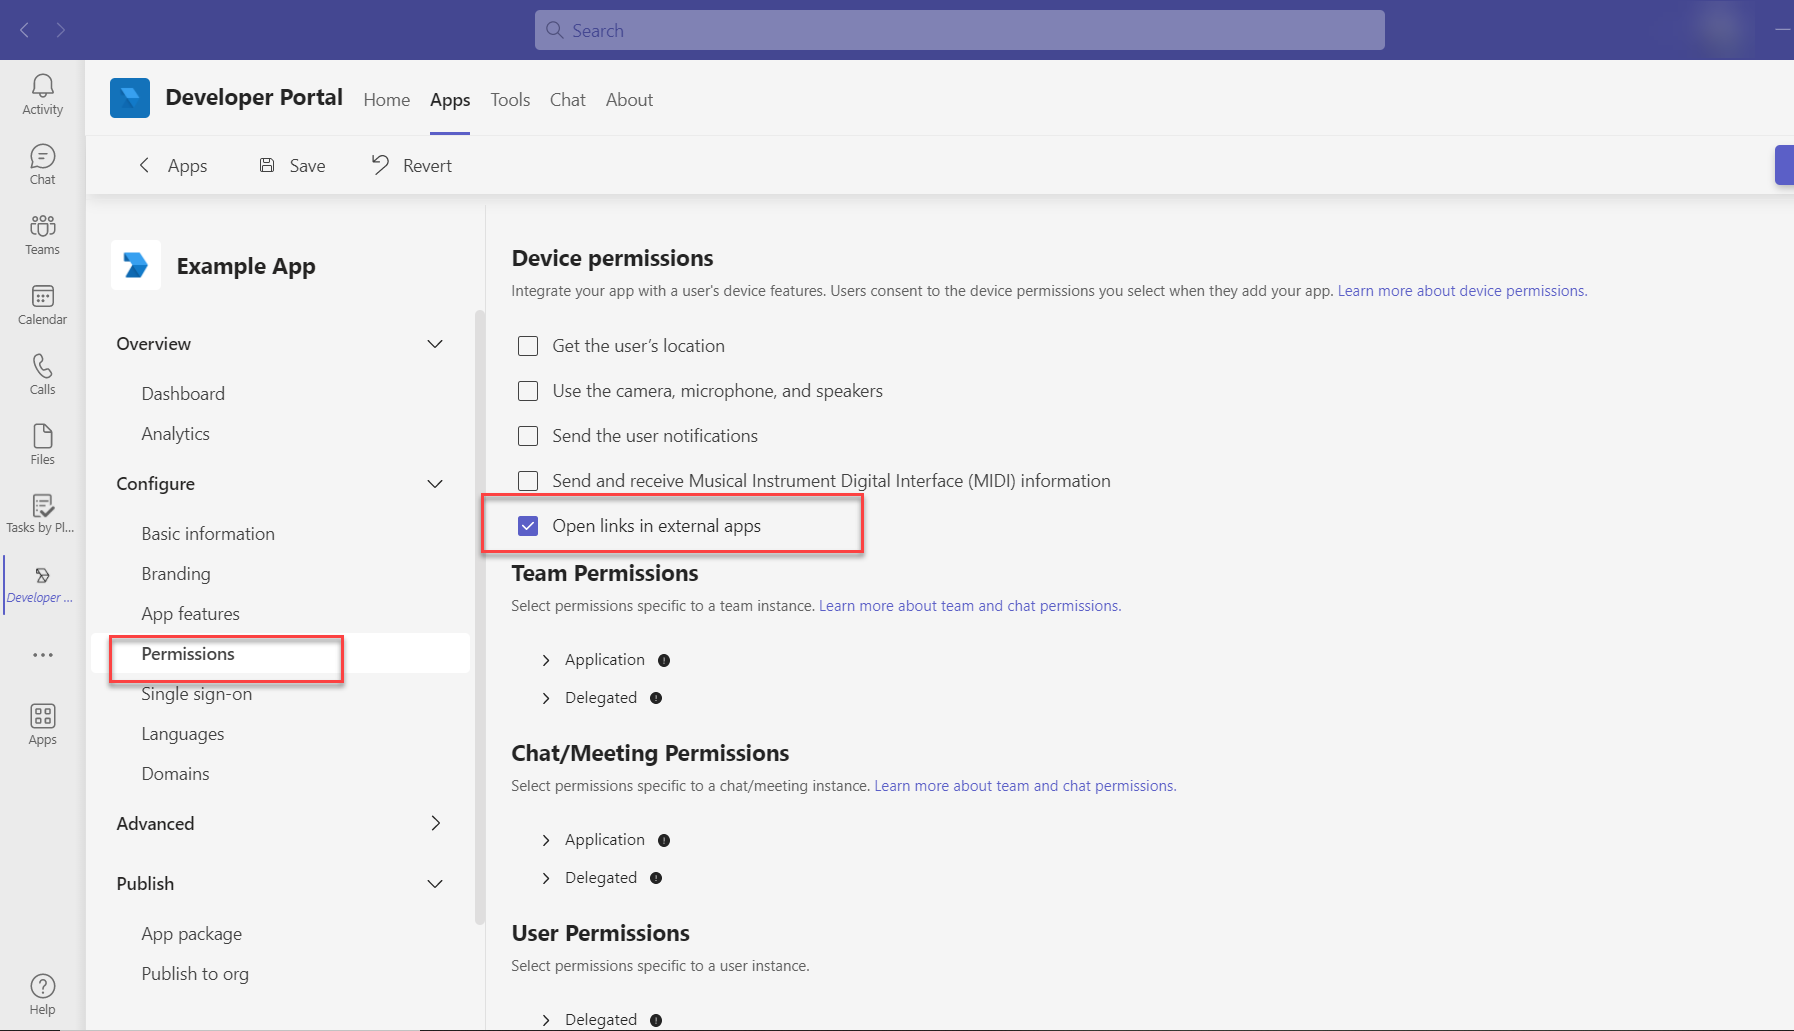
Step 3.9. Edit permissions.
Navigate to Configure > Permissions. In the Device Permissions section tick Open links in external apps.
Step 3.10. Publish your app.
Finally navigate to the Publish section. You can access the app manifest and add the app icons in the App package section.
There are options to publish either to a store or to an organization.
Select the preferable mode, and click on the Publish button in the top right-hand corner to finish the process.