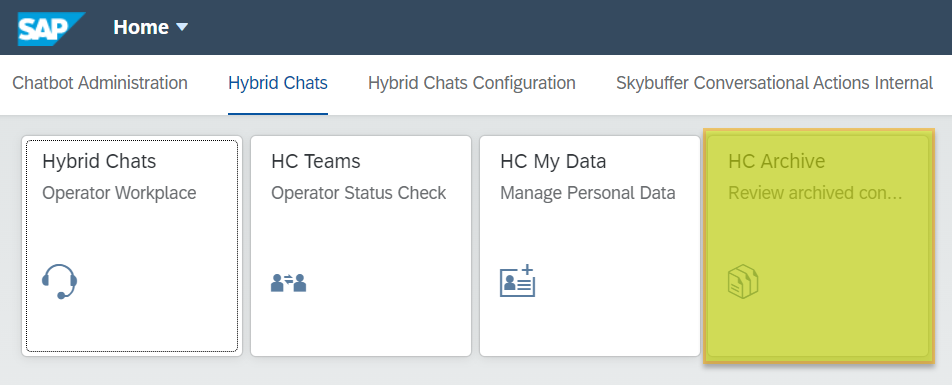
Opening the Application
To access the Archive Mode, navigate to the HC Archive application in Fiori.
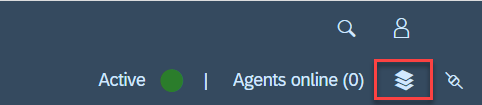
NOTE! You can also switch to the Archive Mode on the Operator Workplace dashboard:
Using Filters and Filter Views
You can see all the tickets created in the Hybrid Chats and make use of the multiple filters offered.
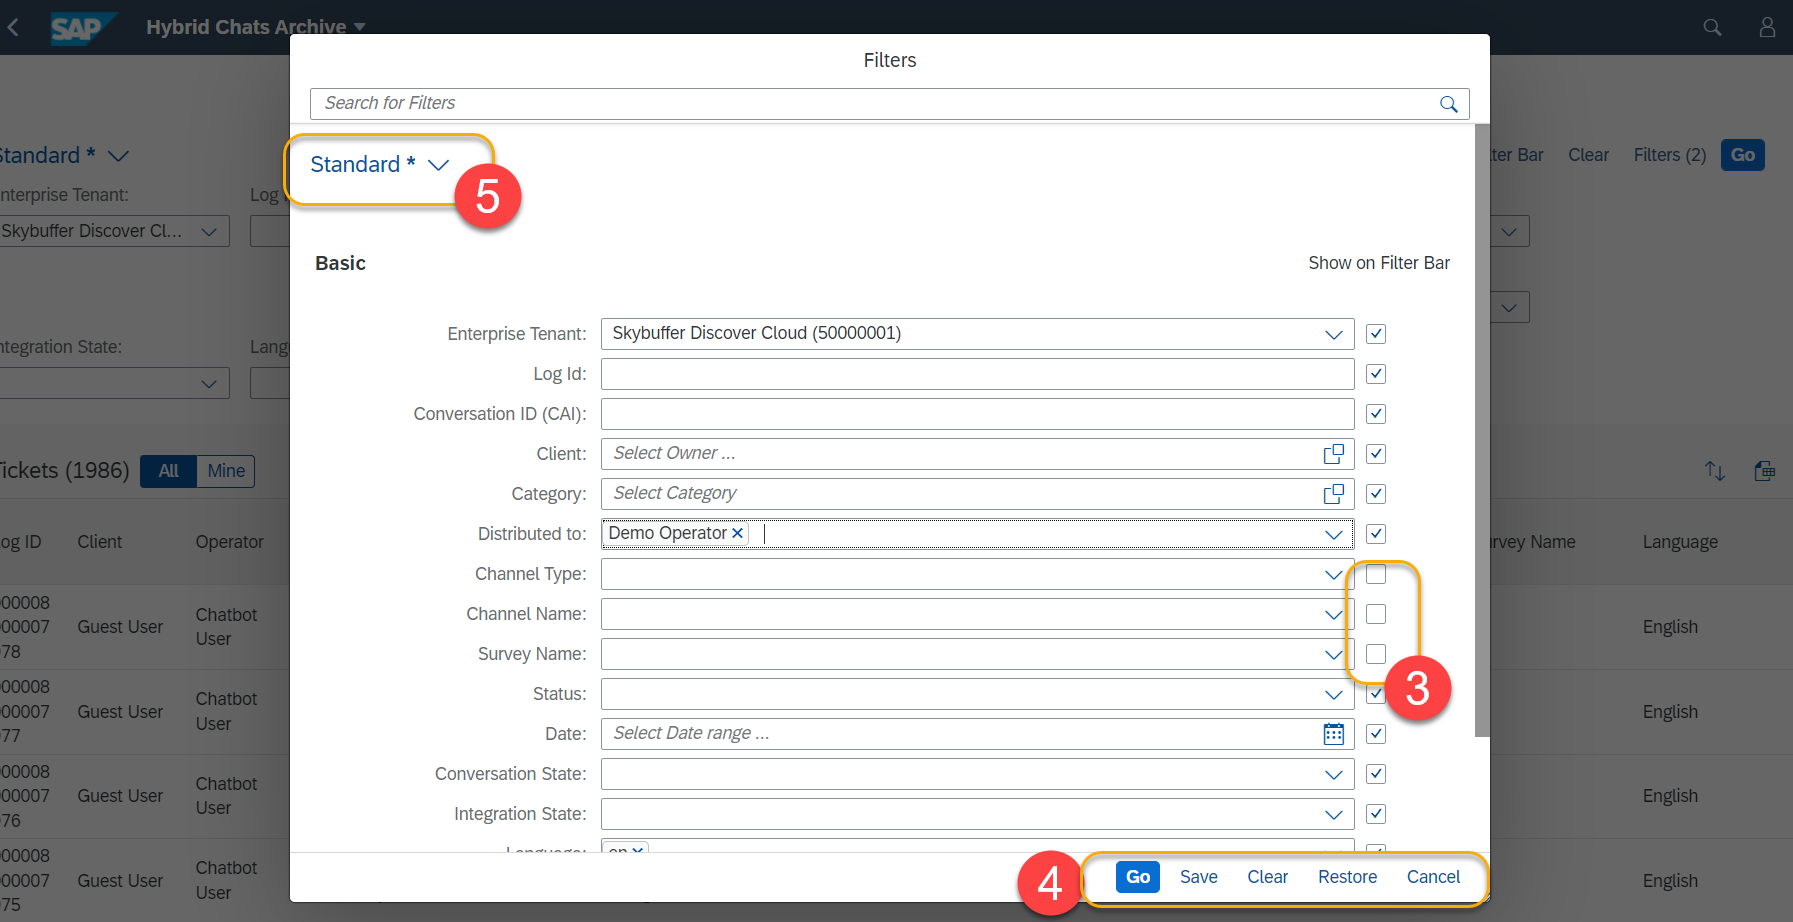
Step 1. Filter Bar gives easy access to all available filters.
Step 2. Open the Filters window to modify the values or hide some filters.

Step 3. Tick or untick the filters to manage their visibility. You can also fill in the filter values from here.
Step 4. Click on Go to apply the changes. You can also select Save to save the changed setup as a new custom view. Restore will remove any changes you have previously made to the current view.
Step 5. The name of the current view is displayed at the top left-hand corner. If there is an asterisk (*) next to it, it shows that there have been changes made to the current view.
Step 6. Saving Custom View
Apply automatically – if activated, you will not have to press Go every time to see the results
Public – if activated, your view will be available to all other users
Set as Default – if activated, this view will be applied every time you open the HC Archive application.

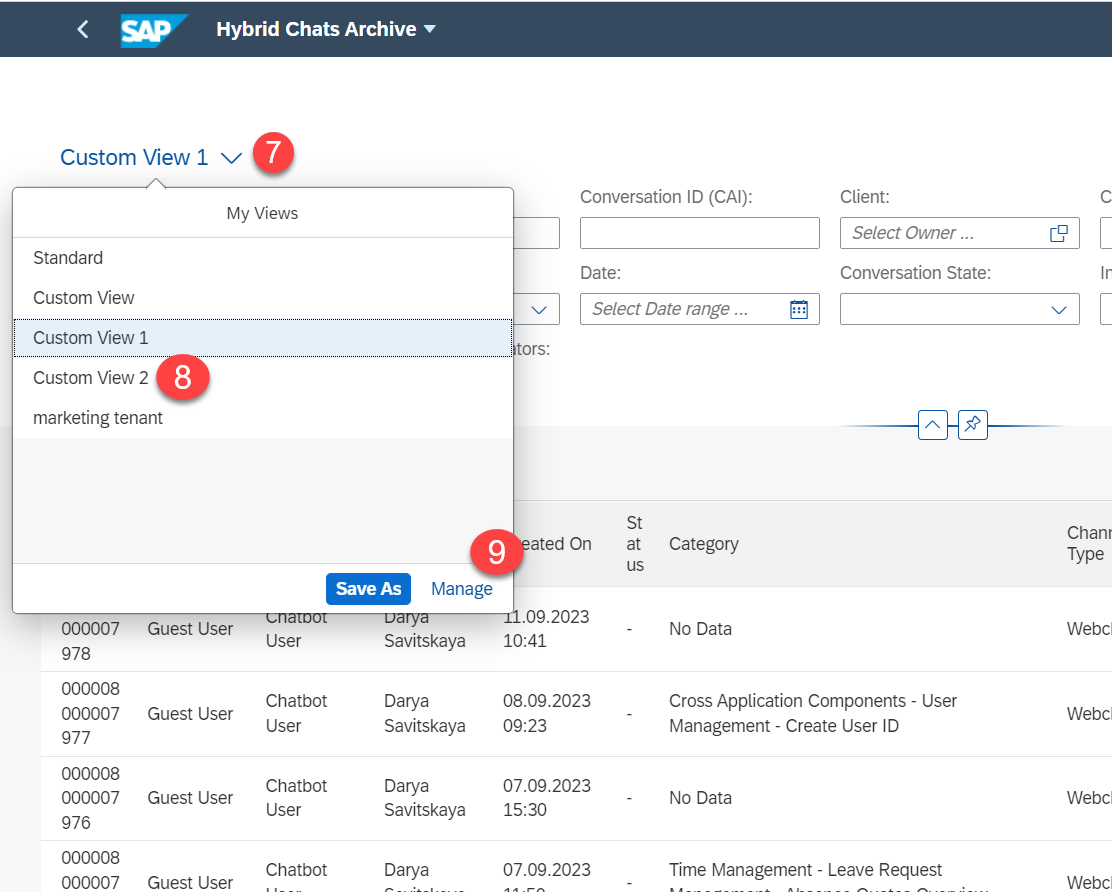
Step 7. If you saved your custom view, its new name should be now visible at the top left-hand corner. You can click on the arrow-down next to the name to select another custom view.
Step 8. Click on another view from the list to apply it.
Step 9. Select Manage to edit the properties of the view.
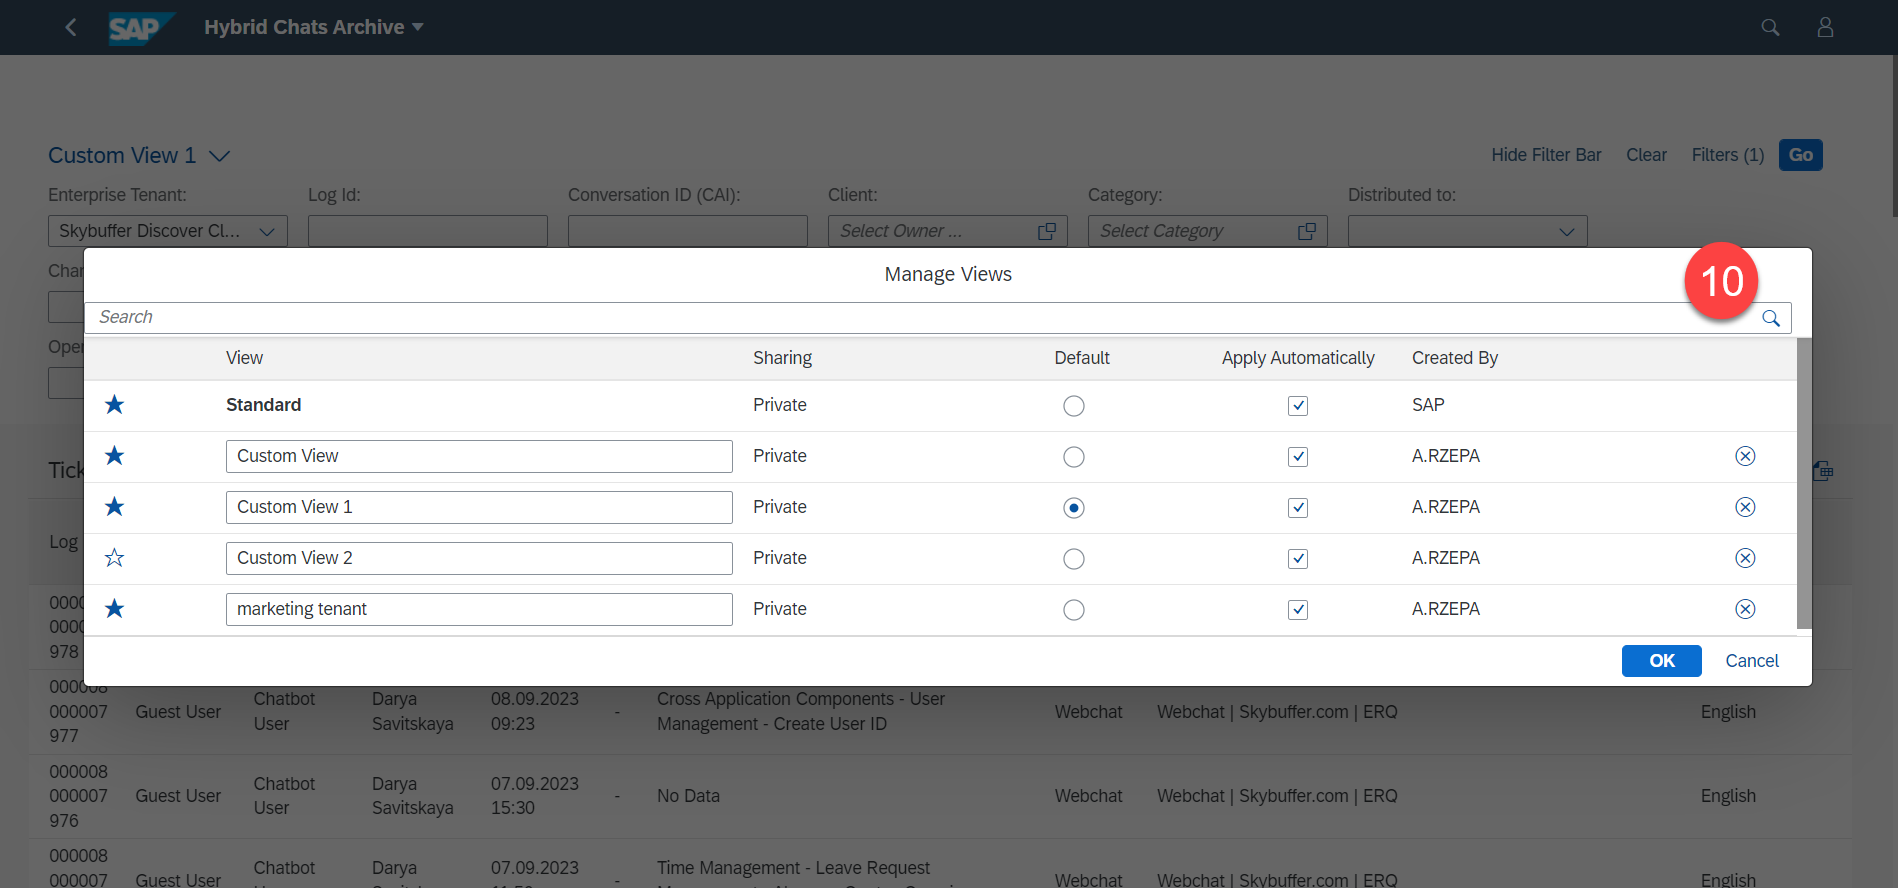
Step 10. Manage Views
Here you can edit all the views at once. Here are the functionalities:
- tick/untick the star icon on the left to show/hide the particular view from the shortlist
- edit the views names
- check if the view is private (visible to you only) or public
- mark the view as default
- if Apply Automatically is ticked, the view will apply on change, without having to click Go
- delete any view by clicking the X icon
- finally you can check which user is the author of the given view
Column Views – Customize Results List
HC Archive allows result lists customization. You can toggle the visibility of columns, and change their order. It’s also possible to save the custom view for further use.
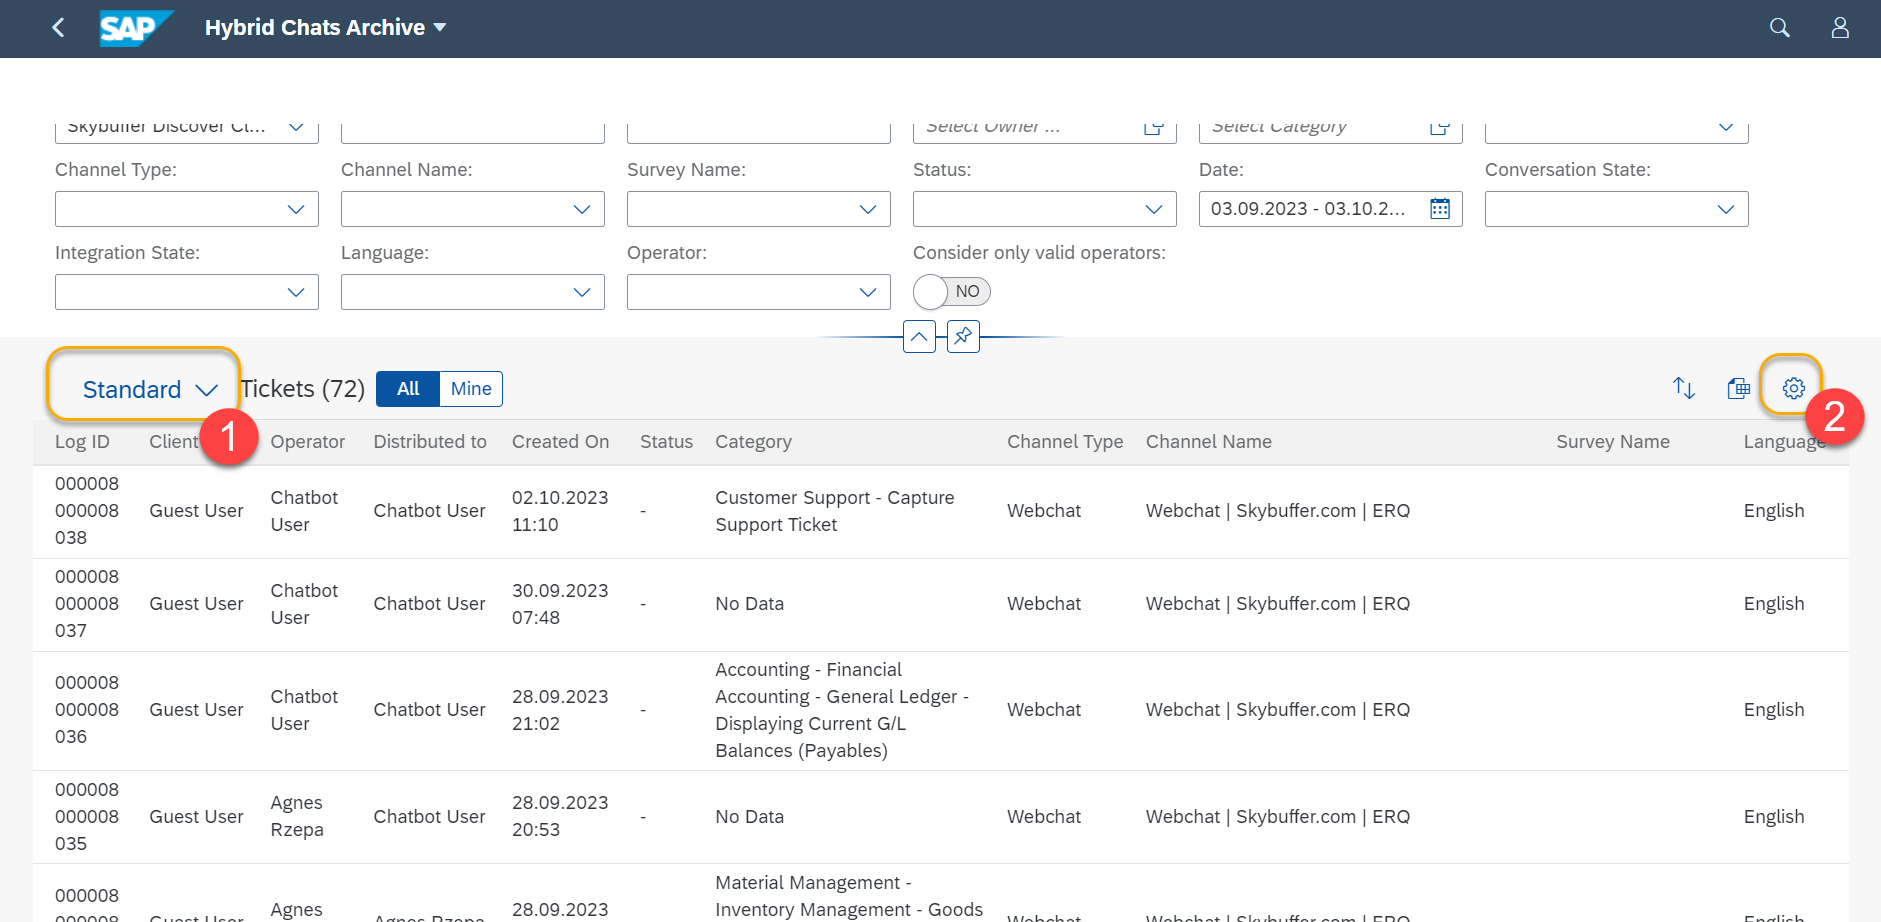
Step 1. The view name that is currently activated can be seen above the list on the left. The default view is called Standard
Step 2. Click on the gear settings icon at the top right-hand corner to customize the result list
Step 3. Tick the columns you want to be visible.
Step 4. Click on the column name (or row), and then use the arrows to change its order.
Step 5. Undo changes and restore the settings for the current view.
Step 6. Click OK to apply the changes made.

Step 7. An asterisk near the view name means that there are some unsaved changes. Click on the down-arrow to display the menu.
Step 8. You can see your starred views here – click on any of them to switch the column view.
Step 9. Click Save As to save the changes you made.
Step 10. Click the Manage button to see and manage all the views available. This feature will be further described down below.

Step 11. Fill in the new name for your custom view. You can also choose to make it the default view used on the app startup for your user.
Another option is to make the view public, so that other users could also make use of it.
Click Save to finish the process.

Step 12. Manage All Views
This is the Manage View window you can navigate from Step 10 described above.
Here you can see and edit multiple views at once. Here are the available options:
- tick/ untick the star icon on the left to show/hide the particular view from the shortlist;
- edit the names of the views;
- check if the view is private (visible to you only) or public;
- mark a view default;
- delete any view by clicking on the X icon;
- finally you can check which user is the author of the given view.

Displaying Individual Conversations in the Archive
Show/ Hide the Side Panels
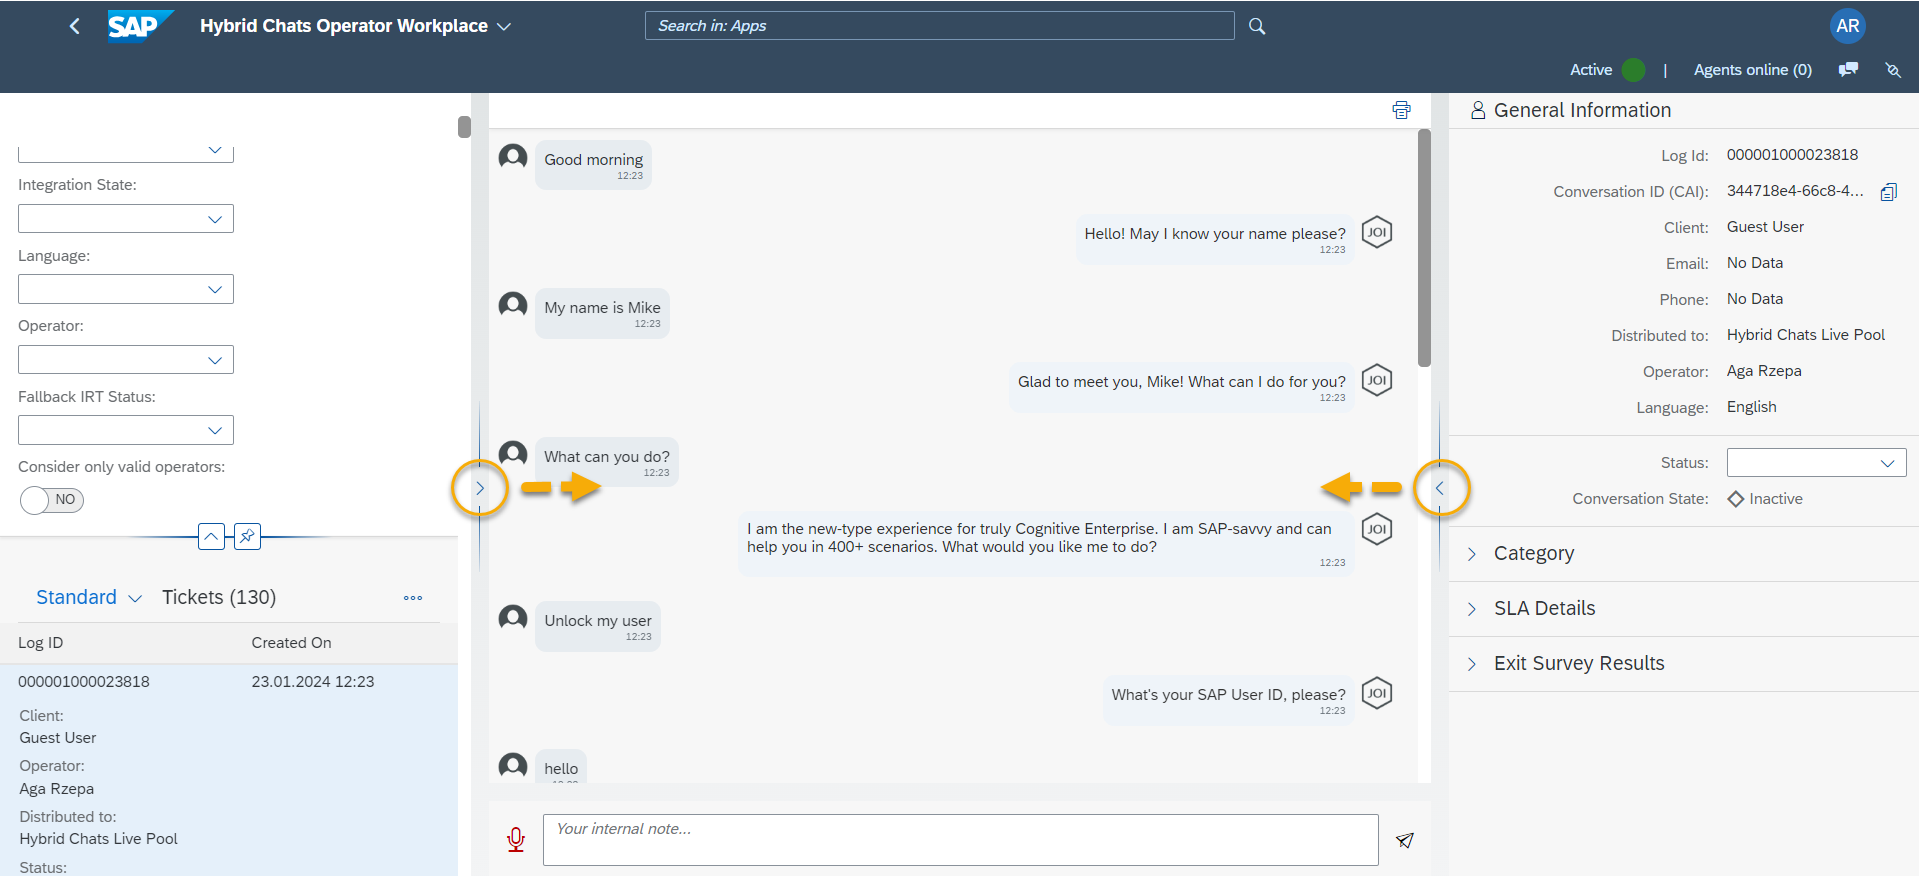
Click on the single conversation row in HC Archive to display the dialogue and all the related details. The application screen will be divided into three sections: two side panels and the browsed dialogue in the middle. You can hide/show the side panels or make them wider by clicking on the arrow buttons marked in orange below.
Left Side Panel – Conversation List with Filters
This is the same list with filters that you can see after opening the application. It comes handy to display the dialogues one by one.
Main Panel – the Dialogue Transcript
The main panel in the middle holds the dialogue transcript. It also shows all the messages the operator wrote to user, and the events as operator cancelled fallback message, operator exited the conversation, etc.
At the bottom, there is an active text field – you can still write and attach a note to the conversation at this point. This note is never shown to the user – it’s only for the system operators.
Right Side Panel – Dialogue Details
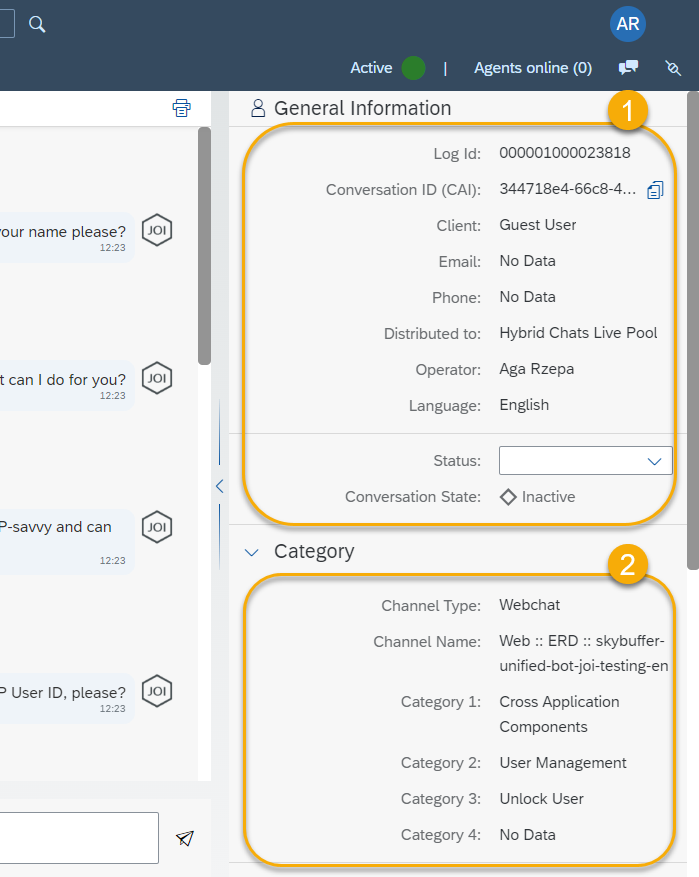
1. General Information Section – this section holds data about the user (client’s phone number and email) and the conversation (log ID, conversation ID on the AI platform, the assigned operator, the conversation status)
2. Category Section – this section holds the channel type and its name, as well as the category data. There can be up to four category levels specified per dialogue – from Category 1 (the most general one) to Category 4 (the most detailed one).
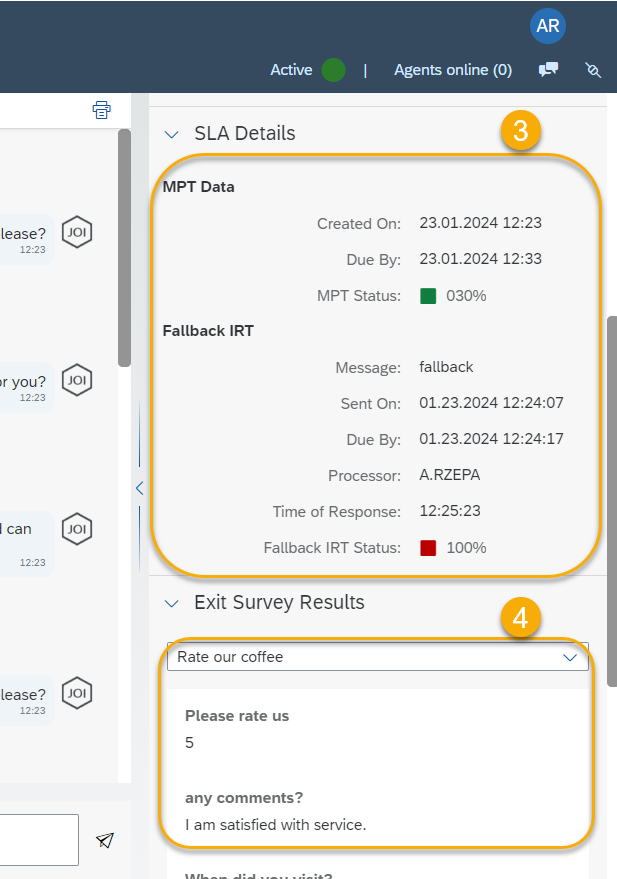
3. SLA Details Section (optional) – this section holds the fallback response time metrics (if the operator took over the dialogue in a fallback situation, and how fast they reacted). This part will only appear if the fallback did happen in a particular conversation.
3a. MPT Data (Maximum Processing Time) – all dialogues have a predefined maximum processing/length time, e.g. 2 hours. So they will be active for a maximum of 2 hours and then they will be closed.
There is a conversation start time (Created On), the expected end time (Due By), and how long the conversation lasted compared to the maximum time (MPT Status, %).
Example: If the conversation started at 2pm, was closed by the user at 3 pm, and the system MPT value is 2 hours. The MPT Status will be 50%.
3b. Fallback IRT (Initial Response Time) – it shows the metrics on how fast the operator stepped in, if the fallback situation happened.
Message, Sent On – the text of the user message that caused the fallback and its time;
Due By – indicates when the time limit for operator to step in is over;
Processor – Operator name and surname, if assigned;
Time of Response – time of operator response after stepping in;
Fallback IRT Status % – the percentage of the IRT period that already passed by the time the operator stepped in.
Example: when the operator had a 10-minute system limit to react, and stepped in after 3 minutes, this value will be 30%. If the operator exceeded the limit, or didn’t step in at all, this value will be 100%.
4. Exit Survey Results Section (optional) – this section shows the exit survey results. This part only appears of any results were passed by the user. The Survey Name is shown at the top, and the list of all the questions and answers is listed.