• IDD
  • IDD
  • Intelligent Decision Dimensions
    • Hybrid Chats
      • Hybrid Chats Installation Guide
        • Software Components to Install
          • Components of Add-On
          • Components Combinations to Be Installed
        • Prerequisites
          • System Prerequisites
          • General Prerequisites
        • Installation Activities
        • Post Installation Activities
          • Copy Standard Texts from 000 Client
          • OData Services Maintenance
          • Activate Services in SICF
          • Maintain Cross-Origin Settings
          • Assign Technical User to WebSocket Service in SICF
          • Copy Fiori Catalogs from 000 Client
          • Copy Translations from 000 Client
          • Clean Cache and Index Recalculation Activities
          • Enable Fiori 3 Theme
          • Set up Content Server to Store Photo of Operator
      • Hybrid Chats Maintenance Guide
        • Business and Technical Users Setup
          • Create User IDs and Business Partners
          • Create Business Partners
          • Appendix A :: User Authorization Matrix
        • System Configuration
          • Configure Parameters and Values Related to Hybrid Chats
          • Configure Parameters and Values Related to Live Pool
          • Configure Parameters and Values Related to Customer 360 View and Customer Match
          • Configure Status Profile
          • Set Up Technical Messages for Hybrid Chats
        • Hybrid Chats Integration with External ITSM System (Zendesk)
          • Activate Integration
          • Customize Header Fields of the Chat Log for Integration
          • Hybrid Chats Fields or Values Mapping on External ITSM Ticket Fields
          • Map Categories during Integration Procedure
          • Schedule Automatic Integration Procedure
        • Tenant Configuration
          • Create Root Organizational Unit for Tenant
          • Enable Configuration RFC Destination for the Tenant
        • Support Team Parameters Configuration
          • Create Position Attribute for Capacity
        • Live Pool Management and Configuration
          • Prerequisites
          • Start Live Pool
          • Manage Live Pool
        • Hybrid Chats Configuration
        • Hybrid Chats Categorization
          • Categorization Management
          • Assign Categories to AI Skills
          • Translate Categories
      • Hybrid Chats User Manual
        • Hybrid Chats
          • Active Mode
          • Archive Mode
        • HC Teams
          • Access HC Teams Application
          • Create New Team
          • Edit Team Name
          • Create New Team Member
          • Edit Agent
        • HC My Data
          • Edit Personal Data and Profile Picture
          • Default Settings Management
          • Notification and Dialogue Manual Mode Management
          • Quick Replies Management
            • Standard User Mode
            • Administrator User Mode
        • Analytics Applications
          • HC Analytics
          • Exit Survey Analytics
          • Operator Activity Analytics
    • Conversational Actions
      • Conversational Action Installation Guide
        • Software Components to Install
          • Components of Add-On
          • Components Combinations to Be Installed
        • Installation Activities
          • General Prerequisites
          • System Prerequisites
          • Installation
        • Post Installation Activities
          • Select Connectivity Option
          • oData Services Maintenance
          • WSDL Service Maintenance
          • Copy Configuration Content from 000 Client
      • Conversational Actions Maintenance Guide
        • Administration
          • Installation Activities
          • Uninstallation Activities
        • Implementation
          • Product Description
            • Product Versions Management
            • Product License
        • Configuration of Email Sending Mechanism
          • Prerequisites
          • License Key Maintenance
          • Configuration Settings
        • Chatbot User Setup
          • Chatbot Central oData Service Authorization Role Maintenance
          • Create Chatbot User ID
          • Assign Chatbot User ID for Authorization Check in User Validation Scenario
        • Assign Chatbot Scenarios to ABAP RIK Classes
        • Set Up Solution Specific Email Sending Control
        • Simplified User Creation Scenario Setup (Without Approval Workflow)
          • Maintain and Assign Reference Users for User Creation Scenario
          • [Optional] Activate Notification for New User Creation
        • User Creation Scenario Setup with Approval Workflow
          • Configure Approval Workflow for User Creation Scenario
          • Set Up Approval Steps for Different User Types Creation
    • Node.js Connector
      • Docker Installation and Configuration
        • Prerequisites. Hardware Recommendations
        • Connection Installation into Company’s Landscape
          • Docker Installation
          • Connector Configuration
          • Deployment Process
            • Download Image Using Registry Server
            • Manual Download of Image
            • Start Container with App
          • Start Application Using Docker Composer (optional)
          • Additional Required Configuration (Reverse Proxy)
    • IDD Uninstallation Guide
      • Prerequisites
      • Uninstallation Process
    • Bot Management
      • Bot Connector Configuration Guide
        • Connector Configuration
        • Nodejs Logs Configuration
        • Twilio Integration
        • Google Services Integration
        • AWS Integration (optional)
        • Yandex Services Integration (optional)
        • Identity Providers (optional)
      • Bot Management Installation Guide
        • Software Components to Install
          • Components of Add-On
          • Components Combinations to Be Installed
        • Installation Activities
          • Prerequisites
            • General Prerequisites
            • System Prerequisites
          • Installation
        • Post Installation Activities
          • UI5 Services Activation in Frontend System
          • RFC Destinations Configuration
          • OData Services Maintenance
          • Copy Configuration Content from 000 Client
          • Copy Tables Content from 000 client
          • Copy Fiori Catalogs from 000 Client to Productive Client
          • Copy Translations from 000 Client
          • Clean Cache and Indexes Recalculation Activities
      • Bot Management Configuration Guide
        • Register Customer Namespace
        • Intelligent Assistant Registration
        • Bot Channels Registration
          • SAP Channels Registration
            • MS Teams Channel Configuration
            • Facebook Messenger Channel Configuration
            • Skype Channel Configuration
            • Slack Channel Configuration
            • Telegram Channel Configuration
            • Webchat Channel Configuration
            • WhatsApp Channel Configuration
            • Viber Channel Configuration
            • Zoom Channel Configuration
          • Channel External Configuration
            • Facebook Messenger External Configuration
            • MS Teams External Configuration
            • Slack External Configuration
            • Telegram External Configuration
            • Skype External Configuration
            • WhatsApp External Configuration
            • Viber External Configuration
            • Zoom External Configuration
        • Chatbot Scenarios Activation
        • Bot Answers Translation
        • Chatbot Destinations Setup
        • Chatbot Scenarios Groups Management
        • Surveys Management

Webchat Channel Configuration

22 views 0

Step 1. Open the channel management application of Chatbot Channels. Create Channels

Step 2. Register new Webchat type channel (Channel Settings Tab)

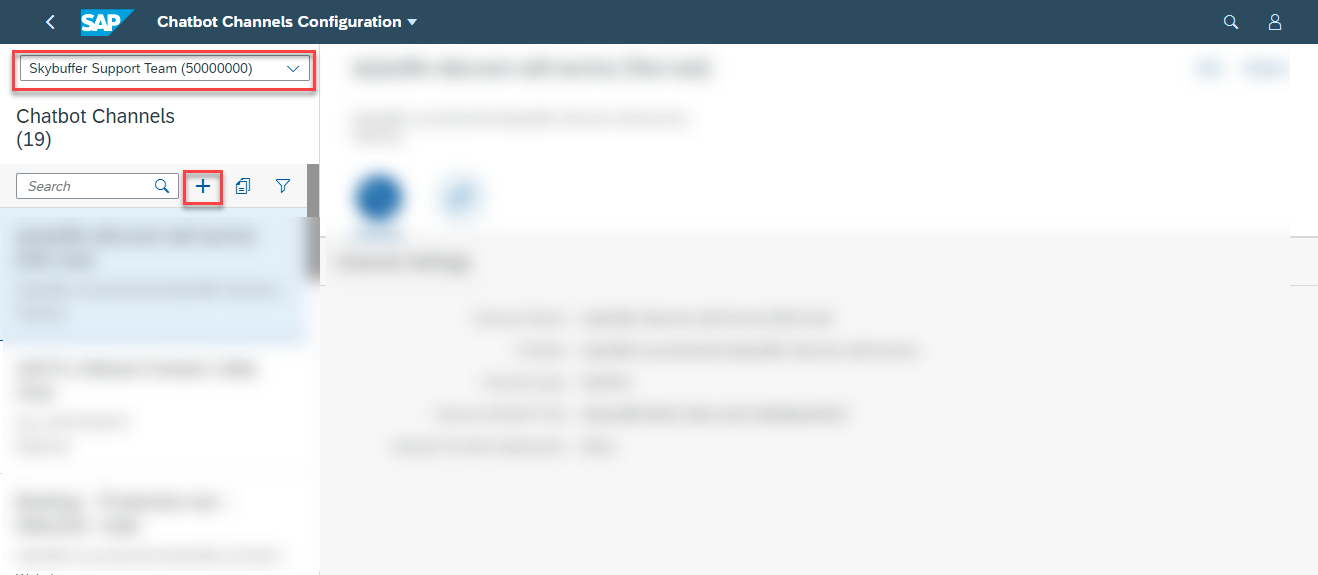
Select the correct tenant from the drop-down menu and click on the Plus button to add a new channel.

Obraz zawierający tekst Description automatically generated

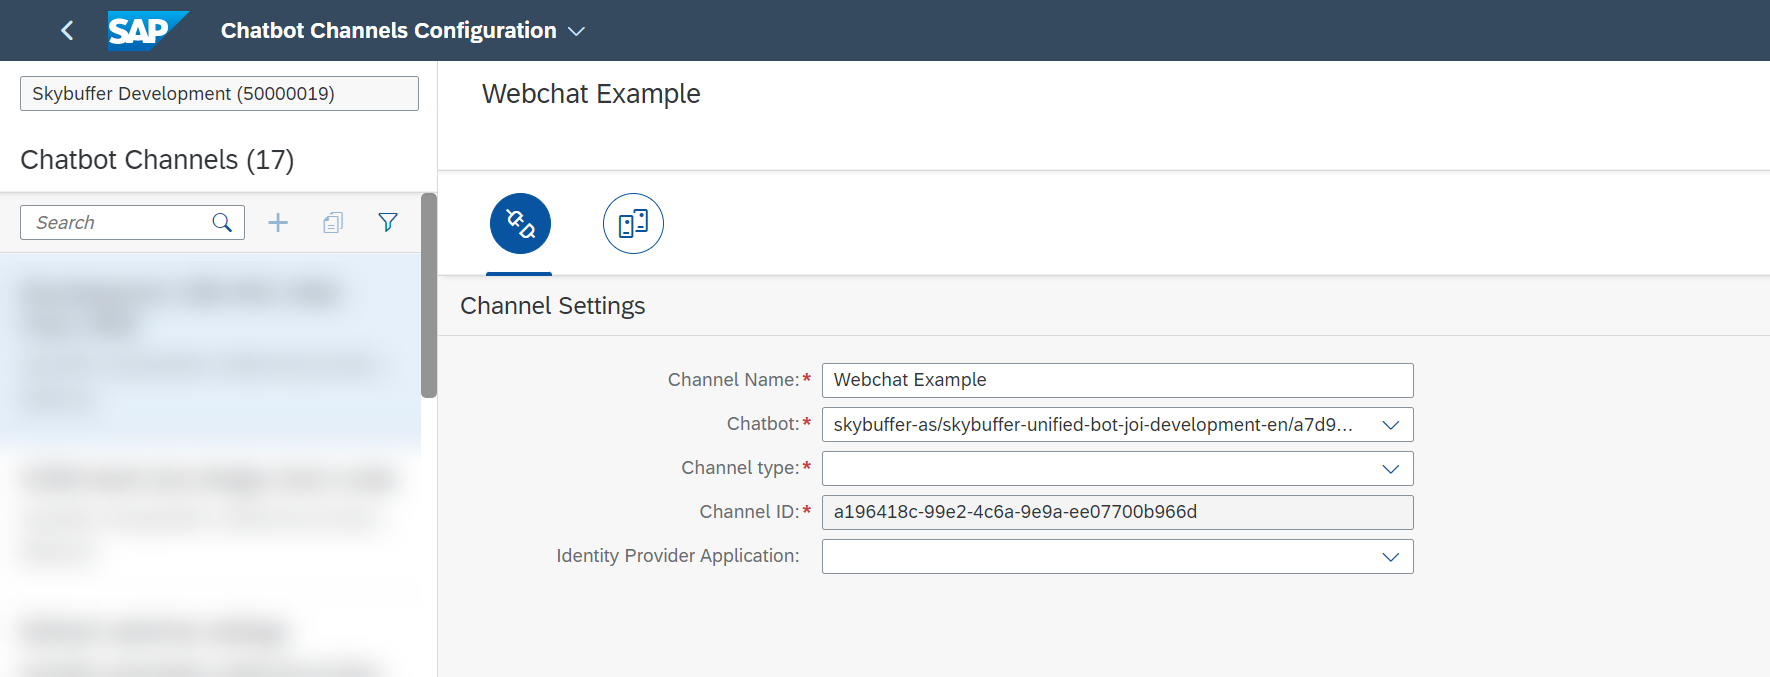
Fill in the new channel details. Start with the tab of Channel Settings.  Fill in the following fields first:

Channel Name, Chatbot (from the drop-down list), set Channel type to Webchat (from the drop-down list).

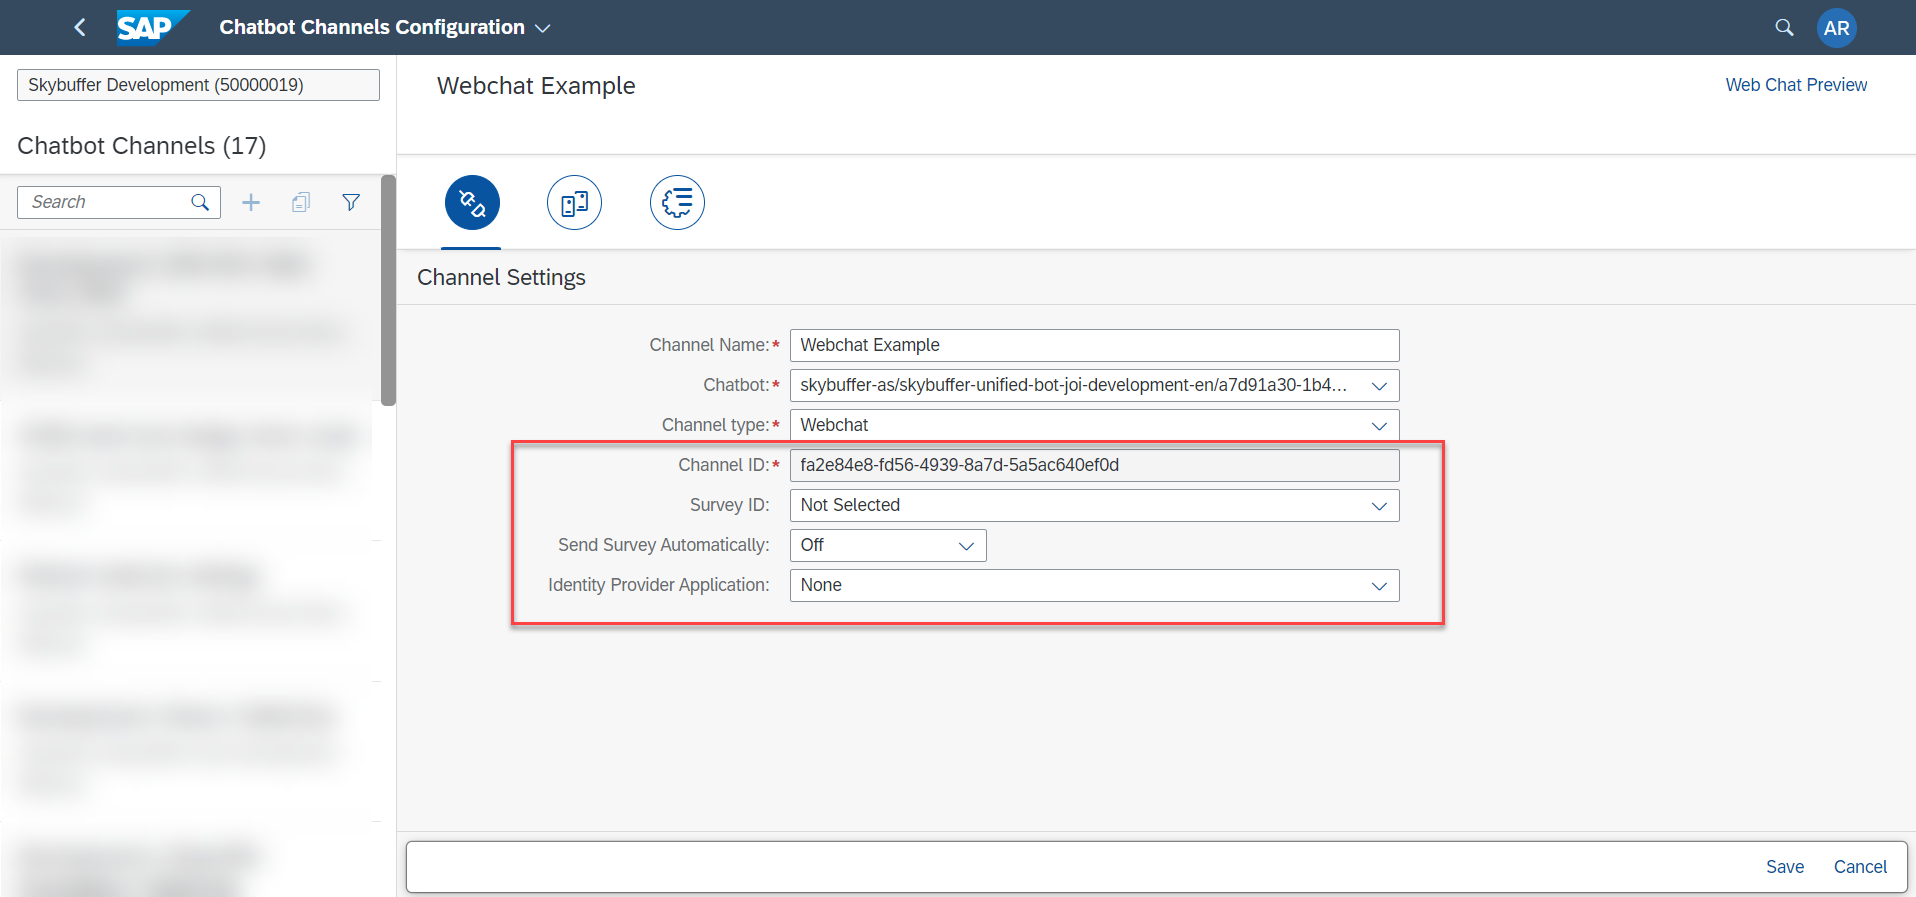
Next fill in the remaining fields:

– Channel ID – this field is auto-generated.

– Survey ID – here you can select one of the existing survey forms to be displayed after the chat end.

– Send Survey Automatically – default value is “off”  (survey won’t be displayed at all).

– Identity Provider Application – choose existing SSO setup from the drop-down list, or select None.


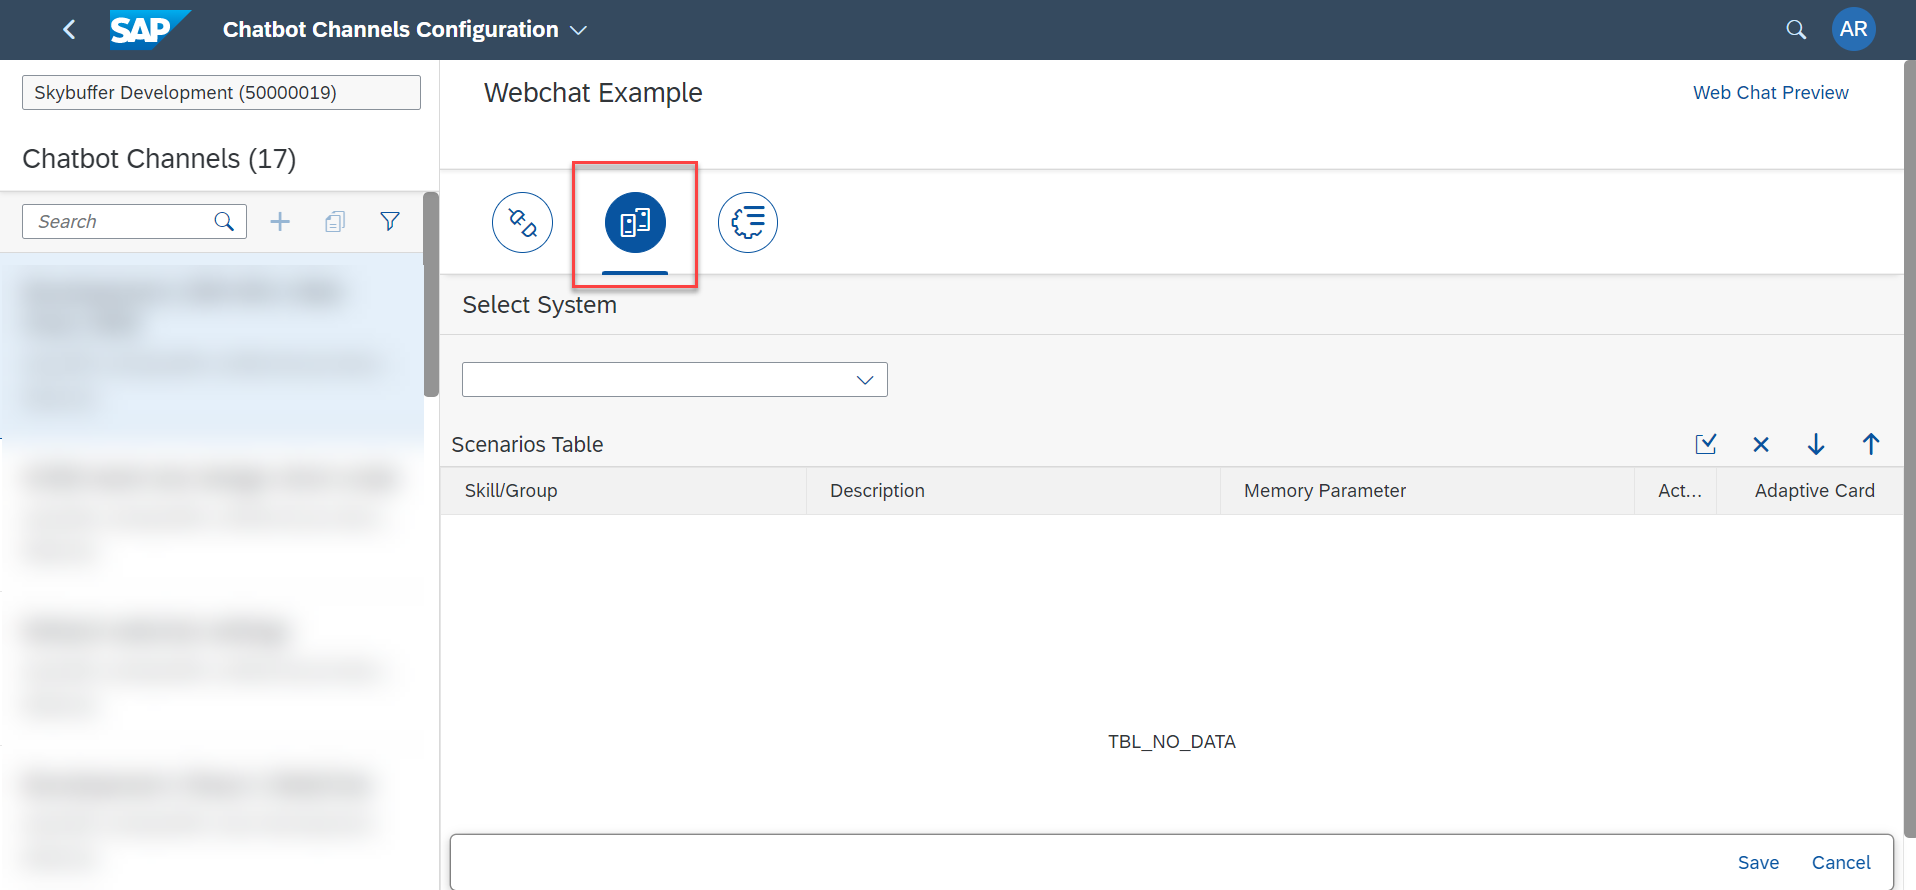
Step 3. Scenario Activation Tab

In this second tab, you will be able to activate scenarios for specific systems/destinations. This option will be available after the channel is already saved.


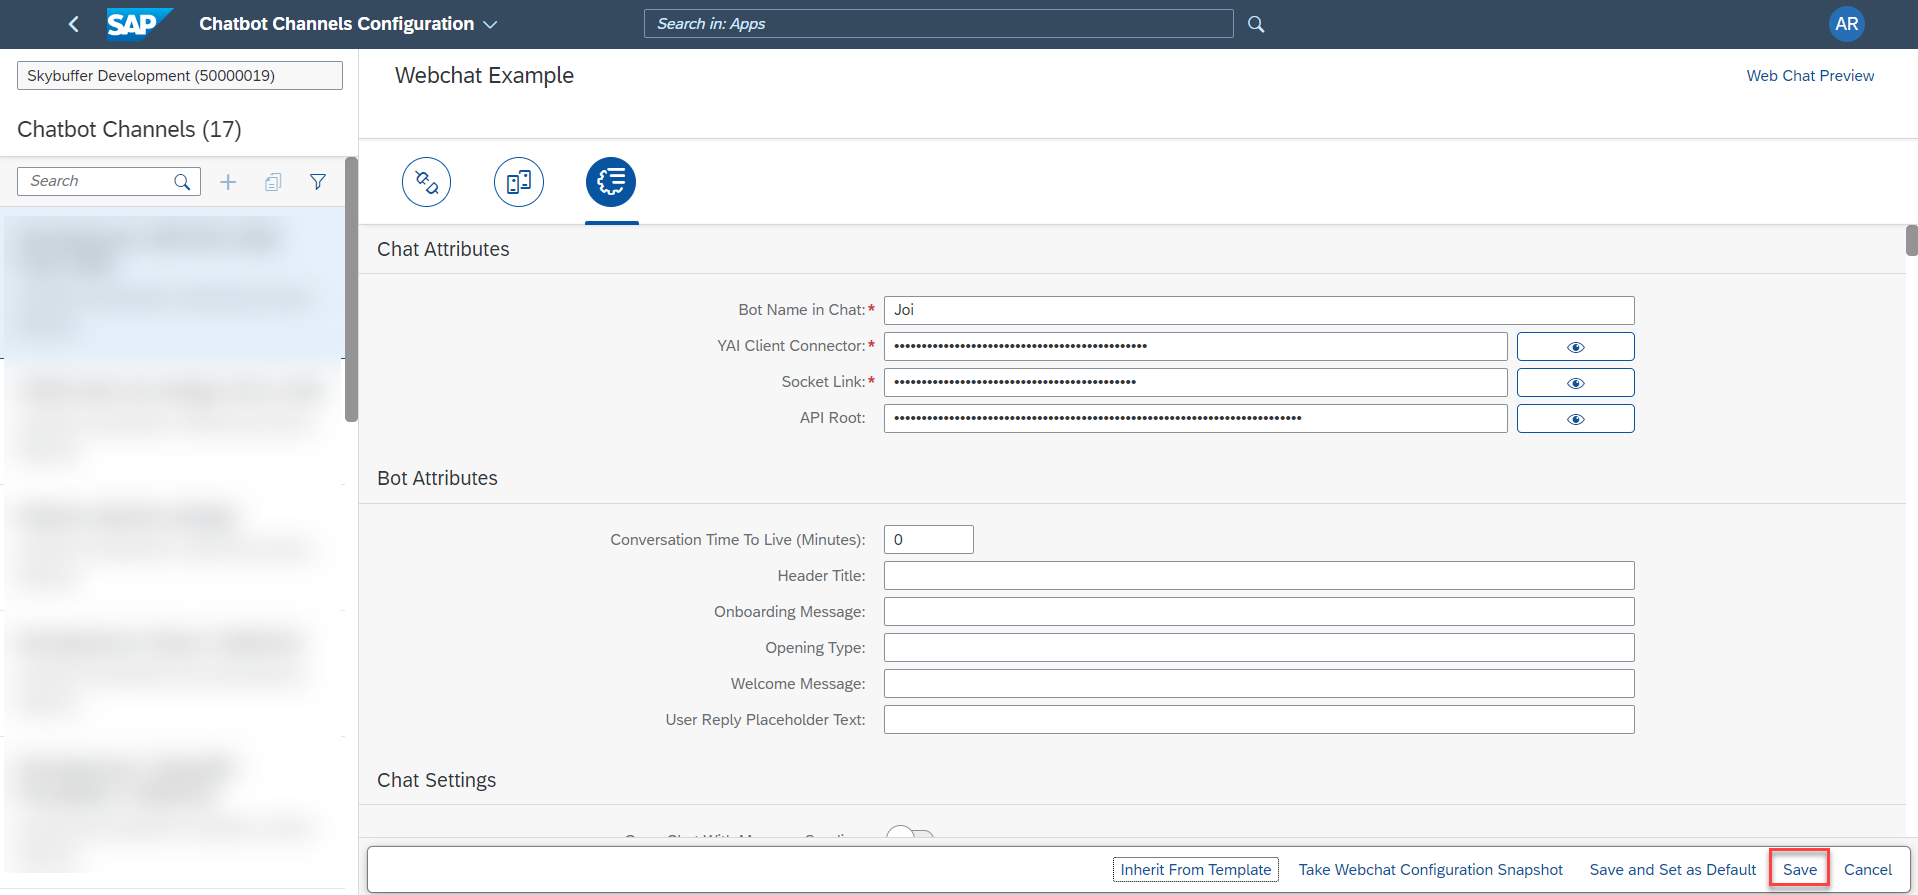
Step 4.  Webchat Styles and Appearance.
For webchat channel type, there is also a 3rd tab which stores connector settings and, most importantly, style properties for each element of the webchat like sizes, colors, fonts, etc.

These are the most important features in this tab:

  • Chat Attributes
  • Bot Attributes ( conversation live time, welcome message, header)

  • Chat Settings (open mode, file sending switch, pop-up messages switch)

  • Expander settings ( style of button used to open webchat)

  • Messages Settings ( initial message, busy indicator message, enable voice messages)

  • User Authentication Settings

  • Style Settings ( styles for webchat window, user and bot messages, fonts, colors, styles for buttons )

  • PopUp Message Style

  • Adaptive Card Style ( font color and size, background color, separators, icons etc.)

  • Audio Settings

  • Amazon Settings, Google Settings

  • Survey Style ( font color and size, background colors, scale icon files)


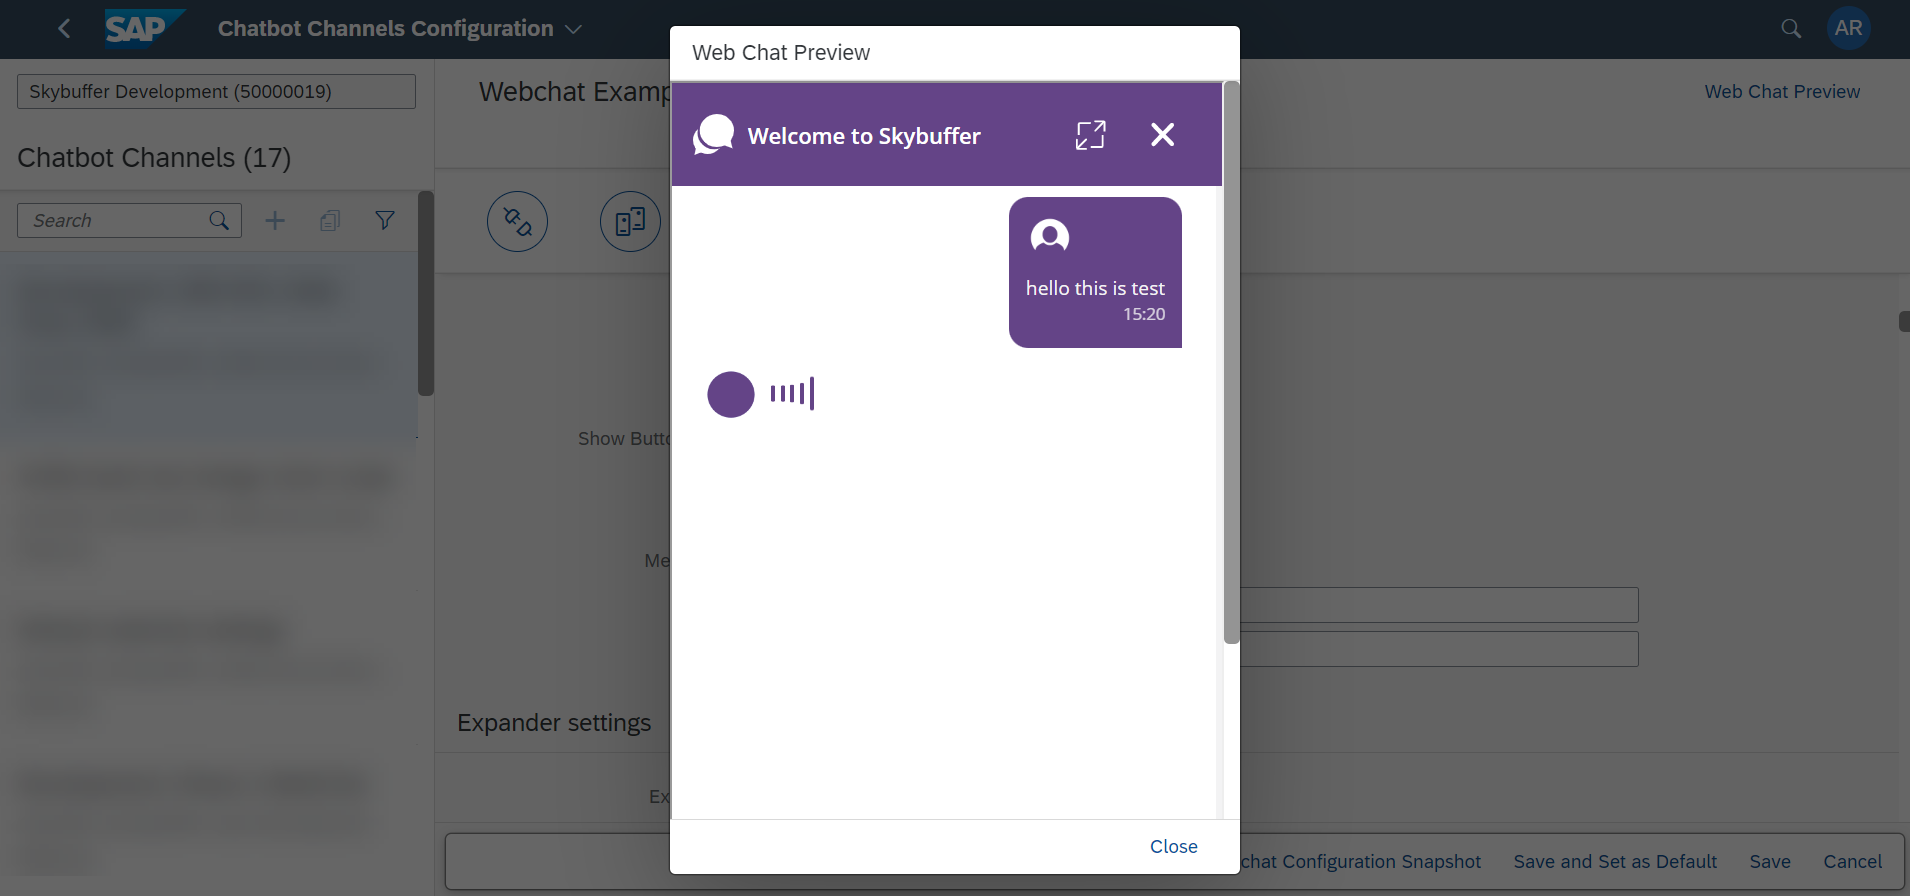
4.1. Webchat Preview

In the upper right corner there is Web Chat Preview button. The preview acts like a mini website with a webchat on it, and will use currently saved style properties.


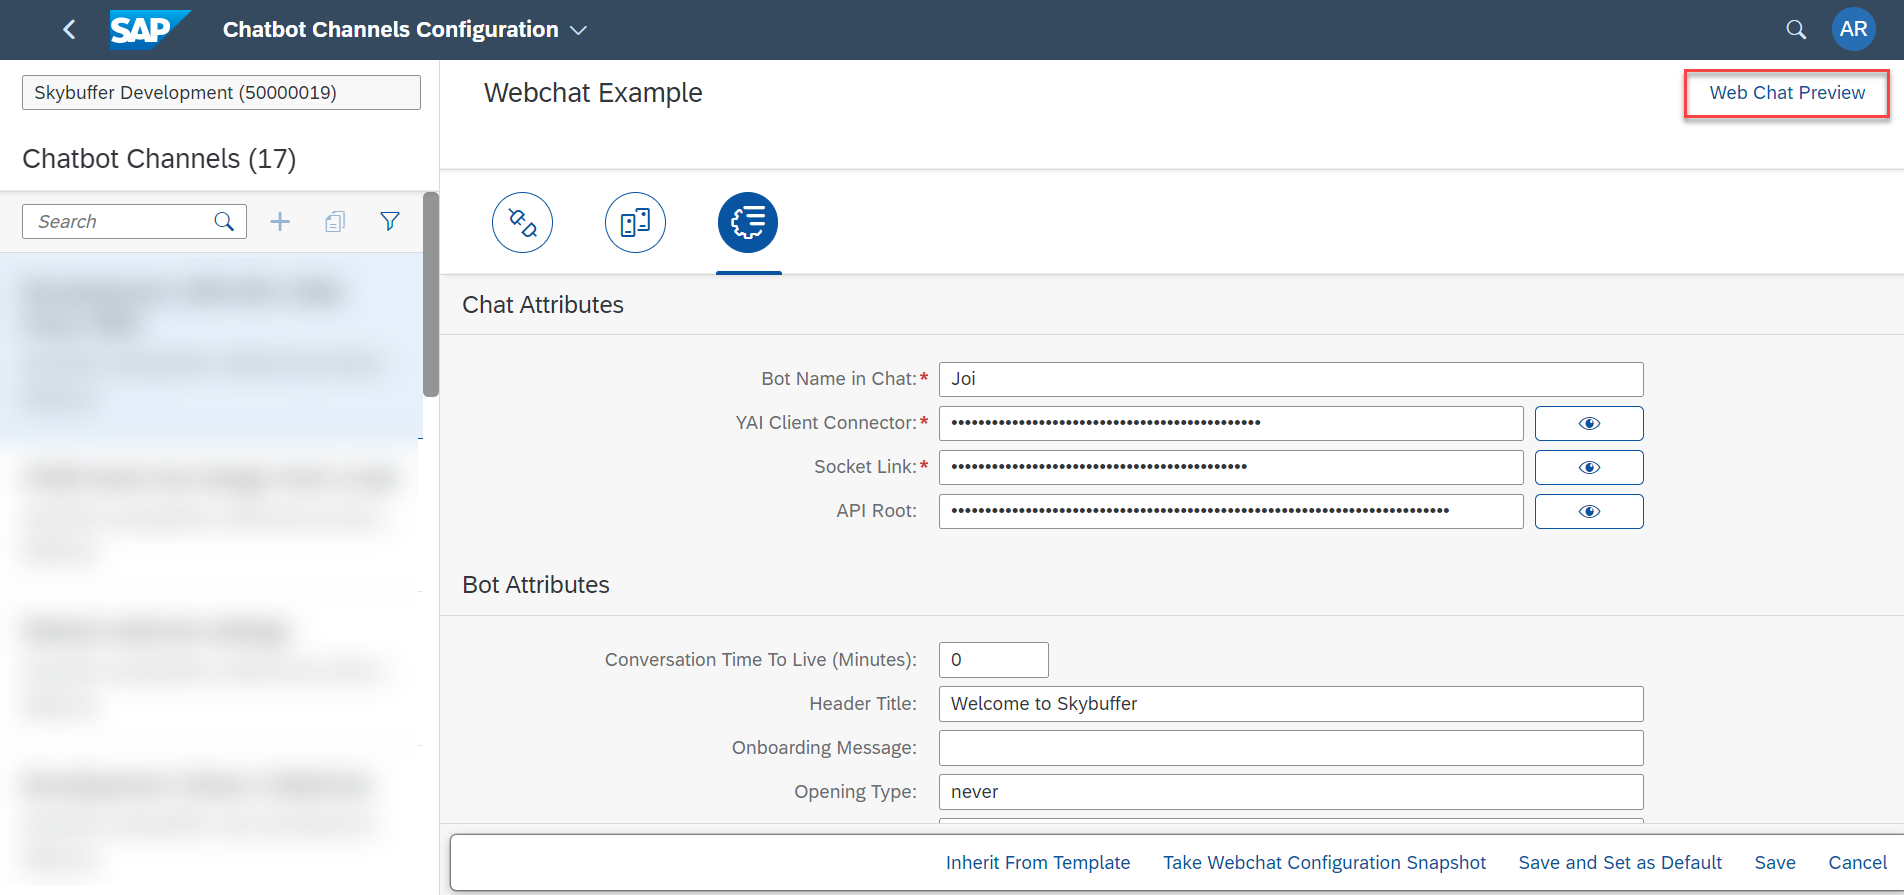
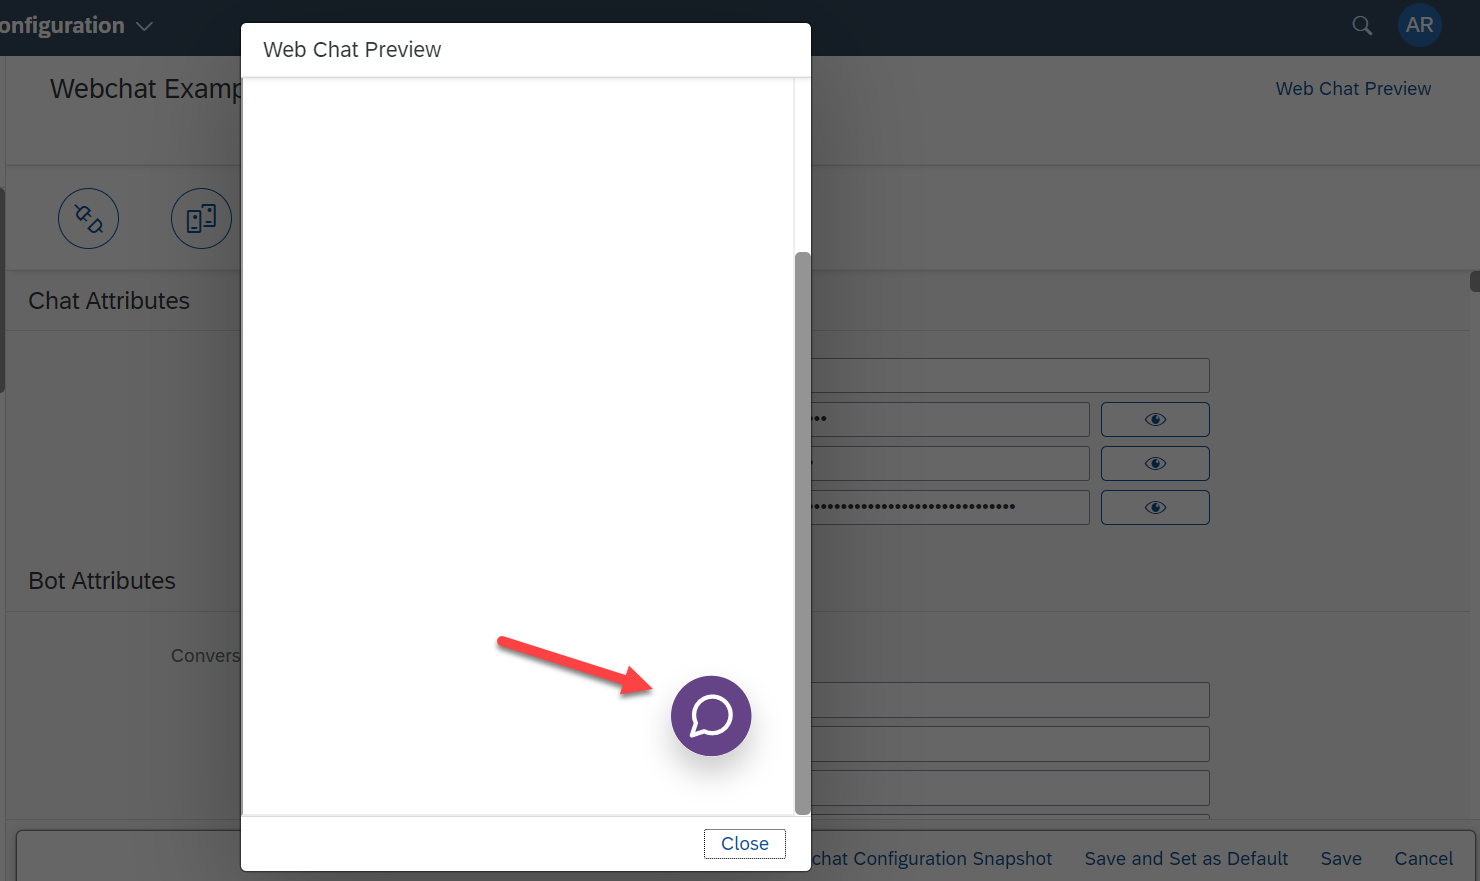
You can send messages in the preview mode to check the style of all possible elements. (Although for the chat to respond in the preview, the setup must be fully finished first, scenarios must be activated, etc).

4.2. Webchat Style Templates

It is possible to save set of style properties to a named template, and reuse it for other channels. One template can also be set as default for tenant.

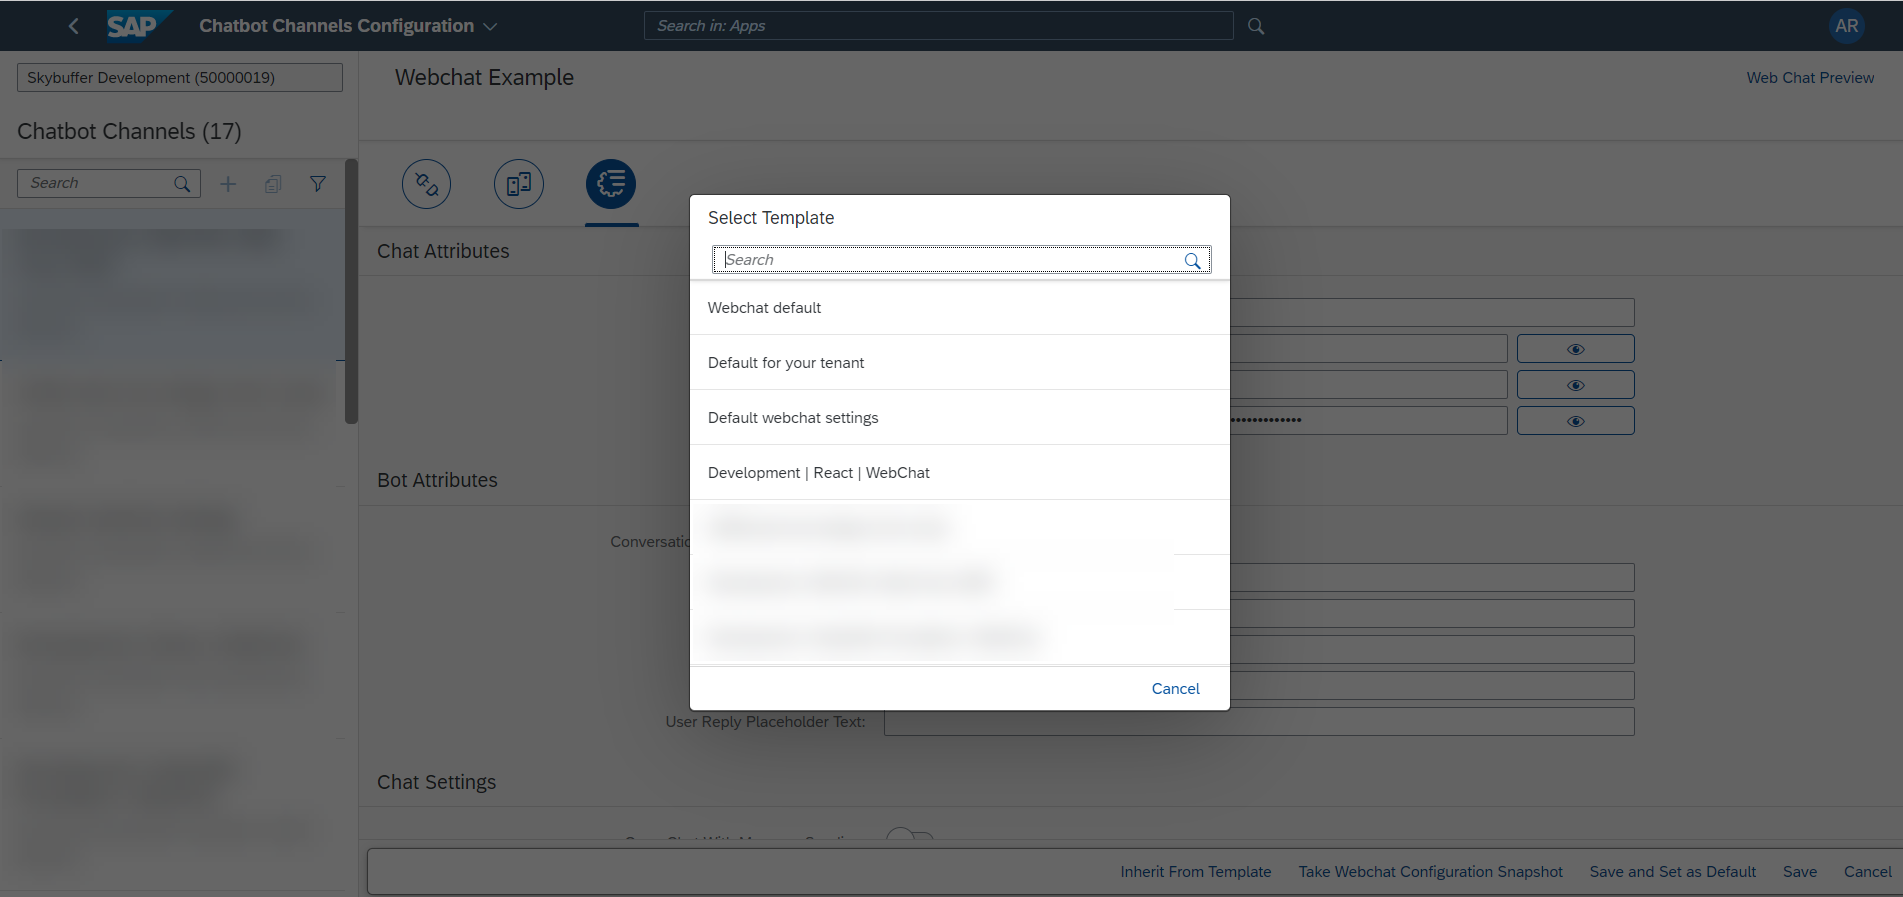
4.3. Inheriting Style from Template

The new channel will be created with default style for th given tenant. But you can also apply different templates by clicking on Inherit From Template at the bottom of the page.

You can then select a template from the drop-down list. There is usually a default one for the tenant, and others reflecting each created channel.

Click on the template name.

4.4. Creation of a New Template

With each newly-created webchat, a new template is also generated with the same name. The template is created when a new webchat is saved for the first time.

4.5. Setting Template as Default

If you want the set the current styleset as default for the tenant, select Save and Set as Default option. The default template is applied to each new channel.

4.6. Taking Configuration Snapchat


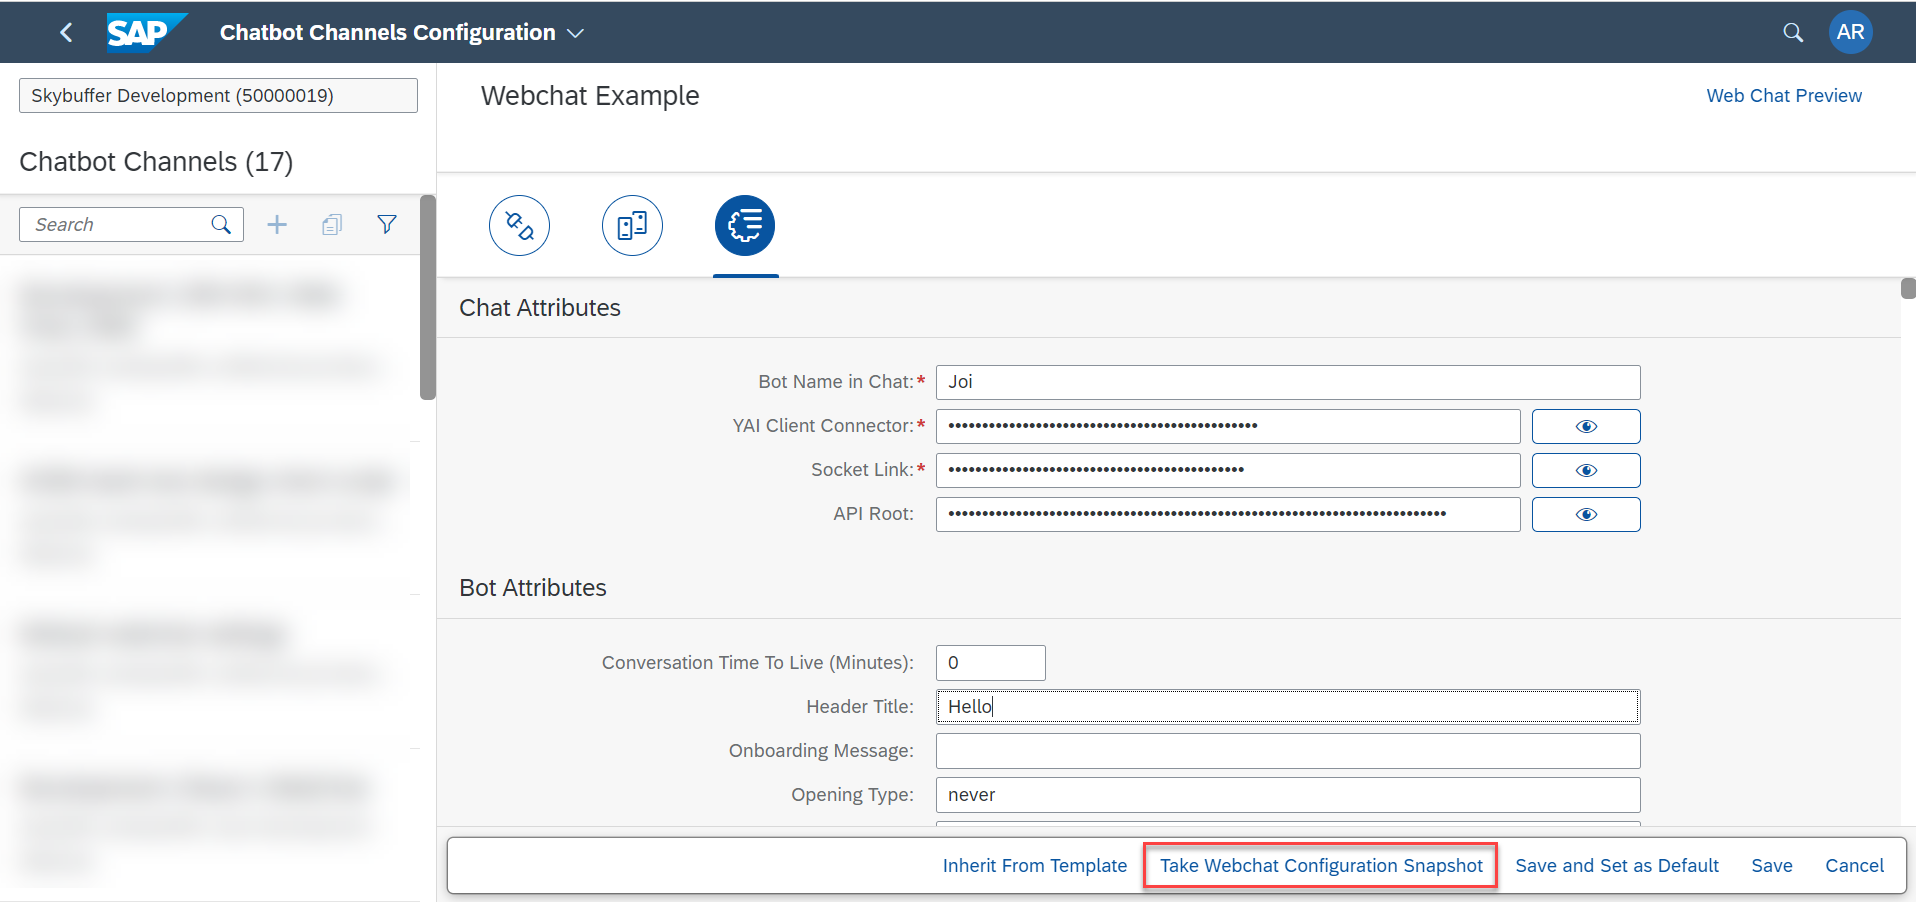
This option allows saving the current styleset to the text file.

Note: Please remember, if you put this script from the snapshot on your website, any later changes made in the channel configuration application won’t be applied to it.

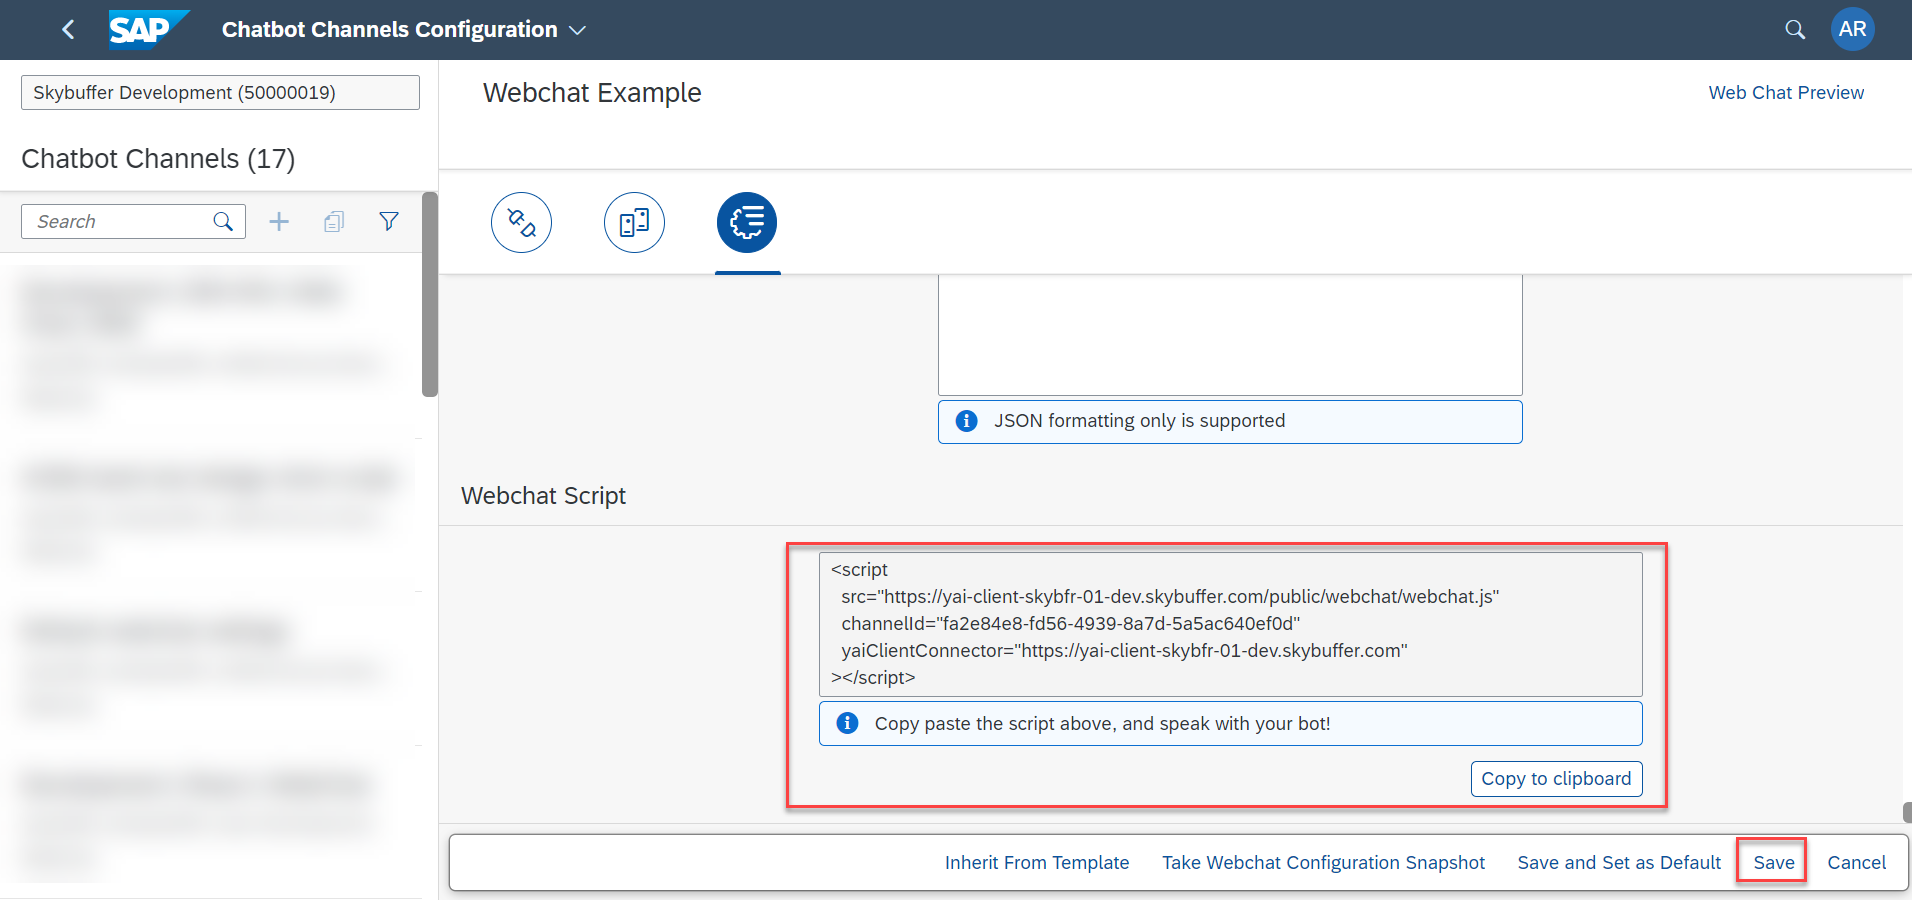
Step 5.  Save Your New Channel

When all the properties are set, you can copy the script from the Webchat Script field, and paste it to your website. This has to be done only once. Finally, click Save to finish the webchat channel creation.


Step 6. Scenario Activation Tab

The last step of channel configuration process is scenario activation. Go to this documentation page for the instructions:

Chatbot Scenarios Activation

Was this helpful?

Yes  No
Related Articles
  • Analytics Applications
  • Operator Activity Analytics
  • Exit Survey Analytics
  • MS Teams External Configuration
  • Zoom External Configuration
  • Viber External Configuration
Copyright 2022 Skybuffer.com. All Rights Reserved.