Step 1. Open the channel management application of Chatbot Channels. Create Channels

Step 2. Register new WhatsApp type channel (Channel Settings Tab)
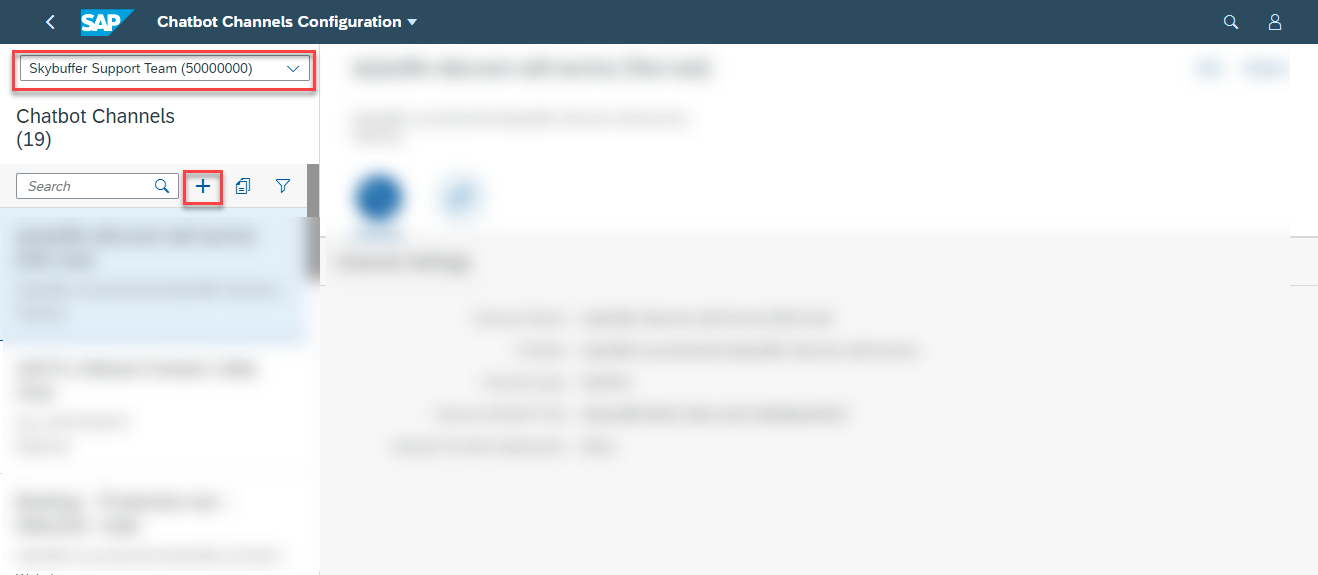
Select the correct tenant from the drop-down menu and click on the Plus button to add a new channel.

Fill in the new channel details. Start with the tab of Channel Settings. Fill in the following fields first:
Channel Name, Chatbot (from the drop-down list), and Channel type to WhatsApp (from the drop-down list).

Next fill in the remaining fields:
– Channel ID – this field is auto-generated.
– Phone Number – put in the telephone number used for the WhatsApp account.
– Twilio API Access Token – request this value from your Twilio administrator.
– Twilio Account SID – request this value from your Twilio administrator.
– Identity Provider Application – choose SSO setup from the drop-down list, or select None.
Click Save to finish creating the channel.

Step 3. Scenario Activation Tab
The last step of the channel configuration process is scenario activation. Go to this documentation page for the instructions: