Skills Creation and Management
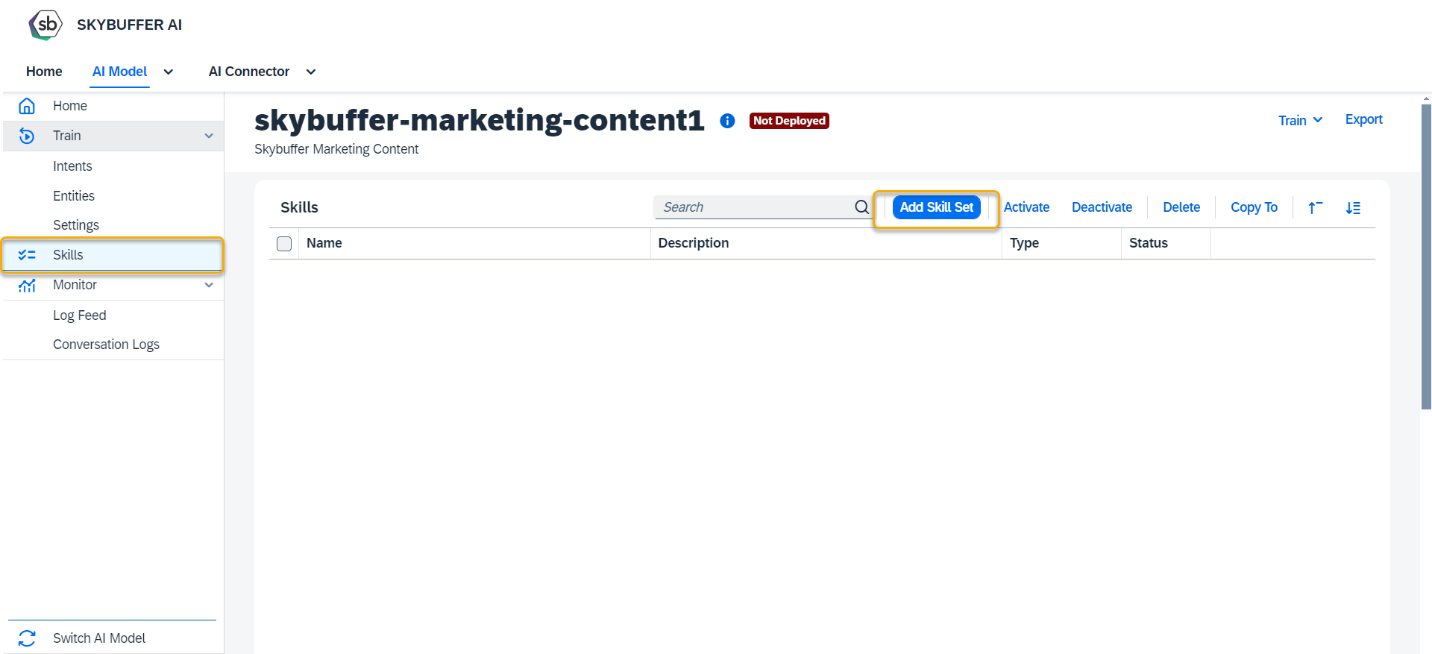
Step 1. Open AI Model Configurator application, choose Skills Section to create a new skill set, and press Add Skill Set button.
Step 2. Enter the necessary information and press Save button.

(1) – Skill set name
(2) – Skill set description (optional)
(3) – Select skill set type.
Business skills reflect the core purpose of your AI Model.
Floating skills complement your AI Model core business skills (example: small talk).
Fallback gets triggered when no other skill does.
Initialize gets triggered at the beginning of the conversation.
Disambiguation reduces uncertainty between scenarios for overlapping skills.
Fallback, Initialize and Disambiguation skill sets can only be created in one instance.
(4) – Choose the skill set content (skills that will be created for a new skill set).
NOTE: Fallback, Initialize, and Disambiguation have only one type of skill content – trigger.
(5) – Skillset Status (Active by default).
(6) – Save your entries.
Step 3. A new skill set has been successfully created.
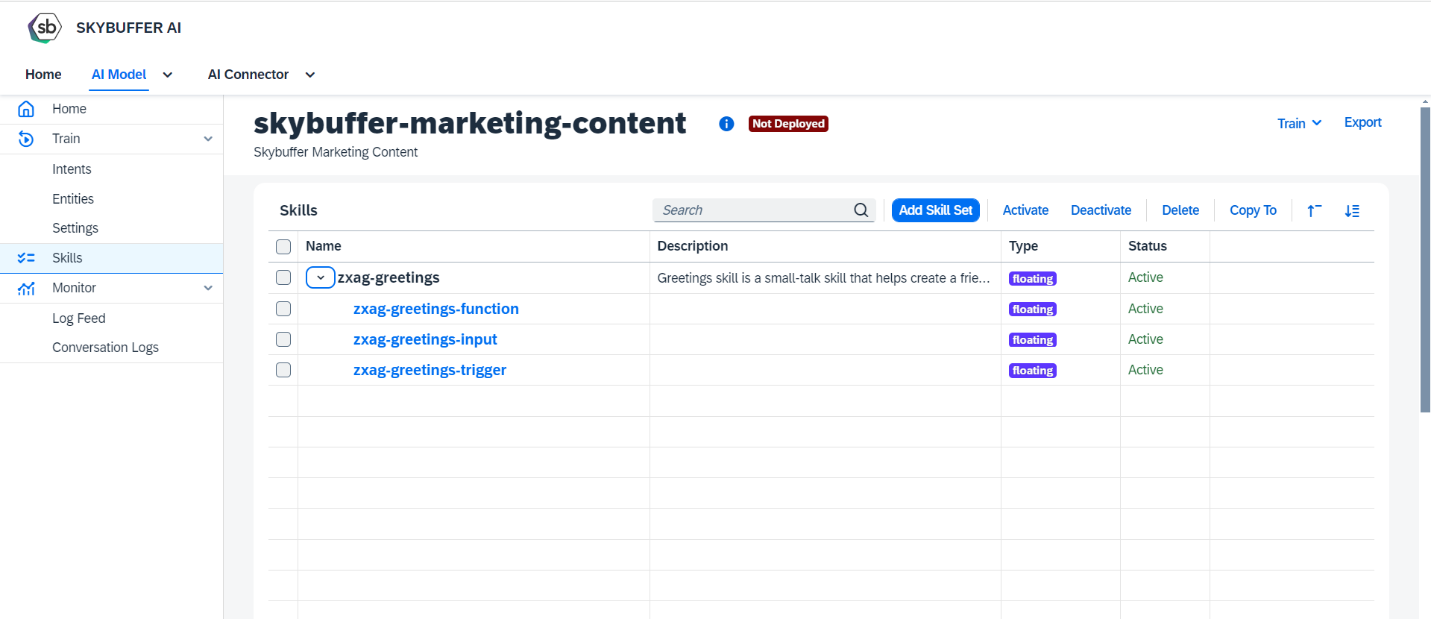
Step 4. To edit triggers and actions for your skill, open the skill from the skill set, go to Triggers tab and press Edit button.

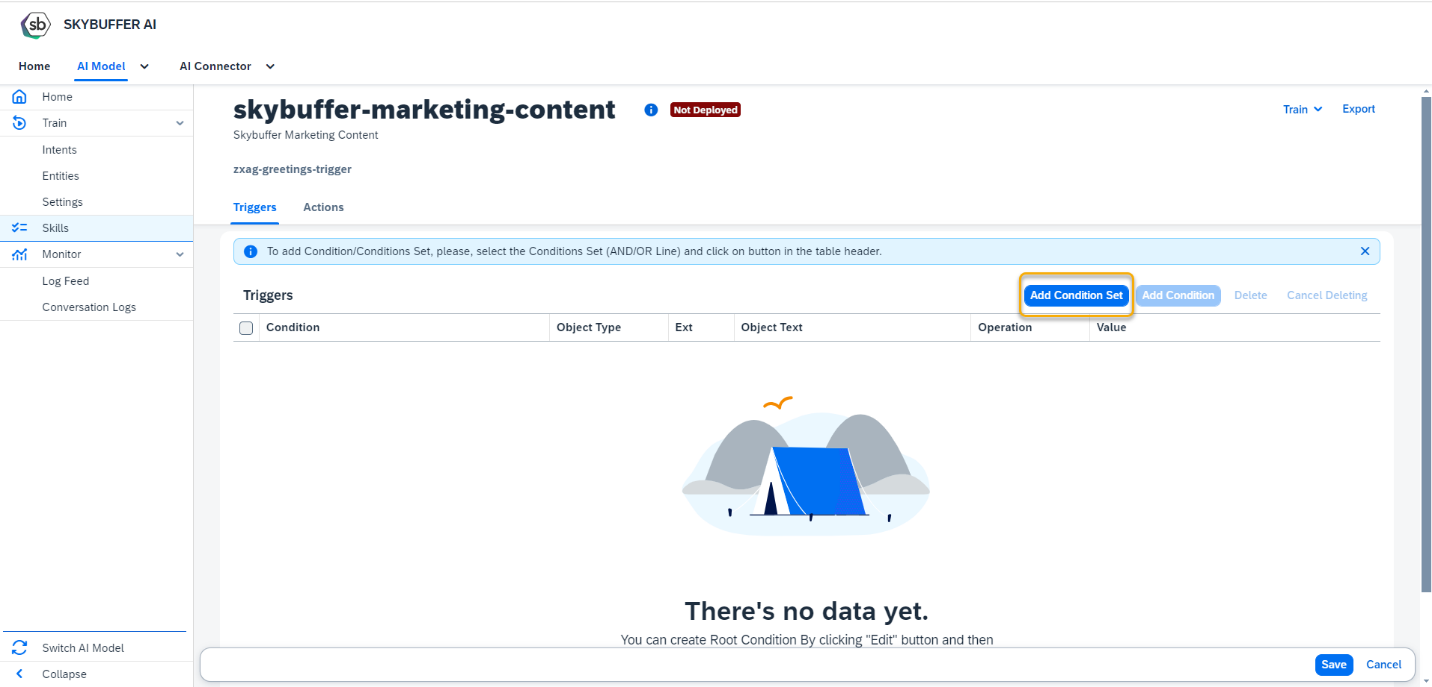
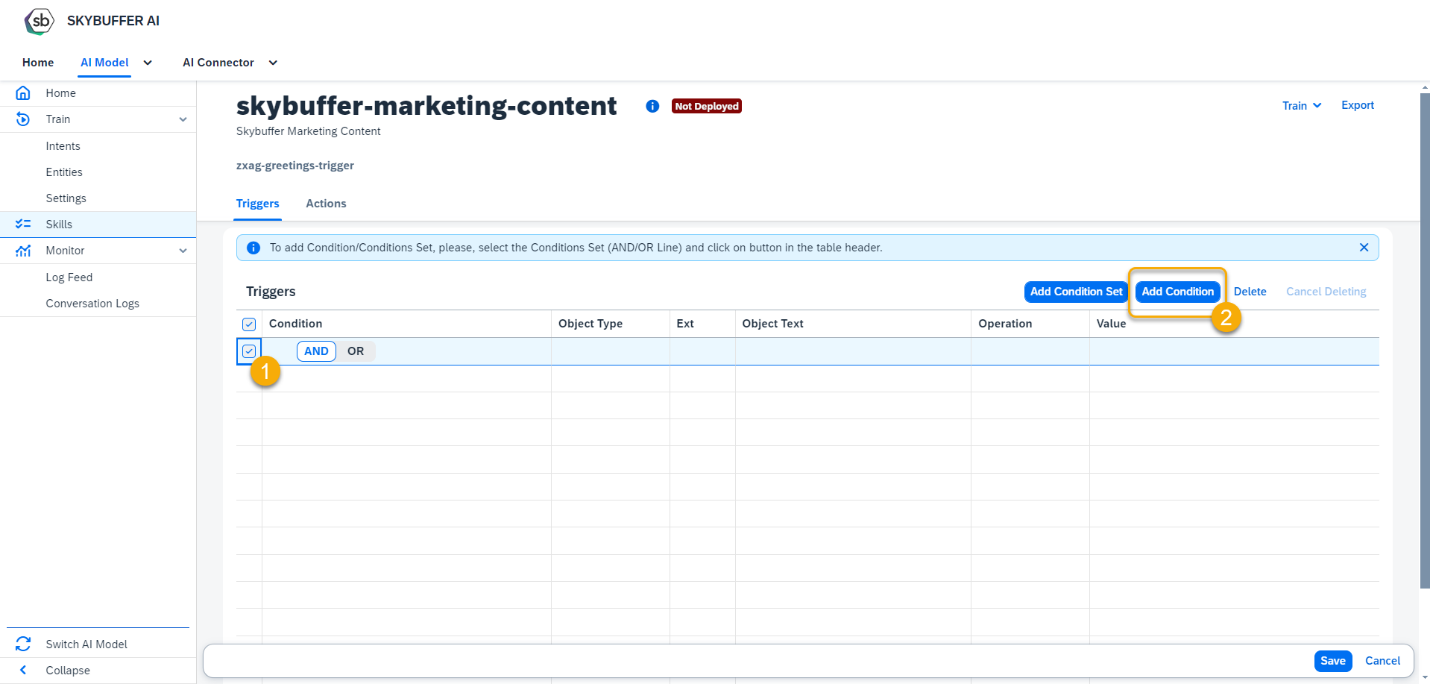
Step 5. Press Add Condition Set button to add trigger conditions.
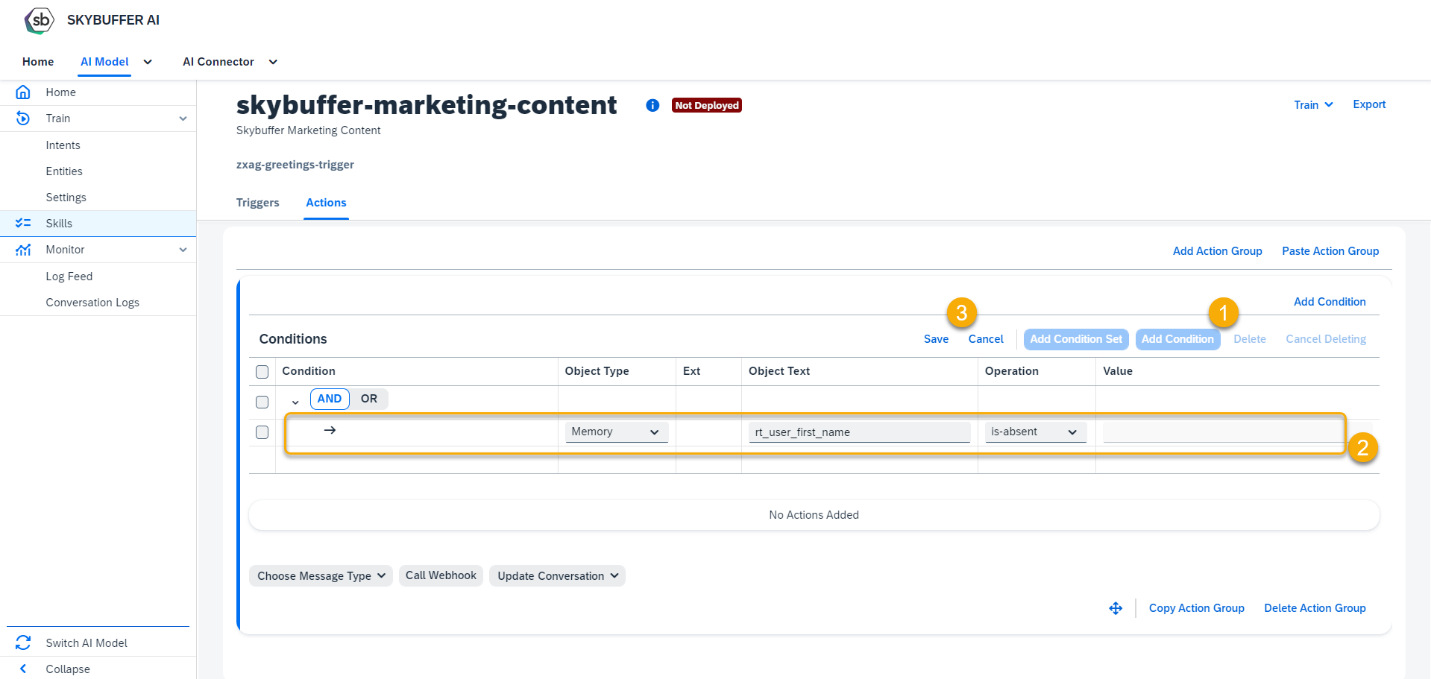
Step 6. To add Condition to Condition Set, select root condition and press Add Condition button.
Step 7. Select the Object Type, Object Name, Operation and add value if needed. Press Save button.
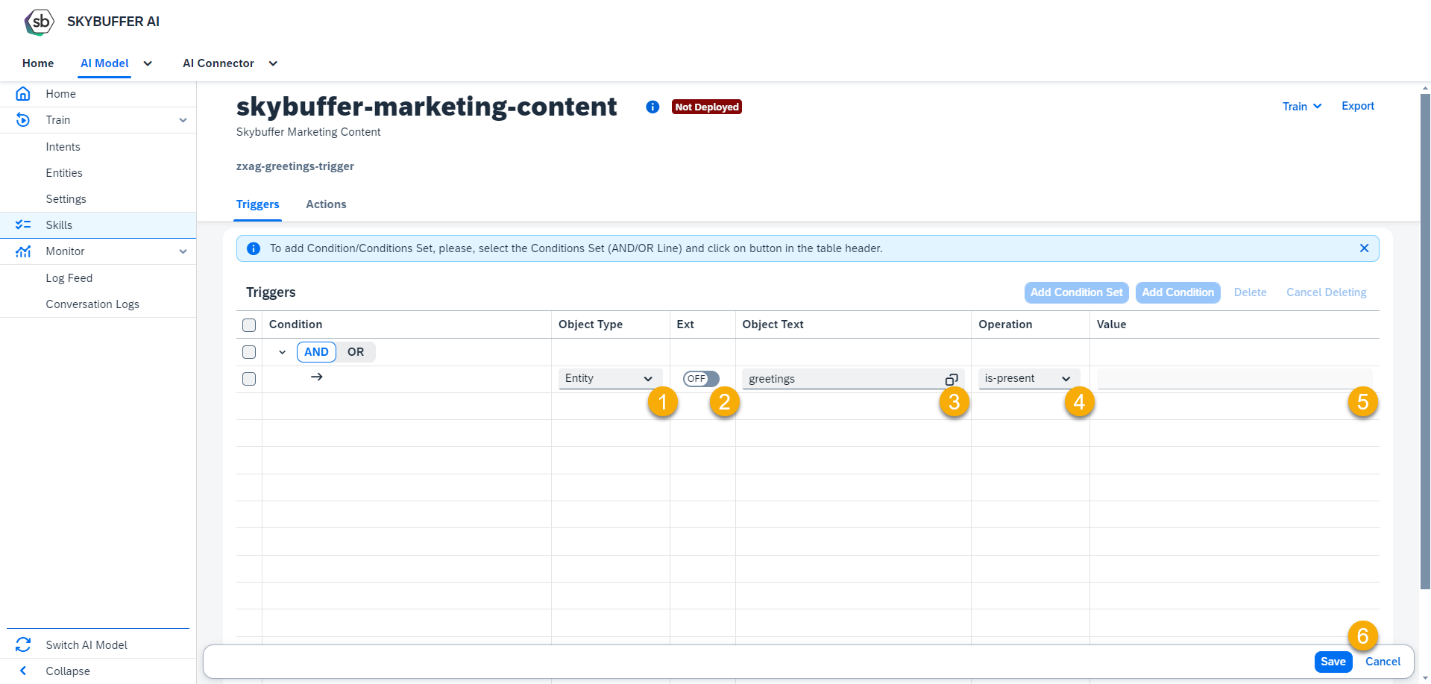
Processed Object types: Entity, Intent, Memory, Sentiment.
NOTE: By default, Entity and Intent objects types should be selected from the list of existing ones. Switch the value in Ext field to On for manual data entry.
Sentiment object allows working with Negative, Positive and Neutral sentiments.
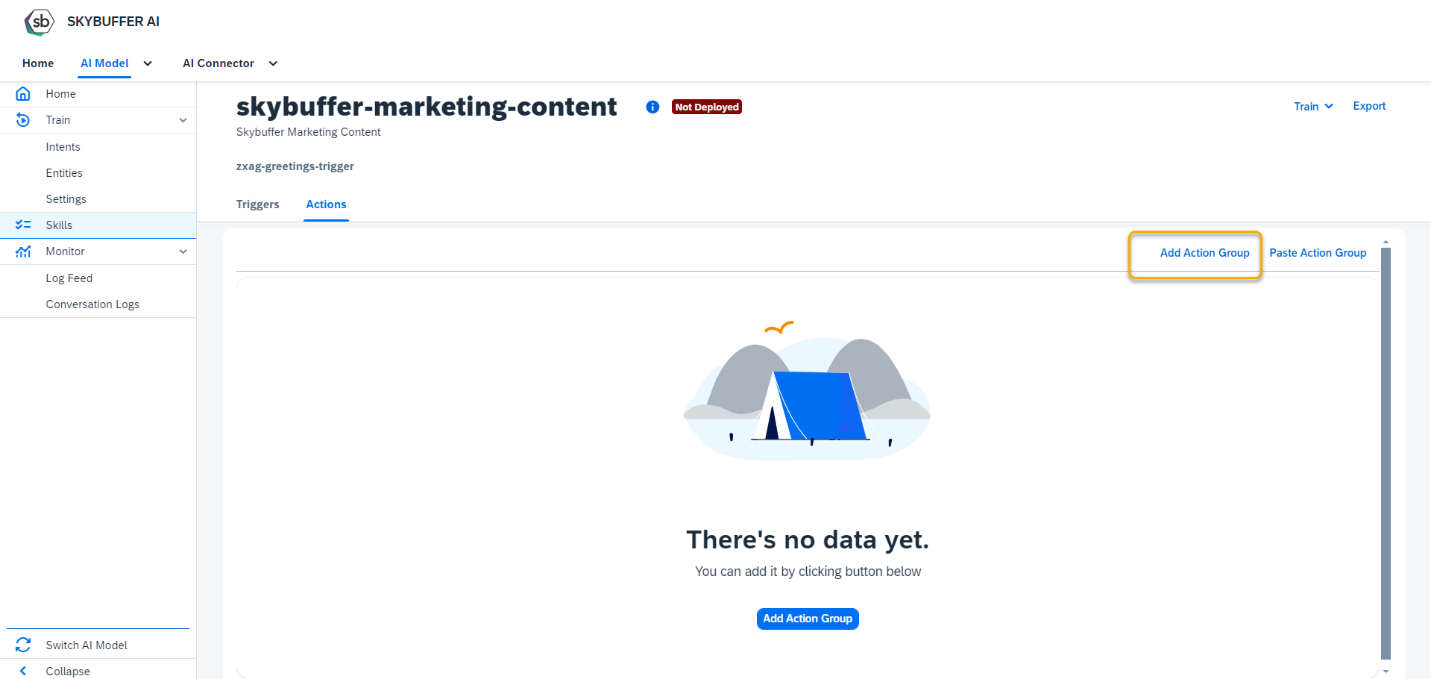
Step 8. Go to Actions tab to create an action for your skill and press button Add Action Group.
Step 9. Here you can Add condition to your Action Group.
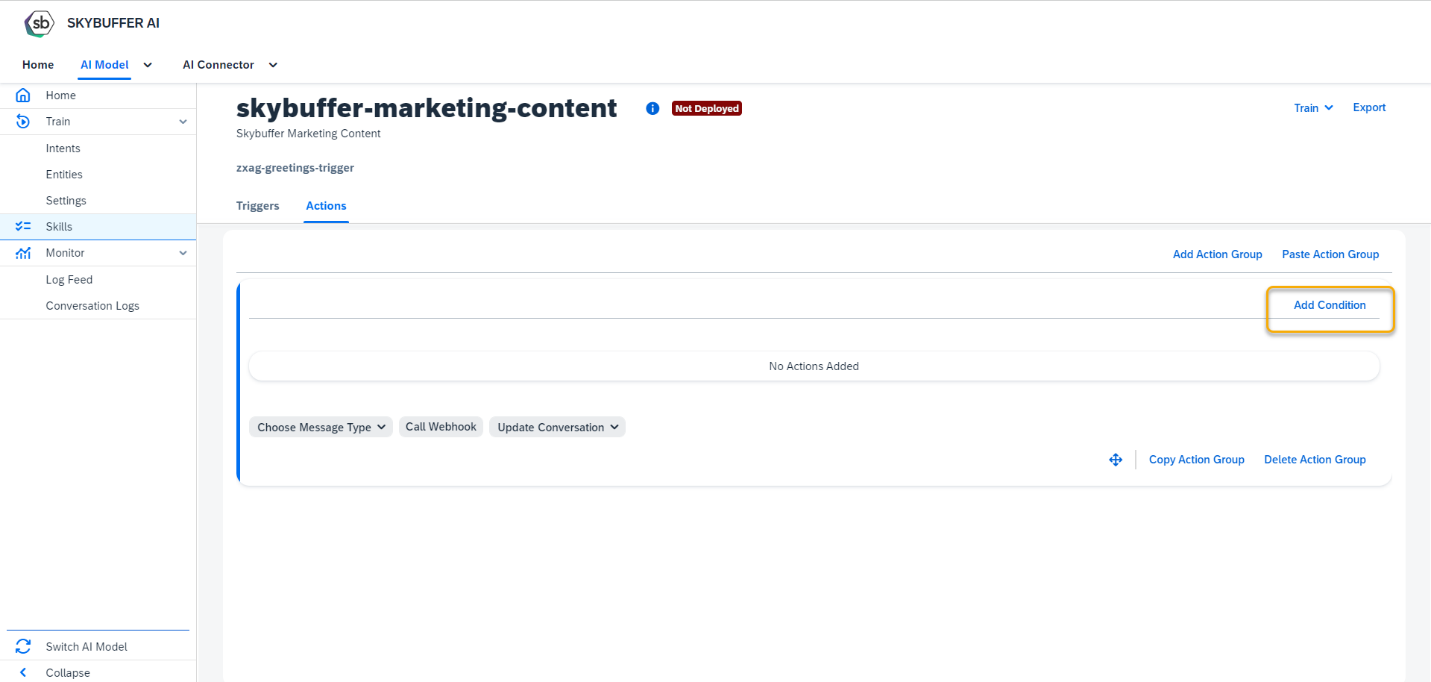
Save your entries.
Step 10. Select action type: Choose Message Type
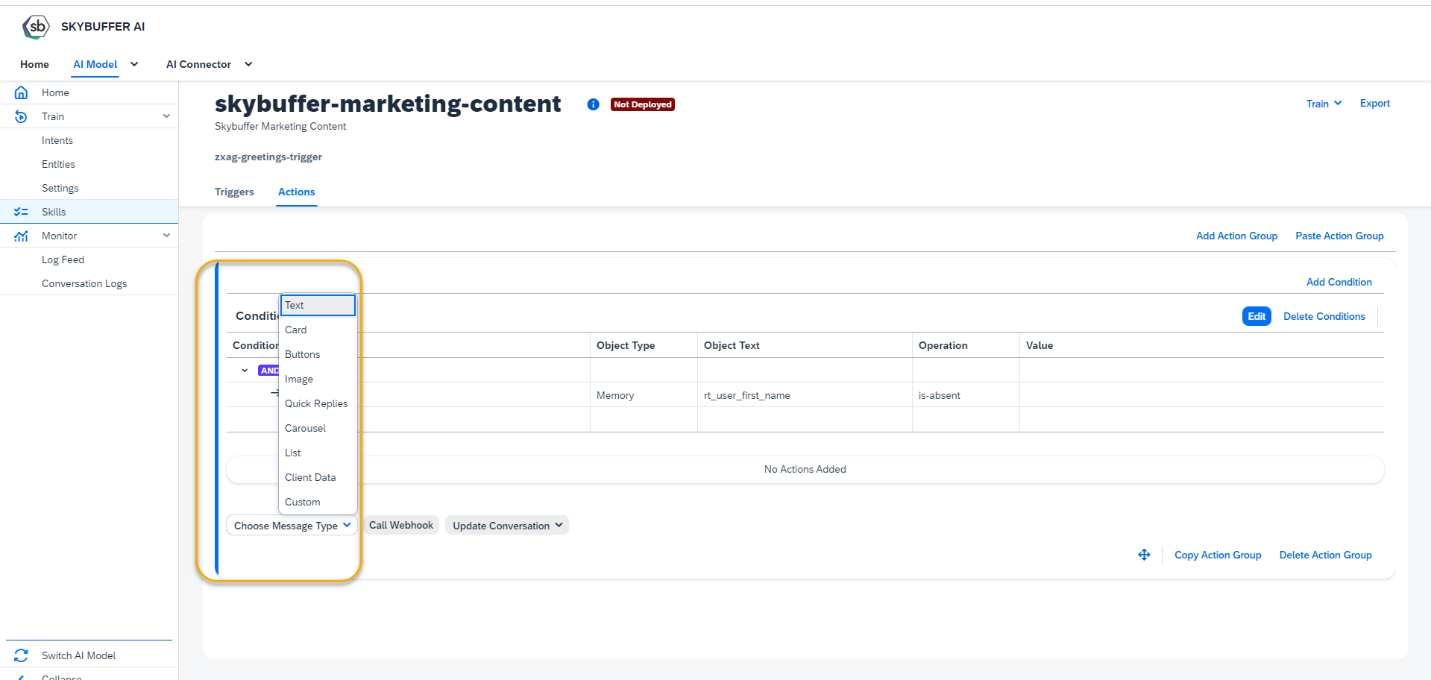
Skybuffer AI allows using several message types: Text, Card, Buttons, Image, Quick Replies, Carousel, List, Client Data, Custom.
Choose the message type from the list, add required texts.
Optionally you can set a delay before sending the next message – input the number of seconds to wait.
Press Save button.
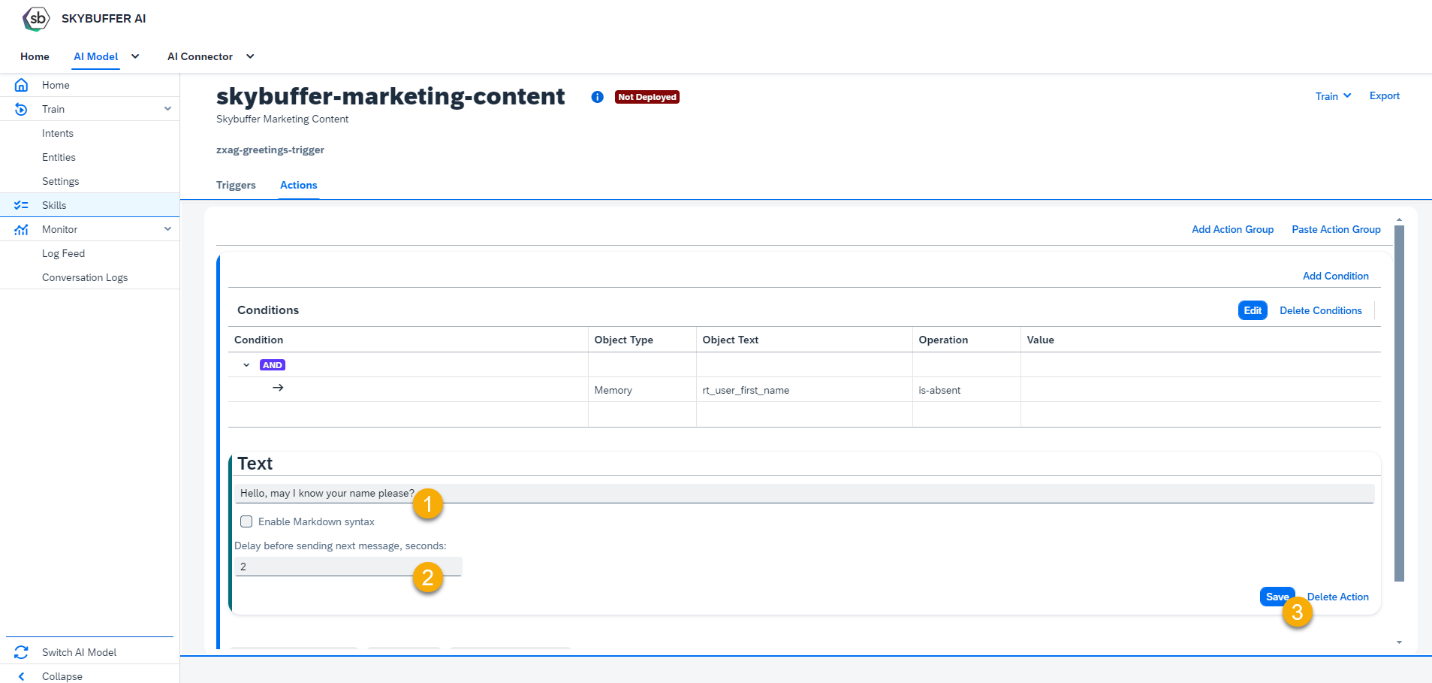 Additionally, it is allowed to use a markdown syntax in the text message. Tick the Enable Markdown Syntax to activate it.

To process the memory parameters in the message, use special syntax: { {{memory.rt_memory_parameter}} } or { {{memory.rt_memory_parameter}}.translate} (to display parameter translation in the message).

Step 11. Select the Action type: Call Webhook
Provide the webhook name and press the Save button.

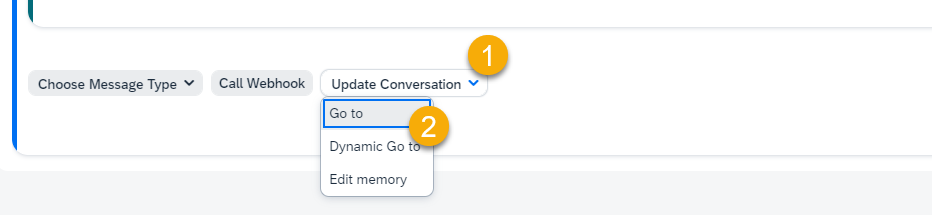
Step 12. Select the Action type: Update Conversation (choose the option how you’d like to update the conversation).
Go to – select the next skill from the skills available in your AI Model.
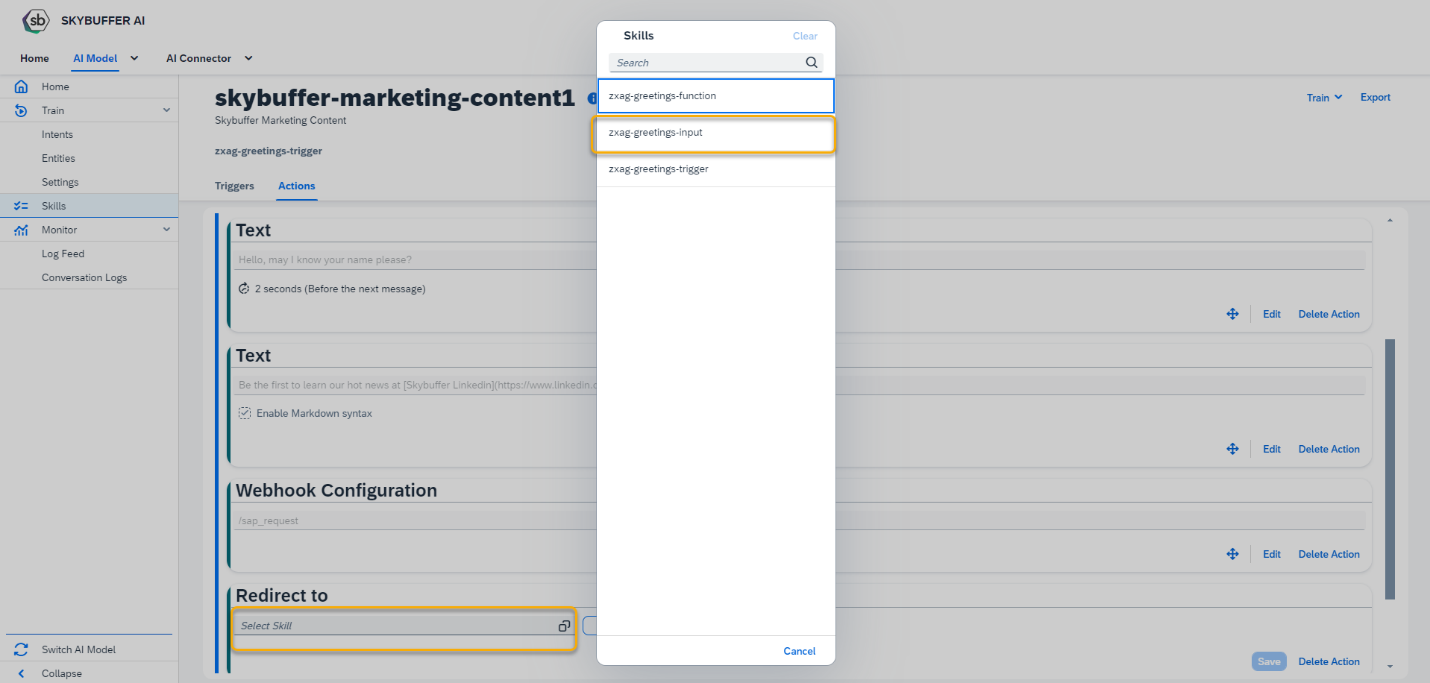
After the skill is selected, determine the moment of execution:

to perform the skill immediately, choose Start the Skill;
to perform the skill after the user answers – Wait for user input.
Press the Save button.
Dynamic Go to – provide the condition (parameter name) for the next triggered skill.

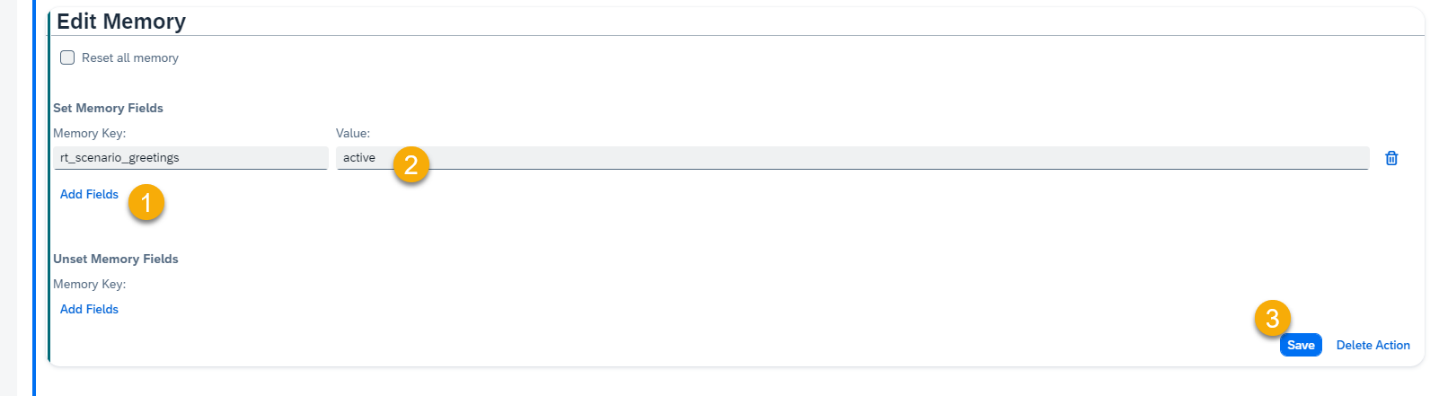
Edit Memory – manage your AI Model memory

To add the memory parameters, press Add fields in Set Memory Fields section, enter Memory Key and its Value. Save.
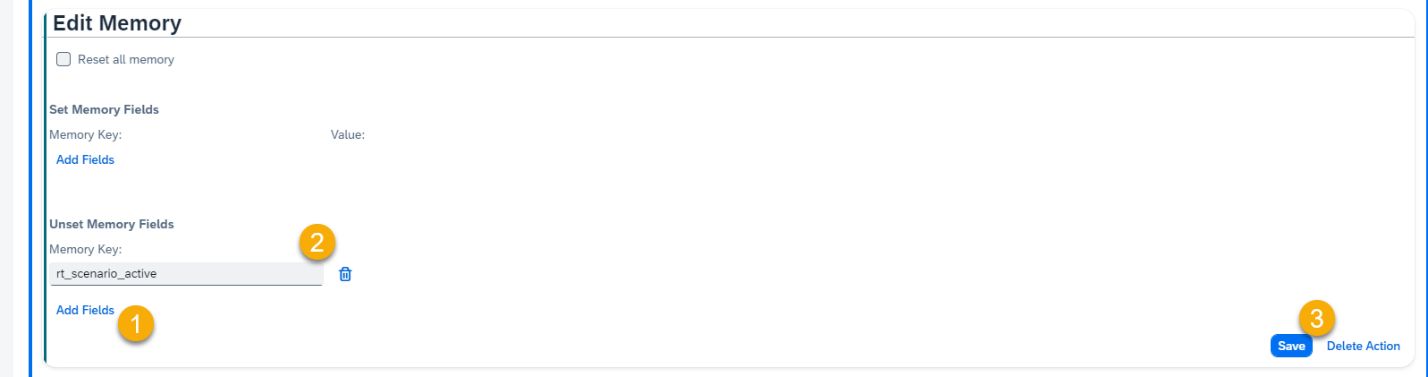
To unset the memory parameters, press Add fields in Unset Memory Fields section, enter Memory Key and Save.
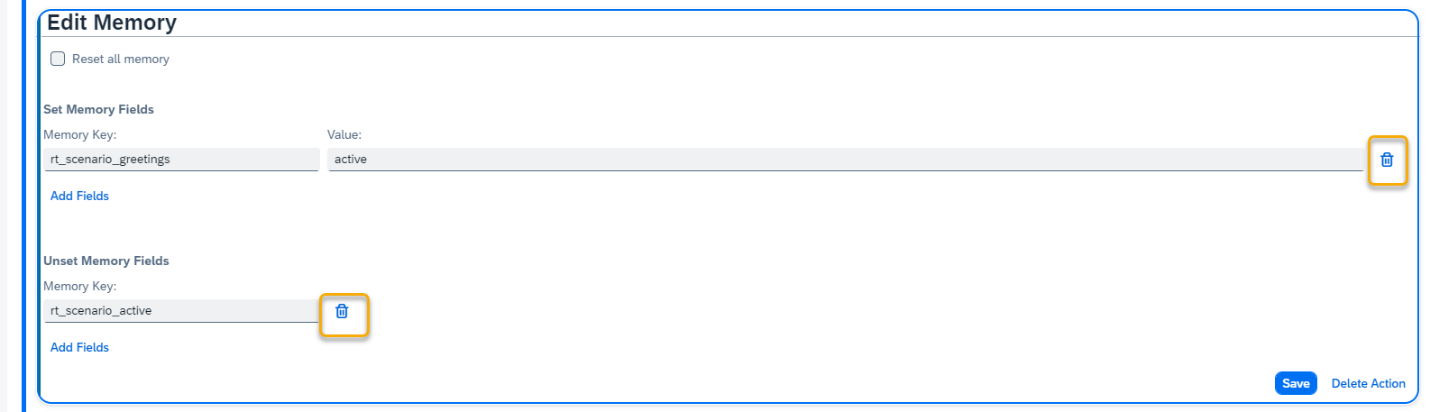
Use the Reset all memory option to clear all the variables in memory.
Use this option carefully.

To delete the memory fields, use the trash icon on the right of the corresponding field.
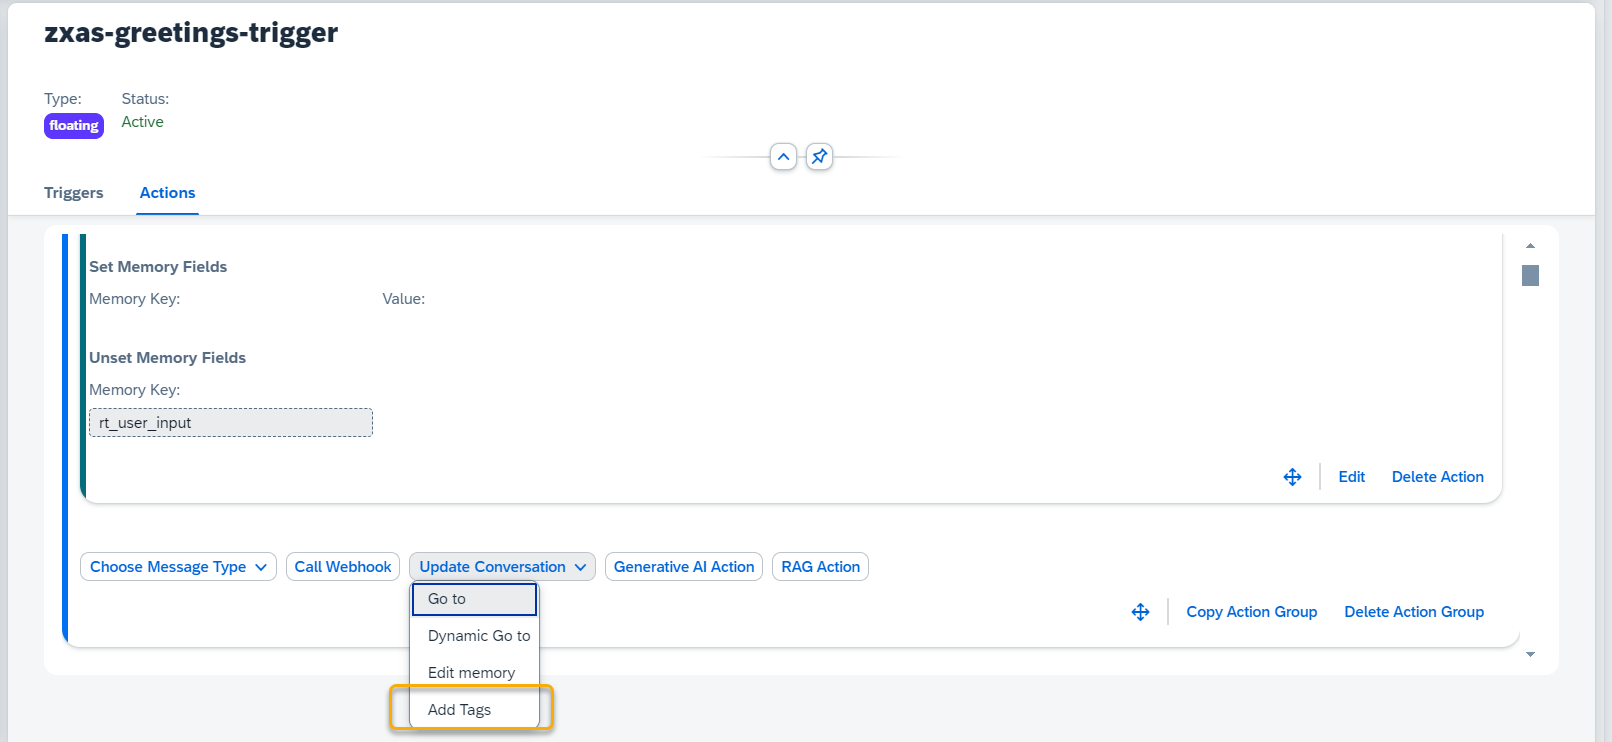
Add Tags
Using Tags in skills is a smart way to browse conversation logs by hand, or support category filtering in other applications.
Select Update Conversation> Add Tags option at the bottom of the Action Group.
Reset all tags – mark this option to remove all tags from the given conversation’s memory.
Set Tags – you can add multiple tags. Add tag name and press enter.
Save your changes when done editing.

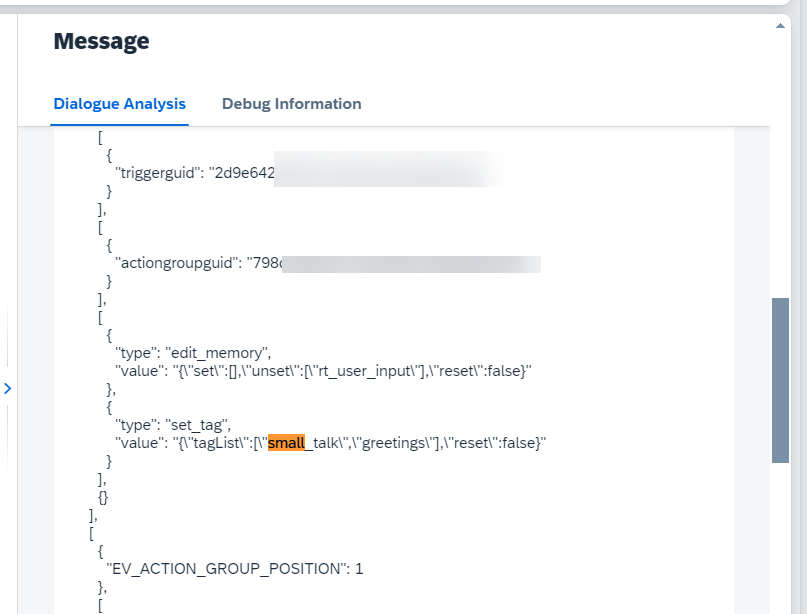
Check conversation log to see tags in action. In this example skill “greetings” was triggered, so we see our tags “small_talk” and “greetings” in memory under “set_tag.value”:
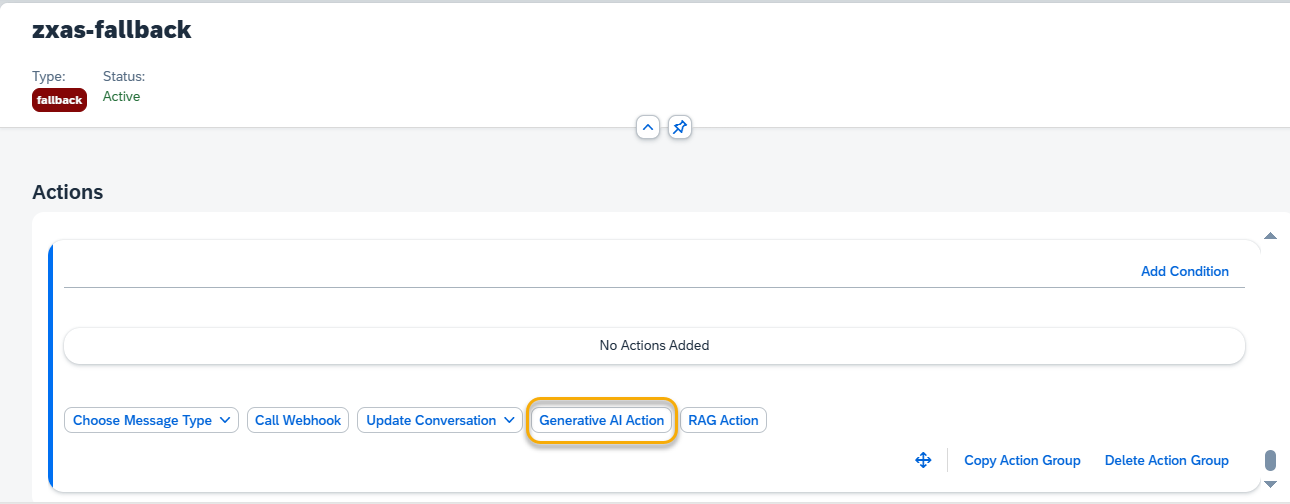
Step 13. Generative AI Action
To utilize generative AI models within skill, simply incorporate the appropriate Gen AI action.
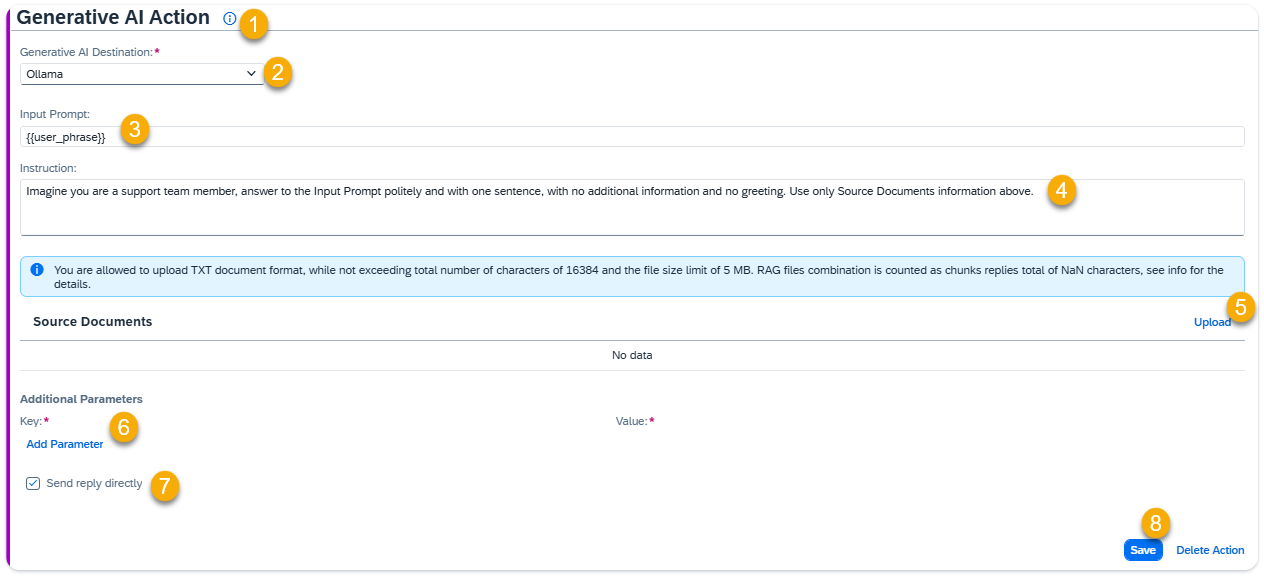
For guidance on the action and some hint, click the Information Icon (1).
Generative AI Destination (2)
You can choose between using the Default Generative AI Destination connection, which is assigned to the current AI Model in the Generative AI Settings section, or selecting a specific one from the list for this action.
Input Prompt (3)
The Input Prompt is where you include the user phrase, which is combined with Instruction and Source Documents to create the Context for Generative AI. You can enhance {{user_phrase}} by adding additional text or memory parameters, or you can choose to remove {{user_phrase}} entirely. If removed, the Generative AI will generate output based solely on the instructions provided.
Example Input Prompt 1: {{user_phrase}}
Example Input Prompt 2: Answer this question: {{user_phrase}} in context of {{memory.rt_leave_request_type}}.
Instruction (4)
The text in Instruction field guides Generative AI in crafting its response. Together with Input Prompt and Source Documents it forms the Context for Generative AI. Attached Source Documents are added at the end of the Context by default. If you need to refer to the specific source document in the instruction body, you can use tag mask {{document.document_name}}, where document_name – the name of the attached document (including file extension) in this Action.
Example Instruction 1:
You are an experienced support agent, produce the reply for the input prompt in the context of user support with one sentence with no additional information, using only the information attached below.
Example Instruction 2:
Imagine you are a sales agent, and your aim is to sell the XYZ and ABC products. Use the {{document.Instruction for product XYZ.txt}} for providing the reply concerning product XYZ and {{document.instruction for product ABC.txt}} for providing the reply about the product ABC. If the user asks about topics other than products XYZ and ABC, try to convince them to switch the topic to the products discussion. The answer should be 2 sentences maximum.
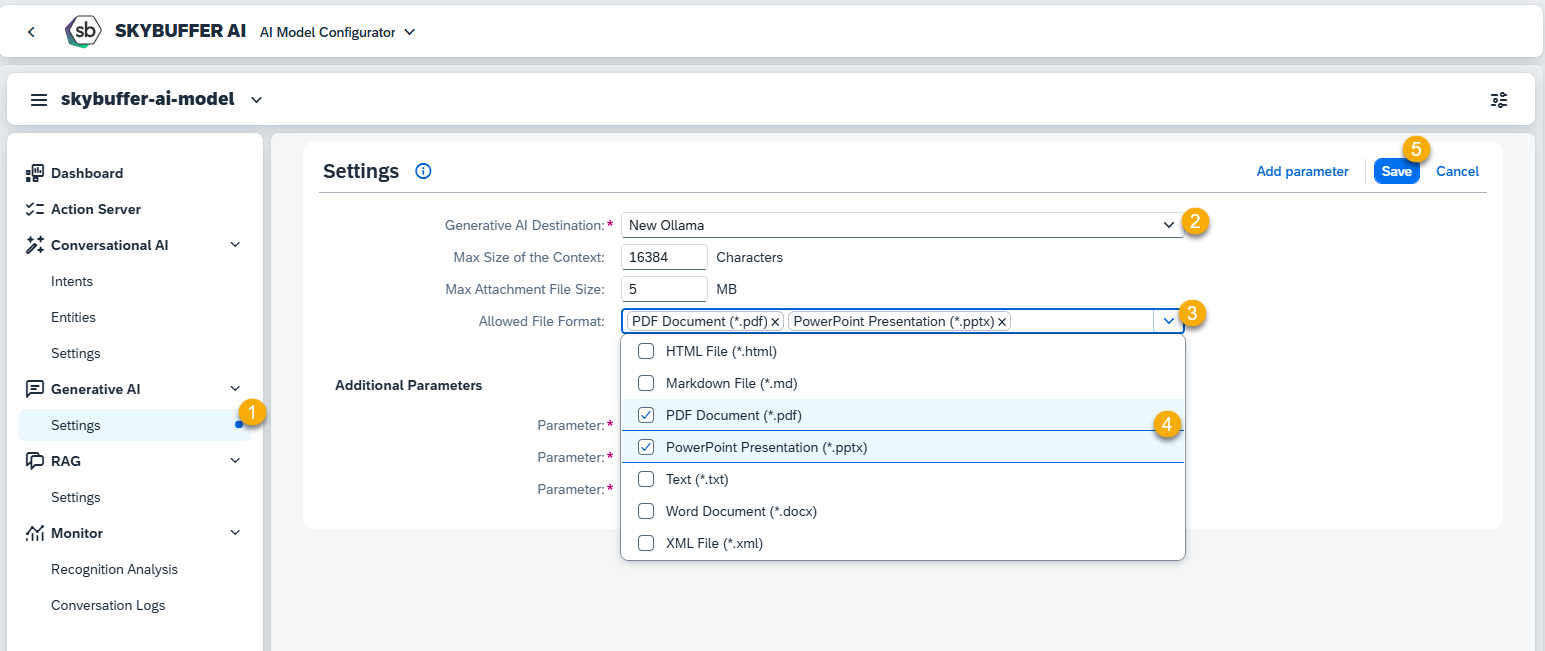
Source Documents (5)
- Purpose: Attach source files that, along with the Input Prompt and Instruction, will be used by Generative AI to generate a response. If no document is provided, the AI will generate responses based on general knowledge.

NOTE: The document formats allowed to upload are set in Generative AI Settings.
- Usage: You can upload one or more documents, or leave this field empty if not required.
- Character Limit: The total size of the attached documents is restricted by the Max Size of Context setting in the AI Model. For instance, if the model’s Max Context Size is set to 2048 tokens (approximately 8,192 characters, without spaces), the content of the documents must fit within this limit. This limit applies to both the input prompt and the generated output, combined.
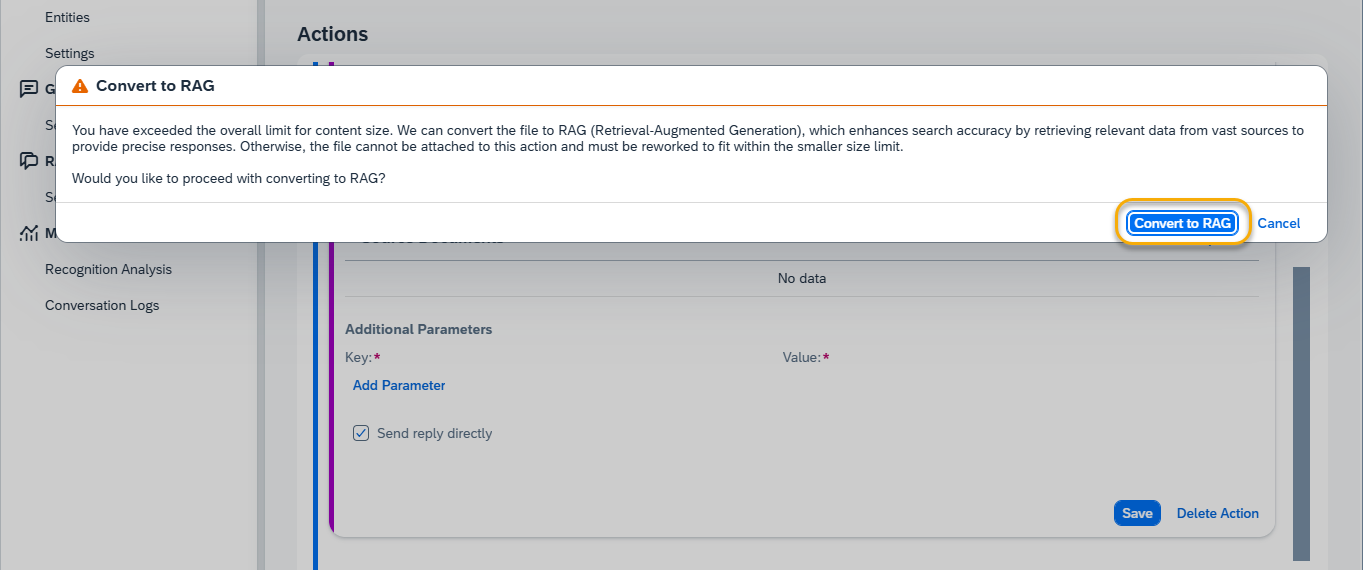
- Important: If the file exceeds the character limit and RAG (Retrieval-Augmented Generation) is activated in your AI Model, you will receive a prompt to convert the attachment to RAG. This enhances search accuracy by retrieving relevant information from large data sources. If RAG is not enabled or the file still exceeds the limit, the document must be reduced in size or reworked to fit within the allowed character count.

- Restriction: With a 2048-token limit (~8,192 characters), the attached documents should not exceed 1-2 pages of text (in a standard MS Word document, 11-point font).
- Examples:
- 1 document of 1-2 pages (~8,000 characters)
- 2 documents of 1 page each (~4,000 characters per document)
Additional Parameters (6)
Parameters for the Generative AI Destination are applied by default. You can view these parameters in the AI Model Configurator application for the respective connected Generative AI. To customize the AI’s behavior further, you can redefine existing parameters or add new ones using the Add Parameter function.
Available Parameters:
- Ollama Models: This link provides a comprehensive list of valid parameters and values for Ollama models.
- OpenAI Models: This link provides a comprehensive list of valid parameters and values for Open AI models.
For other Generative AI models refer to the respective documentation of the model provider.
NOTE: Changing default parameters can significantly influence the AI Model’s performance and responses. Therefore, it is recommended to proceed with caution when making changes.
Send Reply Directly (7)
- Functionality: This checkbox allows the produced reply to be sent directly to the chat with the end user.
- Alternative: If the checkbox is deselected, the reply will be saved in the memory parameter specified in the ‘Output Paramter’, rt_genai_output by default. To refer to this parameter in future messages, use the following syntax: {{memory.rt_genai_output}}.
Example Message
Please use the following information: {{memory.rt_genai_output}}.
Save your changes when done editing.
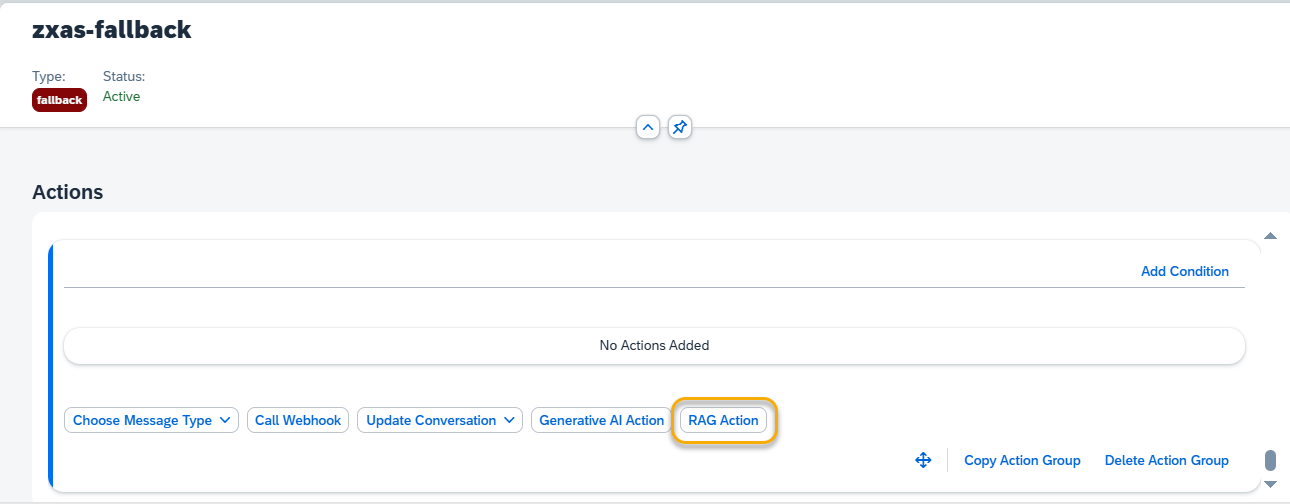
Step 14. RAG Action
You can also integrate RAG models into the skill.
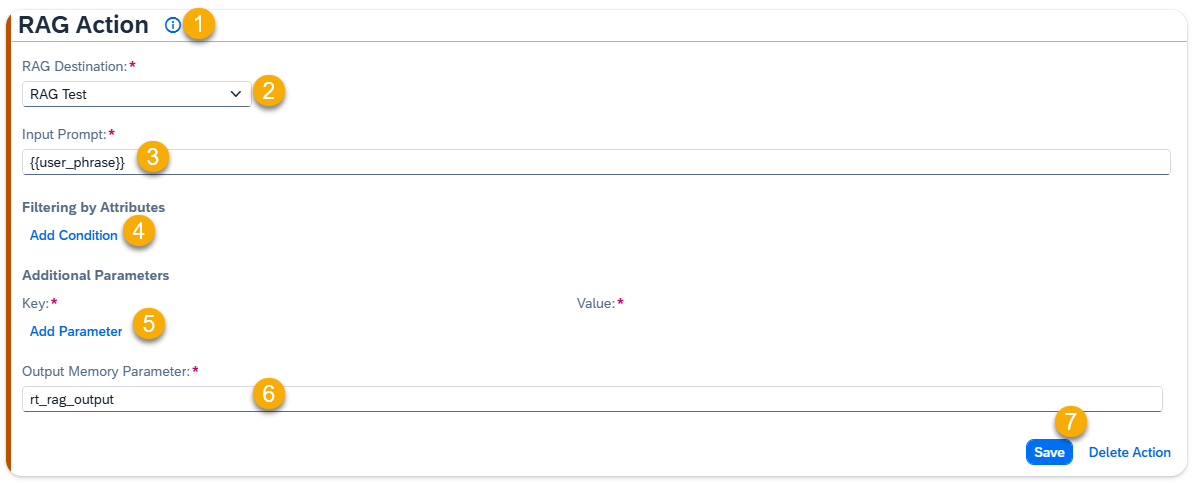
For guidance on the action and some hint, click the Information Icon (1).
RAG Destination (2)
You can choose between using the Default RAG Destination connection, which is assigned to the current AI Model in the RAG Settings section or selecting a specific one from the list for this action.
Input Prompt (3)
The Input Prompt is where you include the user phrase. You can enhance the {{user_phrase}} by adding additional text or memory parameters.
Example Input Prompt 1: {{user_phrase}}
Example Input Prompt 2: Answer this question: {{user_phrase}} in context of {{memory.rt_leave_request_type}}.
Filtering by Attributes (4)
This feature allows you to limit the RAG search by specific attributes associated with the documents in the RAG database. To filter by attributes, use Add Condition button. You can also create advanced filtering by combining multiple conditions within Condition Sets.
NOTE: To select an attribute from the list, it must first be added to the corresponding RAG model in the ML Models Hub application.

Additional Parameters (5)
Parameters for the RAG Destination are applied by default. You can view these parameters in the AI Model Configurator application RAG Settings section. To customize the AI’s behavior further, you can redefine existing parameters or add new ones using Add Parameter function.
Available Parameters:
- chunks: sets the maximum number of text segments (chunks) that will be retrieved and used for generating a response to the user’s query. Expected Format: Integer (e.g., 3, 5)
- max_distance: sets the relevance threshold for how closely chunks must match the query. Lower values yield more precise results, higher values include broader context. Expected Format: Integer (e.g., 30, 10)
NOTE: Changing default parameters can significantly influence the AI Model’s performance and responses. Therefore, it is recommended to proceed with caution when making changes.
Output Memory Parameter (6)
The result of RAG search will be saved as the array structure in the memory parameter specified in Output Parameter, rt_rag_output by default.
The RAG reply structure:
[
    {
        "chunkText": "", // Extracted text segment (chunk) from the document matching the search criteria.
        "distance": "",  // Relevance score indicating how closely the chunk matches the search query (lower values = closer match).
        "docGUID": "",   // Unique identifier (GUID) of the document from which the chunk was extracted.
        "docName": "",   // Name of the document containing the extracted chunk.
        "link": "",      // URL or link to access the document directly.
        "ragGUID": "",   // Unique identifier (GUID) for the RAG document.
        "startPos": ""   // Starting position of the extracted text chunk within the document, indicating where the relevant text begins.
    }
]
To refer to the RAG reply structure, use the following syntax: {{memory.rt_rag_output.[n].field_name}}, where n — ordinal number of element in the array starting from 0, field_name — name of the field of the array element.
Save (7) your changes when done editing.
Postprocessing Hints:
Since the reply by RAG search engine is saved in a memory parameter there is a full flexibility of referring to the RAG search results. There are several most common options of the RAG search result post-processing.
1. Raw output of RAG search results (can be added as a set of messages of text type):
I was able to find the following facts according to your search request:
**Fact number 1**: {{memory.rt_rag_output.[0].chunkText}}
**Document Name**: {{memory.rt_rag_output.[0].docName}}
**Document Link**: {{memory.rt_rag_output.[0].link}}
**Fact number 2**: {{memory.rt_rag_output.[1].chunkText}}
**Document Name**: {{memory.rt_rag_output.[1].docName}}
**Document Link**: {{memory.rt_rag_output.[1].link}}
**Fact number 3**: {{memory.rt_rag_output.[2].chunkText}}
**Document Name**: {{memory.rt_rag_output.[2].docName}}
**Document Link**: {{memory.rt_rag_output.[2].link}}
Note: You may format and refer to the elements of the RAG output structure as required by the specific of your business scenatio.
2. RAG reply processing by Gen AI:
- Add a Generative AI Action after your RAG action.
- Add a Processing Instruction: In the Generative AI Action, include an instruction in the ‘Instruction’ field to define how the RAG results should be processed. Use the memory parameter {{memory.rt_rag_output}} to refer to RAG search results.
Instruction Template: If you need a starting point, use the template below as an example. Copy and paste it into Instruction field of your Generative AI Action:
Template 1:
Please create a reply to the Input Prompt using the provided chunks and output them in the following structure:
**Fact number …**: [summary of each chunkText]
**Document Name**: [docName]
**Link**: [Link]
Start with some general phrase, like ‘Here are the facts according to your request’ or similar.
There should be as many facts, document names and links as chunkText elements. If no facts, reply that nothing was found according to the request.
Facts: {{memory.rt_rag_output}}
Template 2:
Generate a consistent reply to the Input Prompt basing on the chunkTexts of the following facts: {{memory.rt_rag_output}}. Don’t include any additional information in the reply.
NOTE: You can customize the instruction to fit your specific needs. This template is just an example to help you get started.
Step 15. Move, Edit, Delete Action
Use the Edit button to switch to the edit mode.
To move an Action within an Action Group, hold down the move button with the left mouse button and drag to a new position.
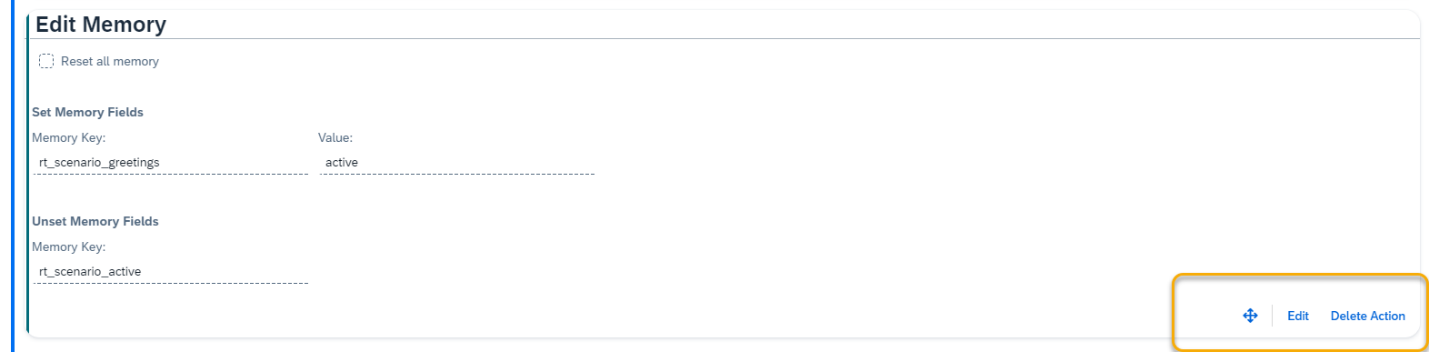
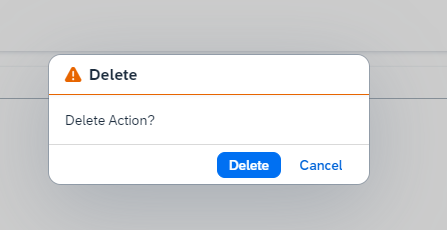
To delete the Action from the Action Group, press the Delete Action button and confirm.
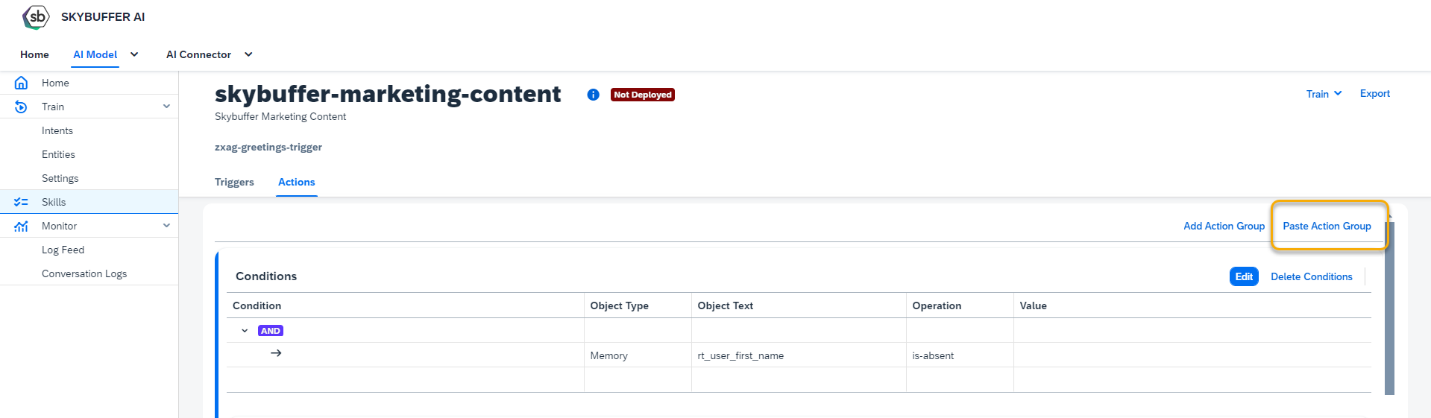
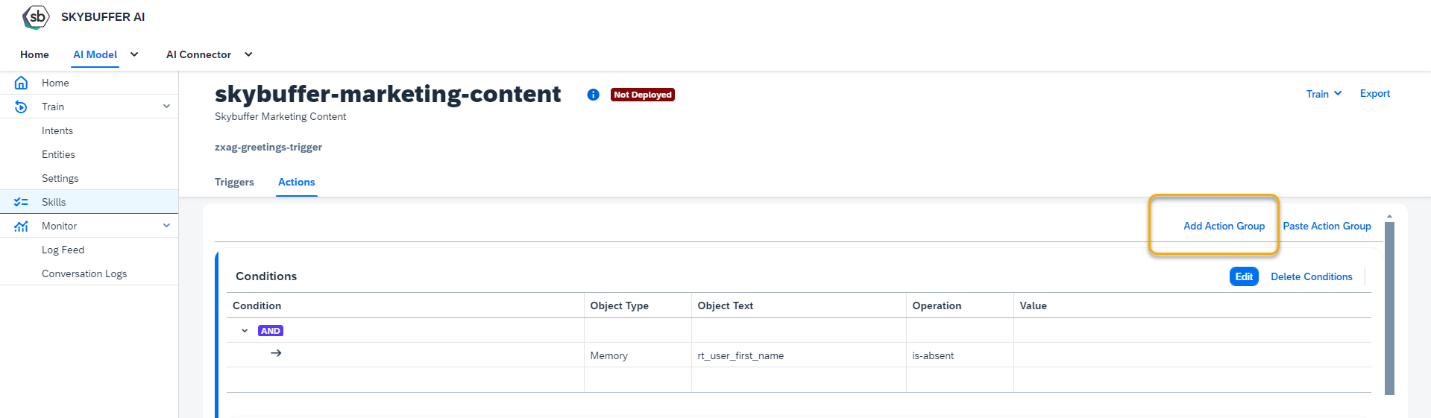
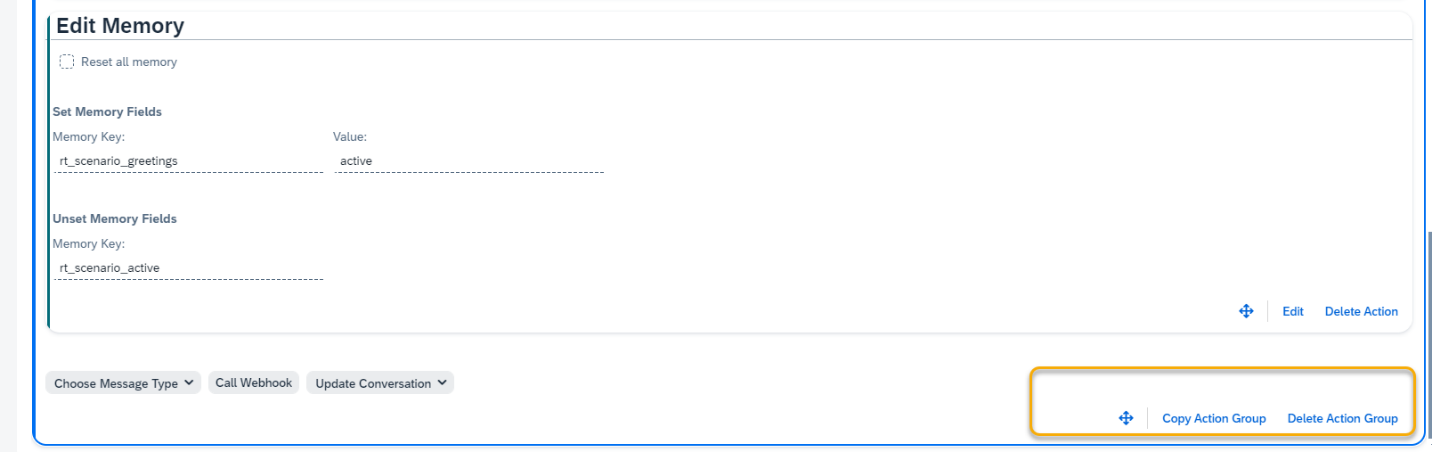
Step 16. Manage Action Group
To create a new Action Group, press the Add Action Group button on the top of the skill Actions tab.
At the bottom of each Action Group, there are buttons to Move, Delete Action Set, Copy Action Group and Paste.
Additionally, the Paste Action Group button is located at the top of the skill Actions tab.