• IDD
  • IDD
  • Skybuffer AI
    • Skybuffer AI Installation and Initial Setup
      • On Business Technology Platform (BTP)
        • Skybuffer AI Installation Guide on BTP
      • On Premise: XSA Runtime and SAP HANA EE
        • Installing SAP HANA Including XS Runtime
        • XS Deployment Process
      • Post Installation User Guide
    • AI Agent
      • AI Agent Configurator
        • Register New AI Agent
        • Intents and Entities Creation
        • Skills Creation and Management
          • Standard Action Types
          • Generative AI Action
          • Document Grounding Action
          • Log Insight Action
        • Scheduling
        • Communication Channels
          • Copy the Existing Channel
          • Skills Activation
          • Webchat Communication Channel Setup
          • Destination Assignment
          • Facebook Messenger Communication Channel Setup
          • Zoom Communication Channel Setup
          • MS Teams Communication Channel Setup
          • Slack Communication Channel Setup
          • Telegram Communication Channel Setup
          • Viber Communication Channel Setup
          • WhatsApp Communication Channel Setup
          • AI Agent Communication Channel Setup
        • Monitor Section
      • Destination Management
      • AI Translate
      • Survey Craft
      • Identity Providers
      • Business AI Scenarios
      • Models Hub
      • Document Grounding Hub
    • AI Connector
      • AI Connector Configurator
      • AI Connector Logs
      • AWS Integration
      • Google Services Integration
      • Twilio Integration
      • Yandex Services Integration
    • SAP Backend for Business AI
      • Business AI Scenarios Package Administration
        • Installation Guide
        • Uninstallation Guide
      • Business AI Scenarios Package Maintenance Guide
        • Product License
        • Configuration of Email Sending Mechanism
          • Configuration Settings
          • Setup of Specific Email Sending Control
        • Technical User Setup
          • Central oData Service Authorization Role Maintenance
          • Technical User ID Creation
        • Assigning Business AI Scenarios to ABAP RIK Classes
        • Simplified User Creation Scenario Setup (Without Approval Workflow)
          • Maintain and Assign Reference Users for User Creation Scenario
          • Activate Notification for New User Creation (Optional)
        • User Creation Scenario Setup with Approval Workflow
          • Configure Approval Workflow for User Creation Scenario
          • Set Up Approval Steps for Different User Types Creation
    • HOW-TO Guides
      • MS Teams Integration. Single Sign-On
        • Create Azure Bot Service
        • Configure Azure Bot Service and Connect to the AI Agent MS Teams Channel
        • Create Middleware SSO Application
        • Configure Bot Service Application SSO
        • Create Azure AD Enterprise Application for SAP Backend
        • Configure oAuth2 in SAP System
        • Assign Identity Provider in AI Agent Channel Configuration
        • Deploy Your App into Microsoft Teams
        • Managing Application Keys
      • Skybuffer AI PoC Setup
      • SAP AI Core Integration. Ollama Server Setup
      • MS SharePoint Integration. Add-in Registration
    • Troubleshooting
      • Edge Browser Access Issue
    • Hybrid Chats
      • Hybrid Chats Maintenance Guide
        • Business and Technical Users Setup
          • Create Business and Technical Users
          • Create Business Partners
        • Tenant Configuration
        • Live Pool Management and Configuration
          • Start Live Pool
          • Manage Live Pool
        • System Configuration
          • Configure Status Profile
          • Set Up Technical Messages for Hybrid Chats
        • Hybrid Chats Configuration
        • Hybrid Chats Categorization
          • Categorization Management
          • Categorization Mapping
          • Translate Categories
      • Hybrid Chats User Manual
        • Hybrid Chats
          • HC Archive Mode
          • HC Active Mode
        • HC My Data
          • Edit Personal Data and Profile Picture
          • Default Settings Management
          • Notification and Dialogue Manual Mode Management
          • Quick Replies Management
            • Standard User Mode - Quick Replies
            • Administrator User Mode - Quick Replies
        • HC Analytics
          • HC Analytics
          • Operator Activity Analytics
          • Exit Survey Analytics
        • HC Teams
          • Access HC Teams Application
          • Create New Team
          • Create New Team Member
          • Edit Agent
          • Edit Team Name

Standard User Mode - Quick Replies

10 views 0

Standard User Mode – Quick Replies

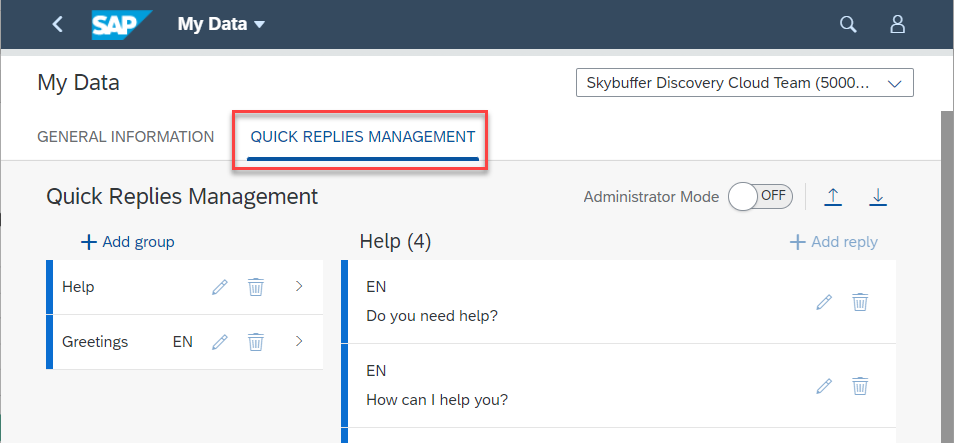
Step 1. Go to the tab Quick Replies Management on My Data app.

Obraz zawierający tekst, zrzut ekranu, oprogramowanie, Ikona komputerowa Opis wygenerowany automatycznie

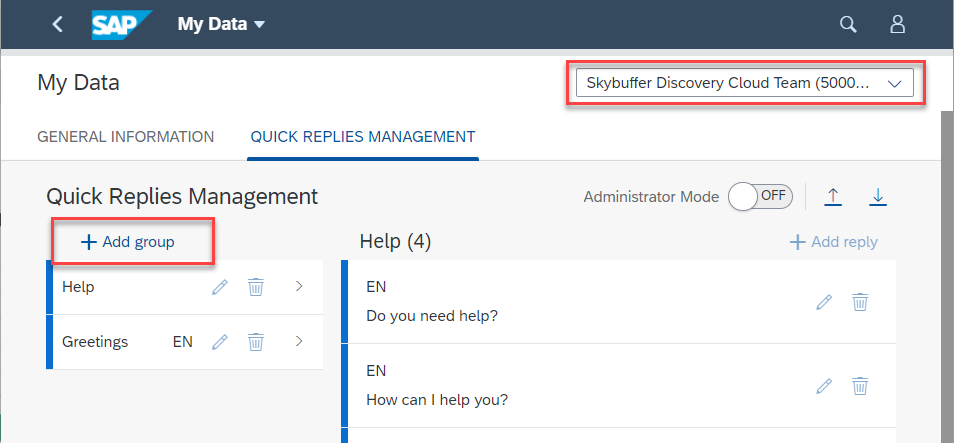
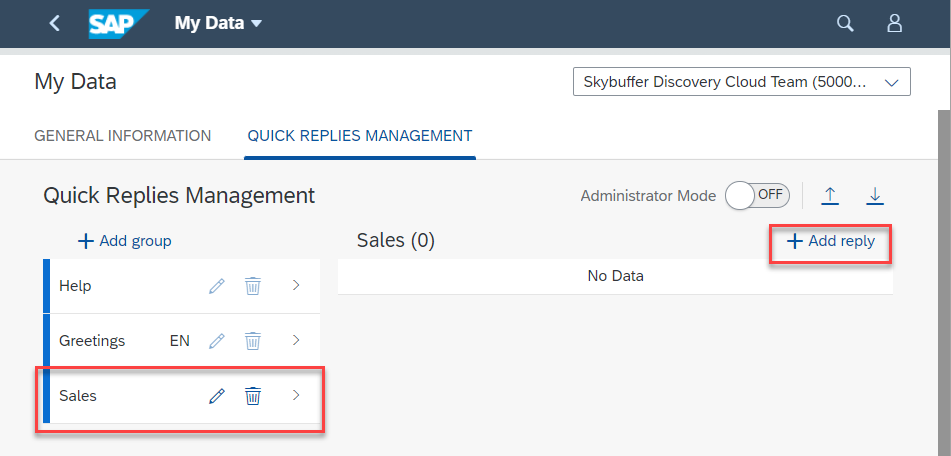
Step 2. To add a new group for quick replies, please choose a Tenant and click the Add Group button:

Obraz zawierający tekst, zrzut ekranu, oprogramowanie, Ikona komputerowa Opis wygenerowany automatycznie

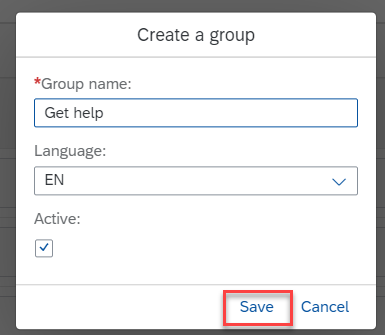
Step 3. Enter Group name and Language if it is a language-specific group:

Graphical user interface, application Description automatically generated

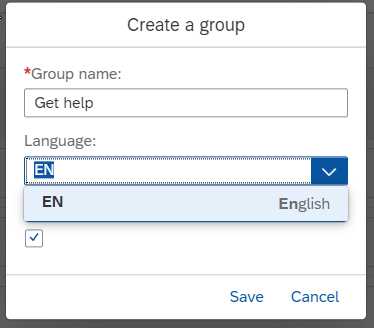
Step 4. Press Save button

Obraz zawierający tekst, zrzut ekranu, numer, Czcionka Opis wygenerowany automatycznie

Step 5. To add reply to the created group, please click this group and press the Add reply button at the top right-hand corner.

Obraz zawierający tekst, zrzut ekranu, oprogramowanie, Ikona komputerowa Opis wygenerowany automatycznie

Step 6. Enter Text of the reply, select Language (here it is a mandatory parameter) and press the Save button.

Obraz zawierający tekst, zrzut ekranu, numer, Czcionka Opis wygenerowany automatycznie

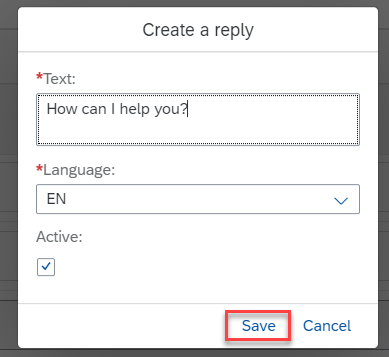
NOTE: All replies created in Standard Mode will be visible only for your own user.

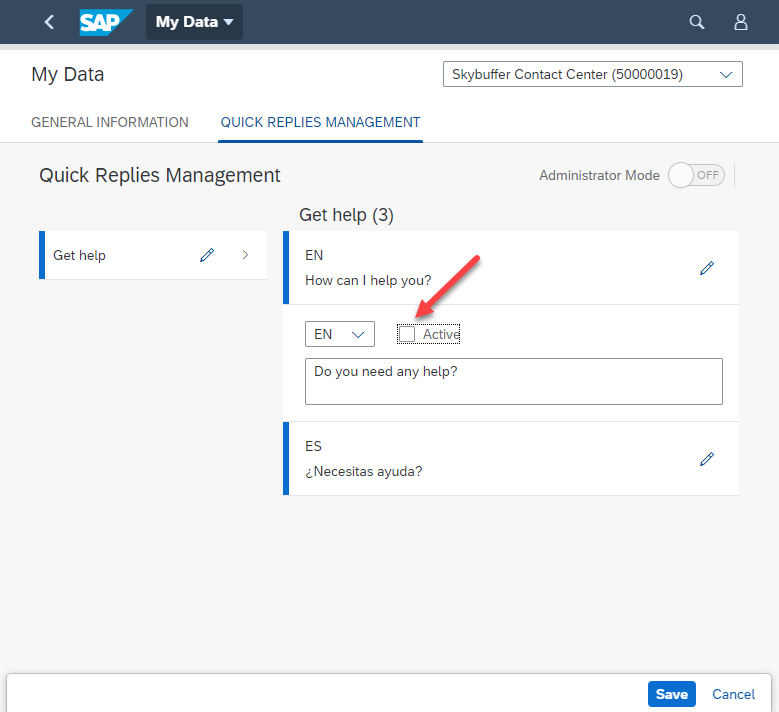
Step 7. You can modify your replies and groups. To do it, click the appropriate Edit button.

Obraz zawierający tekst, zrzut ekranu, oprogramowanie, numer Opis wygenerowany automatycznie

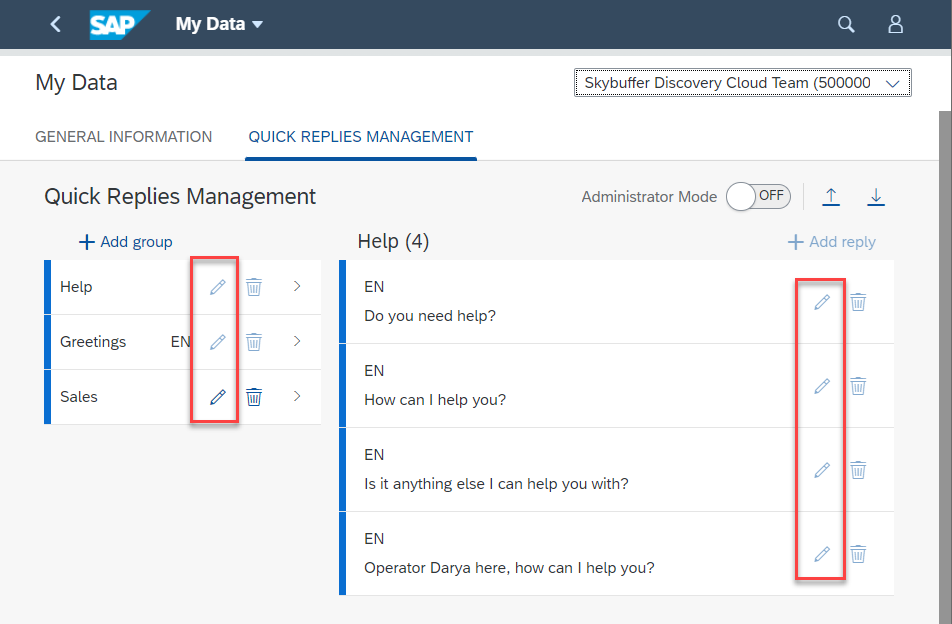
Step 8. Change the necessary data and save.

NOTE: You can deactivate/activate replies and groups, even those created by Administrator. When you deactivate a group and/or a reply, it will be deactivated only for your own user.

What does deactivation mean? It means that you cannot see these replies/groups in your Operator Workplace.

Step 9. To deactivate/activate data, just click the appropriate Edit button, tick/untick the active button near the reply/group. If you deactivate a group, replies in the group will be deactivated, too.

Obraz zawierający tekst, zrzut ekranu, oprogramowanie, Ikona komputerowa Opis wygenerowany automatycznie

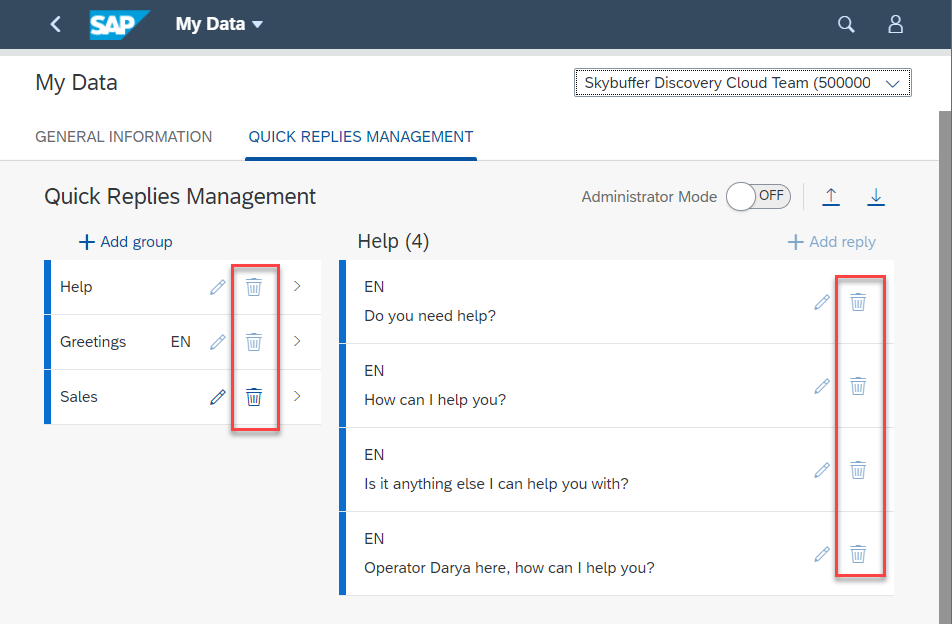
Step 10. To delete a group/reply, click the appropriate Delete button.

Obraz zawierający tekst, zrzut ekranu, oprogramowanie, numer Opis wygenerowany automatycznie


Was this helpful?

Yes  No
Related Articles
  • Skybuffer AI PoC Setup
  • Copy the Existing Channel
  • Destination Assignment
  • Skills Activation
  • Log Insight Action
  • Edge Browser Access Issue
Copyright 2022 Skybuffer.com. All Rights Reserved.