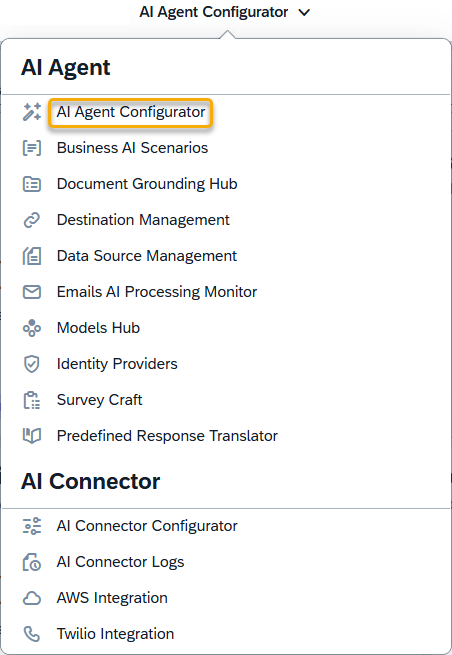
Register New AI Agent
Step 1. Open the AI Agent Configurator application in the AI Agent group.
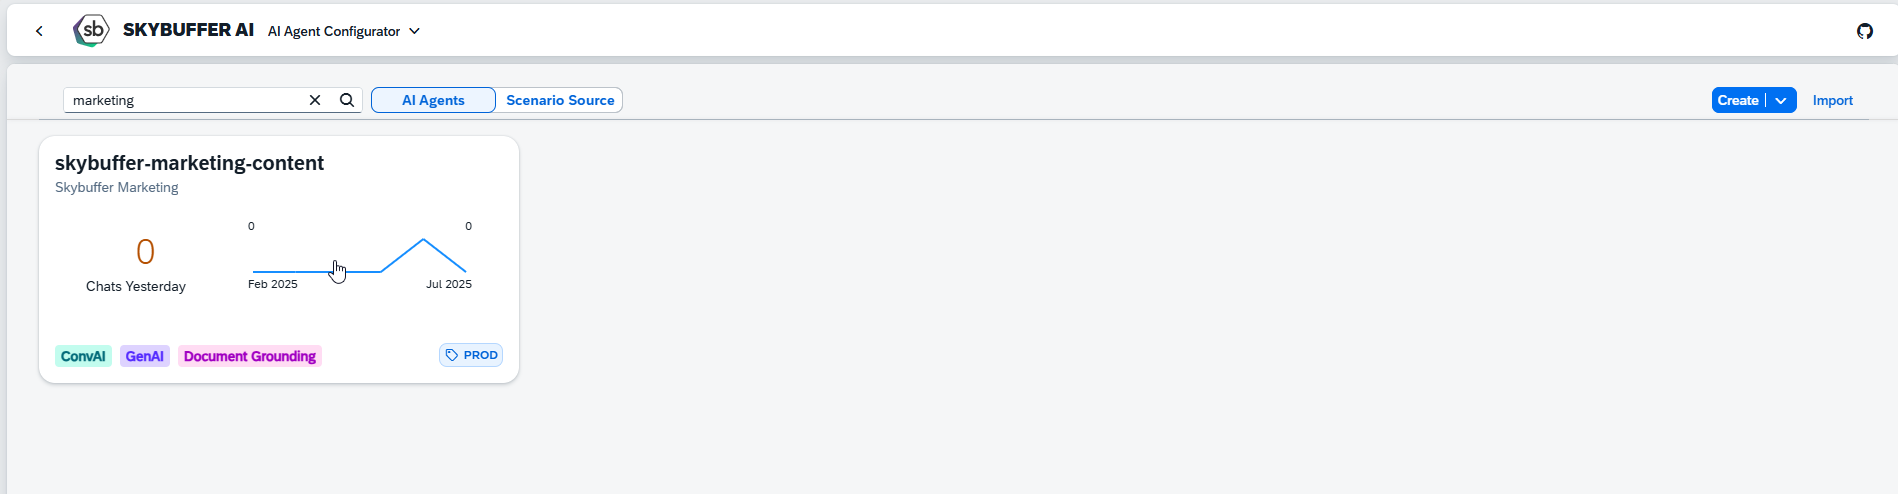
Step 2. After opening the application, the initial screen will display all available AI Agents. Each tile represents a single Agent, showing its name, description, and labels. Click on the Agent you wish to work with to proceed, or navigate to the AI Agent Registration section to register a new AI Agent.
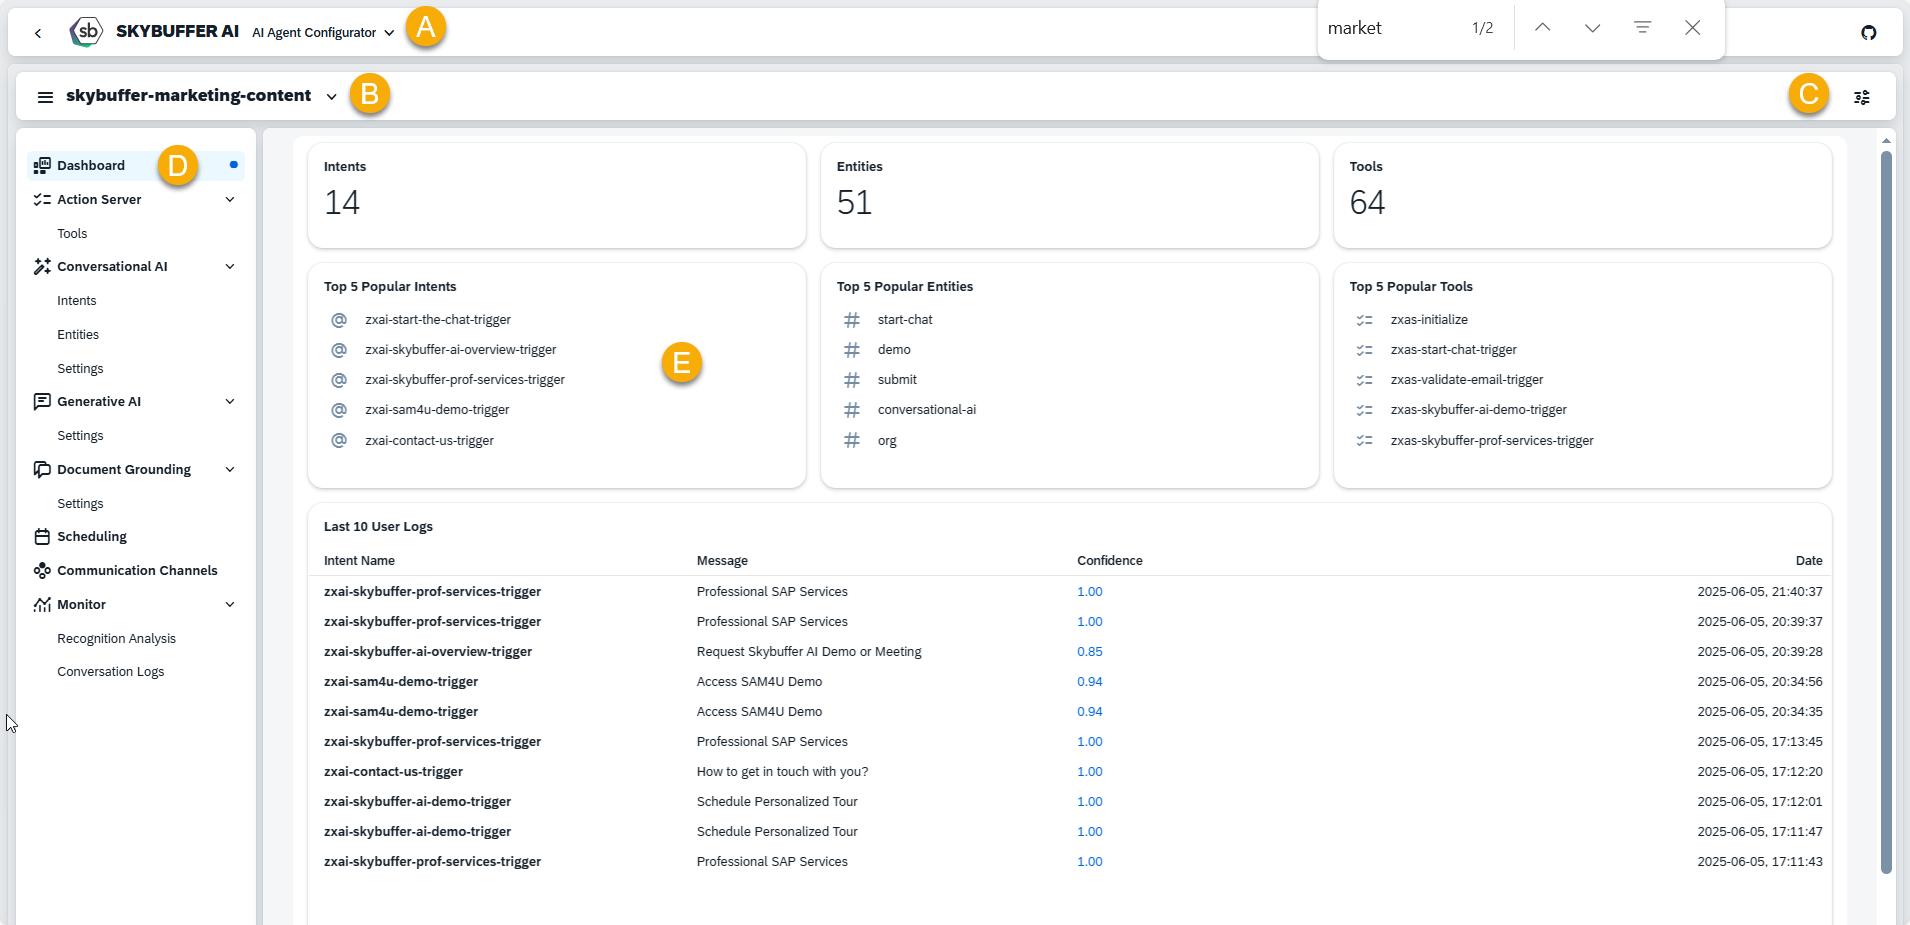
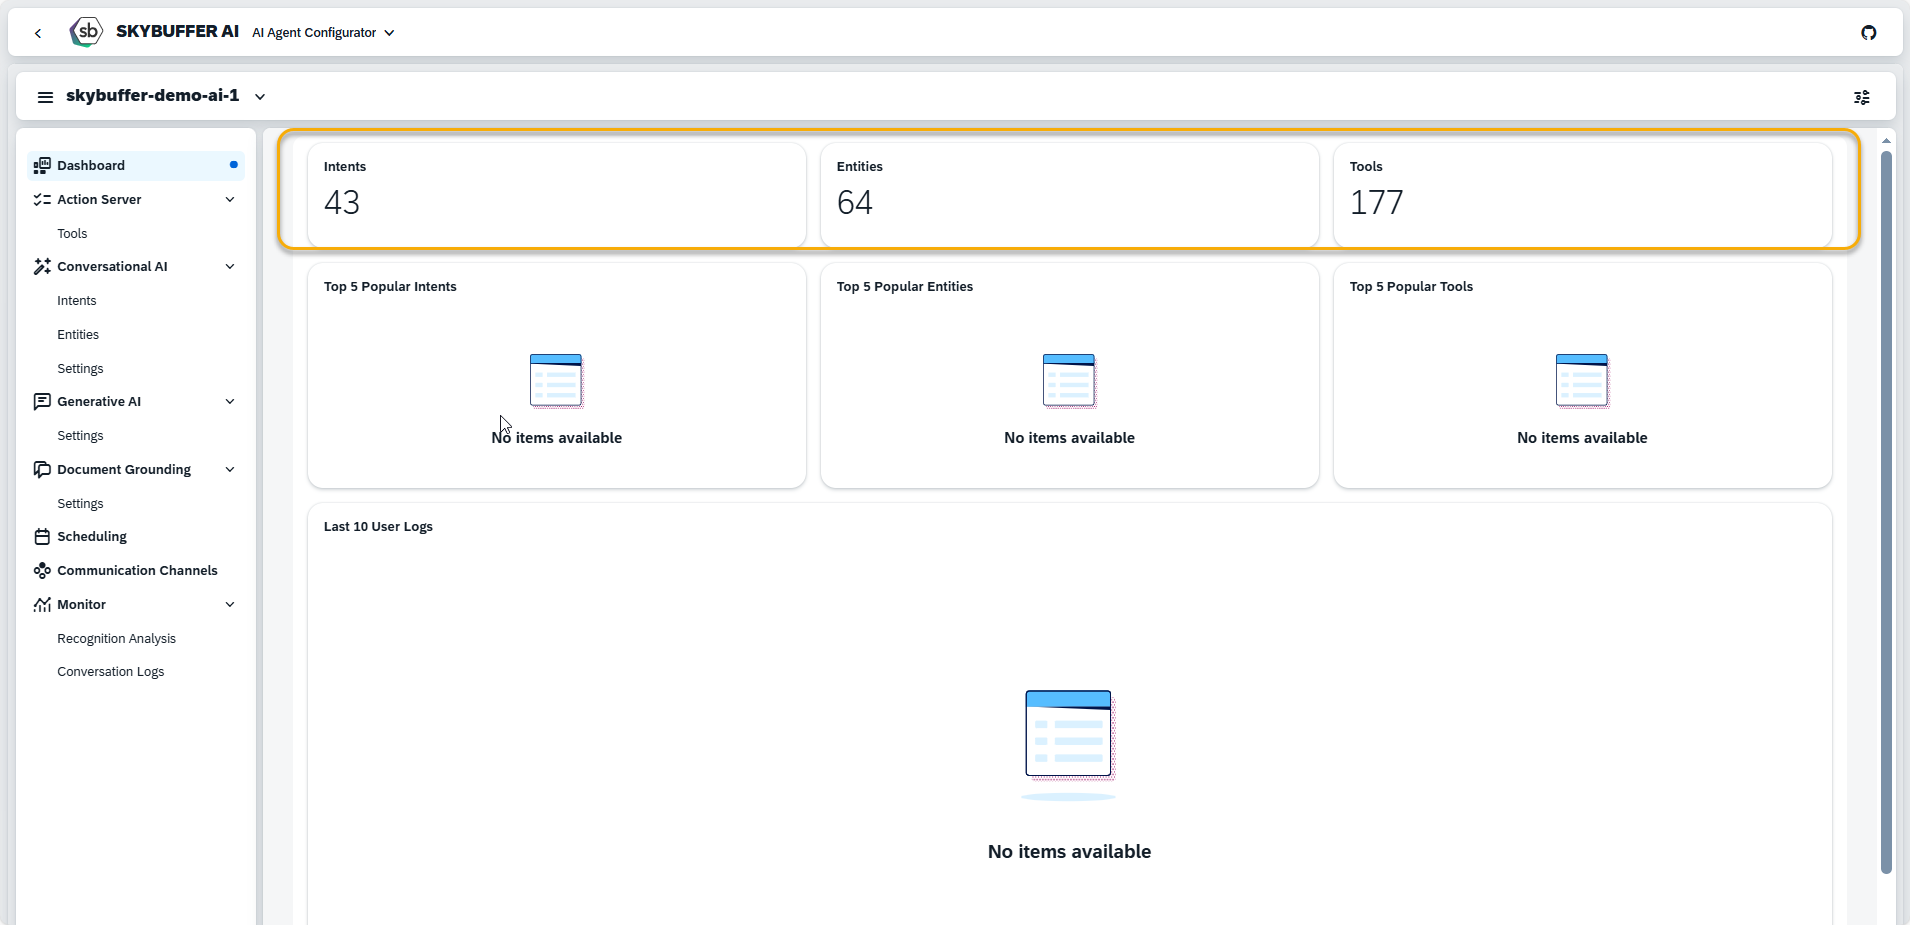
Step 3. AI Agent Homepage
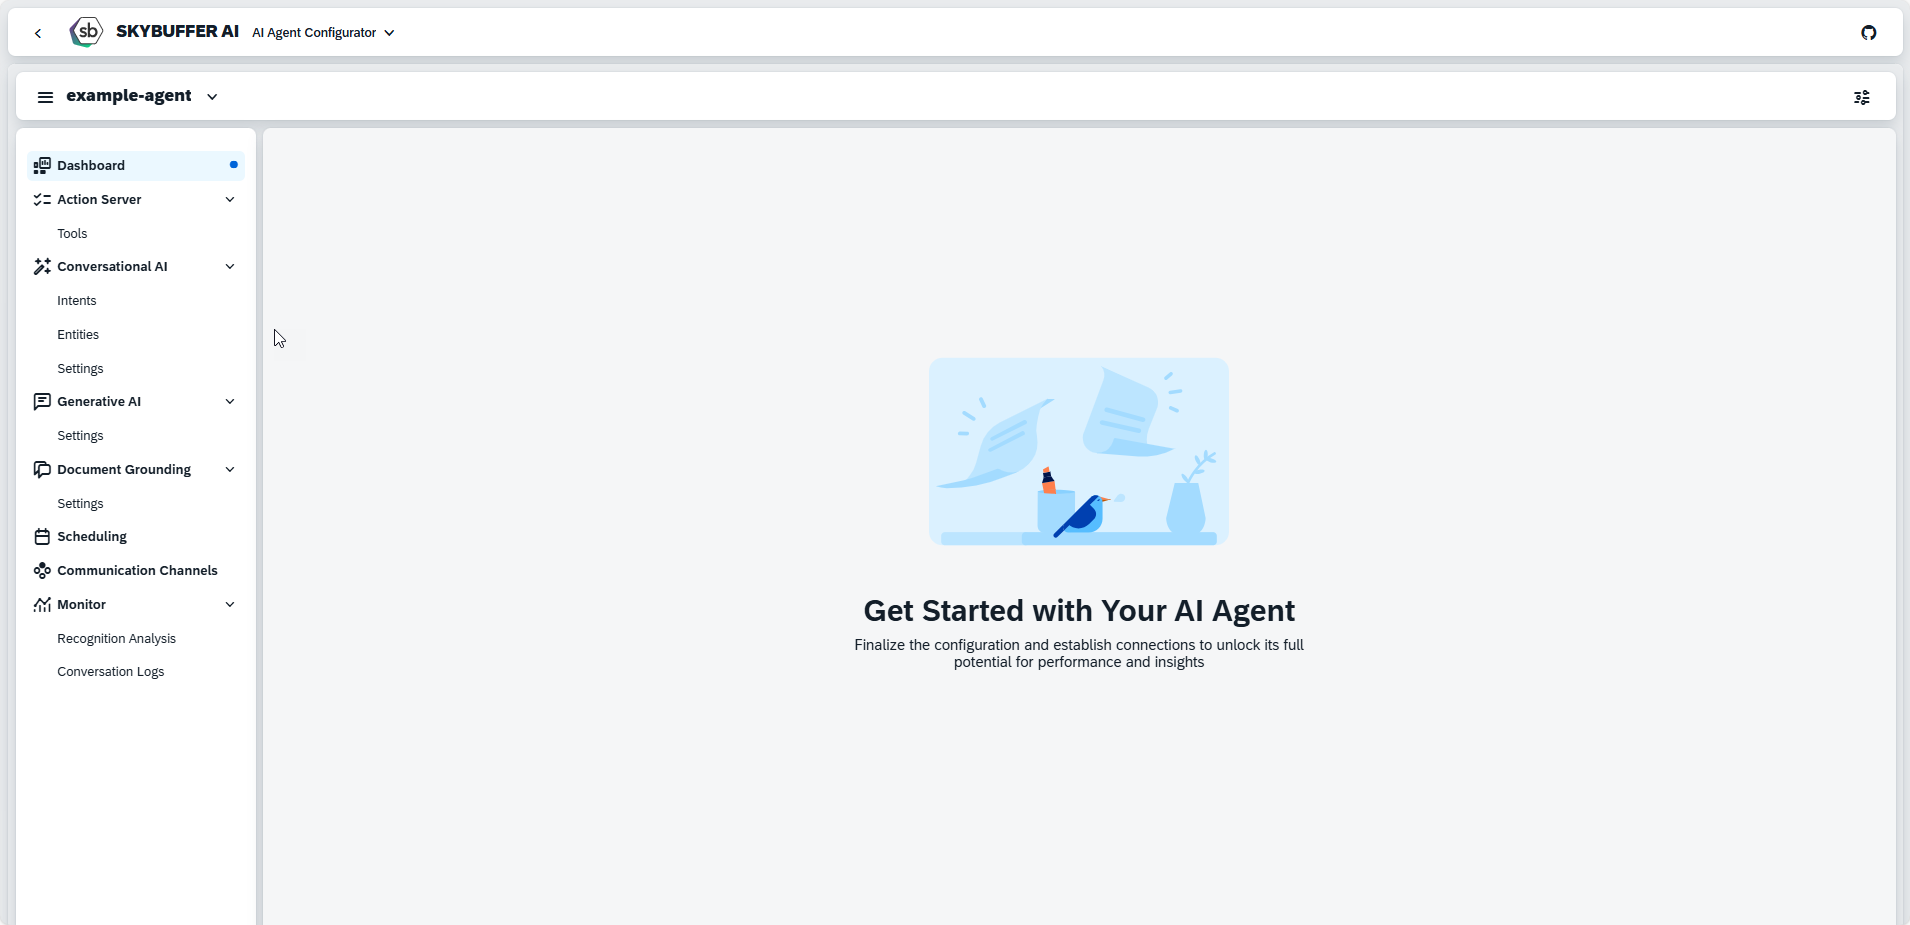
You are now on the homepage of a specific AI Agent. The following elements are available on this screen:
A – Drop-Down Menu with Applications – Use this to switch between different applications.
B – Agent Selector – Switch to another AI Agent
C – Agent Settings – Access the main configuration options for the selected AI Agent.
D – Side Menu – Navigate through key sections such as:
- Action Server (Tools management)
- Conversational AI (Intents and Entities)
- Generative AI
- Document Grounding
- Scheduling
- Monitor (Recognition Analysis and Conversation Logs)
E – Agent Overview and Statistics – View performance metrics and general Agent information.
AI Agent Registration: How to create an AI Agent?
To begin working with your AI Agent, you can either configure it from scratch or duplicate an existing Agent.
Option 1: Create a New AI Agent from Scratch
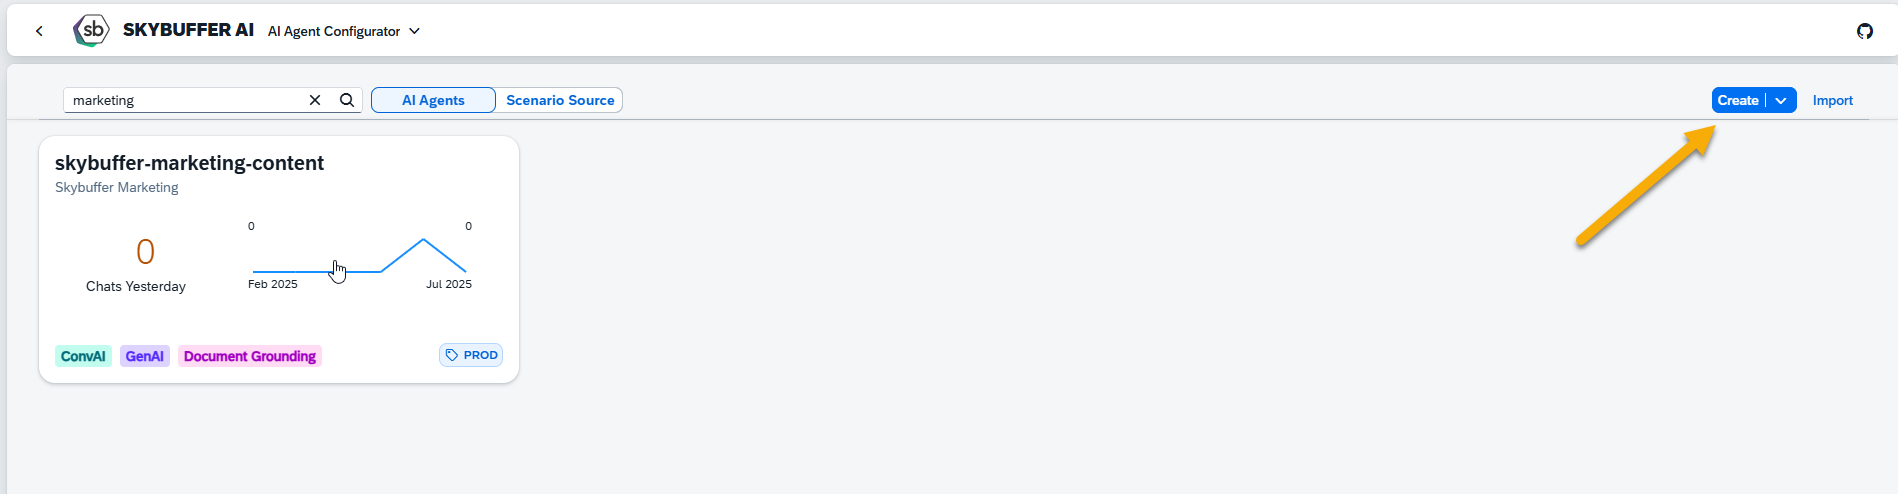
Open the AI Agent Configurator application and click Create.
Fill in all required fields: Name, Description, and Label.
In the Configuration section, select the feature types you want to enable for your Agent.
Click Create to confirm your entries.
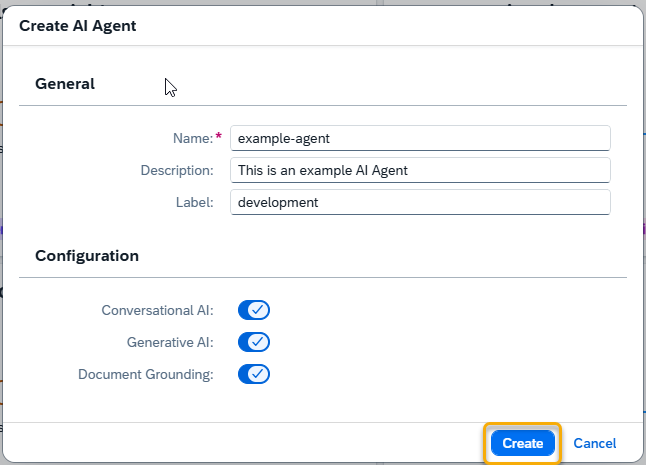
NOTE: Only lowcase letters (a-z), numbers (0-9) and hyphen (-) are allowed while creating a name for your AI Agent.
Your AI Agent will now be created and available for further configuration.
Option 2: Create an AI Agent by Copying an Existing One
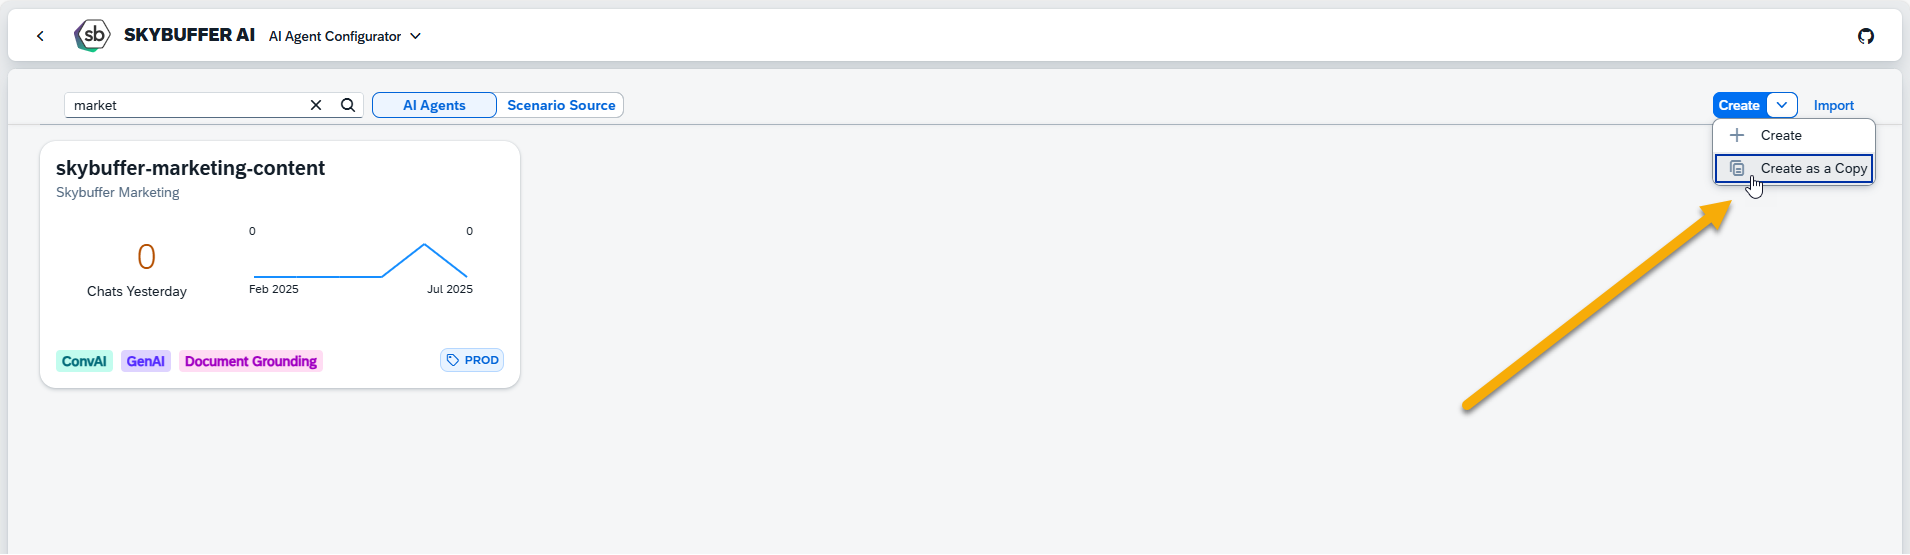
You can also create a new AI Agent by copying an existing one and using it as a foundation for your own project.
Click the Create button and select Create as a Copy.
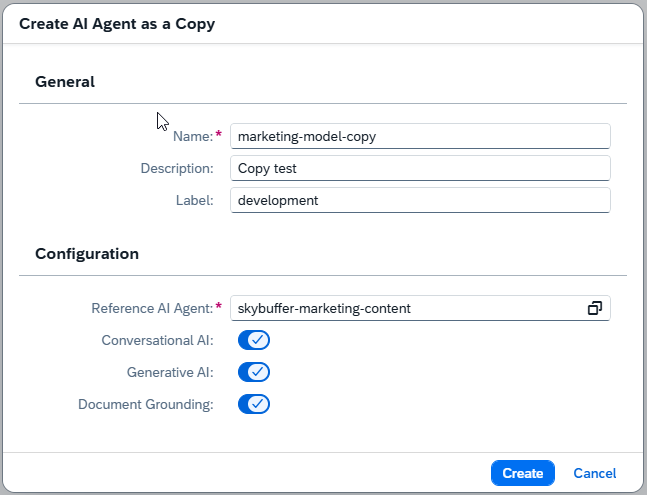
Enter the Name, Description, and Label for the new Agent.
In the Configuration section, choose the existing Agent you want to copy data from.
Select the AI functionalities to include in your Agent (e.g., Conversational AI, Generative AI, Document Grounding).
Click Create to finalize the process.
A new AI Agent will be created based on the selected template and ready for further customization.
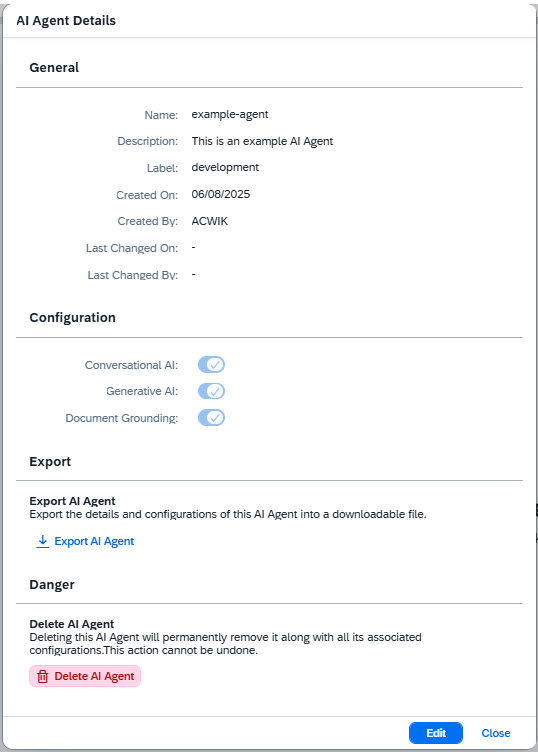
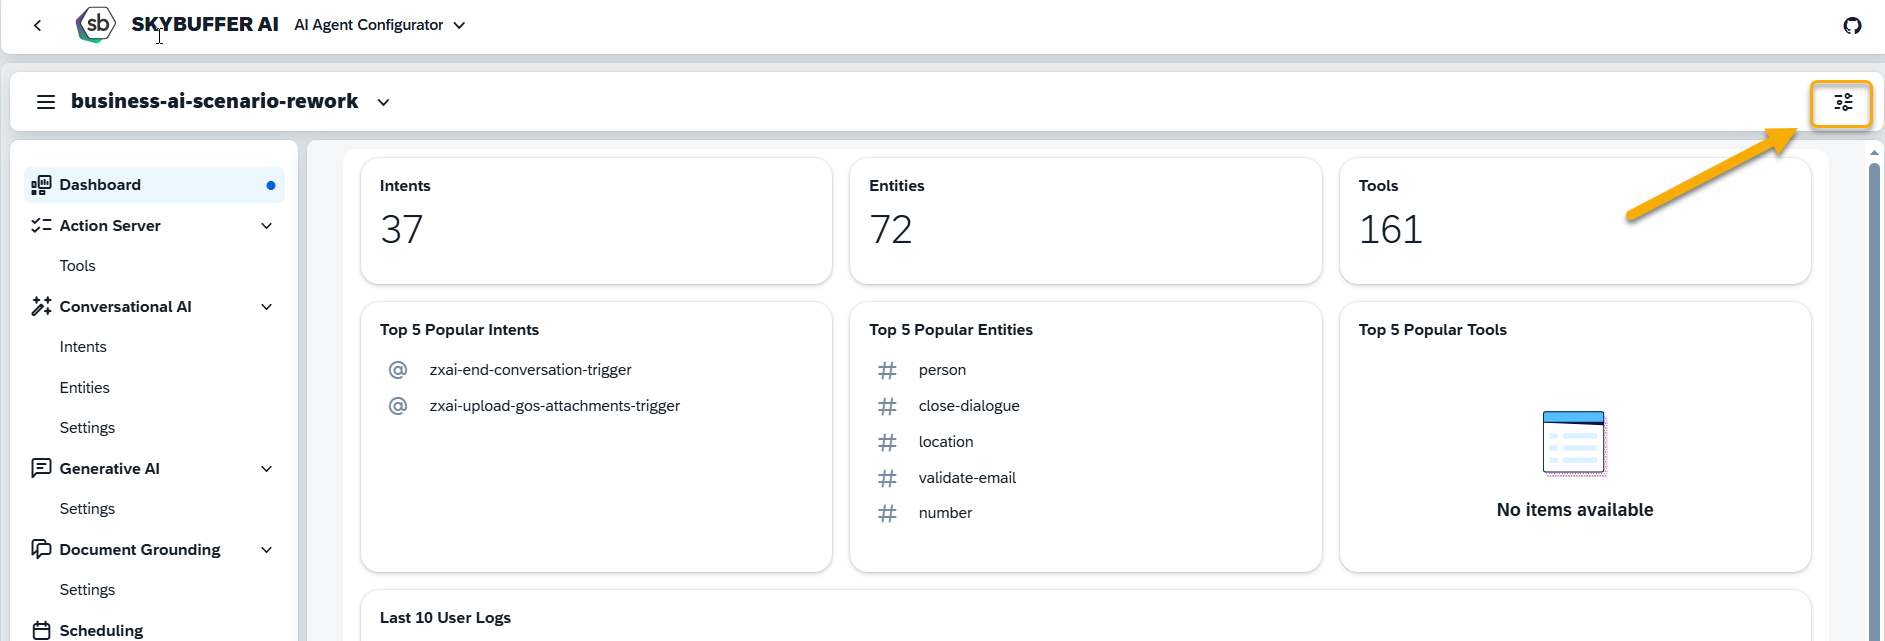
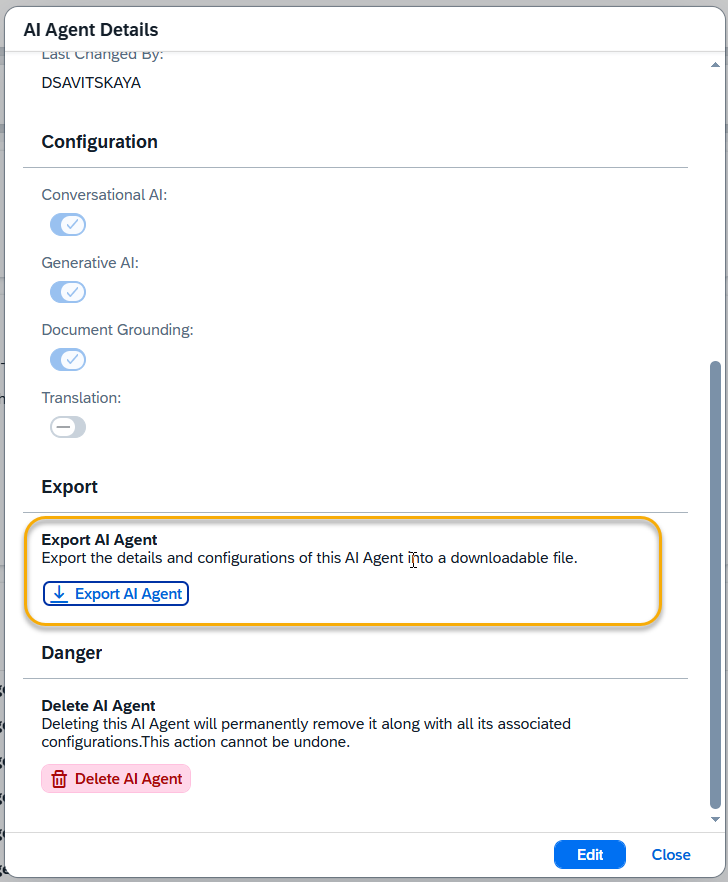
Step 4. Edit Main Settings
Click the Settings icon in the top-right corner to open the configuration panel. This panel displays the basic information and settings for your AI Agent.
From here, you can:
-
Edit the Agent’s configuration
-
Export the AI Agent
-
Delete the AI Agent (if needed)
For detailed instructions on how to work with your AI Agent, follow this link AI Agent Configurator
Step 5. Content Transfer Between AI Agents and Spaces
Skybuffer AI Platform enables you to transfer content and training assets between AI Agents and workspaces. You can reuse existing tools, trained intents, and configured entities across multiple AI Agents, and you can also export complete AI Agents with all embedded content to import them into other spaces.
Copying tools between AI Agents:
Open the AI Agent from which you want to copy the required tools.
Click the Action Server – Tools tab to access the list of tools.
On the left side of the screen, select one or more tool groups by clicking the checkbox next to each group.
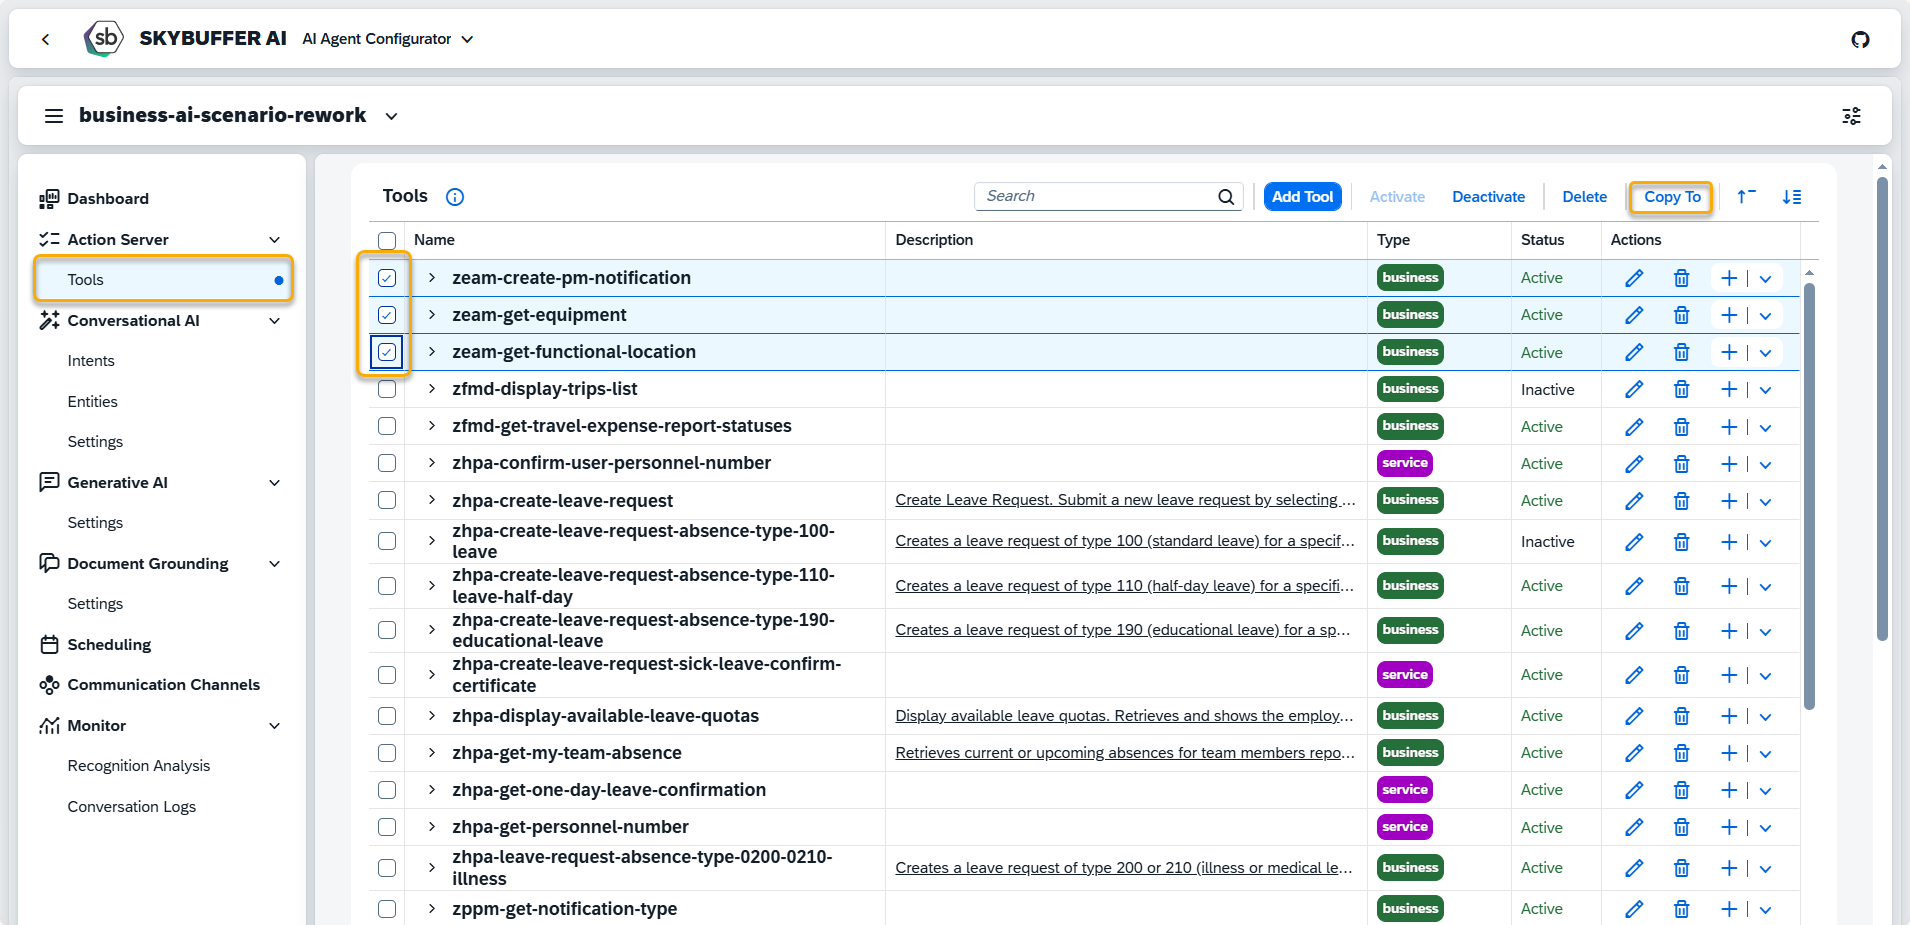
After selecting the required tool groups, click the Copy to button.
In the dropdown list that appears, choose the target Tenant and then select the target AI Agent to which you want to transfer the tools.

Click the Submit button to confirm. You will see a confirmation message at the bottom of the screen: “Tools copied to ‘<selected AI Agent>’”.
NOTE:
If the tool you are copying already exists in the target AI Agent (the check is based on the tool name), you will be prompted to decide whether you want to replace the existing tool or copy it anyway.
If you choose to copy it, a new tool will be created with a numeric suffix added to its name, for example: <tool-name>-1. The numeric suffix is automatically incremented based on how many tools with the same name already exist in the AI Agent.

Copying intents between AI Agents
Open the Conversational AI – Intents tab.
Select one or more intents by activating the checkboxes to the left of their names.
Click the Copy to button.
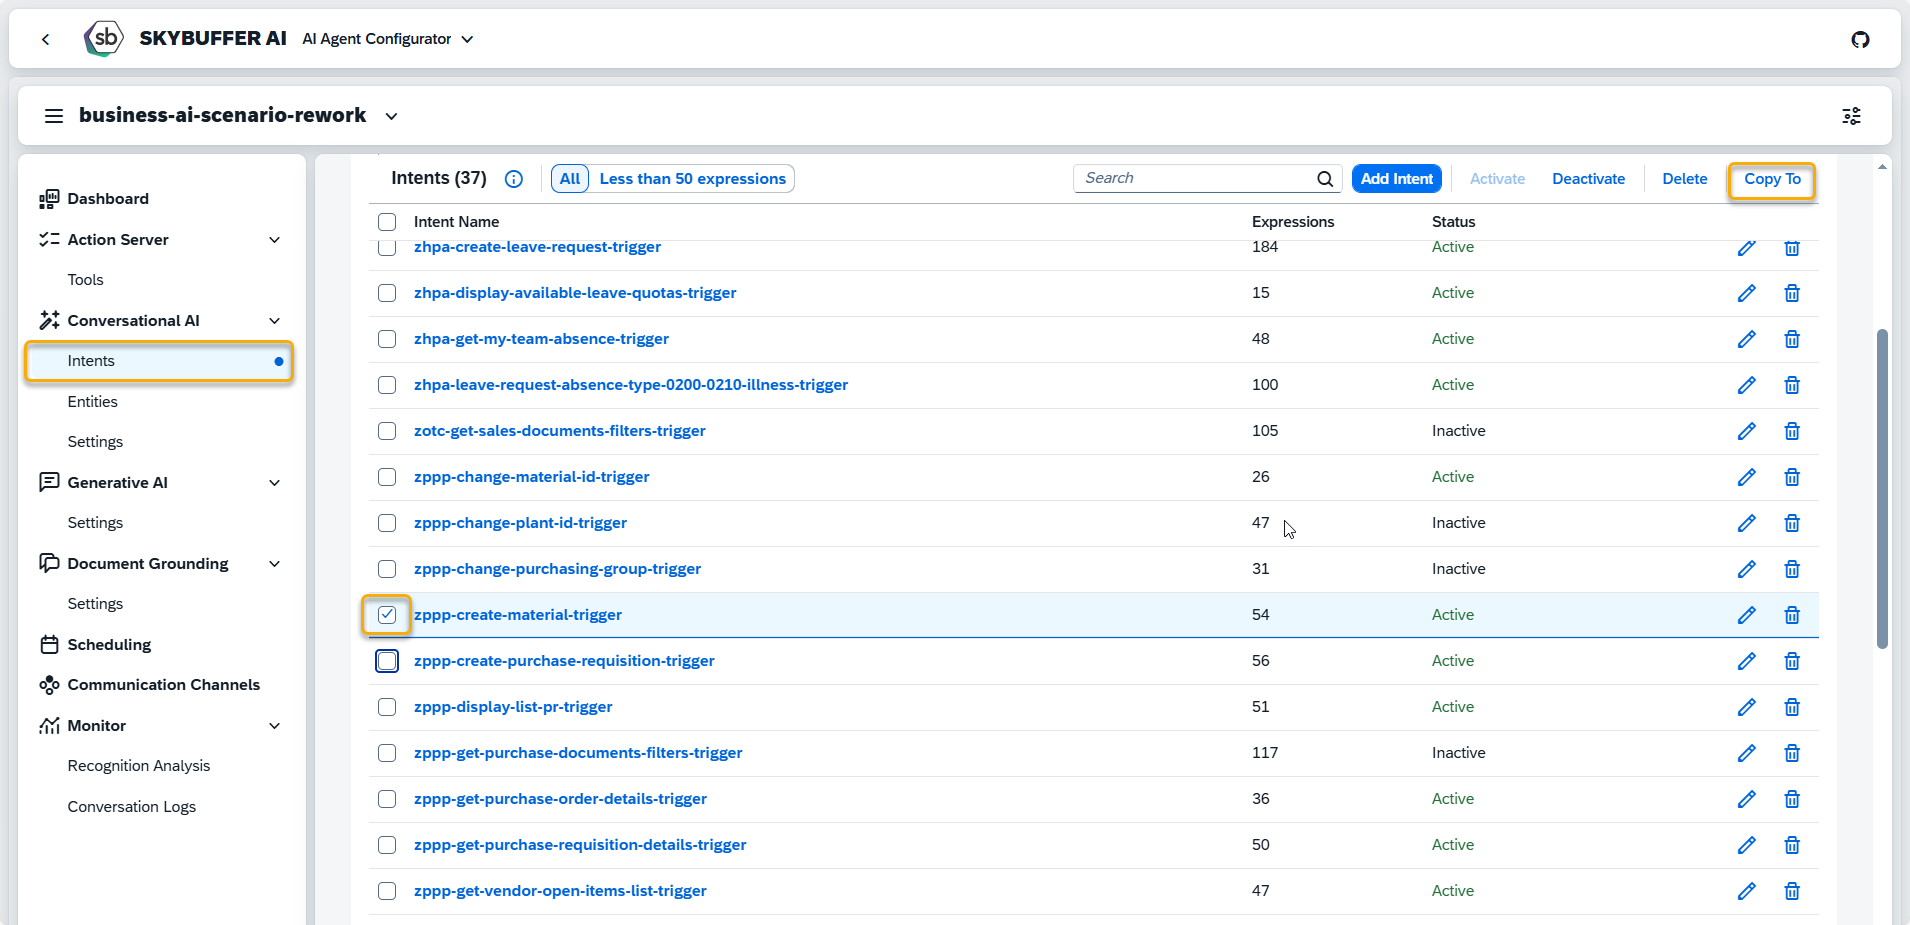
A menu will appear with a dropdown list of available AI Agents. Select the target AI Agent and click Copy.

If the selected intents do not yet exist in the target AI Agent (name check), a success message will be displayed at the bottom of the screen indicating that the operation has been completed.
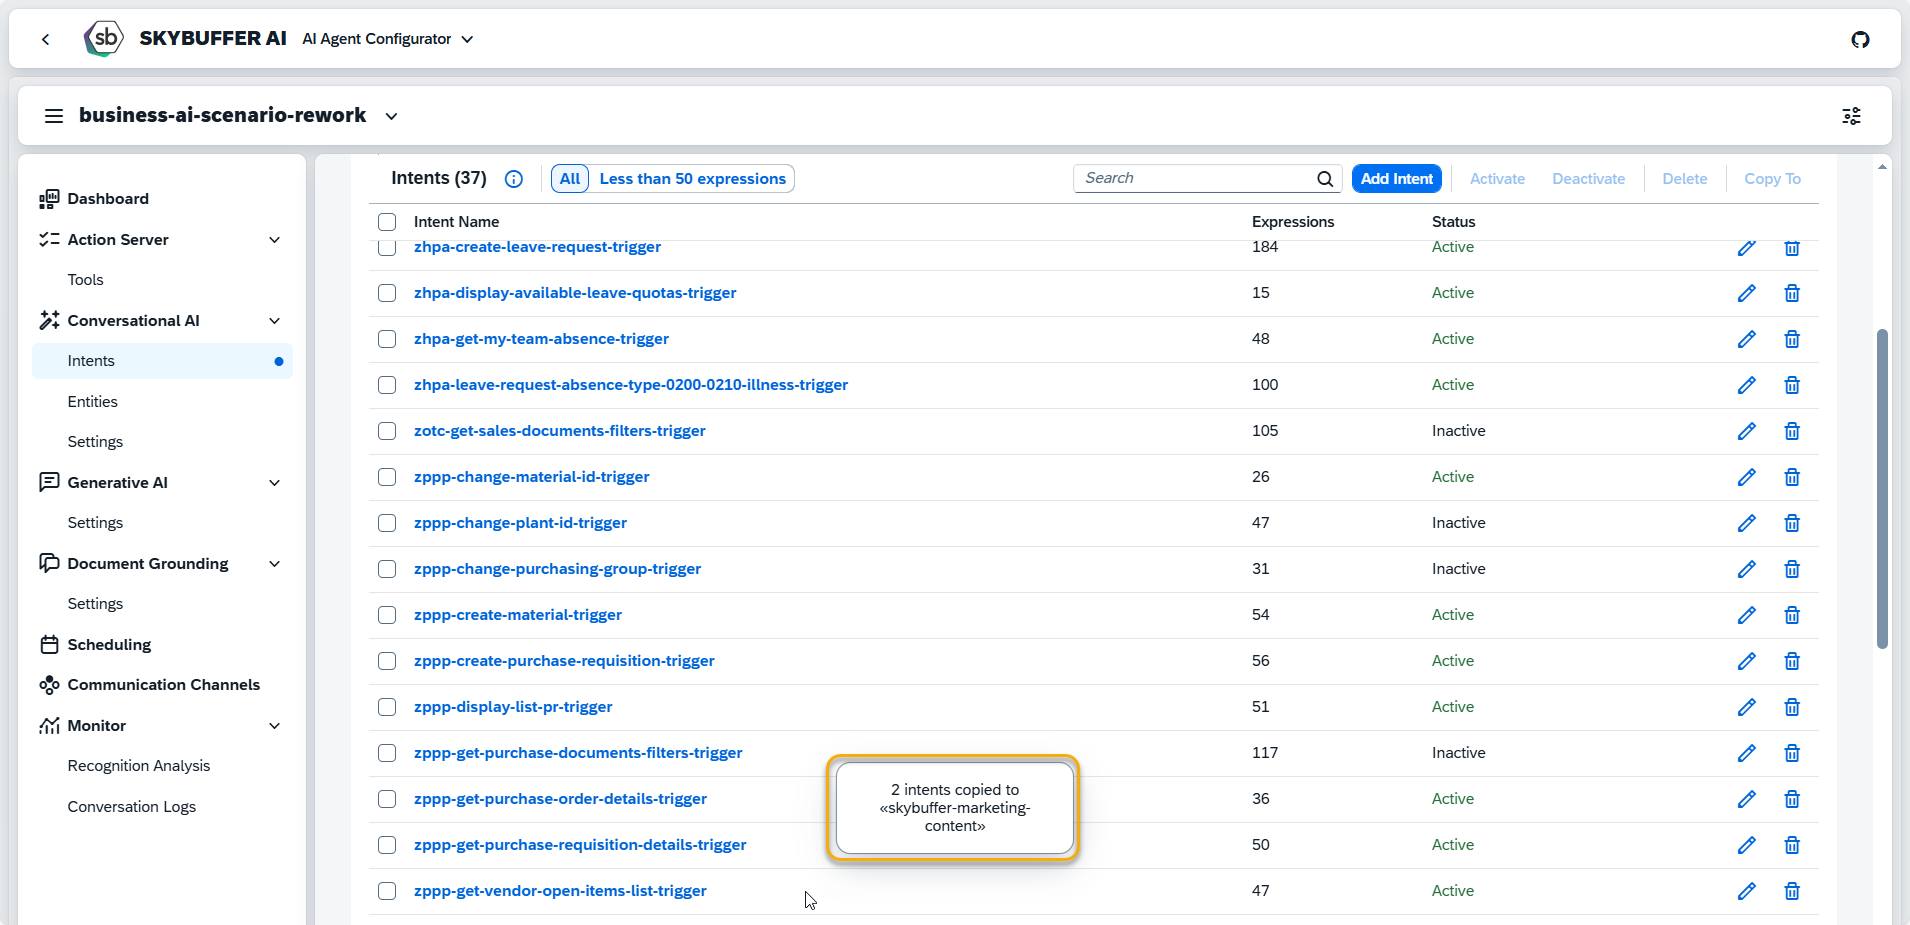
NOTE: If intents with the same names already exist in the target AI Agent, you will be prompted to use the Override option, which overwrites the existing intent data while enriching it with content from the copied intent.

Copying entities between AI Agents
Open the Conversational AI – Entities tab.
Select one or more entities by activating the checkboxes to the left of their names.
Click the Copy to button.
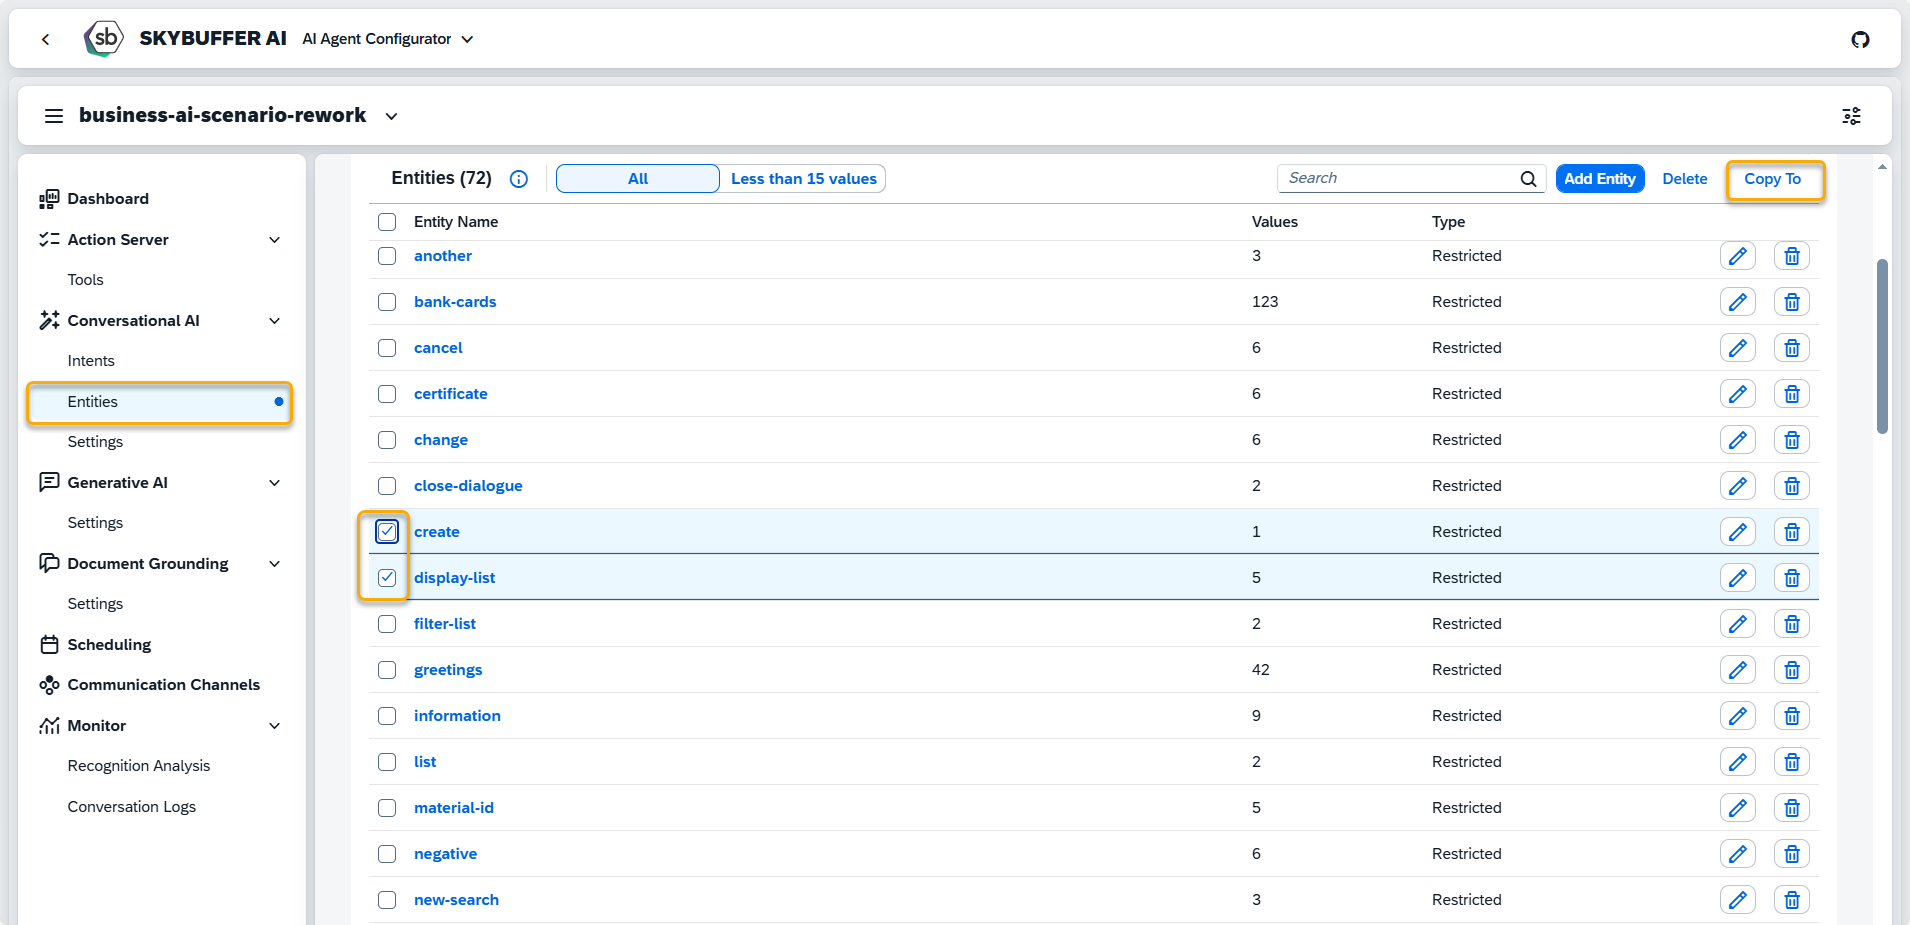
A menu will appear with a dropdown list of available AI Agents. Select the target AI Agent and click Copy.
If the selected entities do not yet exist in the target AI Agent (name check), a success message will be displayed at the bottom of the screen indicating that the operation has been completed.
NOTE: If intents with the same names already exist in the target AI Agent, you will be prompted to use the Override option, which overwrites the existing intent data while enriching it with content from the copied intent.
Migrating AI Agents between Spaces
To migrate your AI Agent between spaces, you first need to export it from the source space and then import it into the target space.
Exporting an AI Agent
Open the AI Agent you want to migrate.
In the upper-right corner of the page, click the AI Agent Details settings button.
In the configuration menu, click Export AI Agent to export the details and configurations of this AI Agent into a downloadable file.
Save the exported AI Agent archive locally.
Importing an AI Agent
You can now import this archive into any other space available to you.
In the target space, open Platform – AI Agent Configurator.
In the upper-right corner, click the Import button.

In the Import AI Agent dialog, select the previously exported file from your local machine, add it to the dialog, and click Import.

A successful import is confirmed by a message at the bottom of the screen: “AI Agent imported”.
NOTE: If an AI Agent with the same name already exists in the target space, the imported AI Agent will be saved with a suffix added to its name (for example, <agent-name>-1), and the numeric suffix will be incremented depending on how many agents with that name are already present.
Transferring content between spaces using a transfer bot
To migrate tools, intents, and entities between AI Agents located in different spaces, you can use an intermediate transfer bot.
In the target space, create an empty AI Agent to act as the transfer bot.
In the source space, copy the required content (tools, intents, and entities) into the transfer bot using the procedures described above.
Export the transfer-bot AI Agent from the source space.
Import the exported transfer-bot AI Agent into the target space.