

Identity Providers
Identity Providers (optional)
Section titled “Identity Providers (optional)”This application is to be used for configuration of the Single Sign-On (SSO) connection in case SSO integration is in scope.
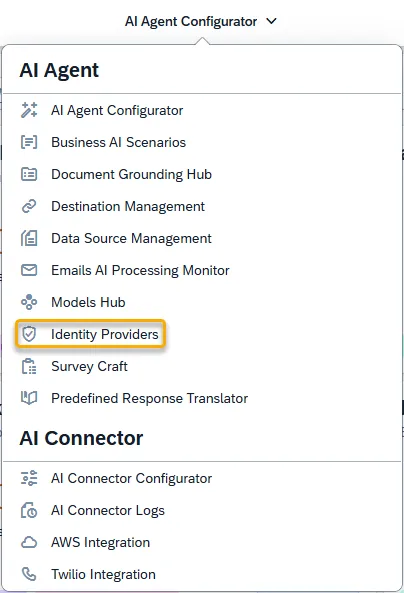
Step 1. Open the Identity Providers app in the AI Agent group:
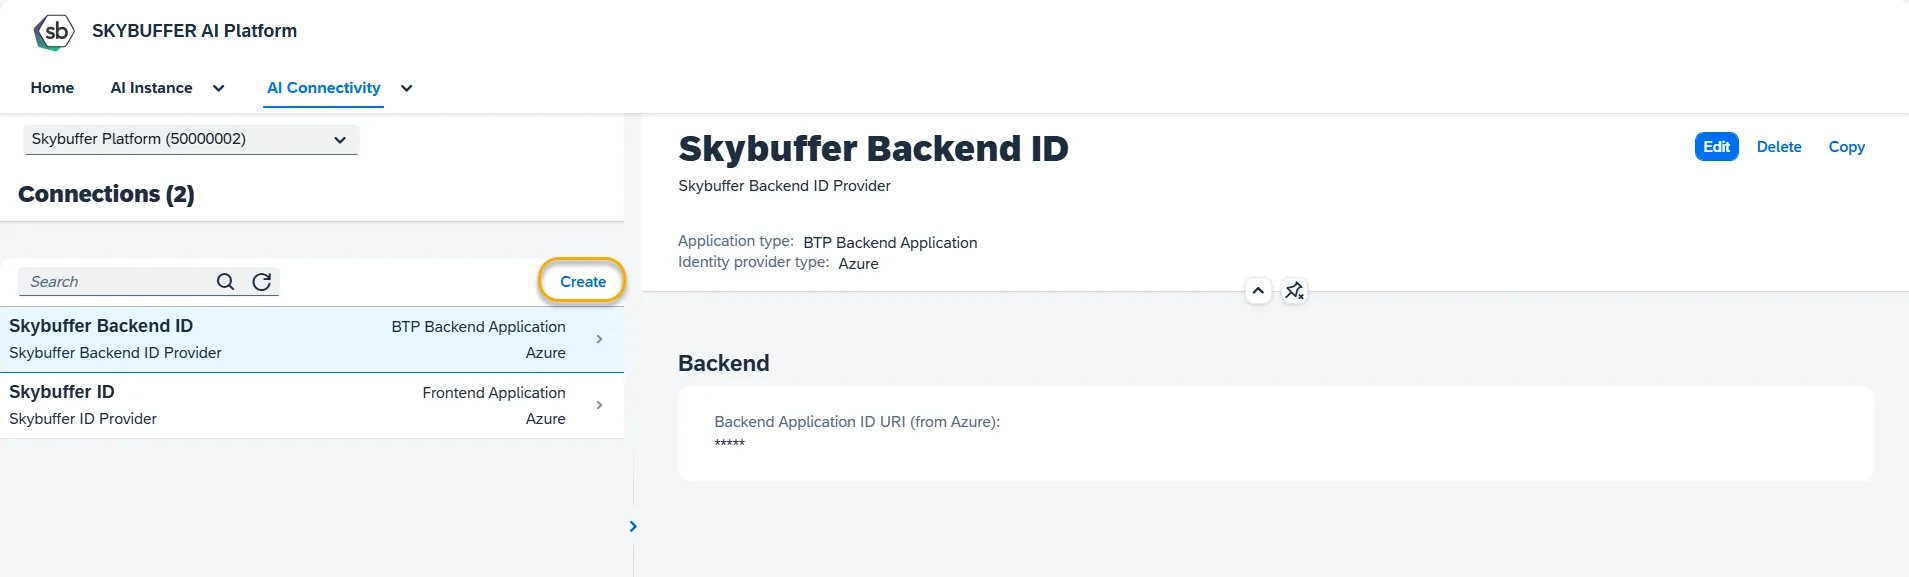
Step 2. Click the Create button to create a new Connection:
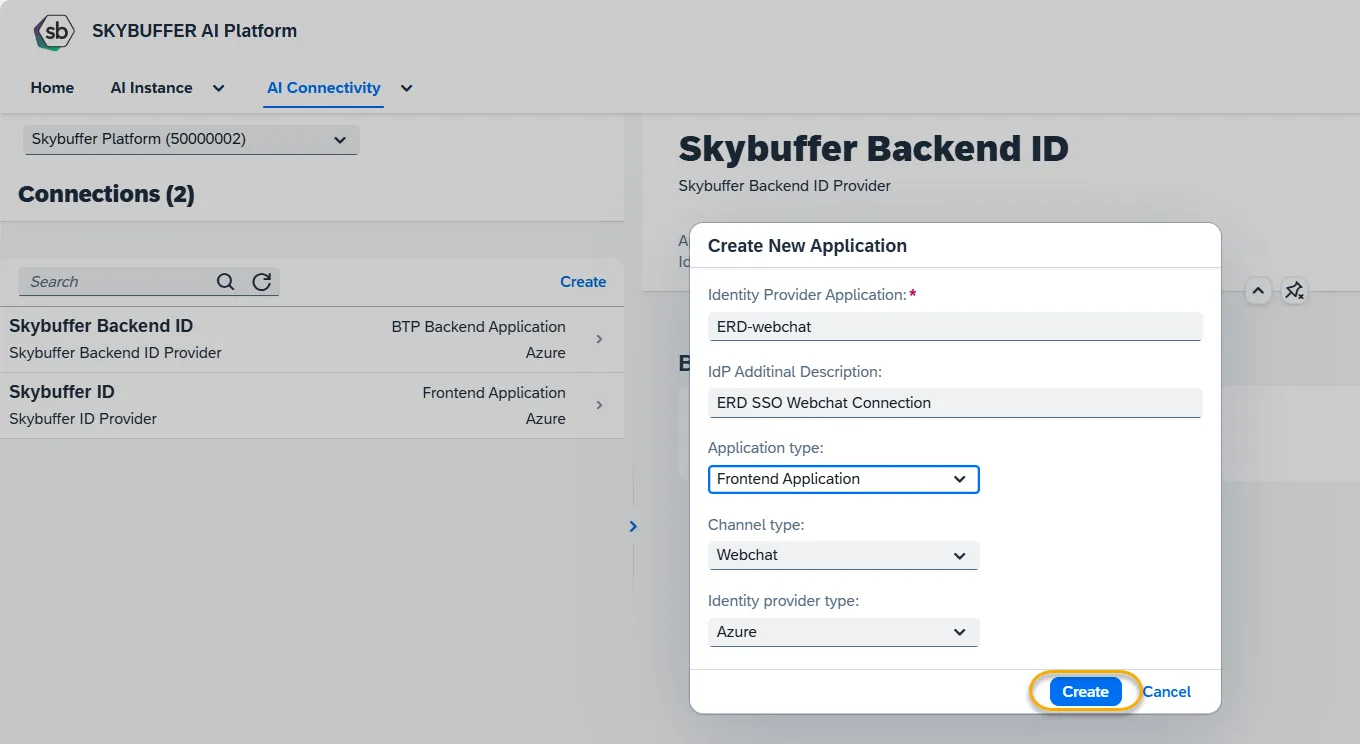
Step 3. To create a new application, fill in the parameters:
Identity Provider Application
IdP Additional Description – Identity Provider additional description
Application type – Select the necessary type: Frontend Application or Backend Application
Channel type
Identity provider type – you can select Azure or Custom type
Step 4. Click the Create button:
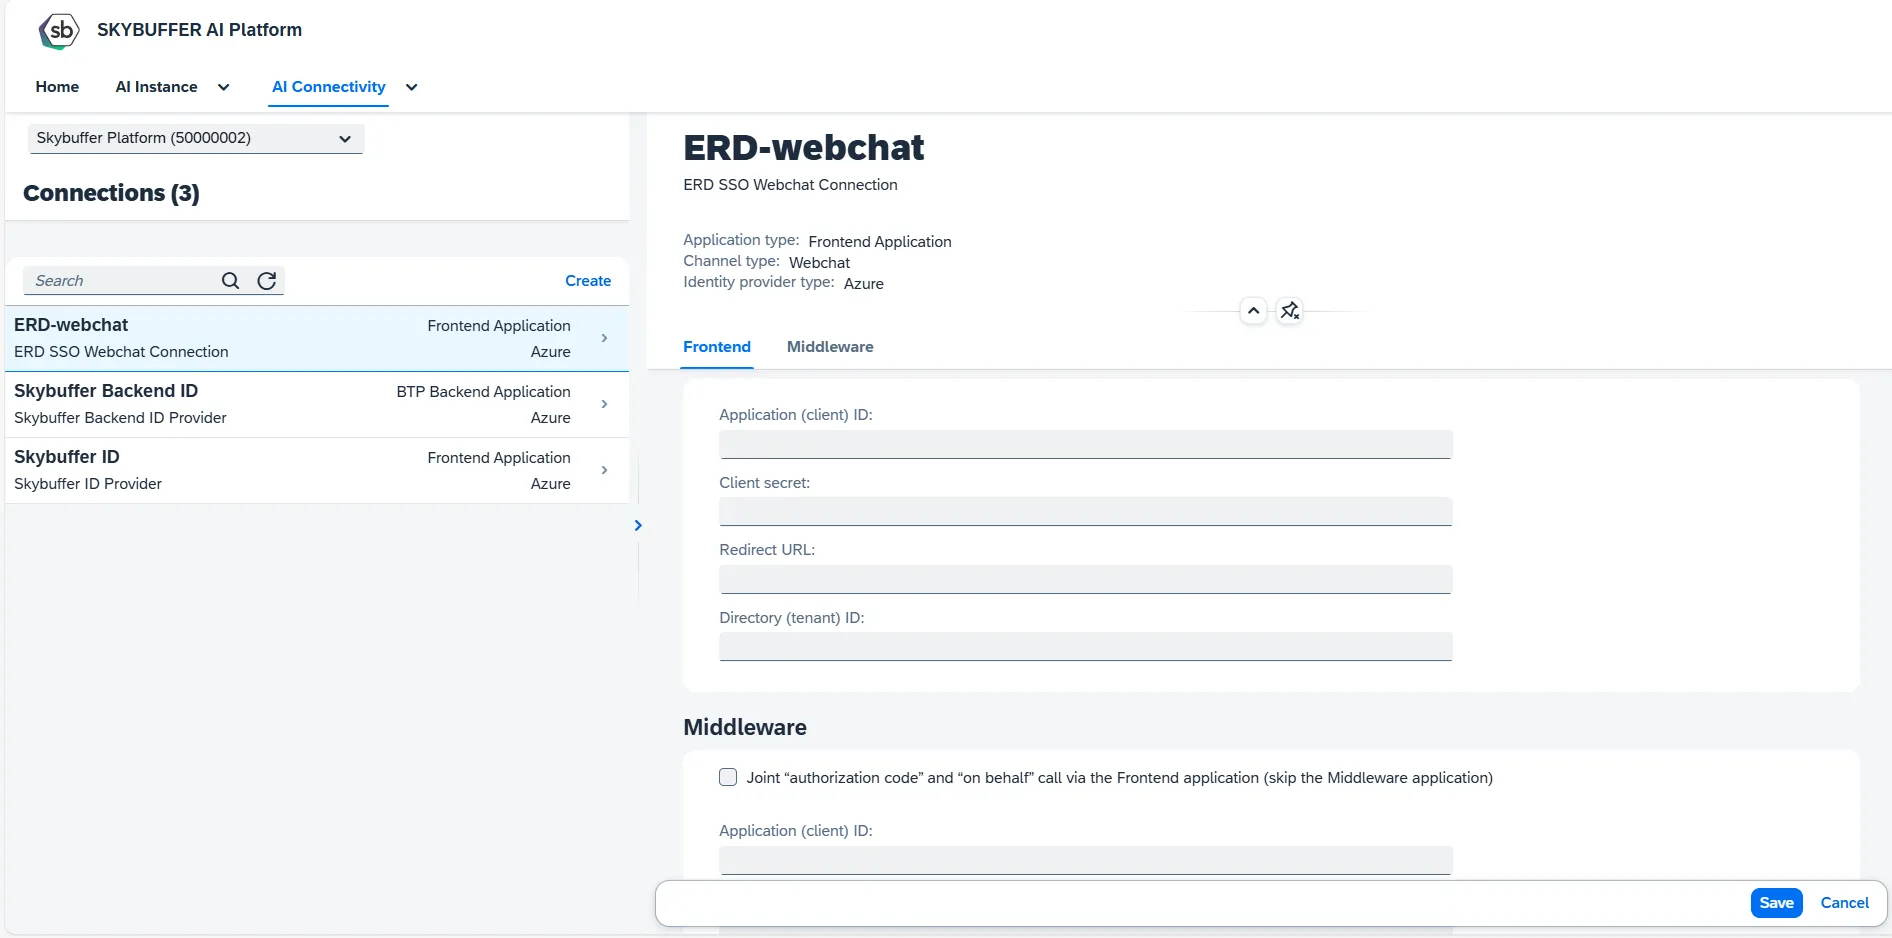
Step 5. Fill in the required parameters:
For Direct Backend Application type, fill in the parameters:
Backend Application ID URI (from Azure)
Directory (tenant) ID differs from Frontend application (tick)
Directory (tenant) ID
Client Authentication for Token Endpoint for OAuth 2.0
User ID
User Password
OAuth 2.0 Client ID
OAuth 2.0 scope ID
Token Endpoint for OAuth 2.0
OAuth Token Lifetime (seconds)
For BTP Backend Application type, fill in the parameters:
Backend Application ID URI (from Azure)
For Frontend Application type, fill in the parameters:
In Frontend tab (for Webchat and Zoom Channel Types):
Application (client) ID
Client secret
Redirect URL
Directory (tenant) ID
In Frontend tab (for Microsoft Channel Types):
SSO Connection Name
Directory (tenant) ID
In Middleware tab:
Joint “authorization code” and “on behalf” call via the Frontend application (skip the Middleware application) – tick to skip the Middleware application
Application (client) ID
Client secret
Middleware Application Scope
Directory (tenant) ID differs from Frontend application (tick)
Step 6. Save your entries.