Before Start
To avoid issues during the deployment process, please check the following prerequisites before starting the deployment process:
Verify XSA version
You can check the current version XSA runtime and XSA components with xs version and xs lc commands executed with <sid>adm user.
For more details, please check the following SAP notes:
https://me.sap.com/notes/2711421
https://me.sap.com/notes/0003129918
Verify Python runtime availability
See Section: Runtimes Handling.
Deployment Scenarios
For XS deployment process we can consider two possible scenarios:
- Regular deployment on machine with possible outside connection
- Deployment in an isolated environment
Below we describe each of the scenarios, as well as the additional section concerning Runtimes Handling.
Scenario 1: Regular deployment on machine with possible outside connection
XS Environment Preparation
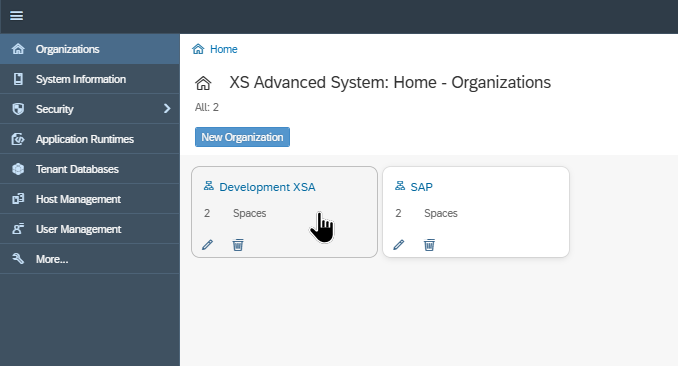
If necessary, create a new organization and a separate space for installation (other than SAP space) in the XSA Cockpit. For more details on that, see the instructions for SAP HANA and XSA Configuration described in the guide of Installing SAP HANA System Including XS Advanced Runtime, Section Configure SAP HANA and XSA, Steps 1 and 4.
Additionally, you can check a list of available spaces from xs cli (i.e. xs command line).
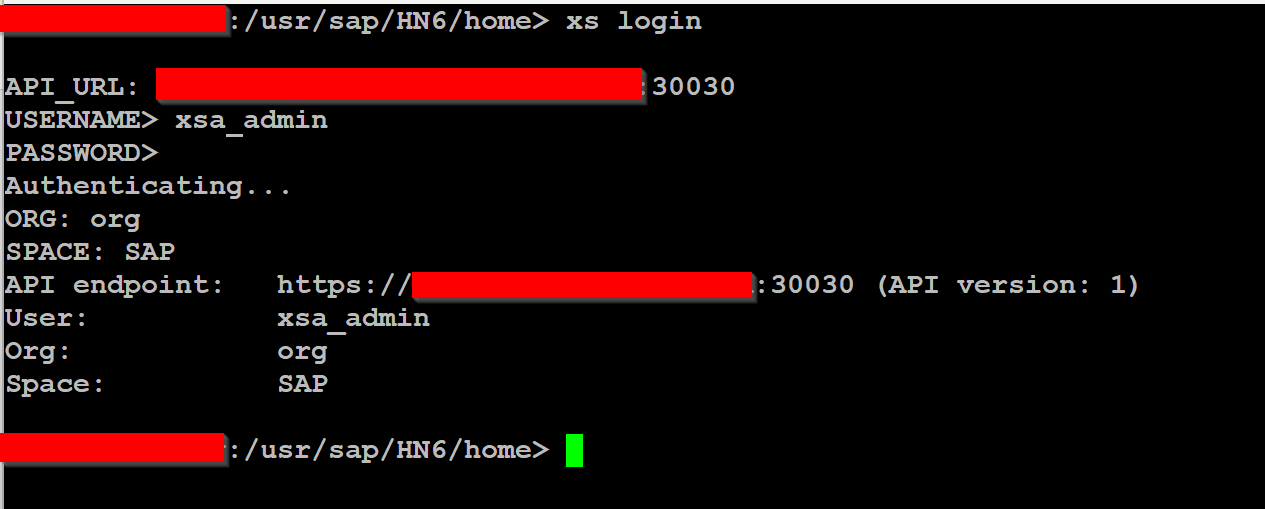
To log in XSA, use the command of xs login
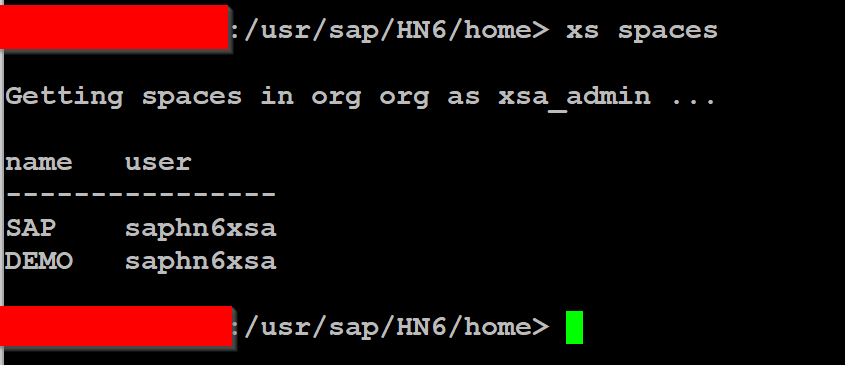
List of available spaces can be found with running the command: xs spaces
If necessary, it is possible to switch between spaces: xs target -s <space name>
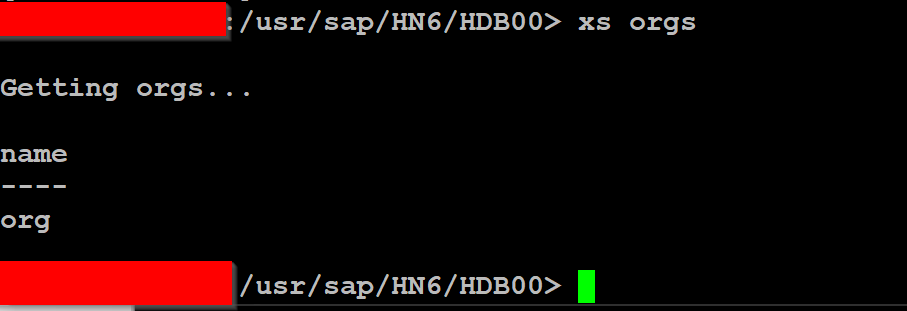
List of available organizations can be found via: xs orgs
If necessary, it is possible to switch between spaces: xs target -o <org name>
Upload mtar files into the machine. It is recommended to use the home folder of sidadm user.
Example:

Deployment Process
Once your environment is prepared and the files are uploaded, you can start the deployment process.
In this scenario, SAPUI5 resources are consumed directly from the SAP CDN over the Internet. The runtime configuration supports patch-level independent SAPUI5 versioning, which means applications reference only the major and minor version (for example `1.120`), while the CDN automatically resolves the latest available patch level.
This approach prevents application startup failures caused by outdated or removed patch-specific runtime URLs.
The recommended order for deploying Skybuffer AI components is the following:
- skybfrxts
- skybfryai
- skybfryai_py_ai_core
- skybfryai_rag_m
- botclientconnector
Deploy each archive using the following command:
xs deploy <filename.mtar>
Before you start, please make sure that you are in the right space. You can do so by using the command of xs apps:
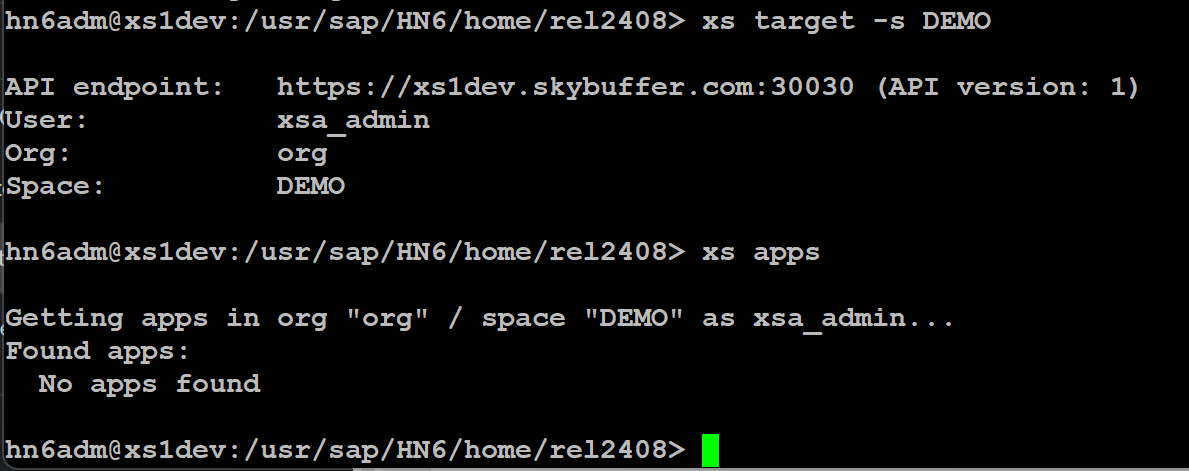 This command makes it possible to see the list of the applications installed. If the output shows `No apps found`, it means the selected space is empty and ready for deployment (all mtar files available).
If applications are already deployed in the target space, you can verify the selected space using: xs spaces
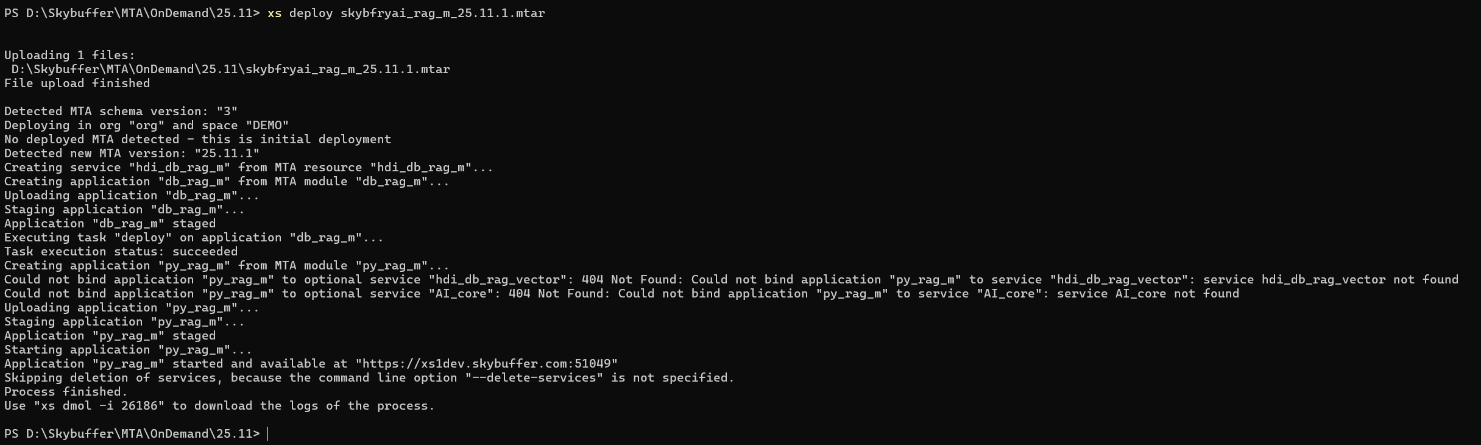
Now run the command of xs deploy <filename.mtar>.
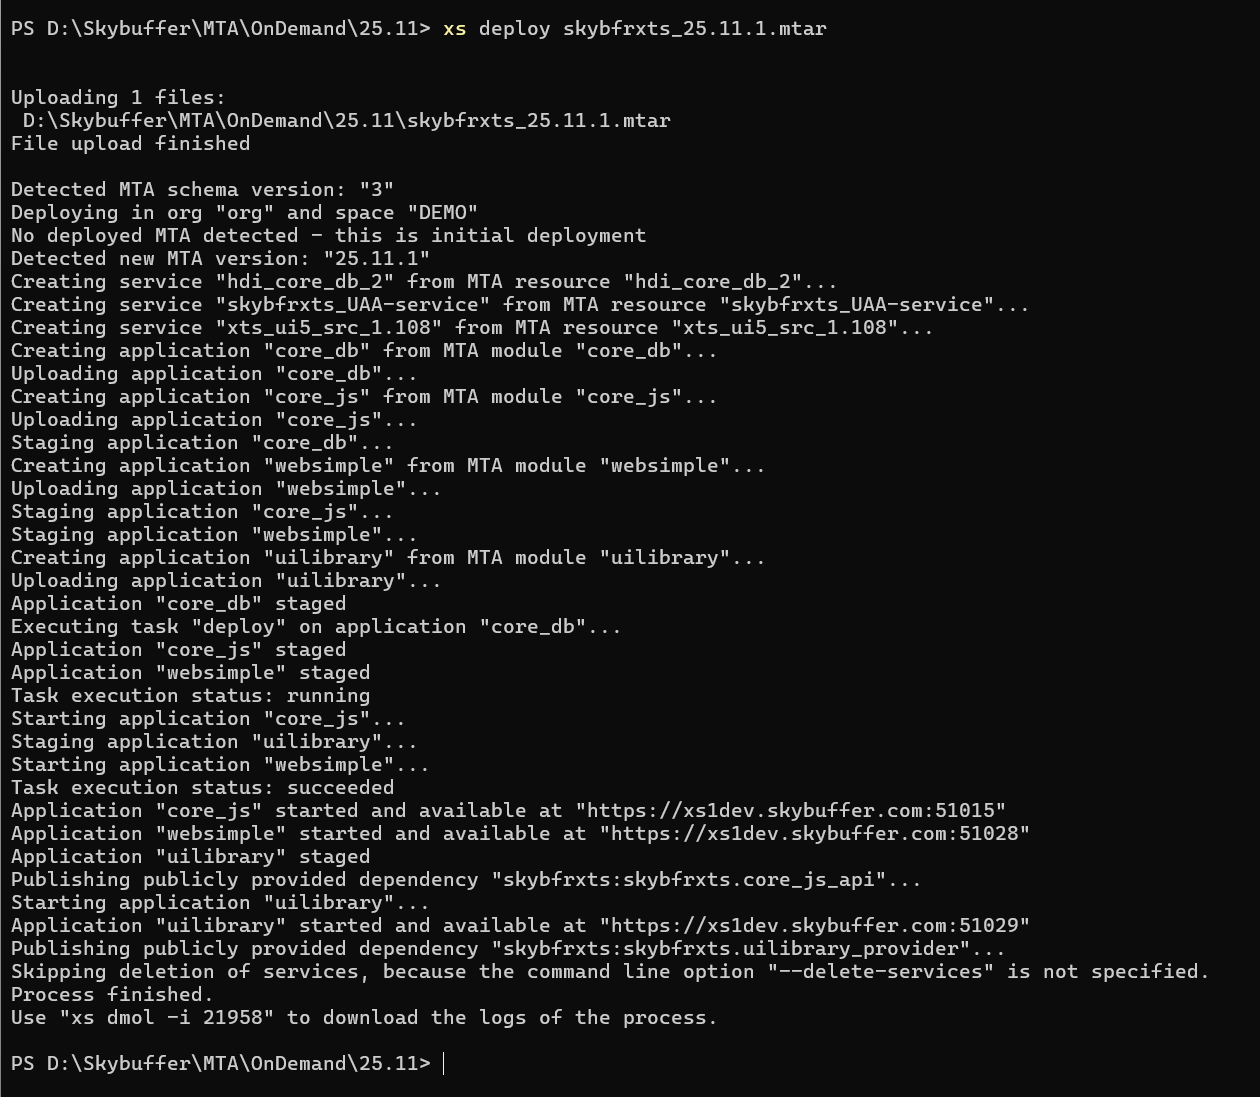
If everything is OK, run this command with all the components to install all Skybuffer archives in the sequence described at the beginning of Deployment Process.
Common Problems during Deployment
Optional service warnings
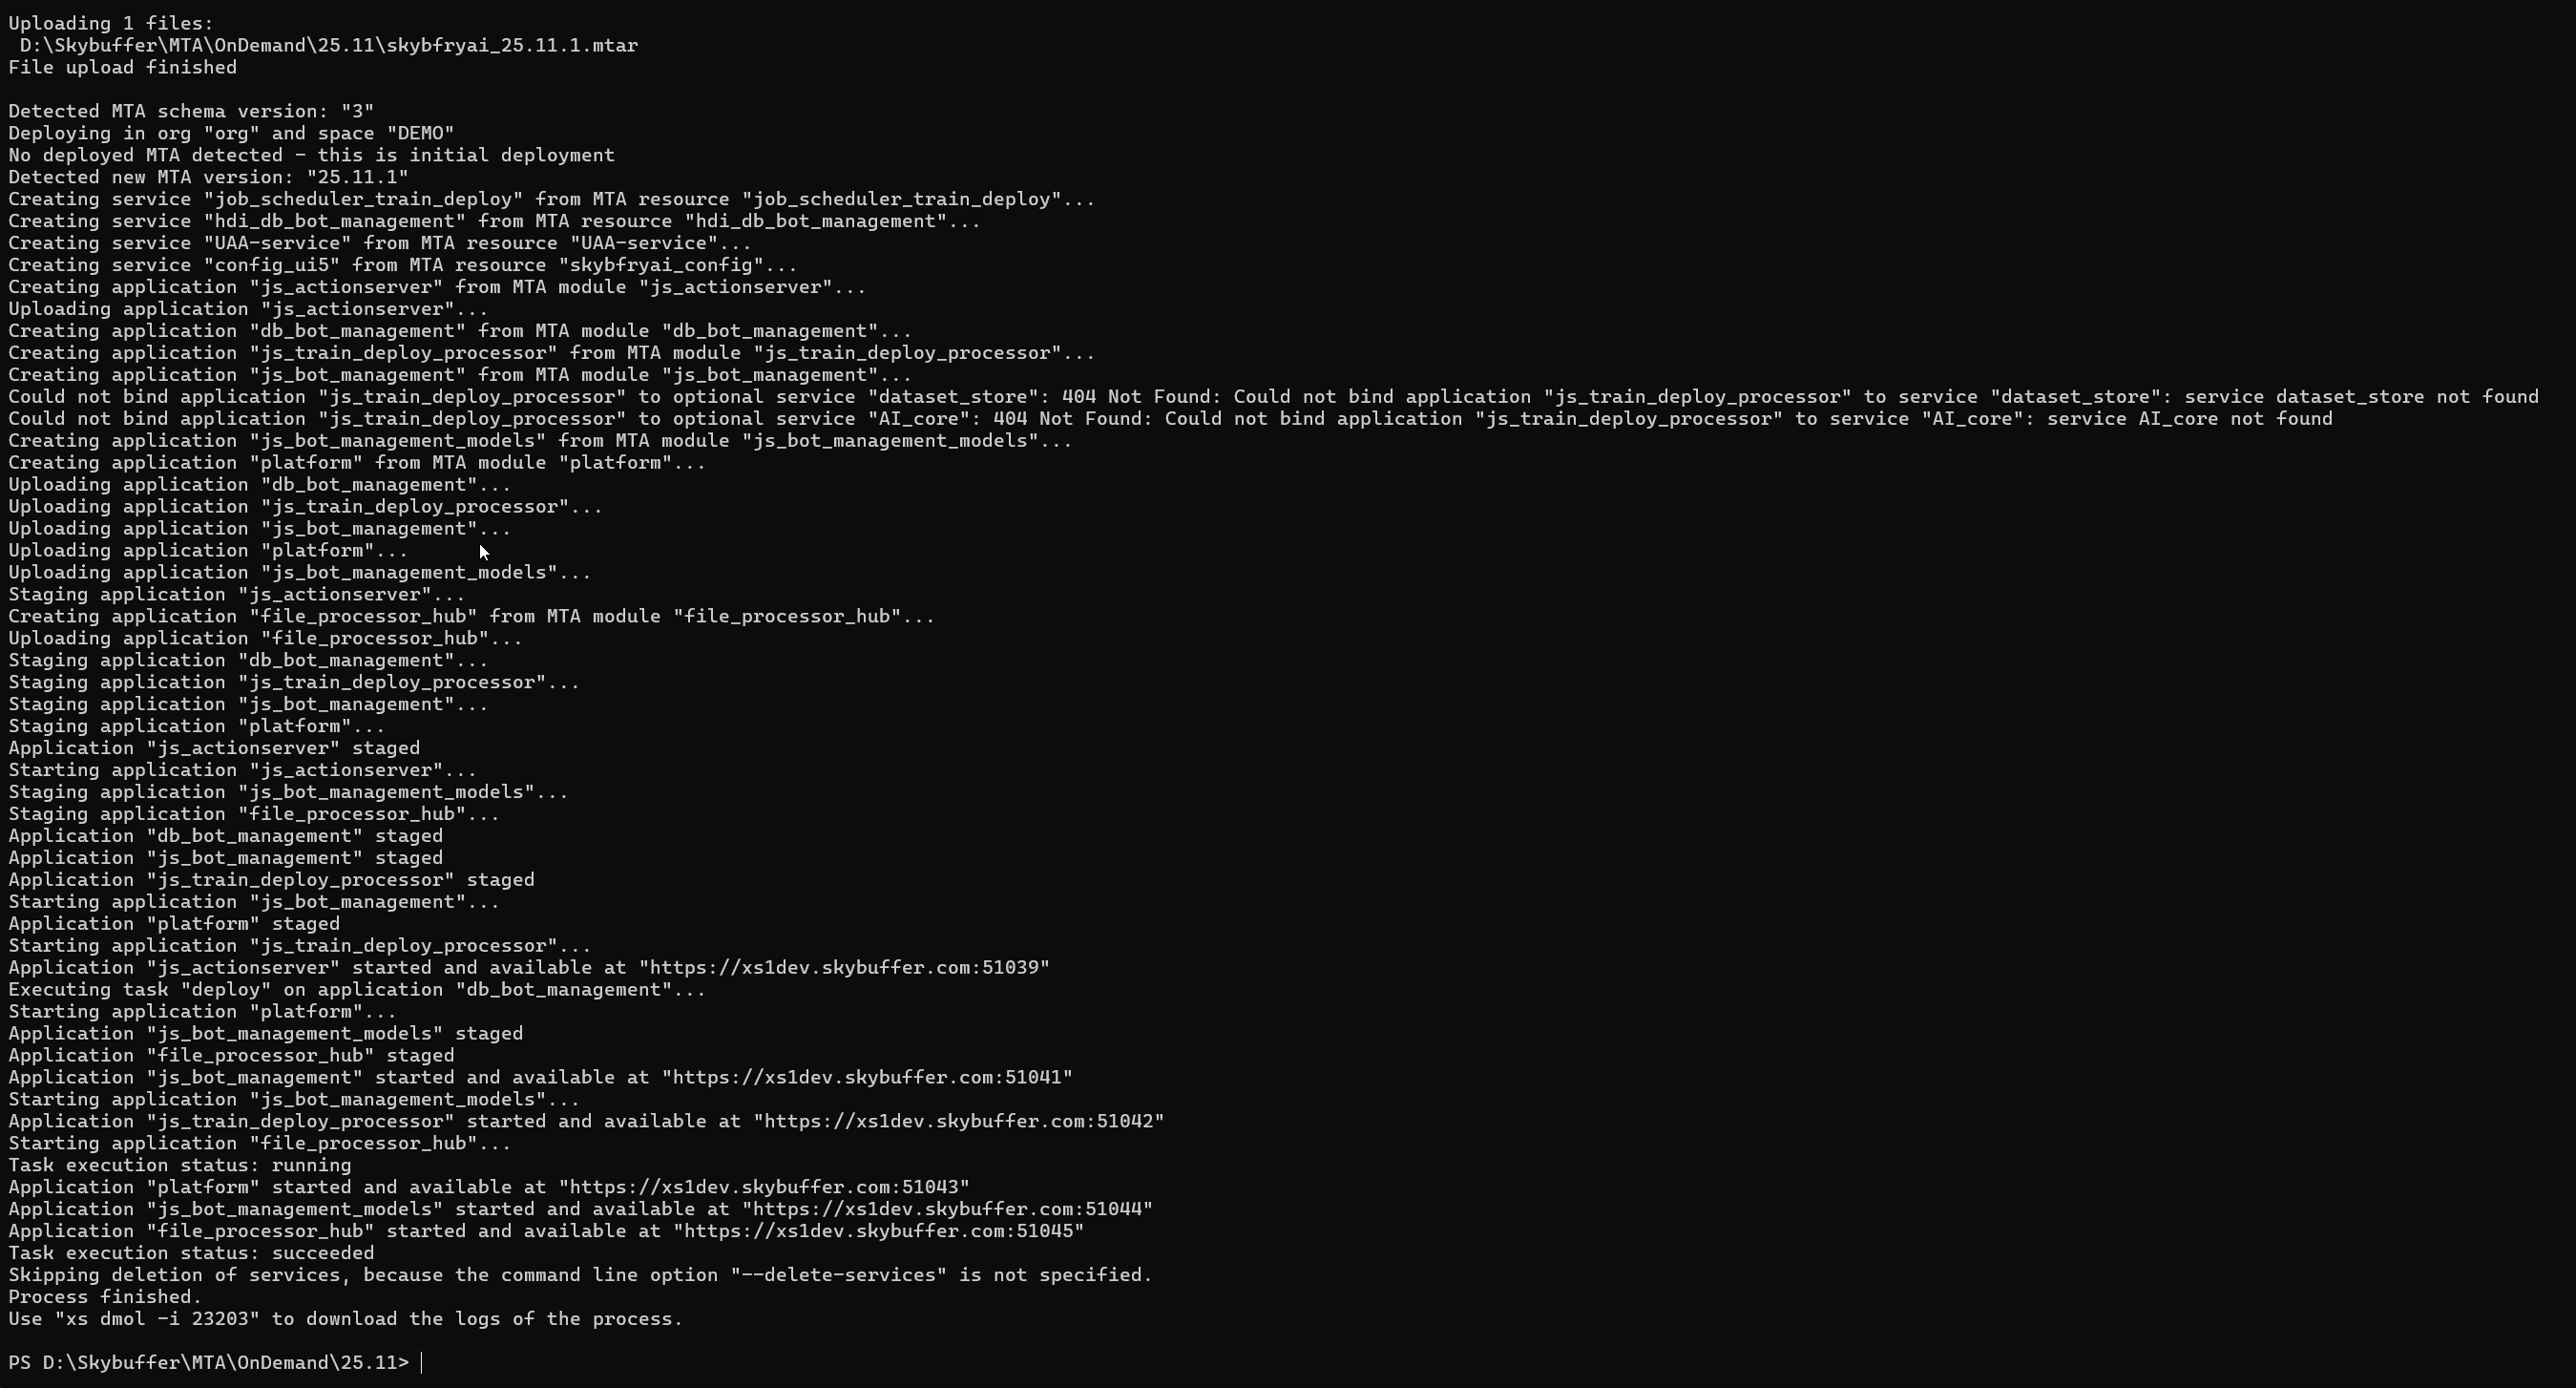
Warnings 404 regarding optional services can be ignored.
During the first attempt to deploy the Python application, it may fail.
The reason is missing Python 3.11.0 runtime as per log.
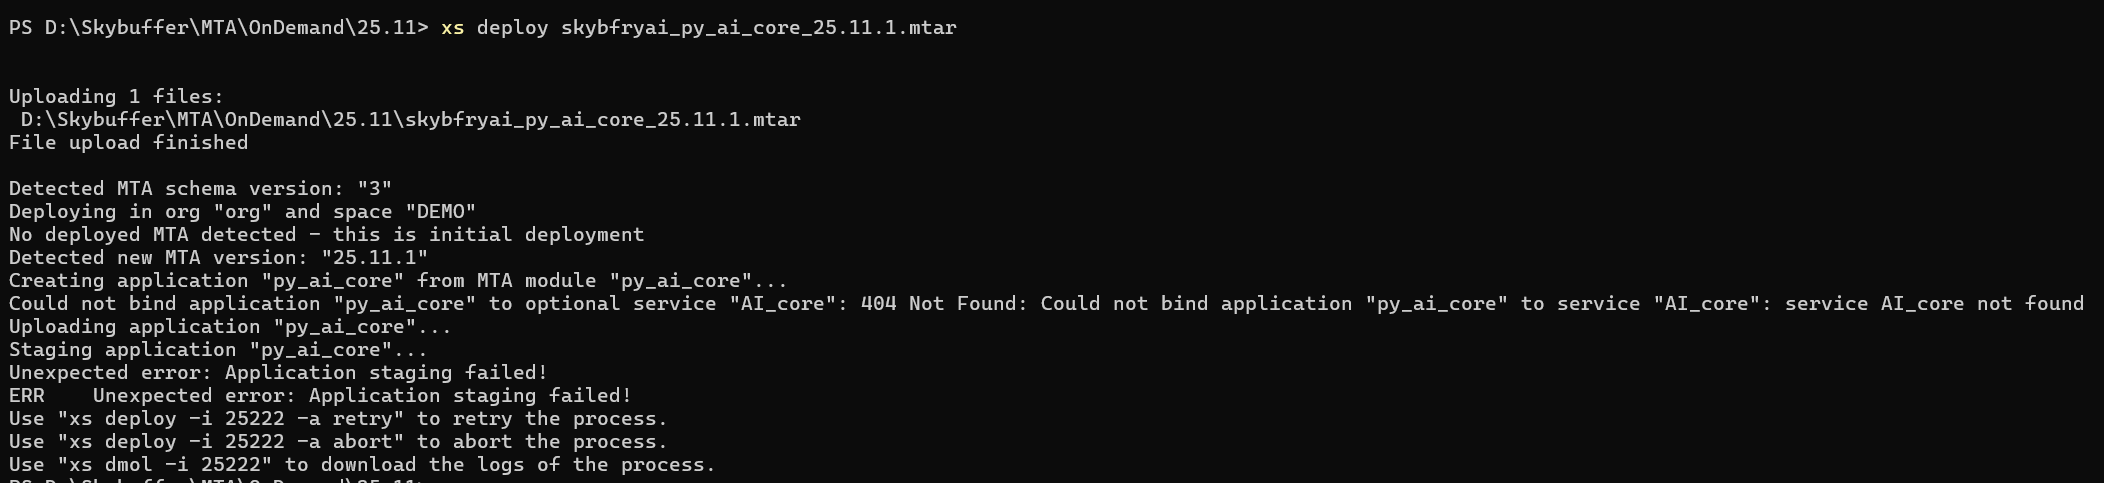
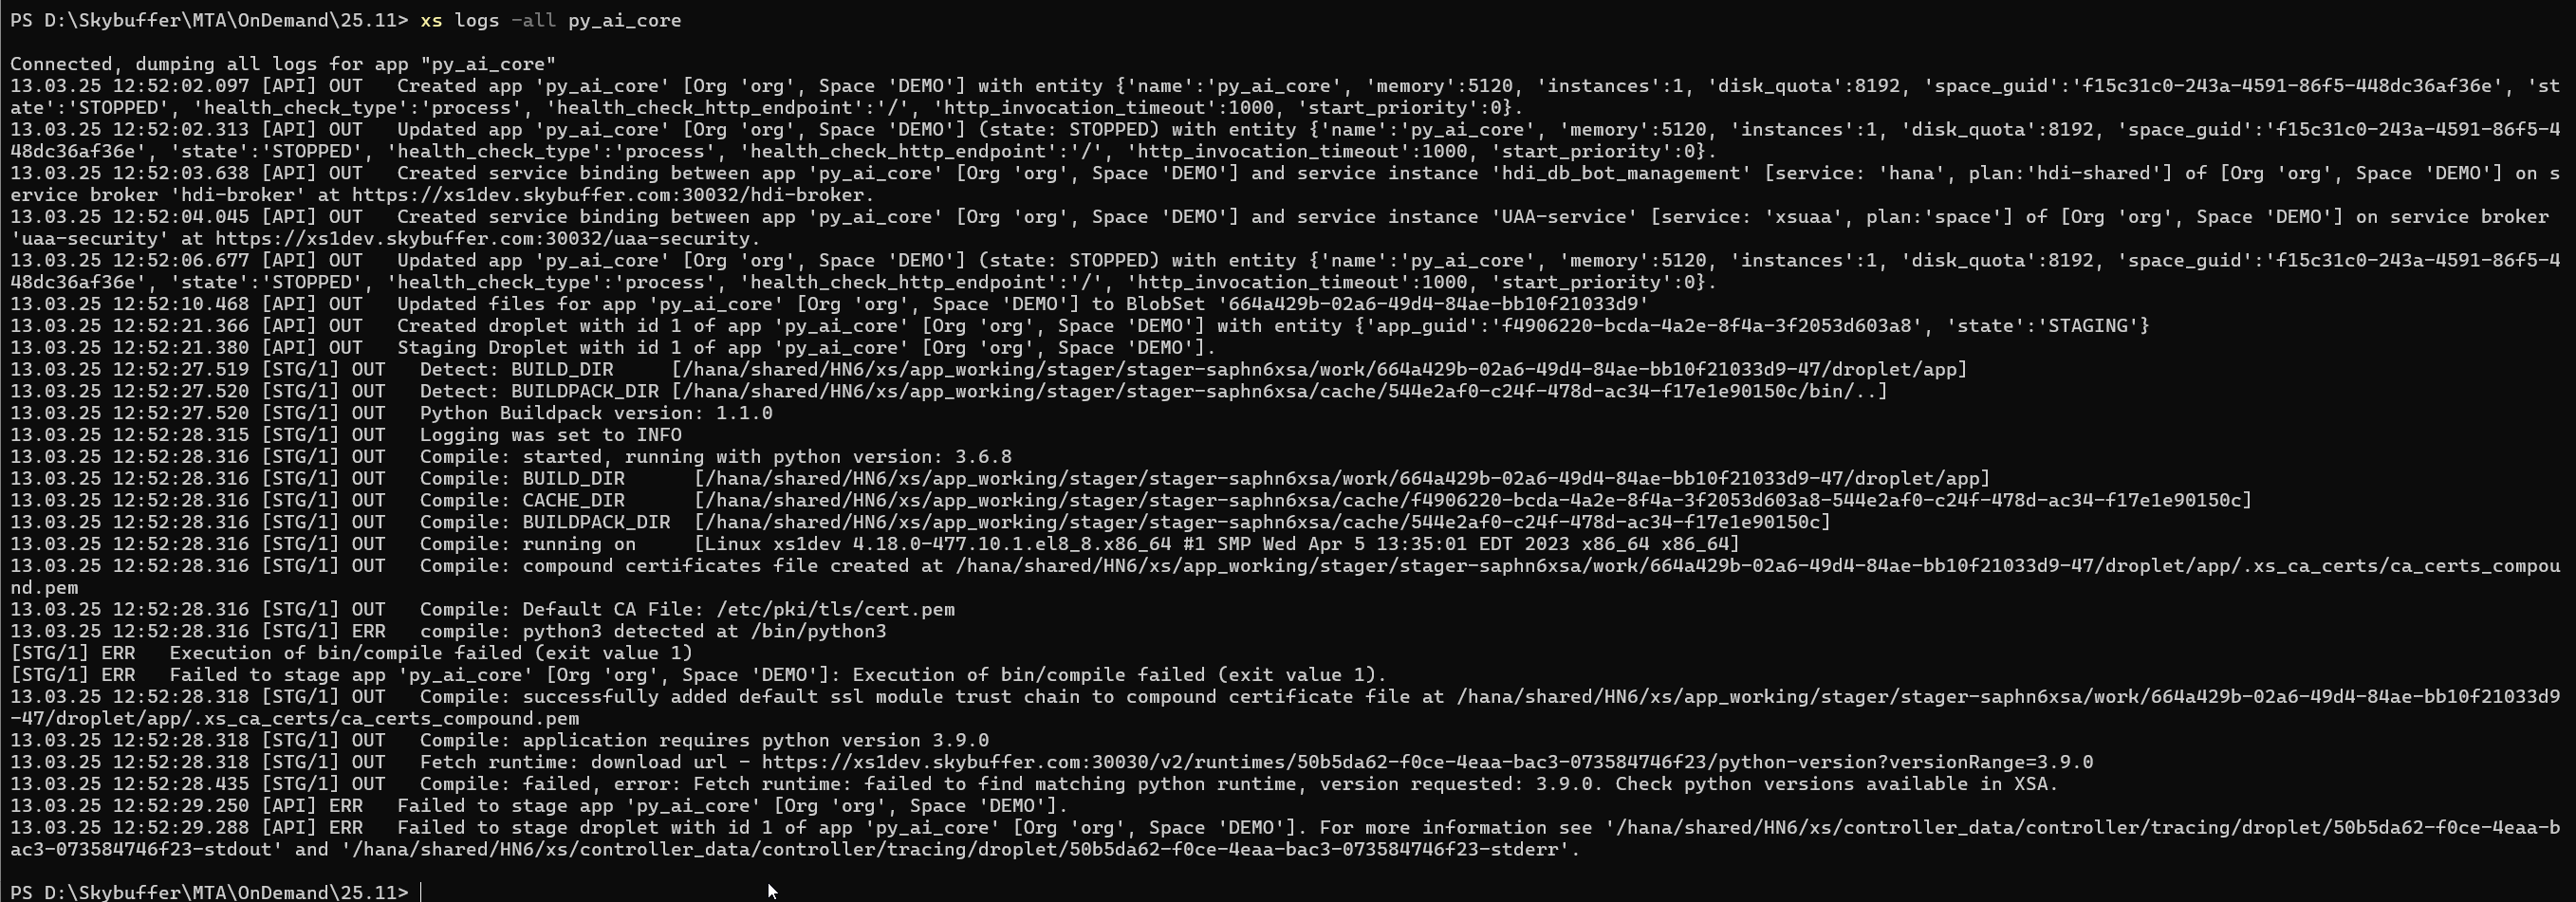
Doublecheck if the Python runtime exists in the proper version 3.11.0.
For more details, see Section: Runtimes Handling.
Once the runtime is available, you can retry deployment.
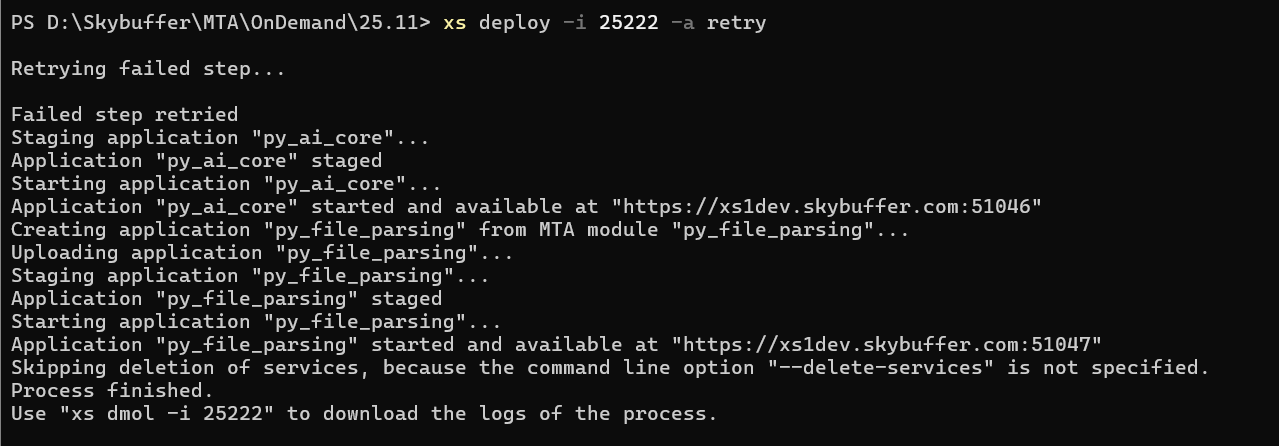
Now the next application should be deployed successfully.
Application Verification
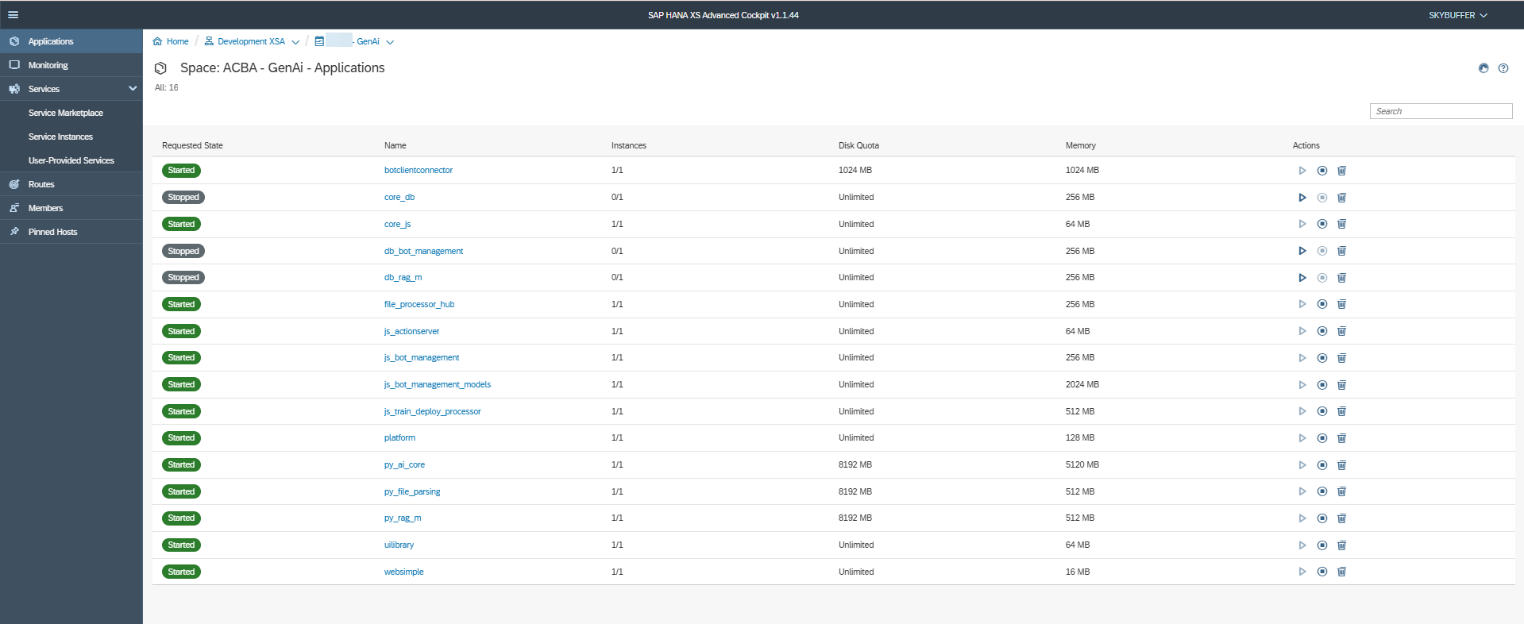
To check all the apps, run the command of xs apps:
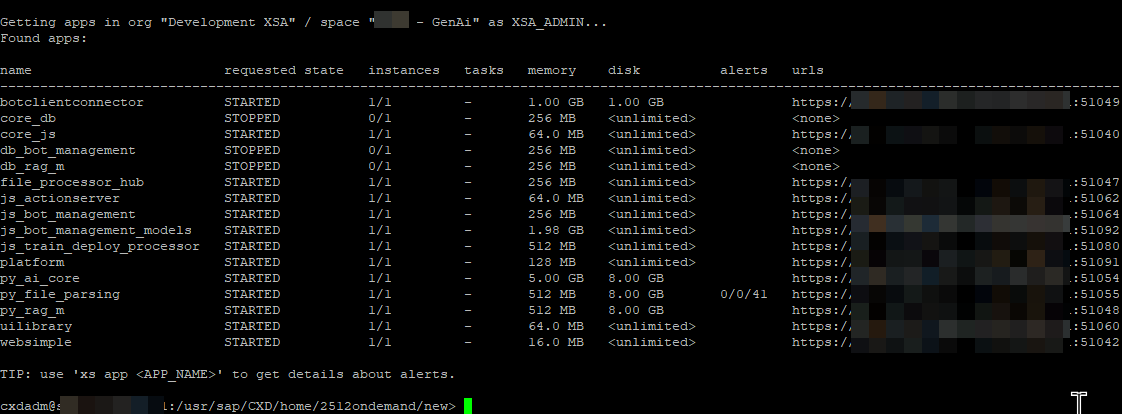
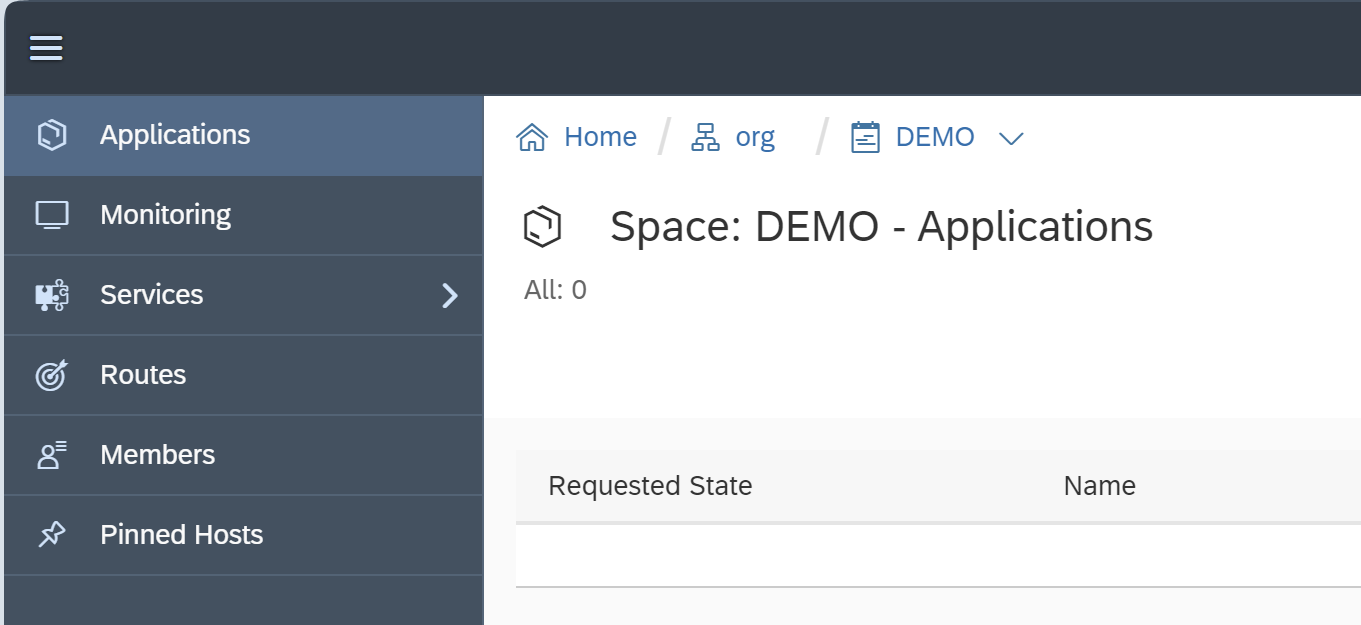
If you check all the applications from the XSA Cockpit, it looks as follows:
The application can be stopped / started from the XSA Cockpit:
In case of any issues, please visit: SAP HANA Developer Guide for SAP HANA XS Advanced Model (SAP Web IDE)
Scenario 2: Deployment in an isolated environment
In an isolated environment, Internet access is not available, therefore all SAPUI5 libraries must be provided locally.
Skybuffer provides an additional application, `xsafecrt`, which serves the SAPUI5 runtime locally instead of consuming it from the SAP CDN.
The locally hosted runtime supports patch-level independent SAPUI5 versioning, similarly to the SAP CDN behavior. Applications do not need to reference an exact patch version (for example `1.120.30`). Instead, only the major and minor version are required (for example `1.120`), while the latest available patch version installed in `xsafecrt` is automatically resolved and served.
This approach prevents application startup failures caused by missing or outdated patch-specific runtime versions after updates or cleanup activities.
The recommended order for installation without the Internet is the following:
- skybfrxts
- xsafecrt
- skybfryai
- skybfryai_py_ai_core
- skybfryai_rag_m
- botclientconnector
As you can see, here there is the archive of xsafecrt which was not present in Scenario 1 (with the Internet).
In case skybfryai component was already deployed, and xsafecrt was installed after, then skybfryai must be redeployed so that the runtime target configuration is updated correctly.
Deploy xsafecrt
Use the same deployment command as for the other archives shown in the previous scenario: xs deploy
Re-deploy skybfryai
Now run the command: xs deploy skybfryai_0.0.1.mtar -e sapui5rt.mtaext
Additional Python runtime must be provided for Skybuffer Python apps.
See Section: Create Python Runtime (Optional)
Generate Python runtime and transfer it into the isolated environment, then add it to the existing runtimes as per the below-mentioned section.
Network Configuration
During the first installation, the following sites should be allowed to connect:
.pytorch.org
.pypi.org
.pythonhosted.org
.python.org
.npmjs.org
.hf.co
.unstructured.io
huggingface.co
.githubusercontent.com
The reason for their necessity is that deployment will fail if the mentioned connection is blocked. These sites are crucial for downloading packages and models during installation and stage python applications.
Customers should provide temporary access to the Internet only during the initial deployment.
Proxy for XSA can also be set as per the official SAP document (Section 2.15 XS CLI Configuration):
SAP HANA XS Command-Line Interface Reference
AI Connector Link
SAP XS Advanced got 2 options to provide connections to deployed applications:
- Link with the application name + default domain
- Ports
In both cases, it happens that during the update, the application port/link can change/be missing and can cause problems.
Go to the section of Routes in the selected space in the XS cockpit.

In case a link is missing, recreate it and bind to the app
In case a new port is assigned, the old one should be available, so just create one and bind to the app as well.
Ollama Server Link
Skybuffer AI solution requires a link to Ollama server with the installed language model.

Customers can host such server on their own and should know its IP Address/link:PORT
In case Skybuffer resources should be used, please contact us to get the connection details.
Runtimes Handling
Official documentation regarding handling runtimes provided by SAP can be found at:
SAP HANA Administration Guide for SAP HANA Platform
Runtime Verification
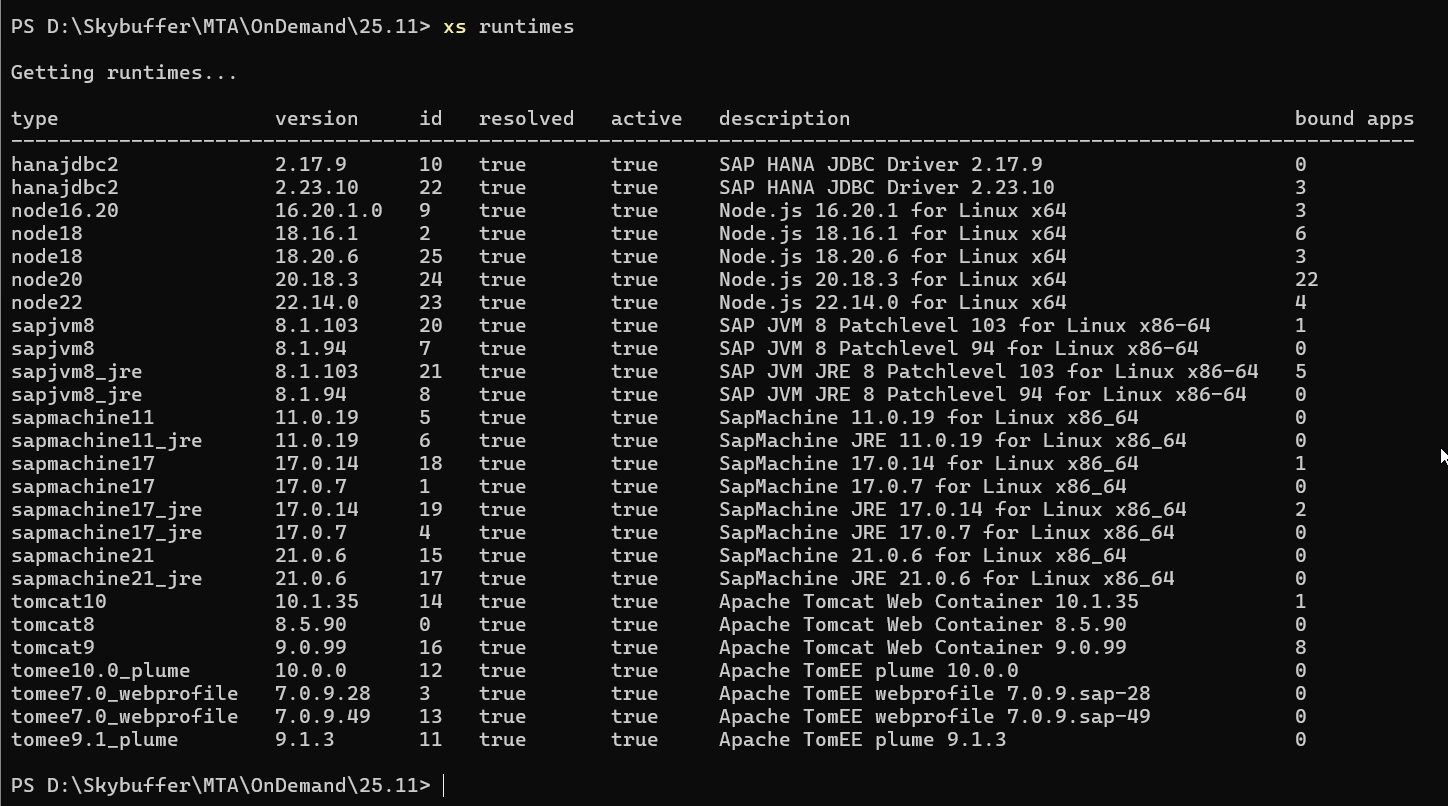
Check the available runtimes by using the command: xs runtimes
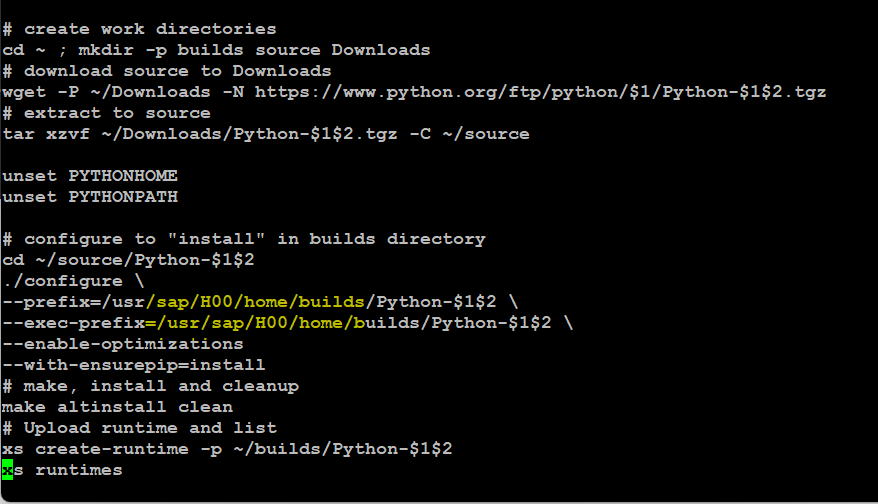
Upload Runtime
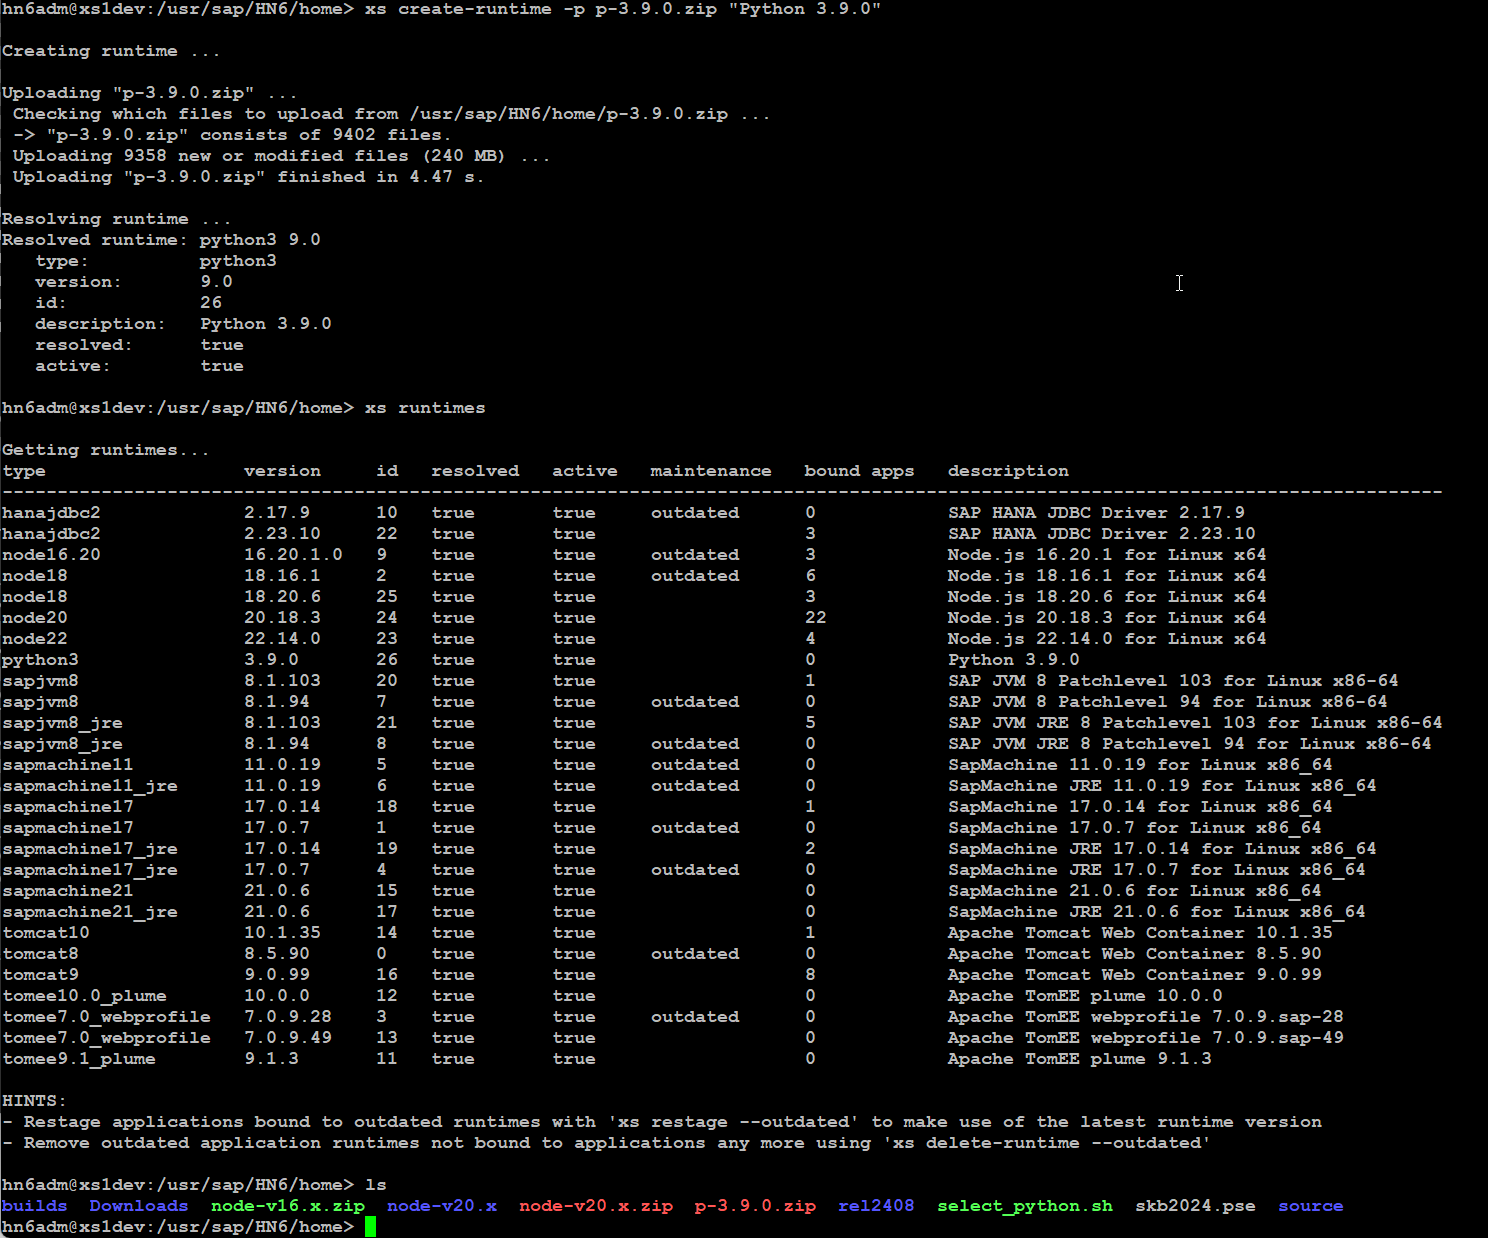
Make sure that you are on the same location where you placed the Python zip file. Otherwise, provide the full path.
Use the following command: xs create-runtime -p <file name> “Python 3.11.0”
See the example of such command in the following screenshot:
Create Python Runtime (Optional)
You can download Python environment in version 3.11.0 from official https://www.python.org/
Then configure and install it on XSA manually.
For more details on manual installation, please contact your OS administrator.
Alternatively, you can download an unofficial script from select_python.sh (This applies only for servers that have external Internet connection)
Edit the script configuration and adjust the path:
Save the file and run the script as a root
./build_python 3.11.0
Remove the existing runtime with the command xs delete-runtime -i <ID> (check phyton ‘id’ by xs runtime command)
Use the command ./<build_python> that is the name of the saved script 3.11.0 to create the runtime.
In case of any questions, contact your OS administrator.
Missing Libraries on Operating System
Potentially, there can be a scenario in which even if you generate a runtime, or use the one already prepared in the new machine, Python app will still crash during stage or run stage. In this case, please contact your OS admin and ensure that the following libraries are installed:
- libffi-devel
- sqlite-devel
- bzip2-devel
Depending on your system, you can use the command: yum install <name-devel>
For more details, contact your OS administrator.
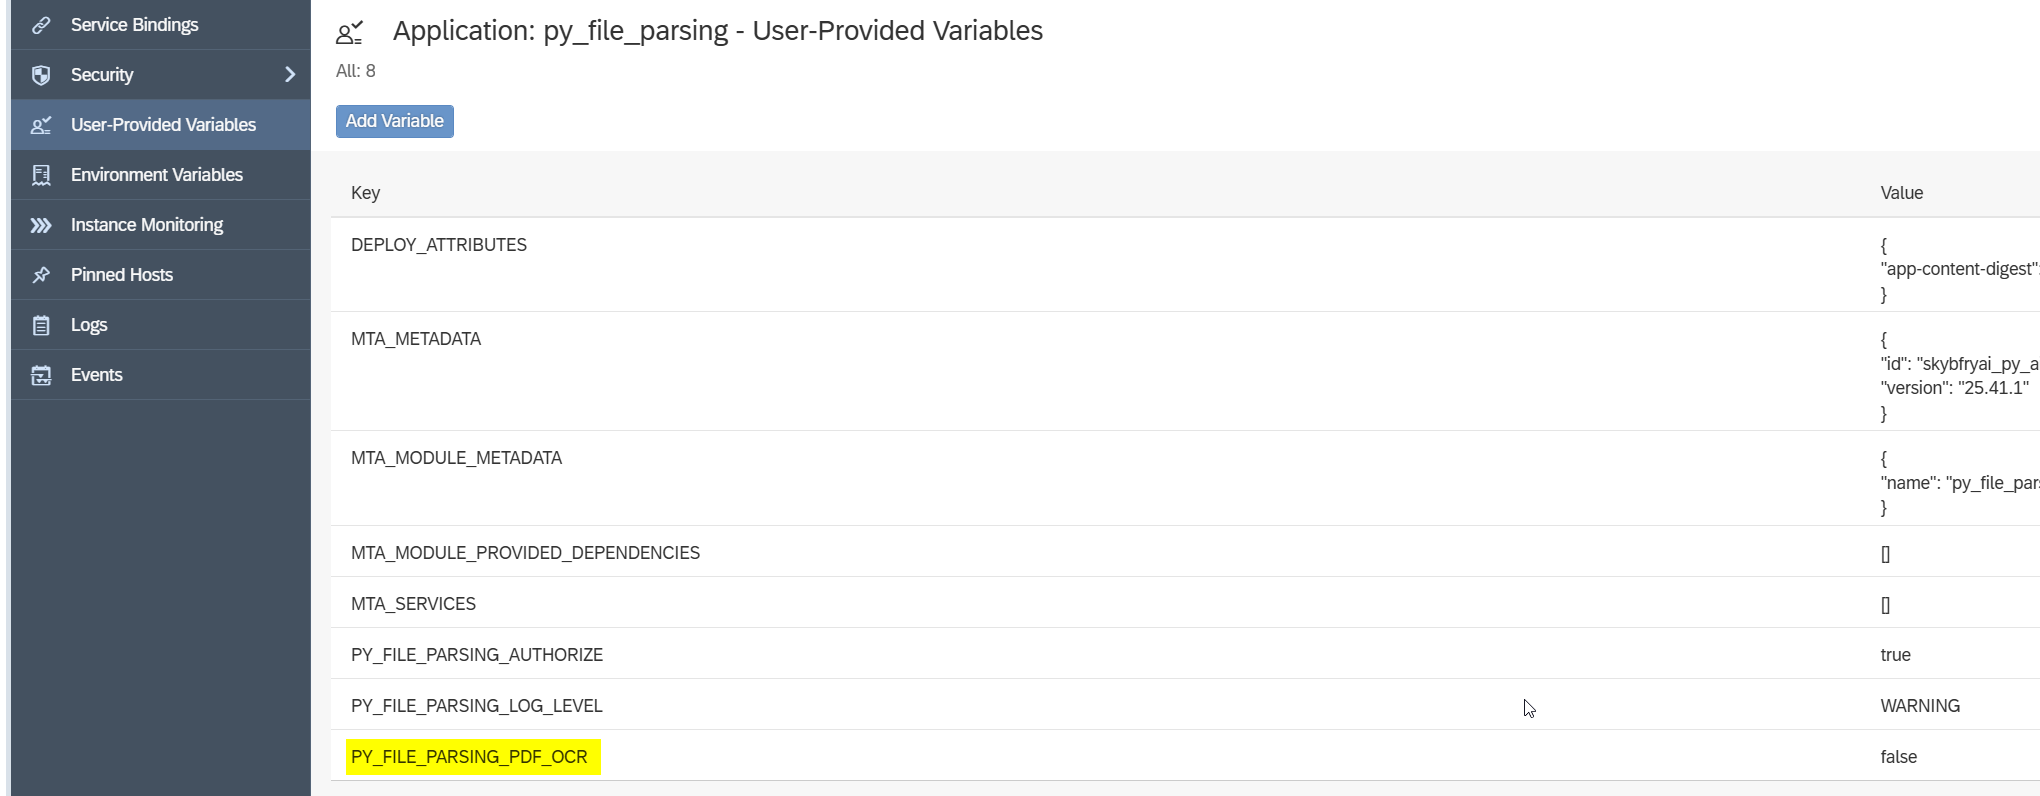
Text recognition – OCR Setup
Skybuffer AI can turn on text recognition. To prepare this feature, we need to have 2 prerequisites :
- Installed OS library
- Change Parameter for py_parsing_file application
To turn it on, we need to go to User-Provided Variables of py_file_parsing app and find PY_FILE_PARSING_PDF_OCR, next click Modify (pencil icon) and change from False to True.
Under OS, search for following packages:
- poppler.x86_64
- poppler-devel.x86_64
- poppler-utils.x86_64
- tesseract.x86_64
- tesseract-devel.x86_64
Useful Links:
- 2711421 – Installing SAP HANA Extended Application Services, advanced model using the XS Advanced installation media:
SAP Note 2711421 - 3129918 – How to install the latest patch on SAP HANA XSA:
SAP Note 3129918 - Getting Started with Application Development in XS Advanced:
SAP Help: Application Development - Maintaining XS Advanced Application Runtimes:
SAP Help: Maintaining Runtimes - Python environment:
Python Official Website - Script of Python selecting:
Python Script
- The SAP HANA XS Command-Line Interface Reference: SAP HANA XS Command-Line Interface Reference
- XSA binding error with Job Scheduler service: https://me.sap.com/notes/3633080