Generative AI Action
This action allows you to prompt the AI Agent, which will respond based on its inbuilt general knowledge or an uploaded source file. You can also provide detailed instructions to guide the AI’s response. Additionally, you can select from multiple registered AI Agents to suit your needs.
In this documentation chapter, let’s create a Generative AI block, that will answer questions about workplace policy.
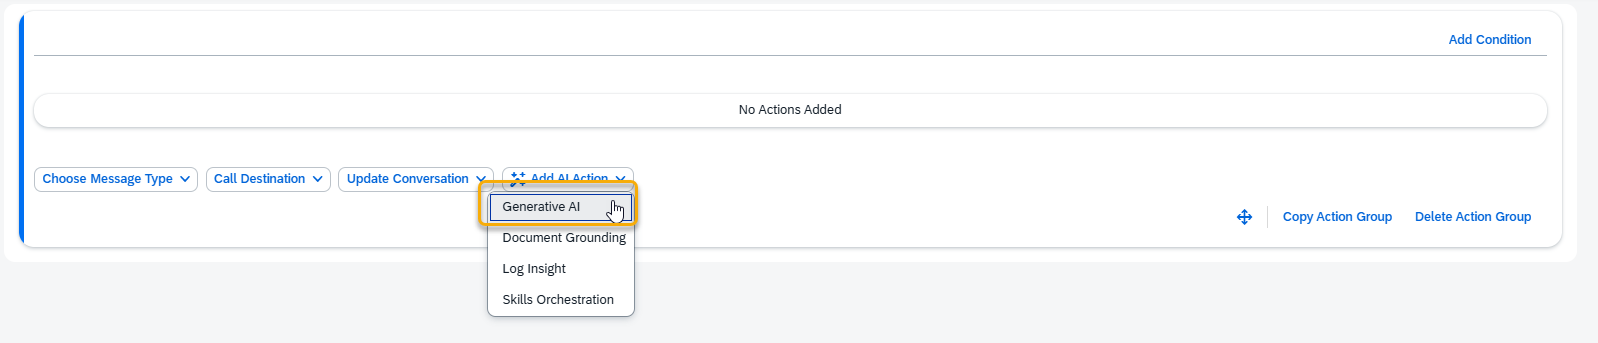
Step 1. Create a Generative AI Action by pressing the button at the bottom of an Action Group :
Step 2. A new Generative AI Action will appear and be ready to be filled in. Let’s set up this block step by step.
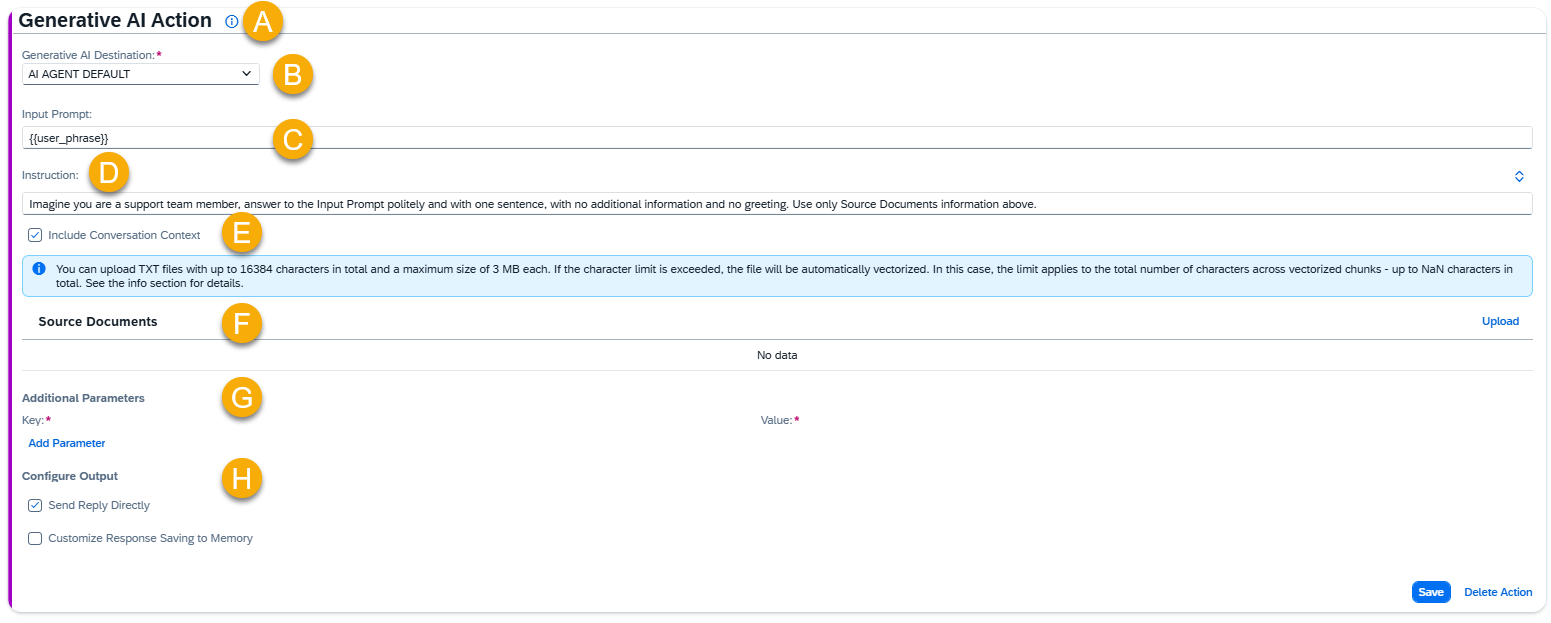
A – Help Dialog
For guidance on the action setup, click the Information Icon. A help dialogue with instructions and examples will appear.
B – Select the Generative AI Destination
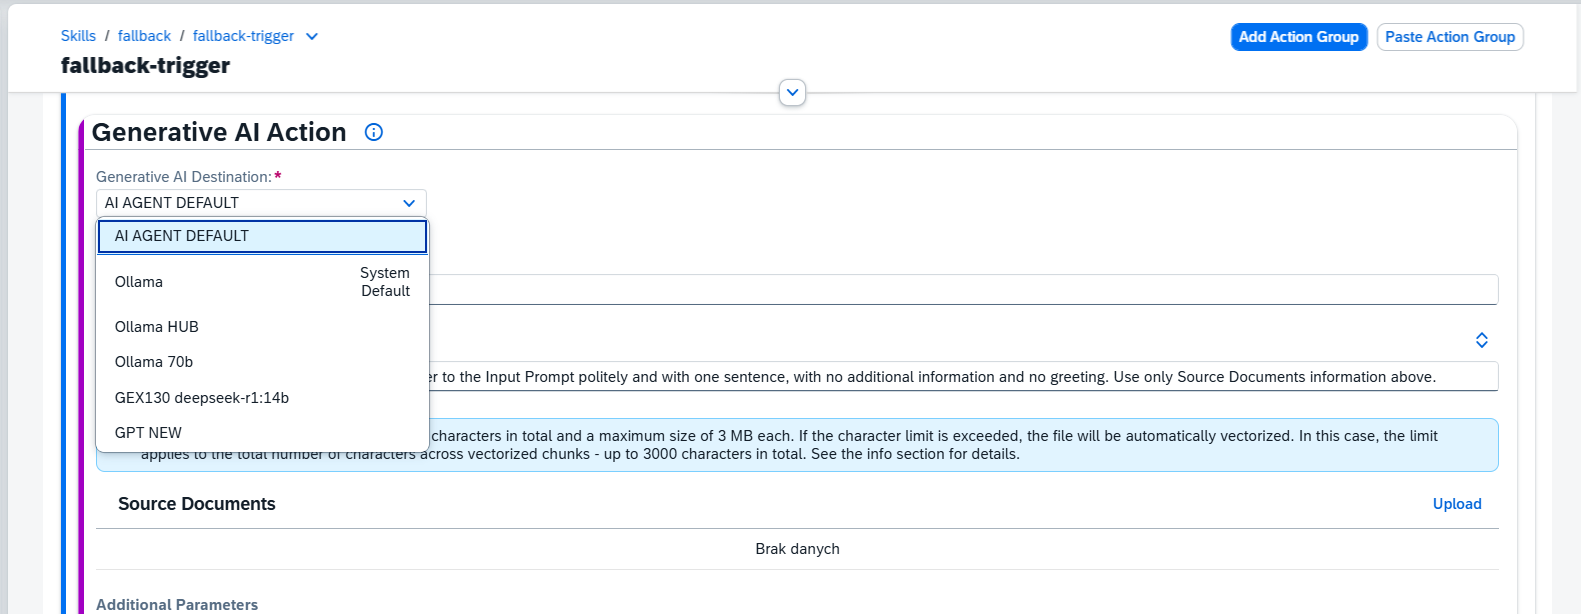
This field defines the AI model used to generate responses. By default, when you create an Action, it is set to use a hardcoded mask called “AI AGENT DEFAULT”. This is not the name of a specific model and does not exist in the model hub.
Instead, “AI AGENT DEFAULT” is a placeholder that always points to the current default generative AI model assigned to the AI Agent.
You can override this by selecting a specific model for your Action (e.g., Ollama). If you do, the Action will always use that model—even if the AI Agent’s default changes later.
C – Set the Input Prompt
The Input Prompt field holds the question asked to the AI. It usually includes the User Phrase ( the exact phrase the user writes), which is combined with Instruction and Source Documents to create the Context for Generative AI.
You can enhance {{user_phrase}} by adding additional text or memory parameters. You can choose to remove {{user_phrase}} entirely. If removed, the Generative AI will generate output based solely on the instructions provided and will ignore user messages.
Example Input Prompt 1: {{user_phrase}}
Example Input Prompt 2: Answer this question: {{user_phrase}} in context of {{memory.rt_leave_request_type}}.
In this example, we only use {{user_phrase}} without any additions.
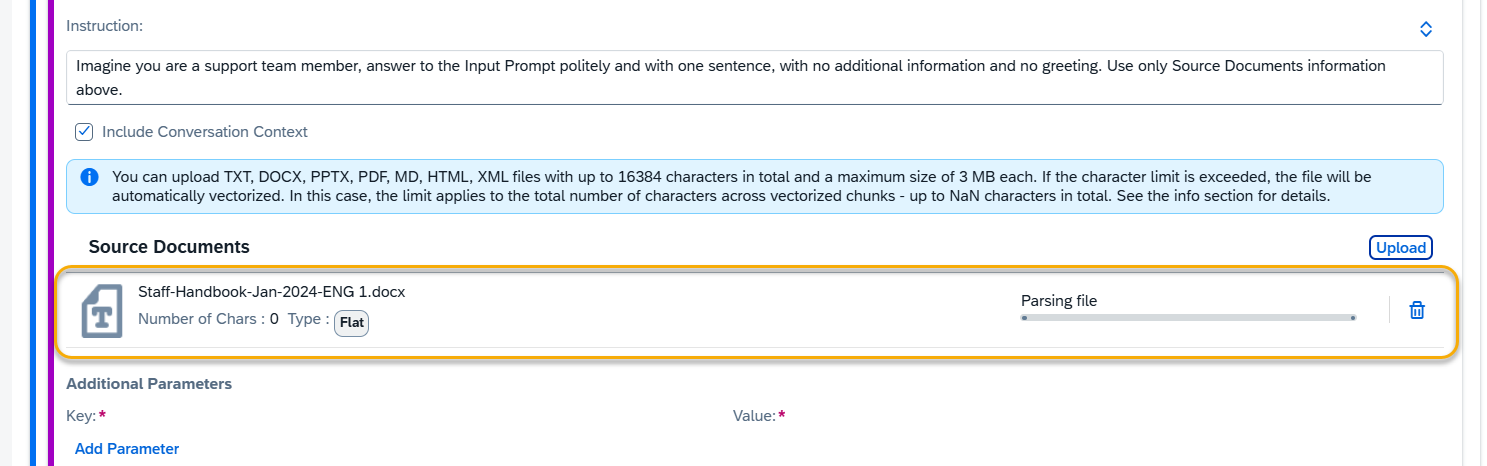
D – Write the Instruction
The text in the Instruction field guides Generative AI in crafting its response. Together with Input Prompt and Source Documents, it forms the Context for Generative AI. Attached Source Documents are added at the end of the Context by default. If you need to refer to the specific source document in the instruction body, you can use tag mask {{document.document_name}}, where document_name – the name of the attached document (including file extension) in this Action.
Example Instruction 1:
You are an experienced support agent, produce the reply for the input prompt in the context of user support with one sentence with no additional information, using only the information attached below.
Example Instruction 2:
Imagine you are a sales agent, and your aim is to sell the XYZ and ABC products. Use the {{document.Instruction for product XYZ.txt}} for providing the reply concerning product XYZ and {{document.instruction for product ABC.txt}} for providing the reply about the product ABC. If the user asks about topics other than products XYZ and ABC, try to convince them to switch the topic to the products discussion. The answer should be 2 sentences maximum.
NOTE: If your input prompt exceeds six lines, you can expand the text area for more comfortable editing.
Click the Expand button in the top right corner, next to the instruction field. When you finish editing the instruction field, press the Save button. The text area will return to its default size. If you need to expand it again, press the Edit button and click Expand once more.

E – Include Conversation Context
When enabled, previous messages from this conversation will be included in the Generative AI prompt to provide context for more relevant responses. Can be toggled off if a clean, context-free prompt is required.
F – Upload Source Files
Generative AI Action allows to attach source files that, along with the Input Prompt and Instruction, will be used by Generative AI to generate a response. If no document is provided, the AI will generate responses based on general knowledge.
- Purpose: Attach source files that, along with the Input Prompt and Instruction, will be used by Generative AI to generate a response. If no document is provided, the AI will generate responses based on general knowledge.
- Usage: You can upload one or more documents, or leave this field empty if not required.
- Character Limit: The total size of the attached documents is restricted by the Max Size of Context setting in the AI Agent. For instance, if the model’s Max Context Size is set to 2048 tokens (approximately 8,192 characters, without spaces), the content of the documents must fit within this limit. This limit applies to both the input prompt and the generated output, combined.
- Important: If the file exceeds the character limit and Document Grounding is activated in your AI Agent, you will receive a prompt to vectorize document for grounded search. This enhances search accuracy by retrieving relevant information from large data sources. If Document Grounding is not enabled or the file still exceeds the limit, the document must be reduced in size or reworked to fit within the allowed character count.
- Restriction: With a 2048-token limit (~8,192 characters), the attached documents should not exceed 1-2 pages of text (in a standard MS Word document, 11-point font).
- Examples:
- 1 document of 1-2 pages (~8,000 characters)
- 2 documents of 1 page each (~4,000 characters per document)
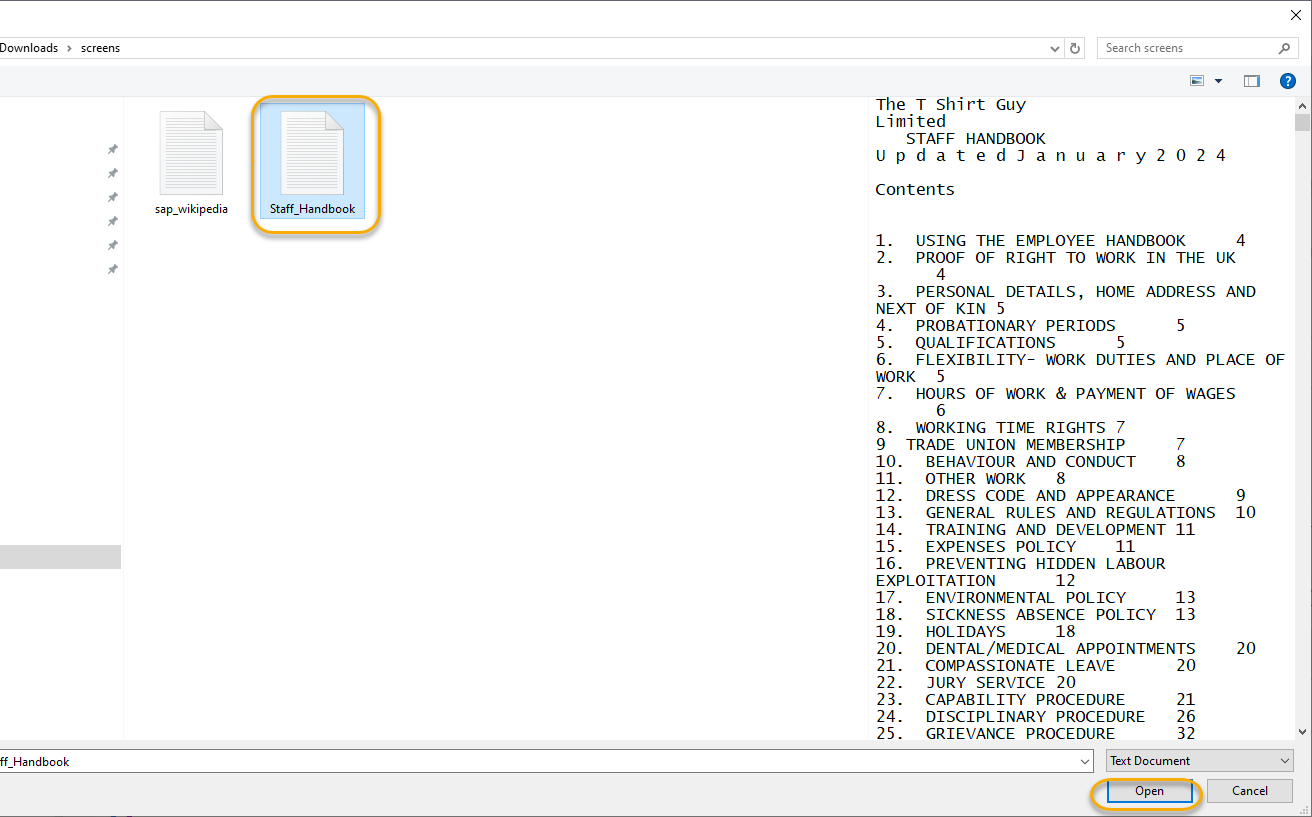
In order to upload documents press the Upload button.

Select a file you want to upload:
If the file doesn’t exceed size or character count limits, it will be saved as FLAT type.
If the file does exceed at least one limit, it will be vectorized, and available in the Grounded Documents Hub Application for reuse
File will start uploading, the progress can be visible next to the file name.
NOTE: The document formats allowed to be uploaded are set in Generative AI Settings section.
G – Additional Parameters
Parameters for the Generative AI Destination are applied by default. You can view these parameters in the AI Agent Configurator application (settings section) for the respective connected Generative AI. To customize the AI’s behavior further, you can redefine existing parameters or add new ones using the Add Parameter function. Save changes in the end.

Available Parameters:
- Ollama Models: This link provides a comprehensive list of valid parameters and values for Ollama models.
- OpenAI Models: This link provides a comprehensive list of valid parameters and values for Open AI models.
For other Generative AI models refer to the respective documentation of the model provider.
NOTE: Changing default parameters can significantly influence the AI Model’s performance and responses. Therefore, it is recommended to proceed with caution when making changes.
H – Configure Output.
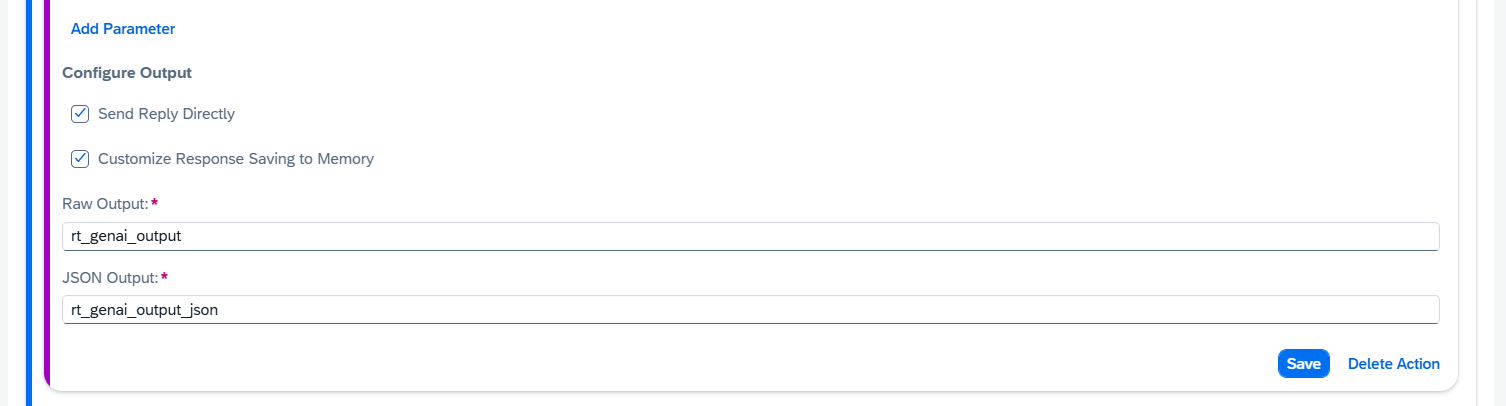
Send Reply Directly
When selected, the generated reply will be sent immediately to the chat with the end user.
If not selected, the reply will not be sent automatically, but will be stored in memory parameters for later use.
Customize Response Saving to Memory
When selected, you can adjust the default memory parameters used to store the AI response.
Raw Output: Stores the complete, unprocessed response.
JSON Output: Stores the structured, JSON-formatted response (if available).
Example usage in messages:
Raw Output: {{memory.rt_genai_output}}
JSON Output: {{memory.rt_genai_output_json}}

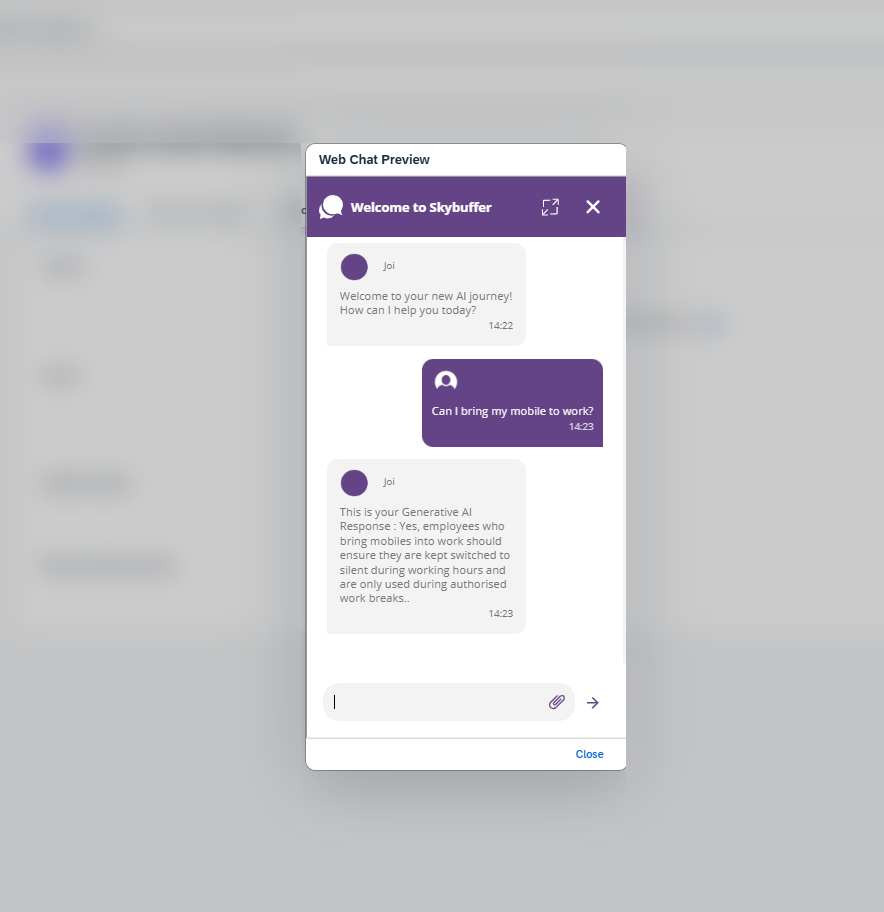
Step 3. Save your changes when done editing, and check the Generative AI block.
Open a Webchat Preview window and ask a question. In this example we saved the response to a variable, and displayed it after a hardcoded “This is your Generative AI Response” text :
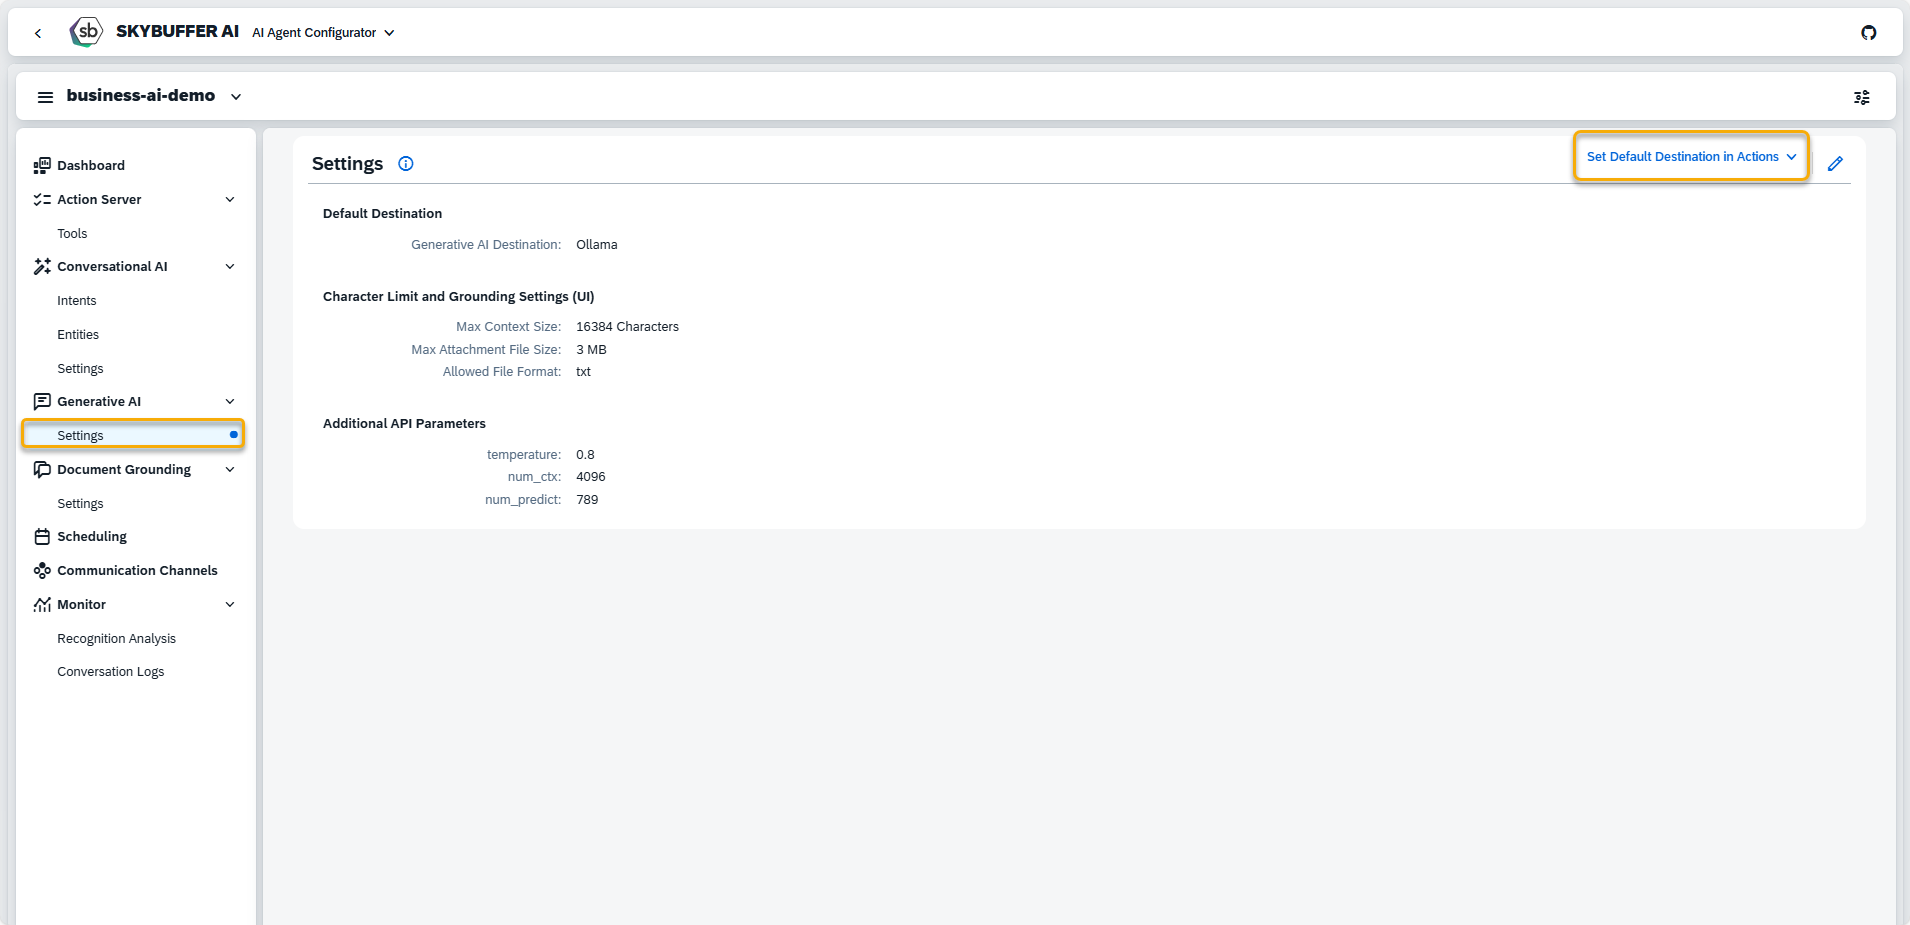
Step 4. Settings Section
Navigate to the Settings section, located in the panel on the left side of your screen.
Set Default Destination in Actions
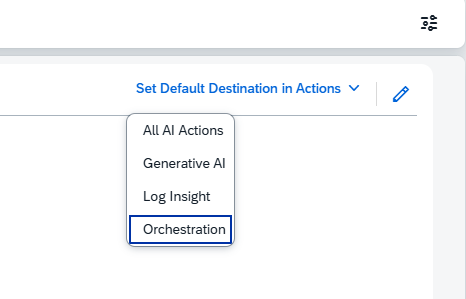
Here, you can set default destinations for different types of actions at once by clicking the Set Default Destination in Actions button.
Choose preferred type of actions:
- All AI Actions
- Generative AI
- Log Insight
- Orchestration
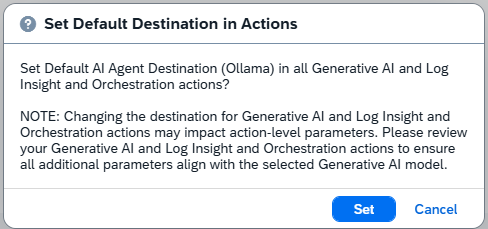
By clicking the Set button, you agree to apply the Default AI Agent Destination to all actions with the selected type.
Edit Settings
To edit a parameter, click the pen icon to enter edit mode and make the desired changes.
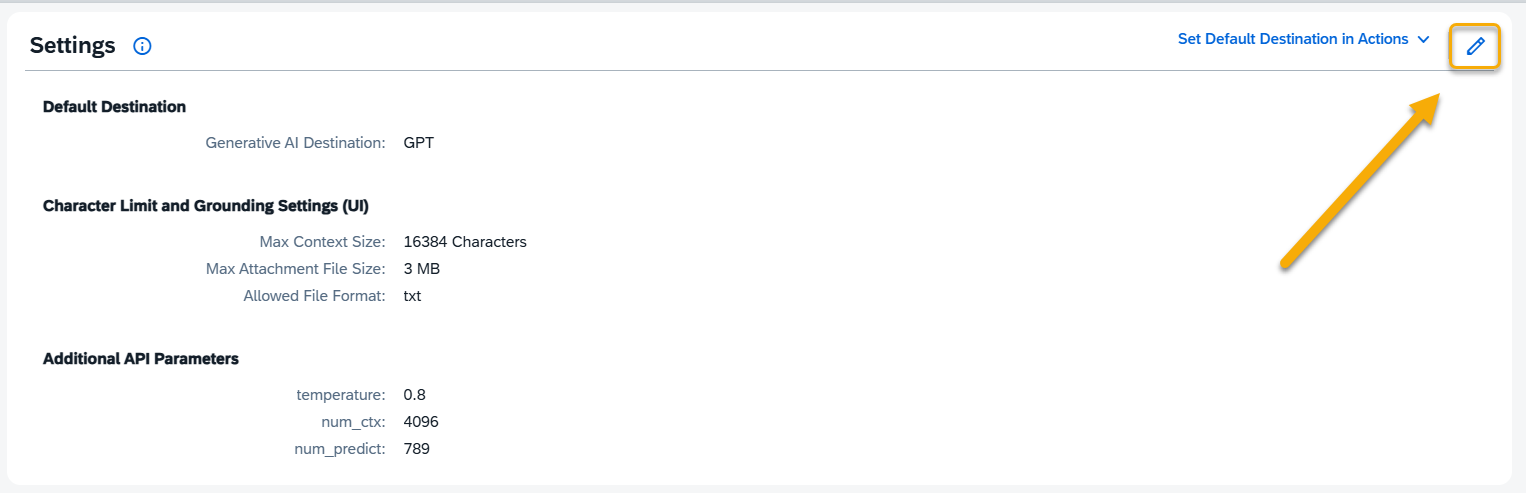
Default Destination
The Generative AI Destination is the configured connection used to access machine learning models in your system. These destinations are managed in the Models Hub application.
To update or assign the default destination, select from the available list.
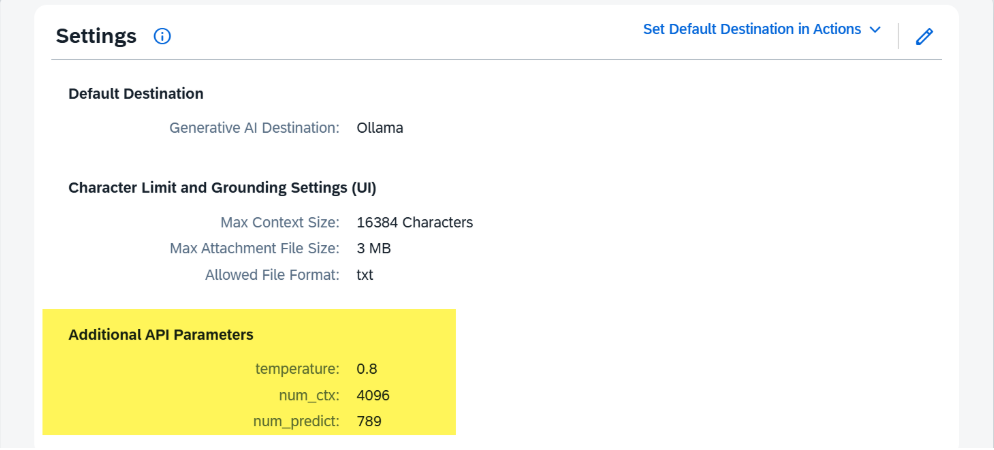
Character Limit and Grounding Settings (UI)
These settings determine how content limits are calculated for display and interaction, but they do not affect the AI model’s actual response.
- Max Context Size: Defines the character limit (excluding spaces) for input and output combined in a Generative AI action. This setting should correspond with the model’s token capacity.
Example limits:- Ollama: ~16,384 characters
- GPT-3.5 and GPT-4 Standard: ~16,384 characters
- GPT-4 Extended: ~131,072 characters
- Max Attachment File Size: Sets the maximum file size allowed for uploads in Generative AI actions. Default is 5 MB.
- Allowed File Formats: This parameter specifies the allowed file types for upload. Users can customize this list, which will be applied in the file upload section of the Generative AI action card.
Additional API Parameters
These parameters are sent with the API request and directly impact the model’s behavior and the quality of responses. You can configure them using the ‘Add Parameter’ option in the UI.
Refer to the model-specific documentation for valid parameters:
- Ollama: Official parameter guide
- OpenAI: OpenAI API reference
- Others: Refer to the respective provider’s documentation
NOTE: Modifying these values can affect performance and should be done with care.
Step 5. Settings Section – Changing the Default AI Destination
Model (AI Destination) selected in Generative AI Settings is applied to every Action Block using Generative AI, that has “AI AGENT DEFAULT” mask selected . It is default setting.
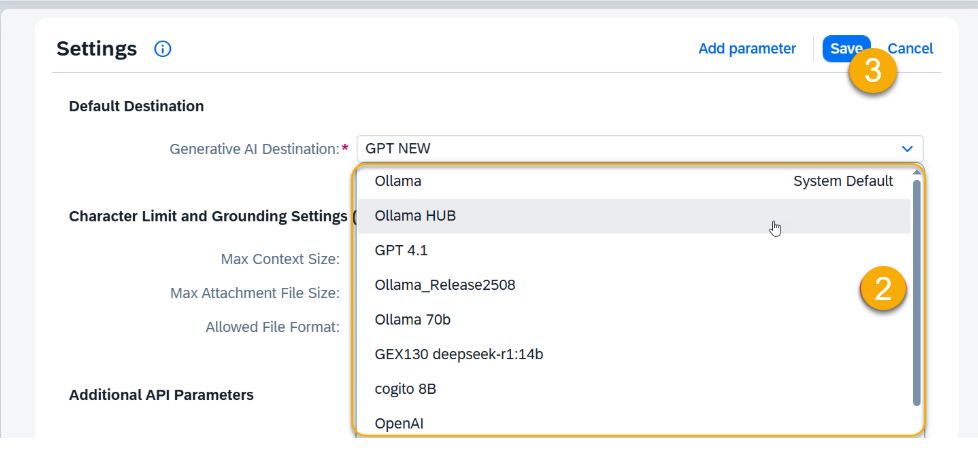
To change that model, navigate to settings and press edit in top right corner :

Select new AI Destination ( Model) from the list and press Save.
Step 5. Settings Section – Changing to a different category Model.
The process of switching default Generative AI Destination ( Model) looks slightly different, when you are also switching to a different “Family” of models. From Ollama to GPT for example. Each model might have set of custom parameters, and we can predefine them in the system. It’s important to clear them when changing model type.
Ollama-specific parameters as an example:
When attempting to change AI Destination between types, you will get a warning:
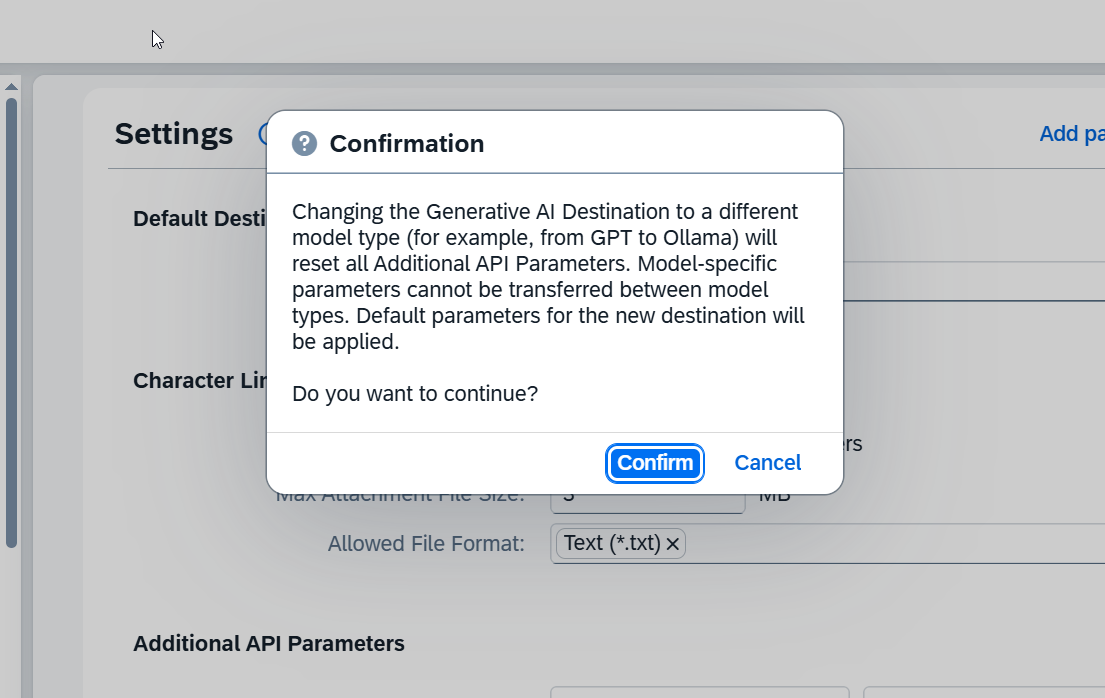
Press Confirm and then Save to change the AI Destination in such case. Additional API Parameters will be reset.