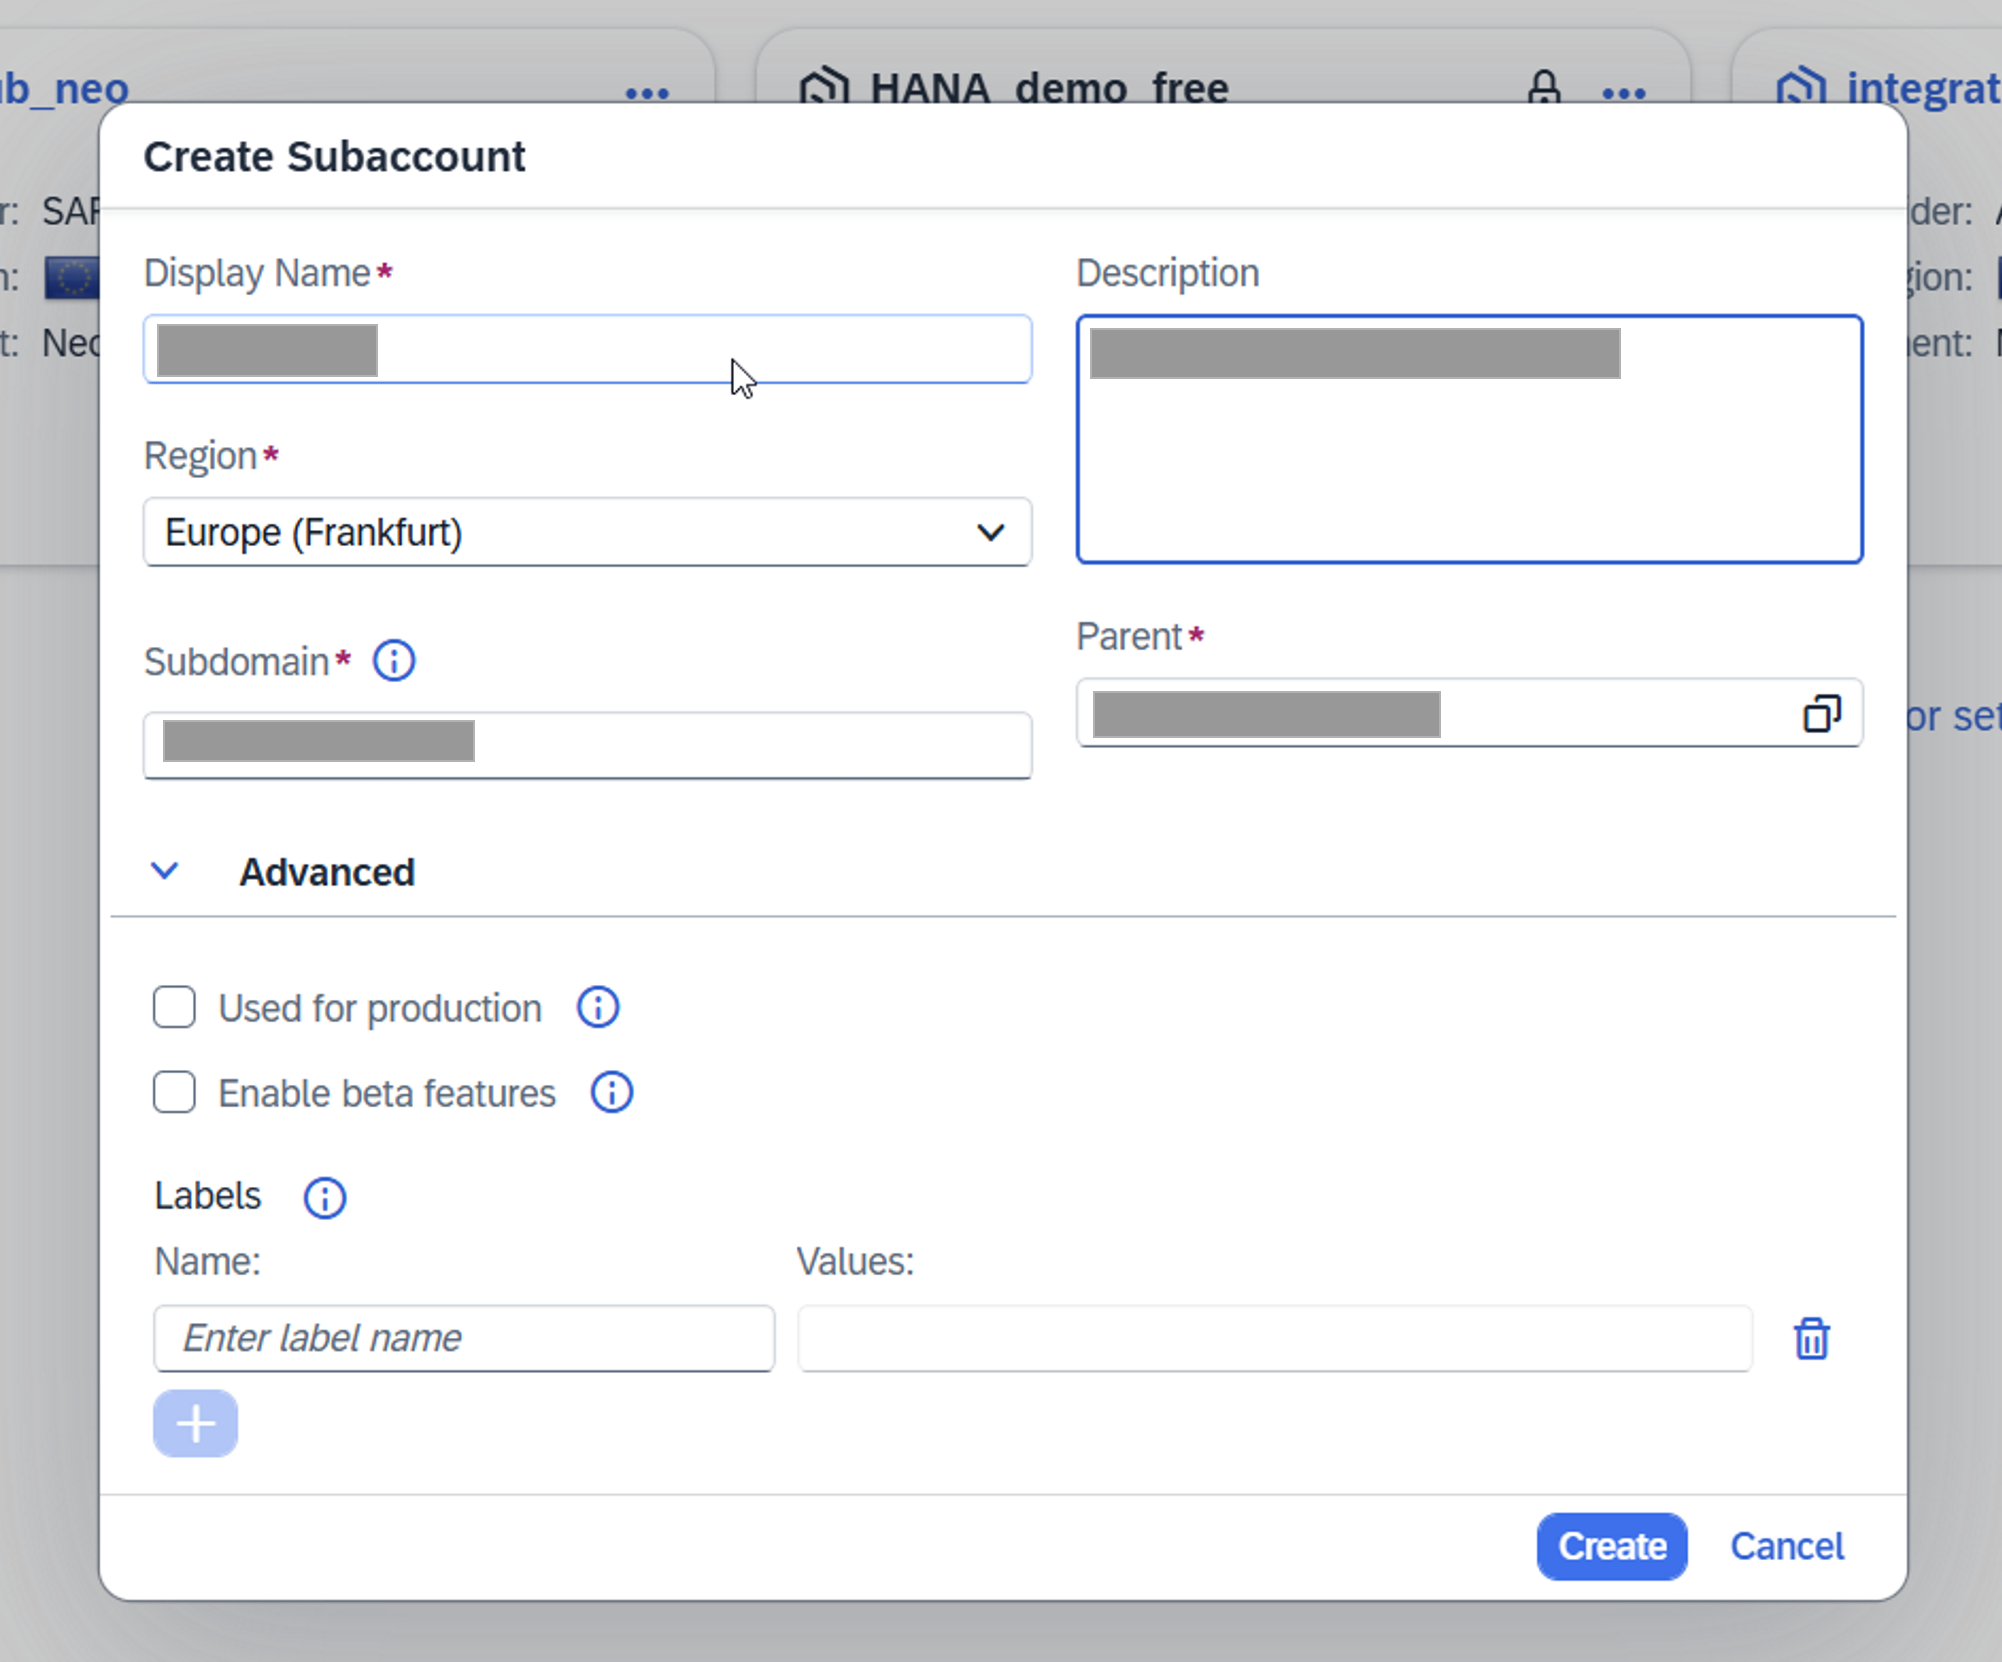
Step 1. Create BTP Subaccount
To begin, create a new subaccount in the NEO environment.
Open the BTP Cockpit, navigate to the appropriate global account, click Create Subaccount, enter the required parameters (including the subaccount name), and click Create to proceed.
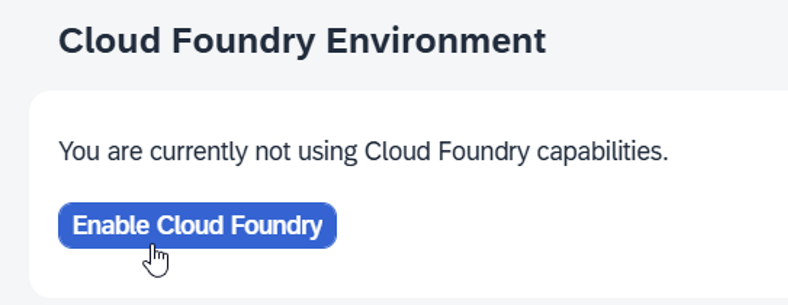
Step 2. Enable Cloud Foundry
Once the subaccount has been created, click Enable Cloud Foundry.
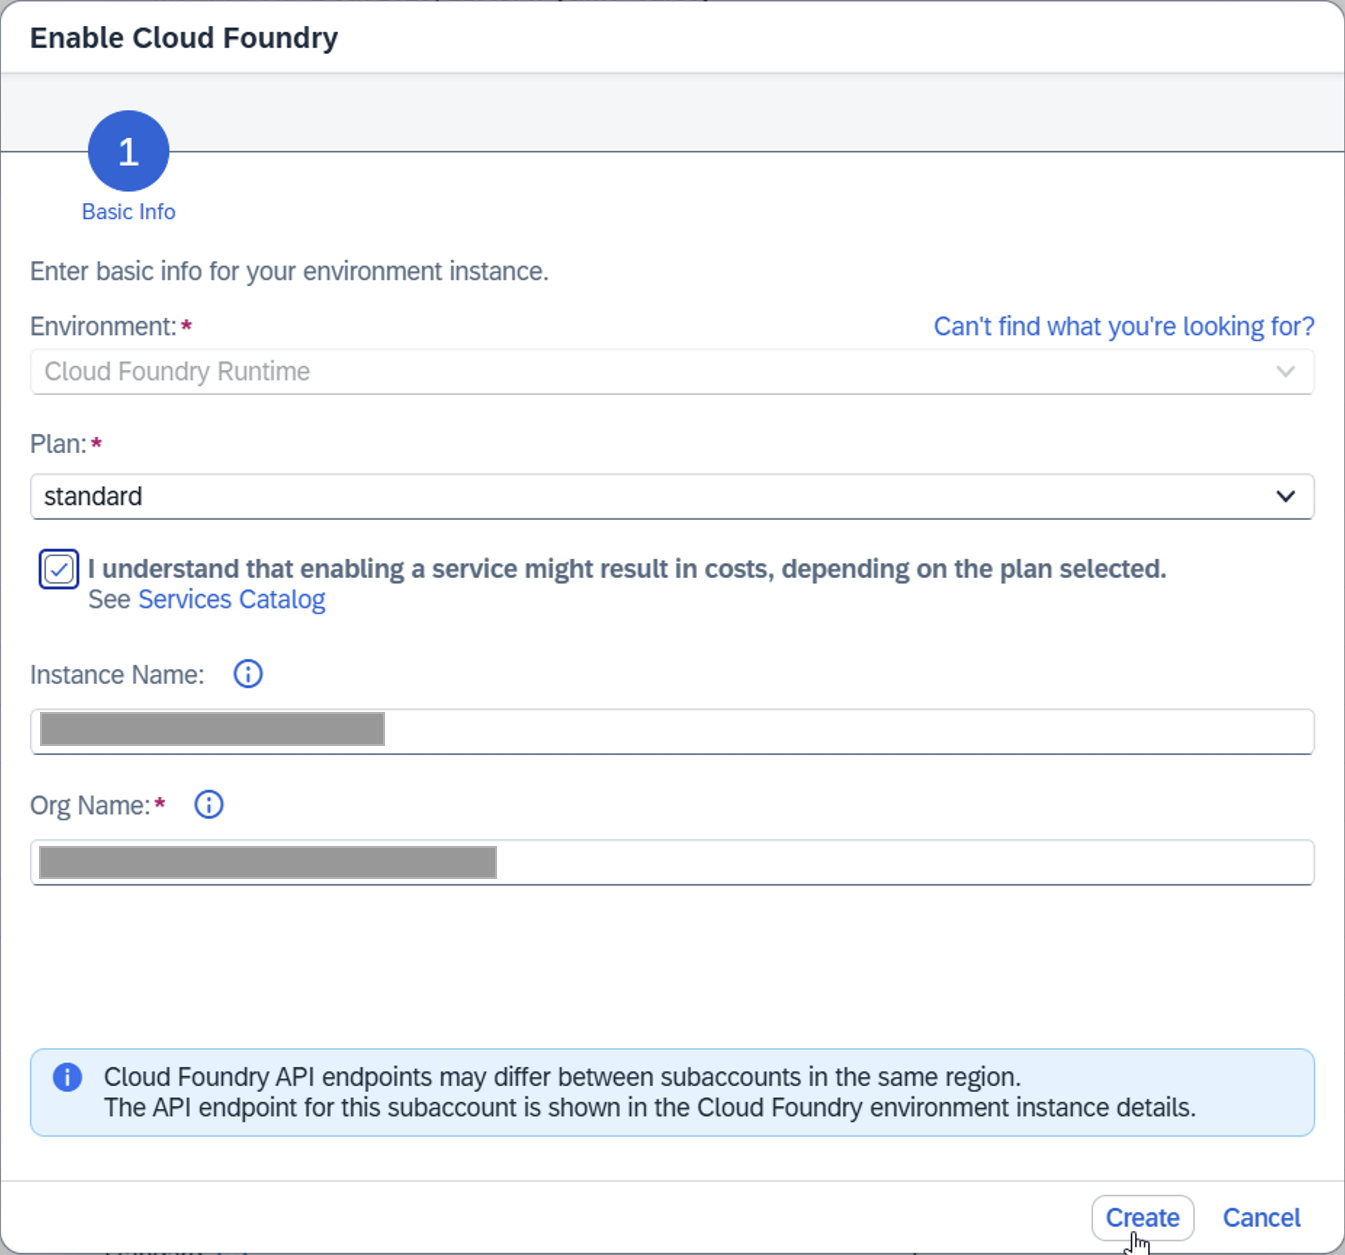
In the newly opened window, verify all parameters and confirm the service plan.
Click Create to enable Cloud Foundry.
In the newly opened window, verify all parameters and confirm the service plan, than click Create to enable Cloud Foundry.
Step 3. Activate Required Services
Navigate to Entitlements and activate the required services for the solution -> Refer to the Installation Guide
Example: Activate HANA Database Service
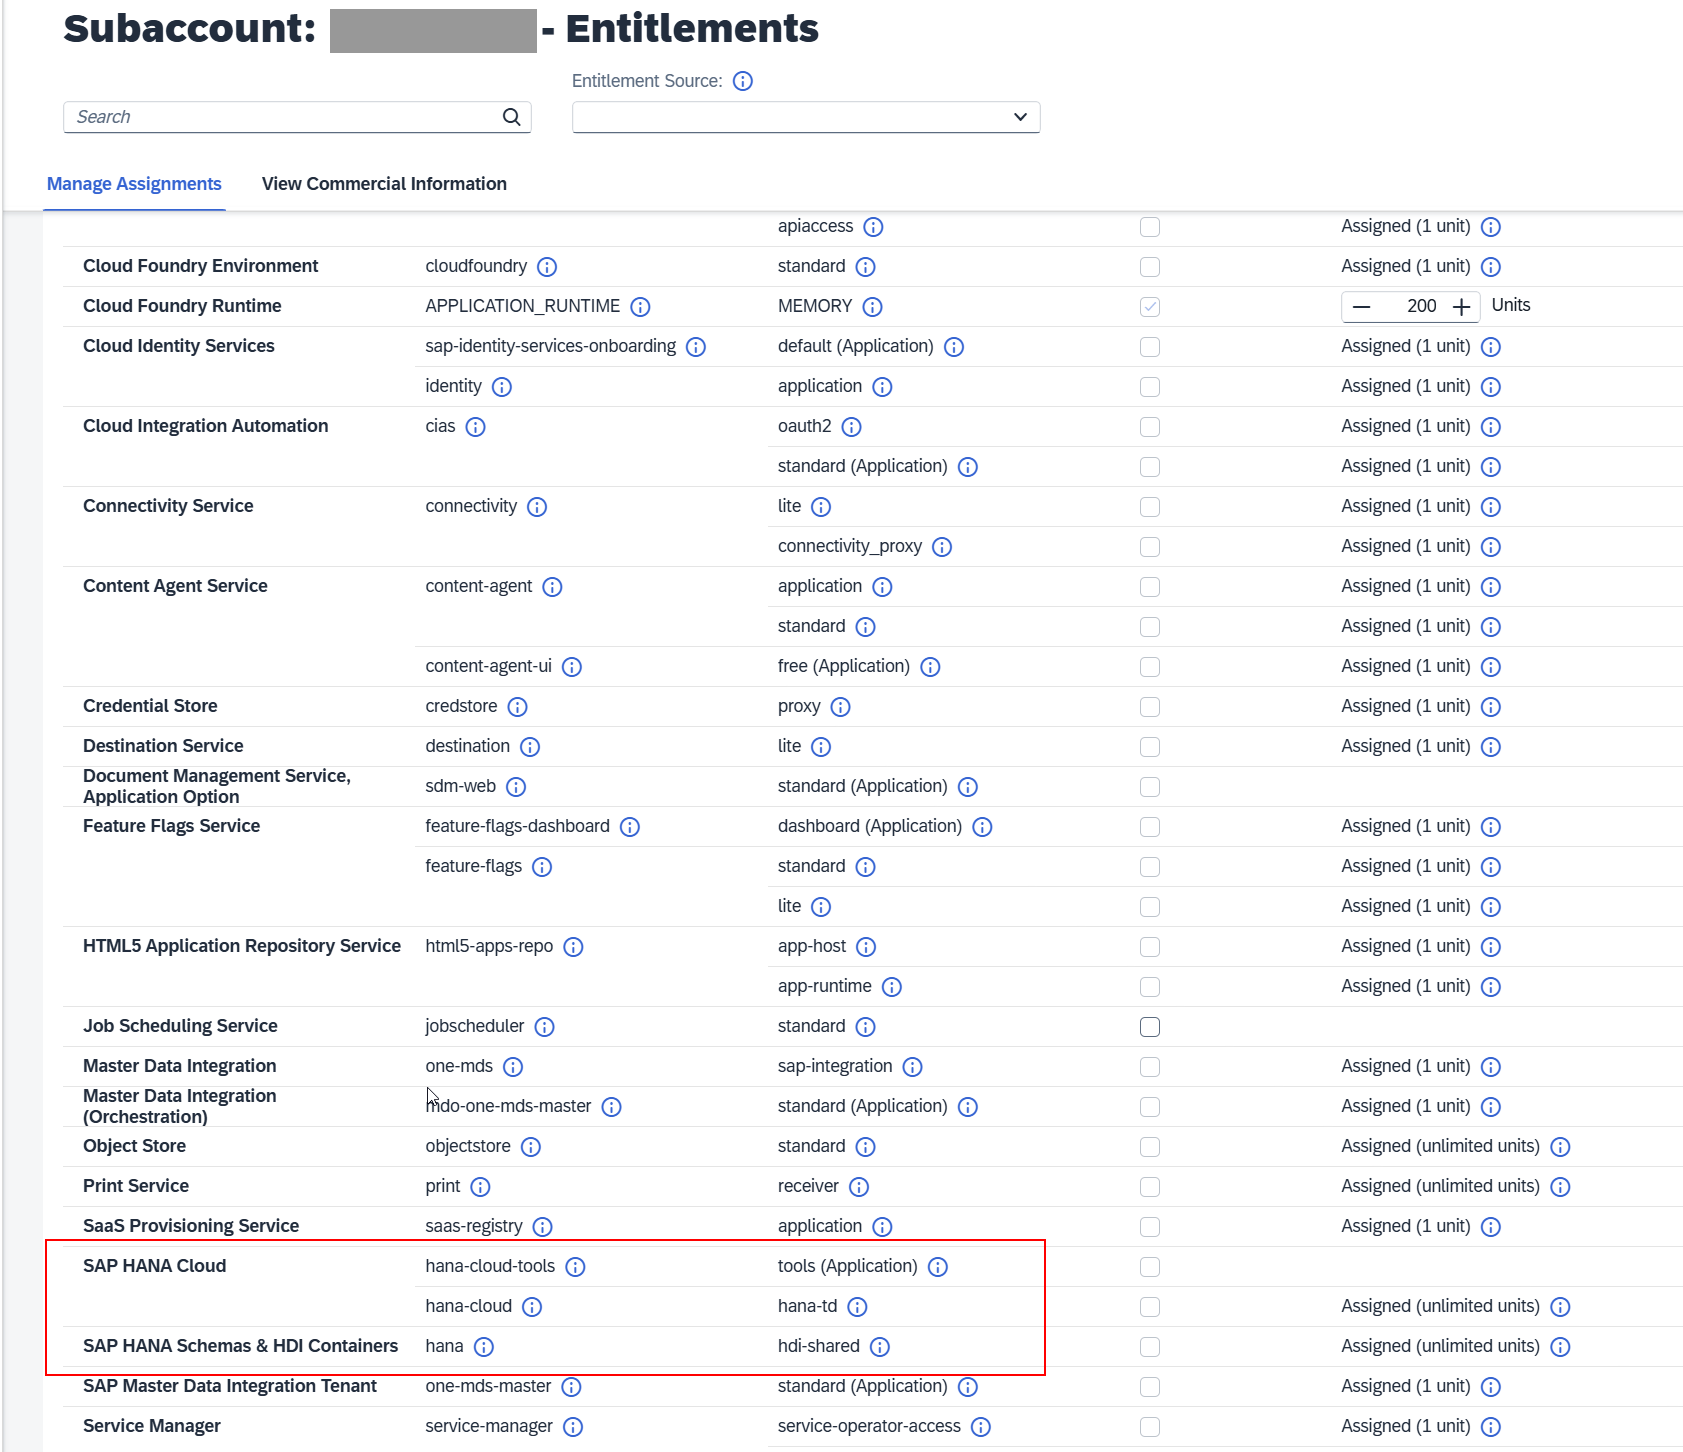
From the left-hand menu in the subaccount, go to Entitlements and click Edit.
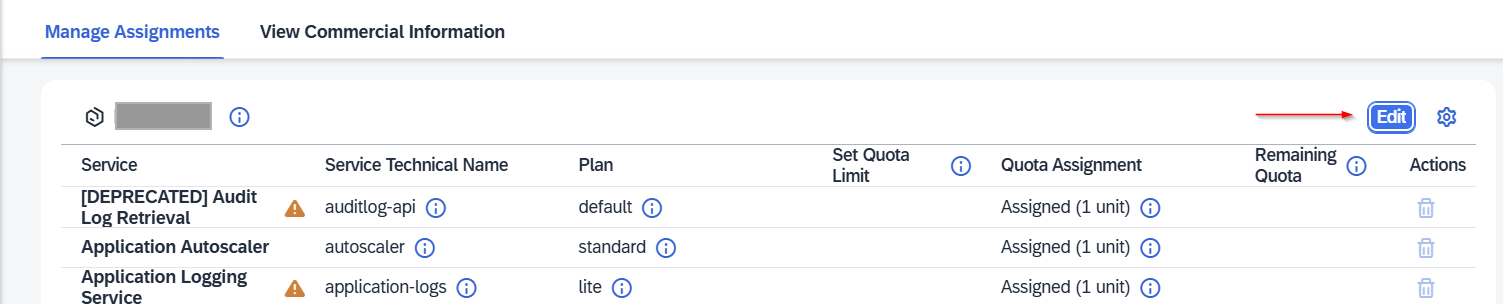
Click Add Service Plans.
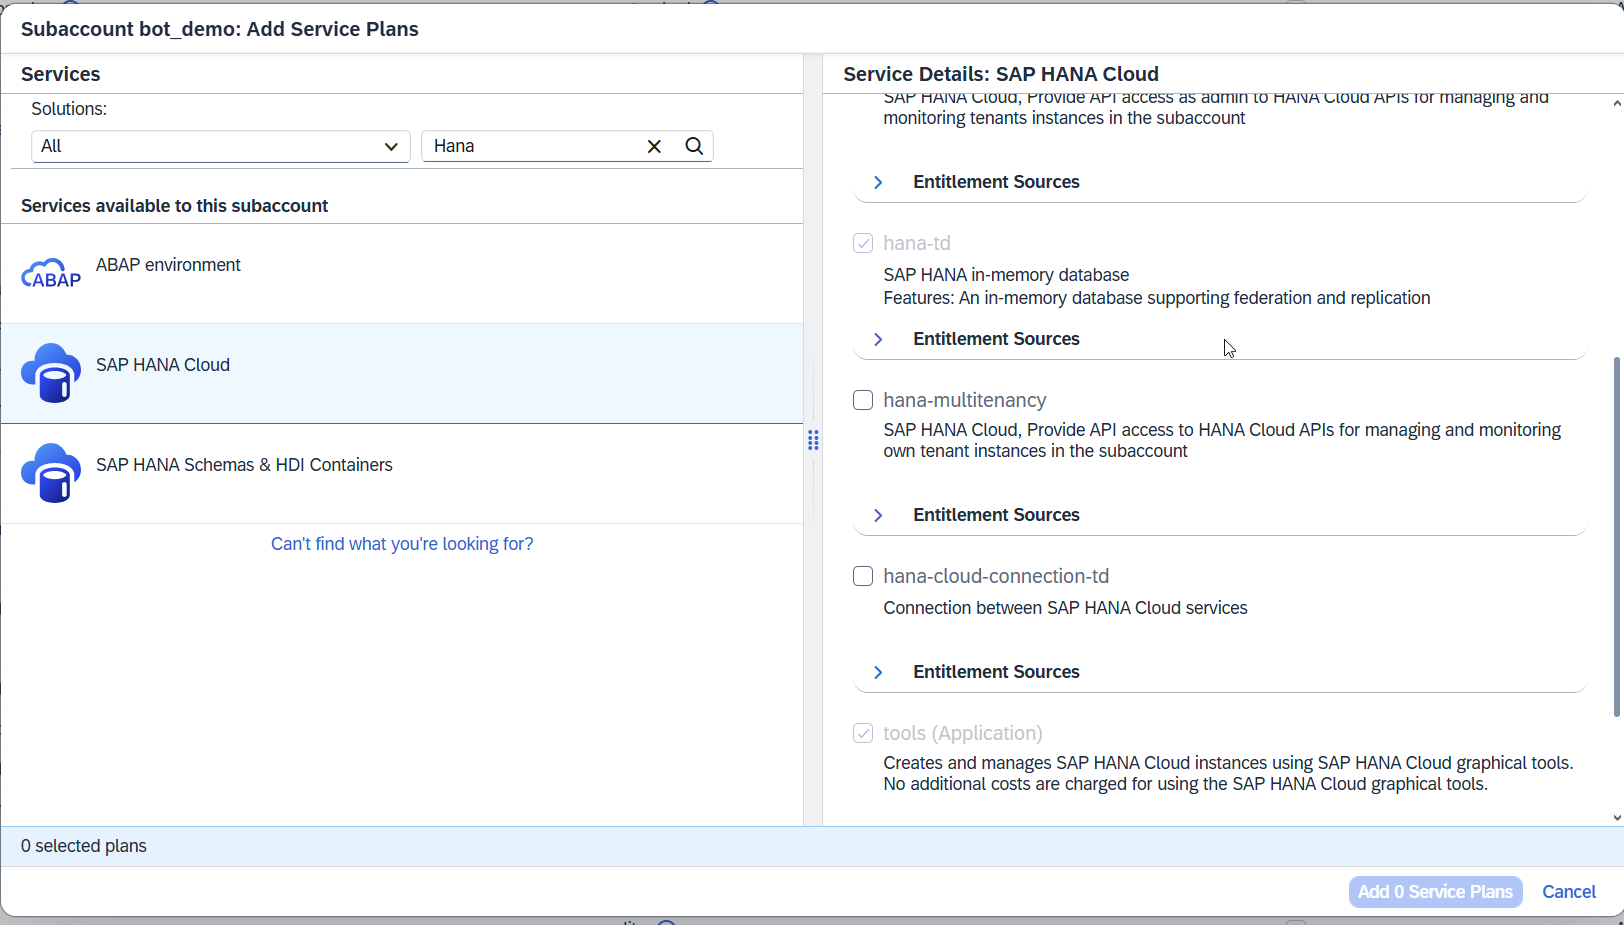
Select the appropriate services and service plans.
Step 4. Update SAP HANA and Create Instance
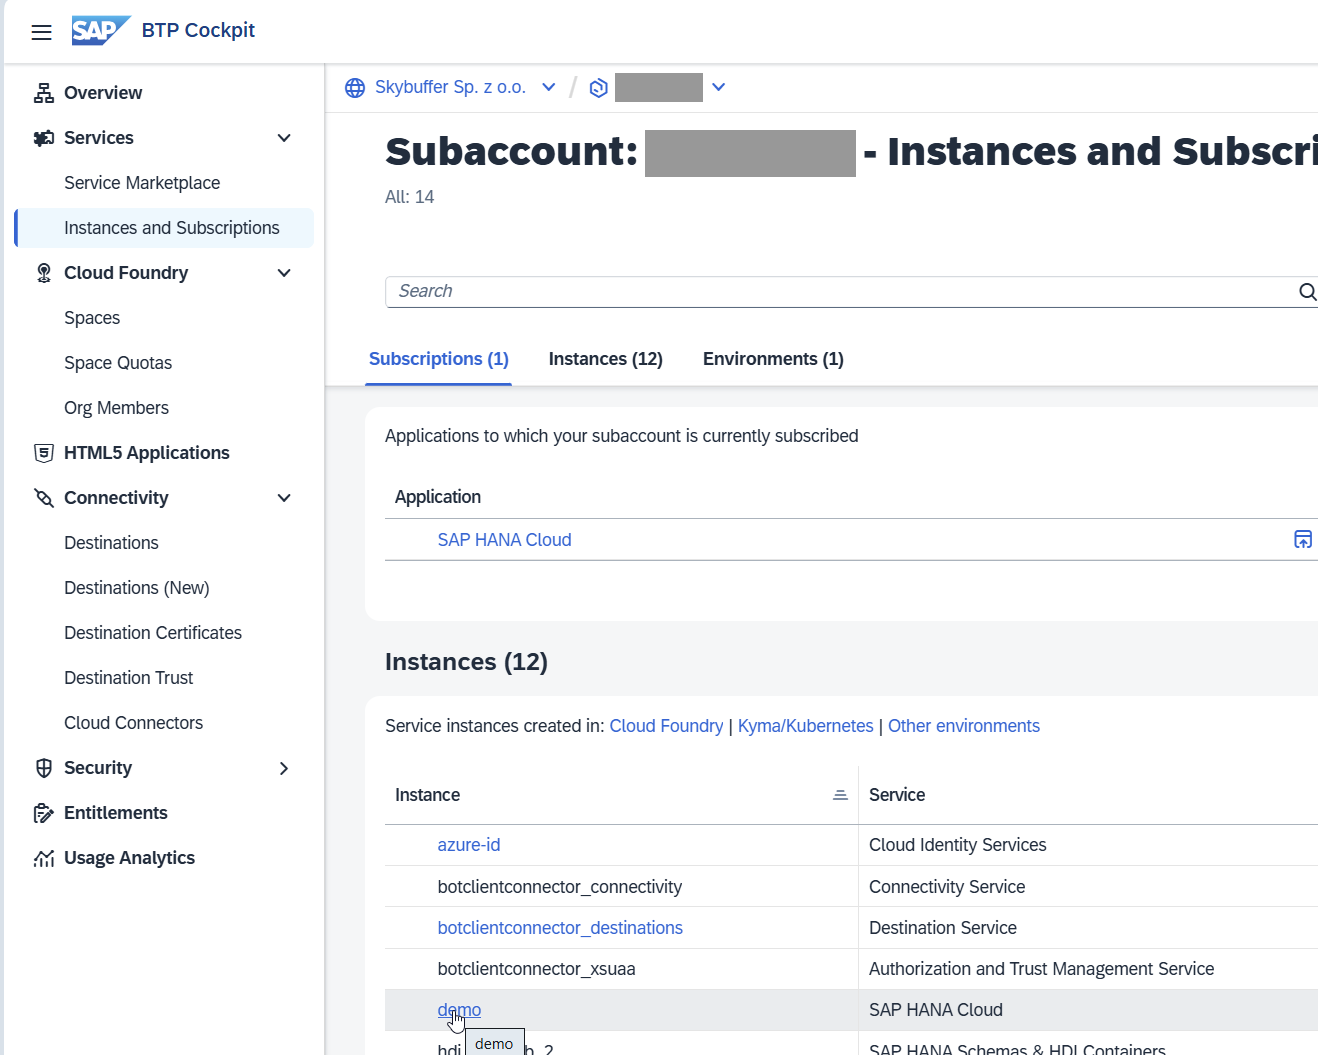
In the subaccount menu, navigate to Instances and Subscriptions.
Select a service and provide details.
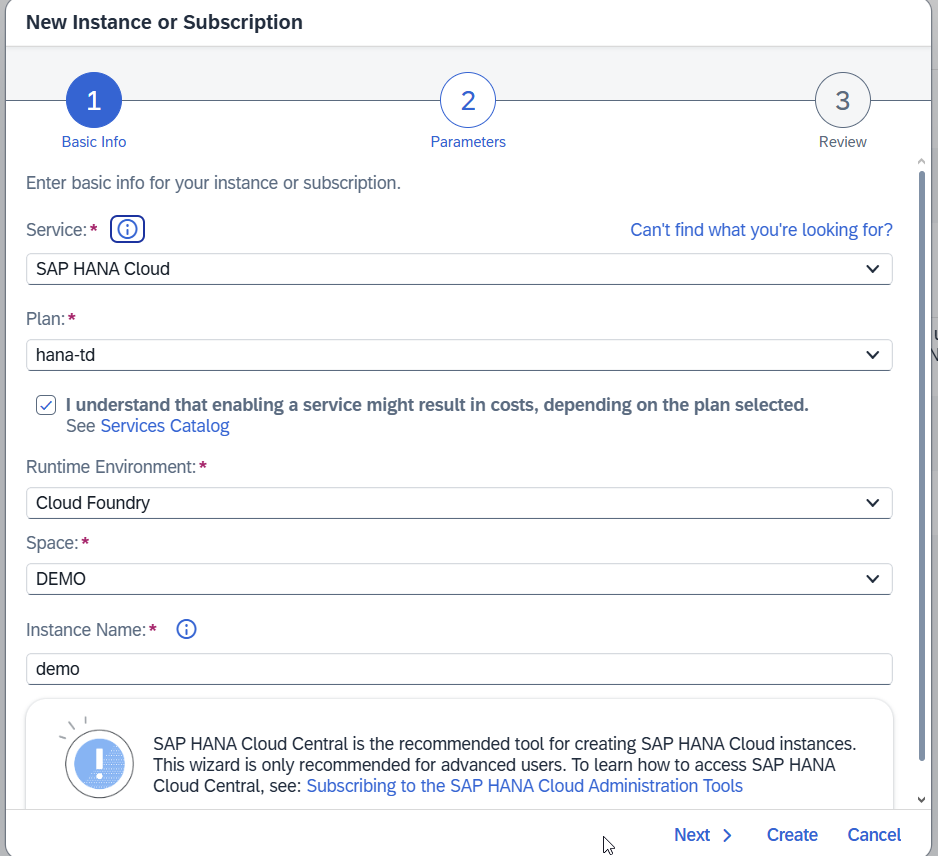
Enter the created instance:
Create Hana Instance by clicking the button Create Instance.

Wait until the instance status is Running. Once it’s ready, click the three dots in the Actions section and select Apply Patch.
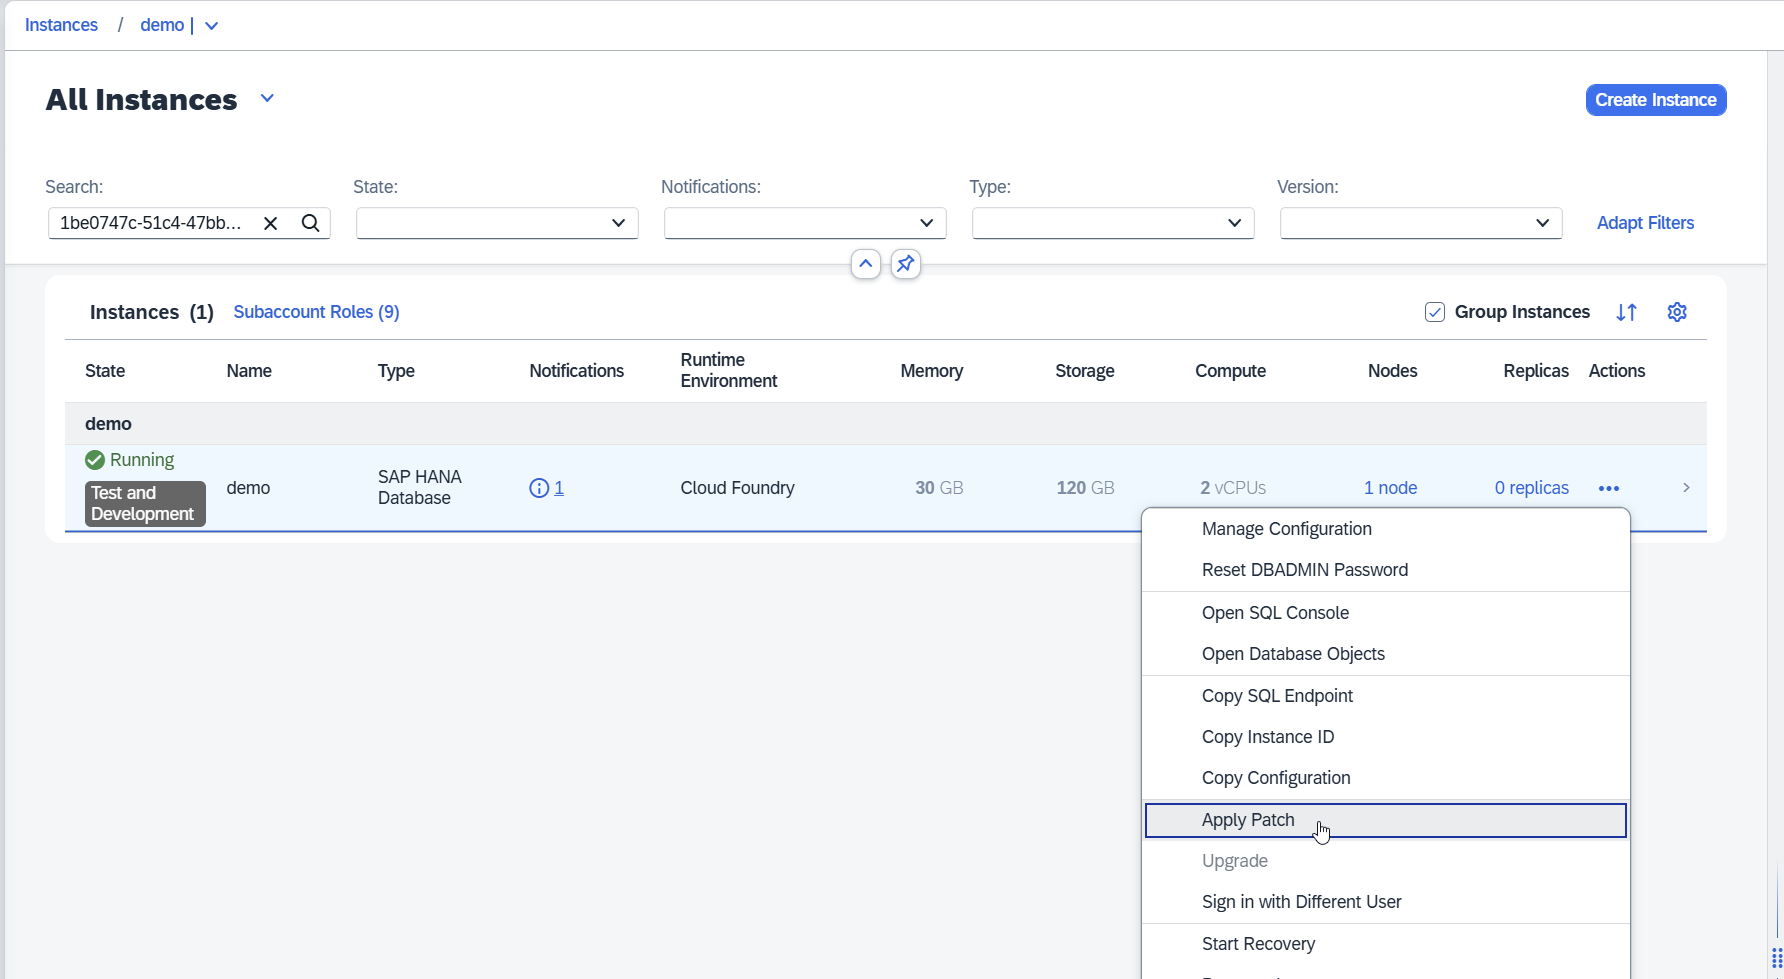
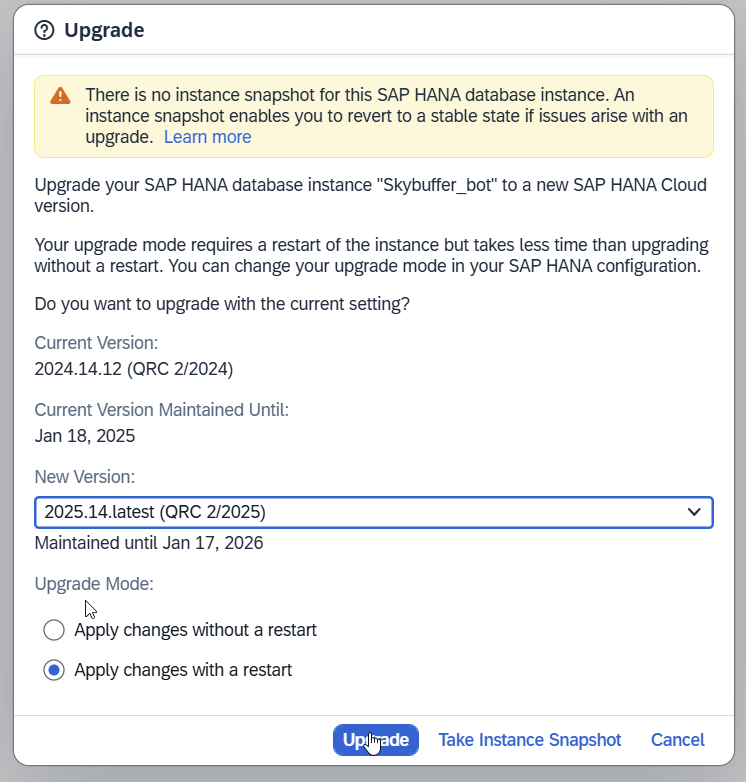
Select the latest patch and wait for the upgrade process to finish.
Step 5. Installation / Deployment of Skybuffer AI Solution
link to BTP install section -> Skybuffer AI Installation Guide on BTP
Step 6. Access Database Explorer and Create Allowed Users in HANA
By default, only the DBADMIN user is allowed to access the HANA Database Explorer.
However, to access Skybuffer AI product tables, we need to create a separate user and assign authorizations.
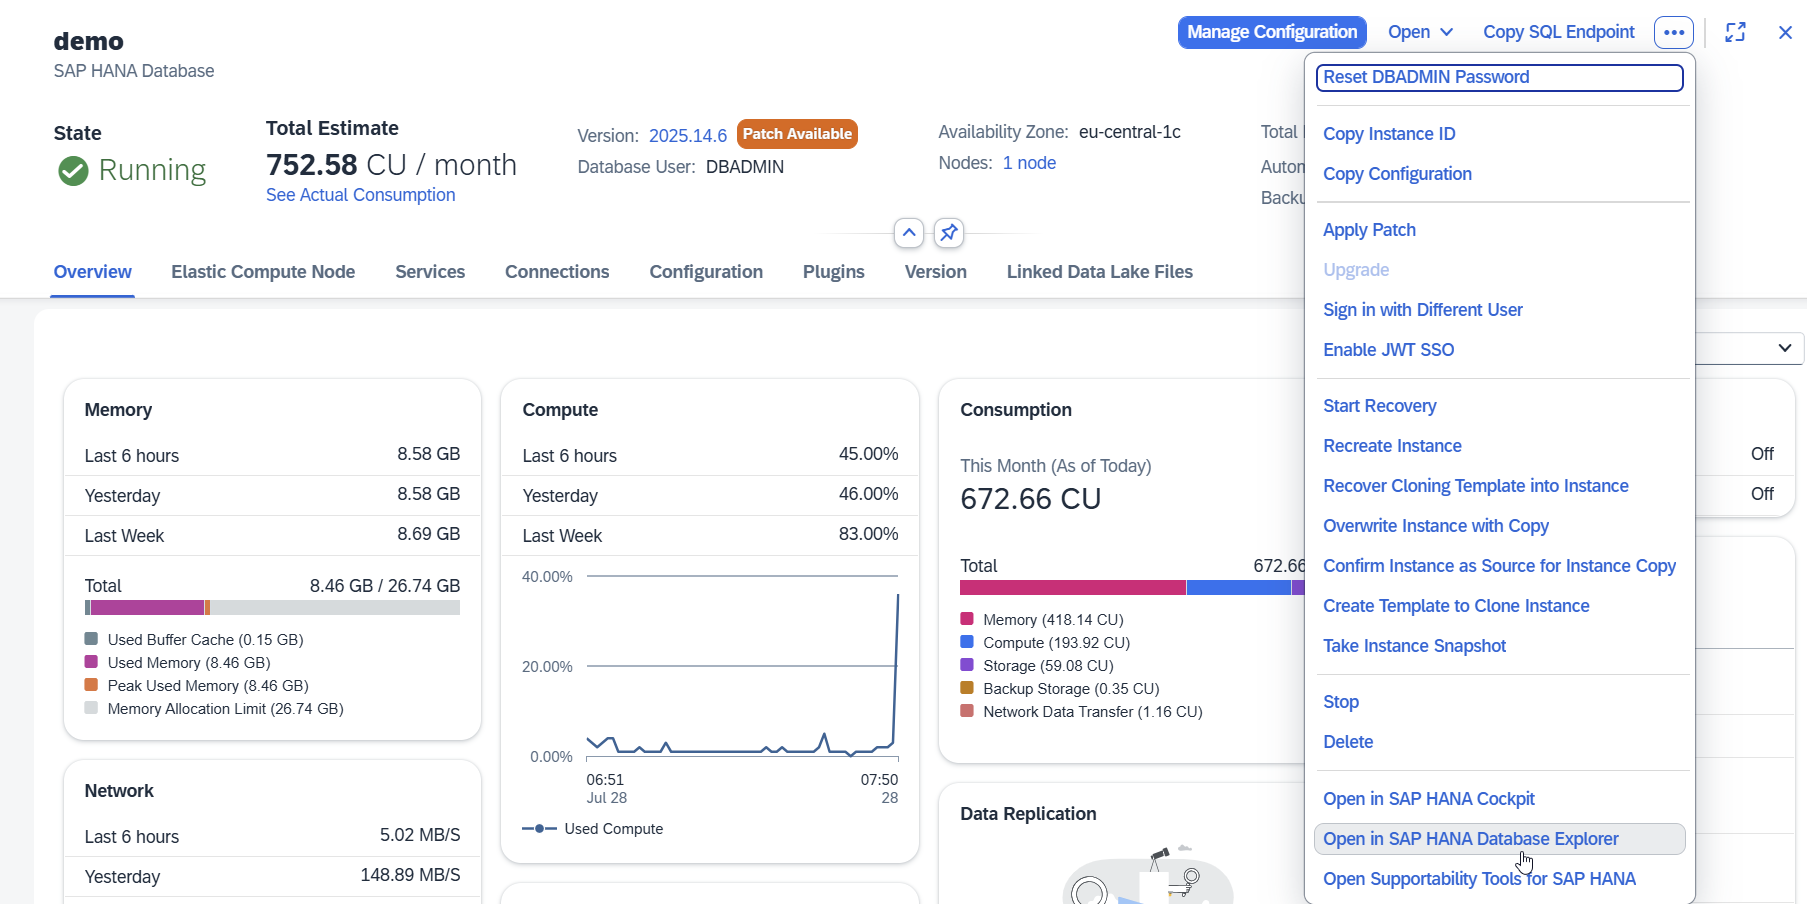
You can access the Database Explorer from HANA Cockpit.
Create a New User:
-
In HANA Cockpit, select the tenant.
-
Go to User & Authorization Management -> Users / User Groups under the Administration tab.
-
Create a new user, set the password, and assign the role authorizations needed to access Skybuffer tables.


Provide user credentials in Database Explorer
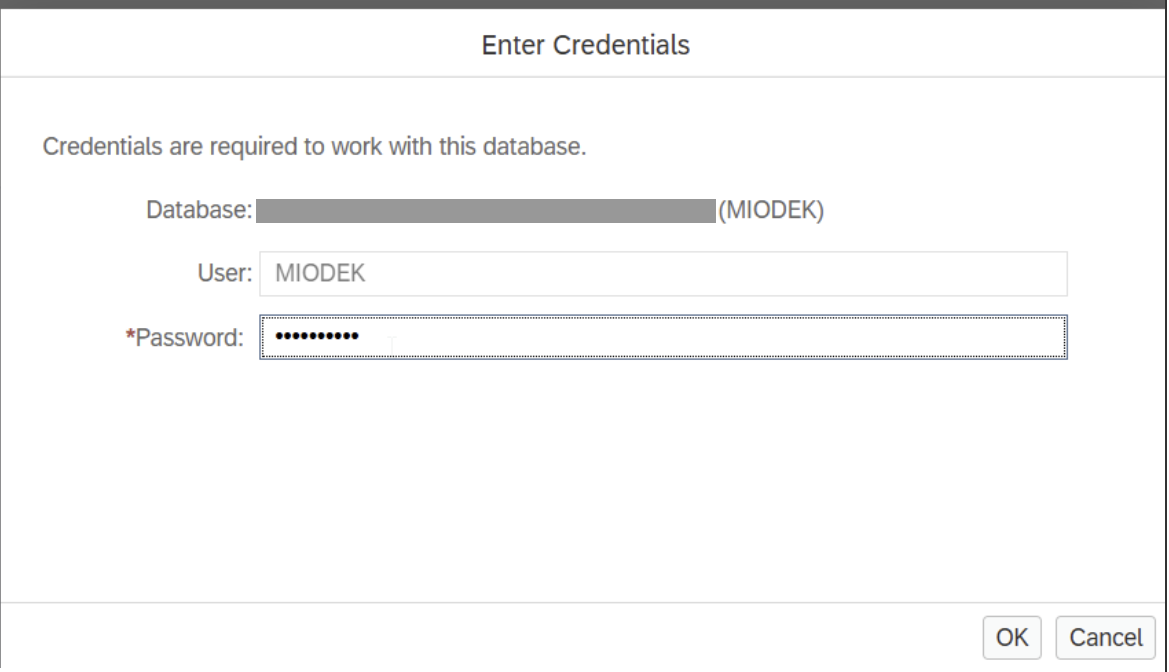
Next, add the instance.
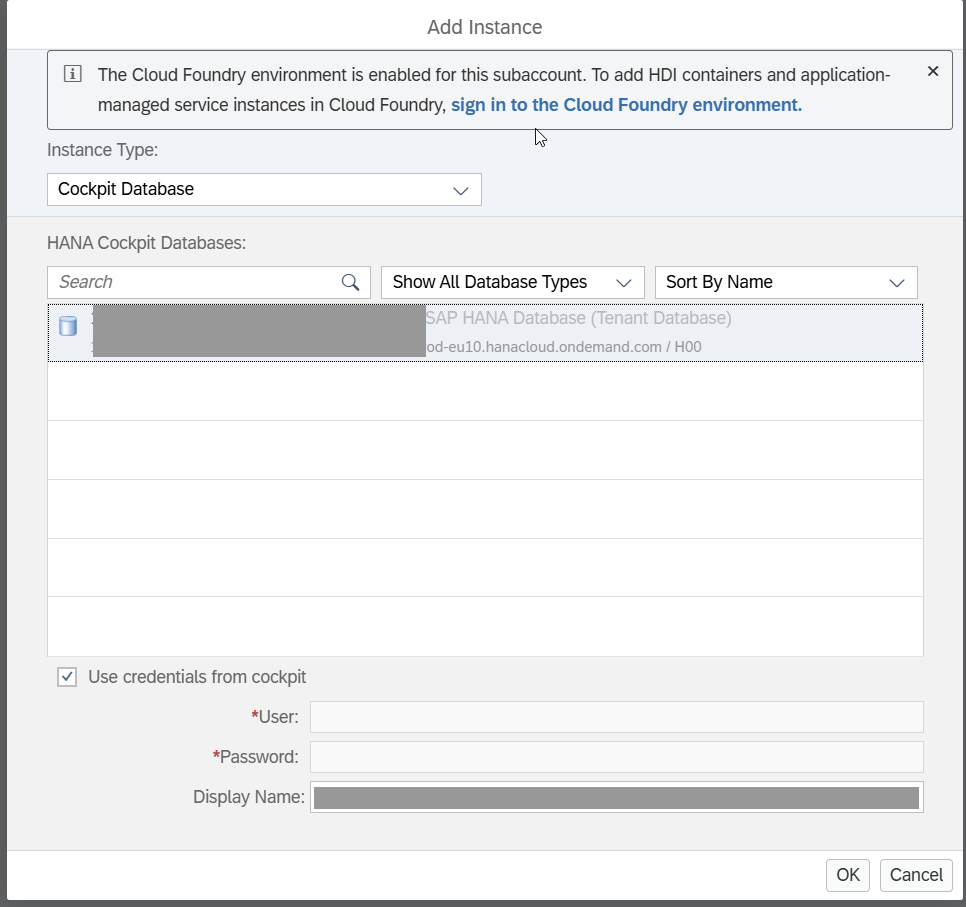
You should now be able to see the Skybuffer tables.
Step 7. AI Launchpad (Optional)
This step is optional and required only if no stand-alone GPU server is available.
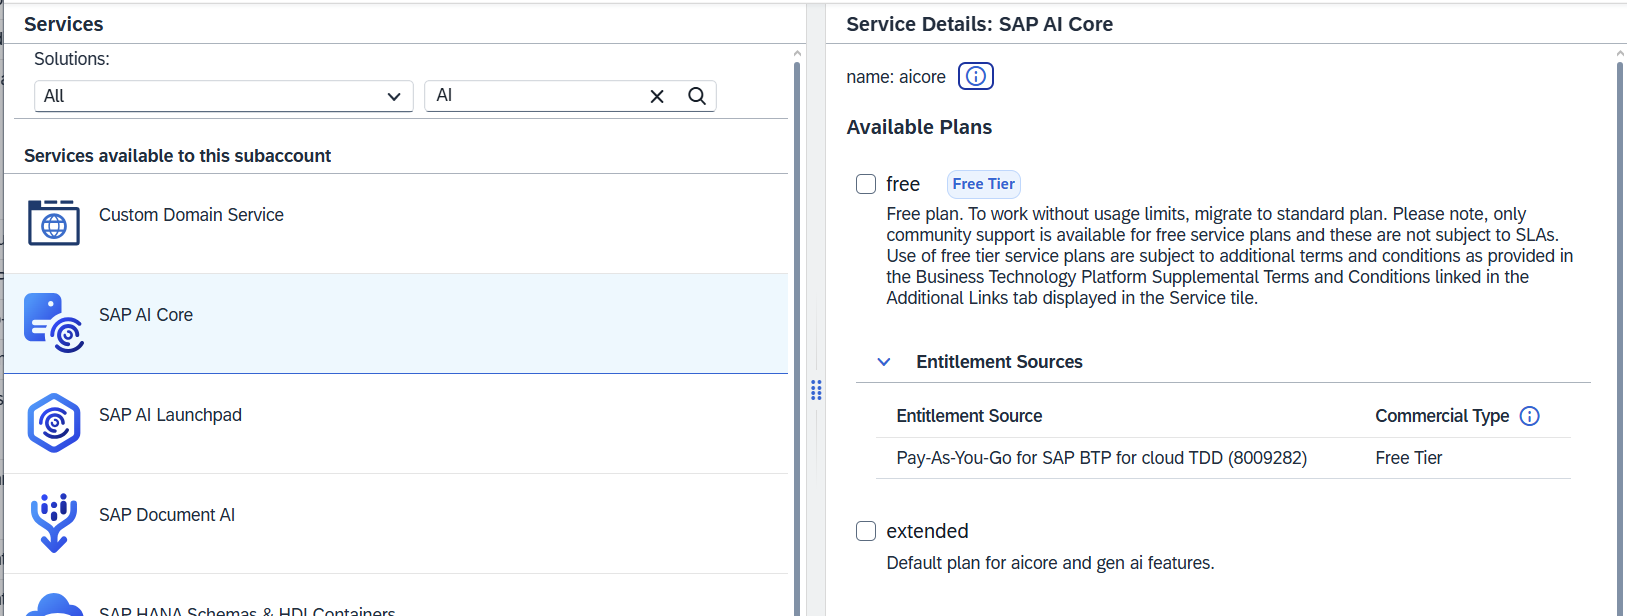
Go to Entitlements and activate all necessary services:
-
SAP AI Launchpad
-
SAP AI Core
-
SAP GenAI Hub
Assign to the default group if needed.
Step 8. Configure Principal Propagation (SSO Integration)
Single Sign-On (SSO) via Principal Propagation requires configuration both in SAP BTP and Azure.
On SAP BTP:
Go to Connectivity -> Destination and ensure that you got OnPremise system connected, and setup with Principal Propagation
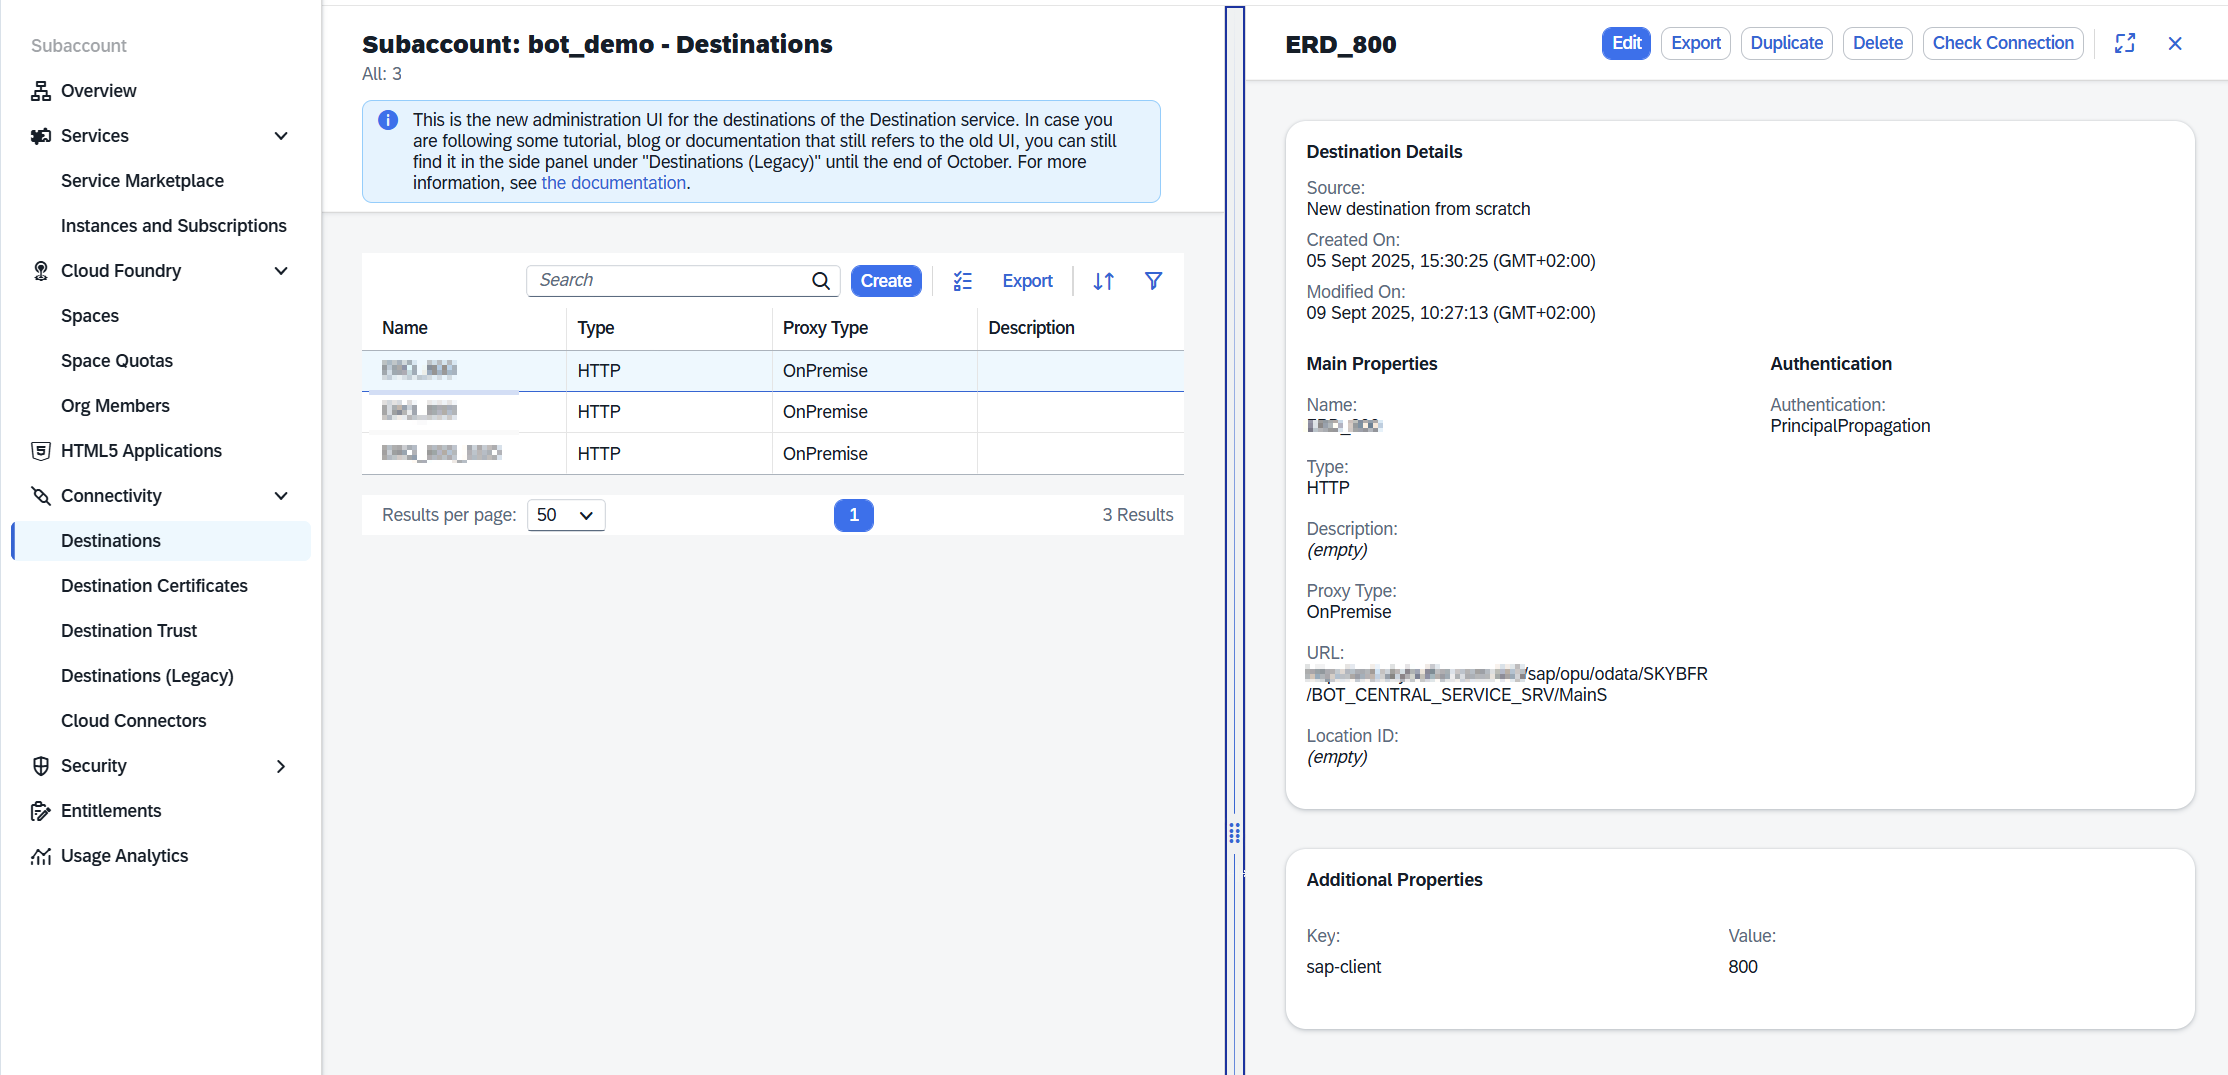
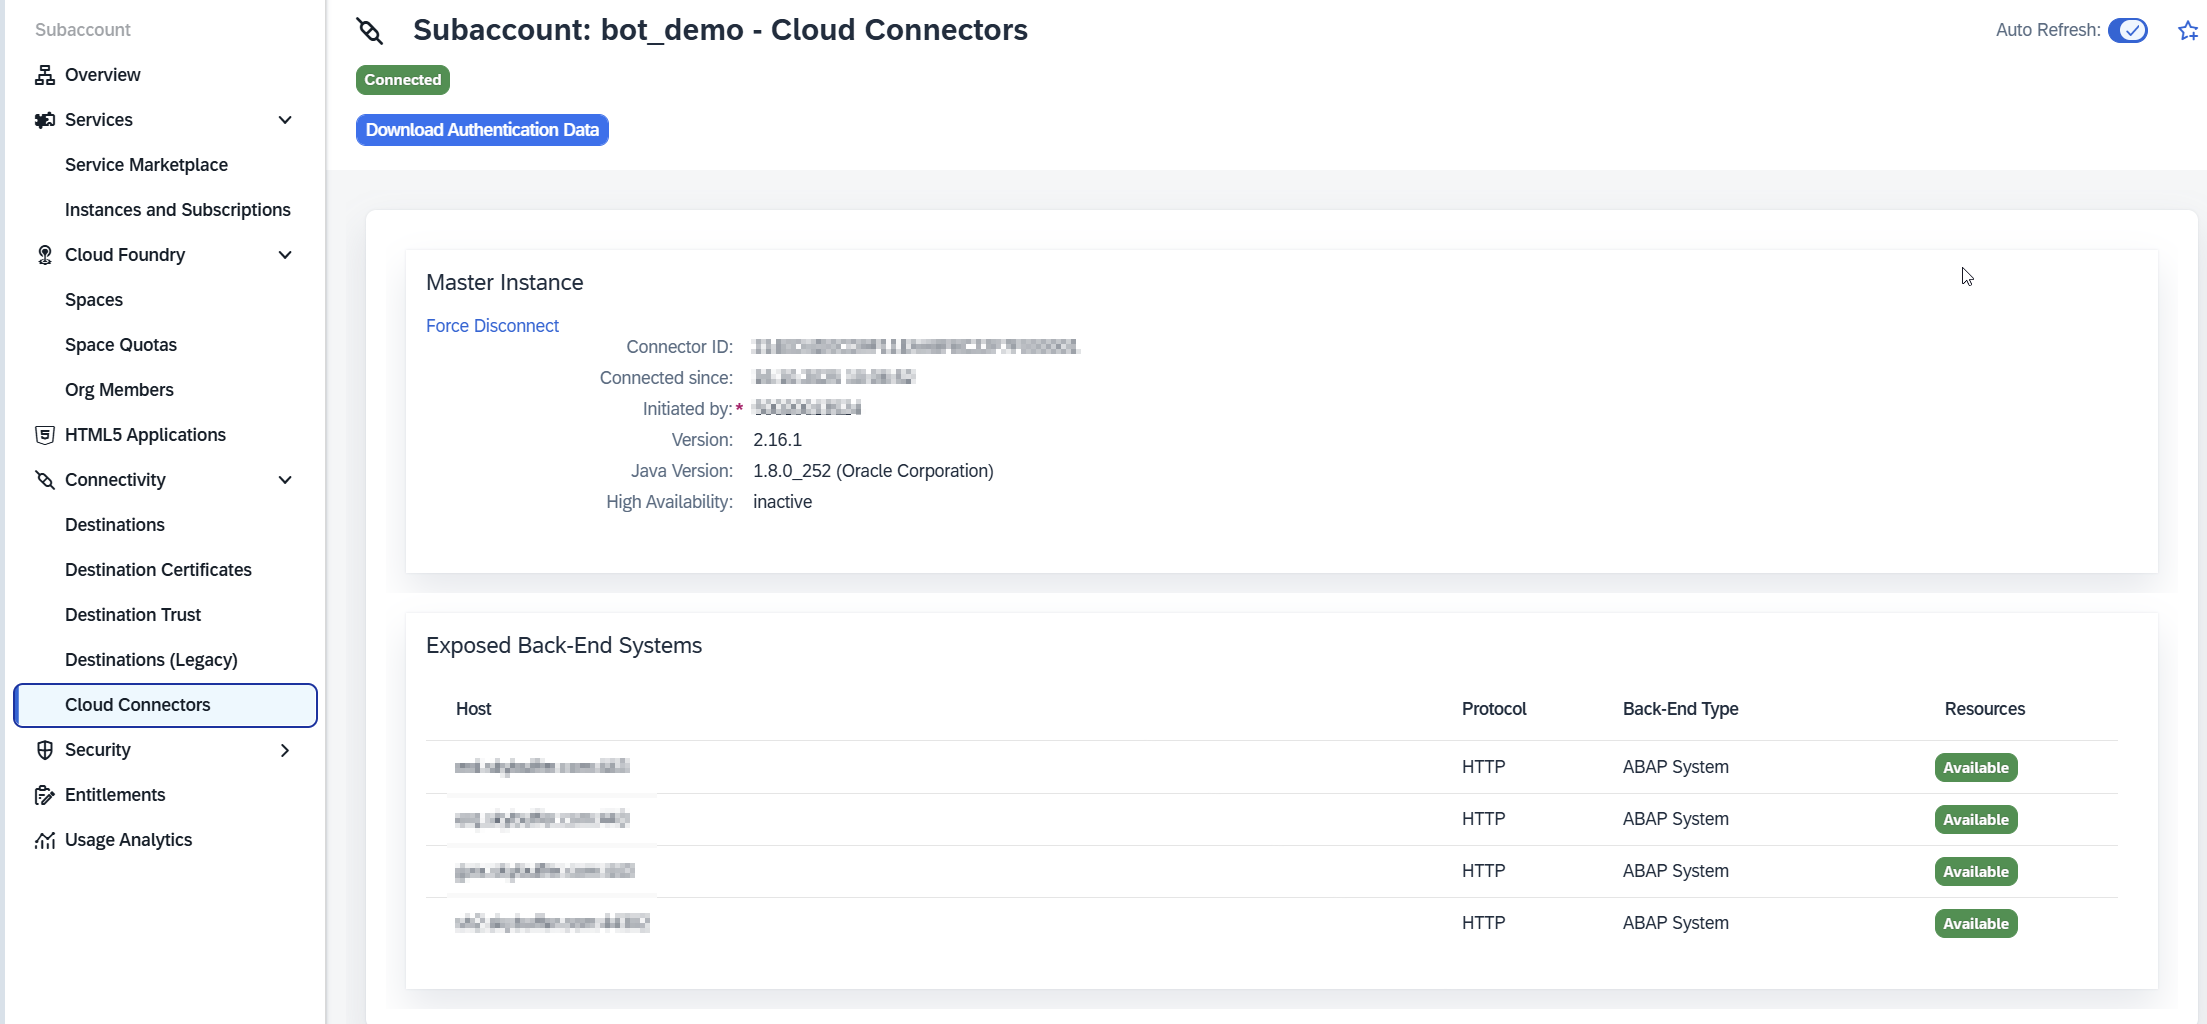
Go to Destination -> Cloud Connector and verify cloud connector and exposed systems
Go to Trust Configuration and download the SAML metadata XML
.
Open the XML and locate the value for:Binding="urn:oasis:names:tc:SAML:2.0:bindings:URI"
This will be required for configuration in Azure.

On Microsoft Azure:
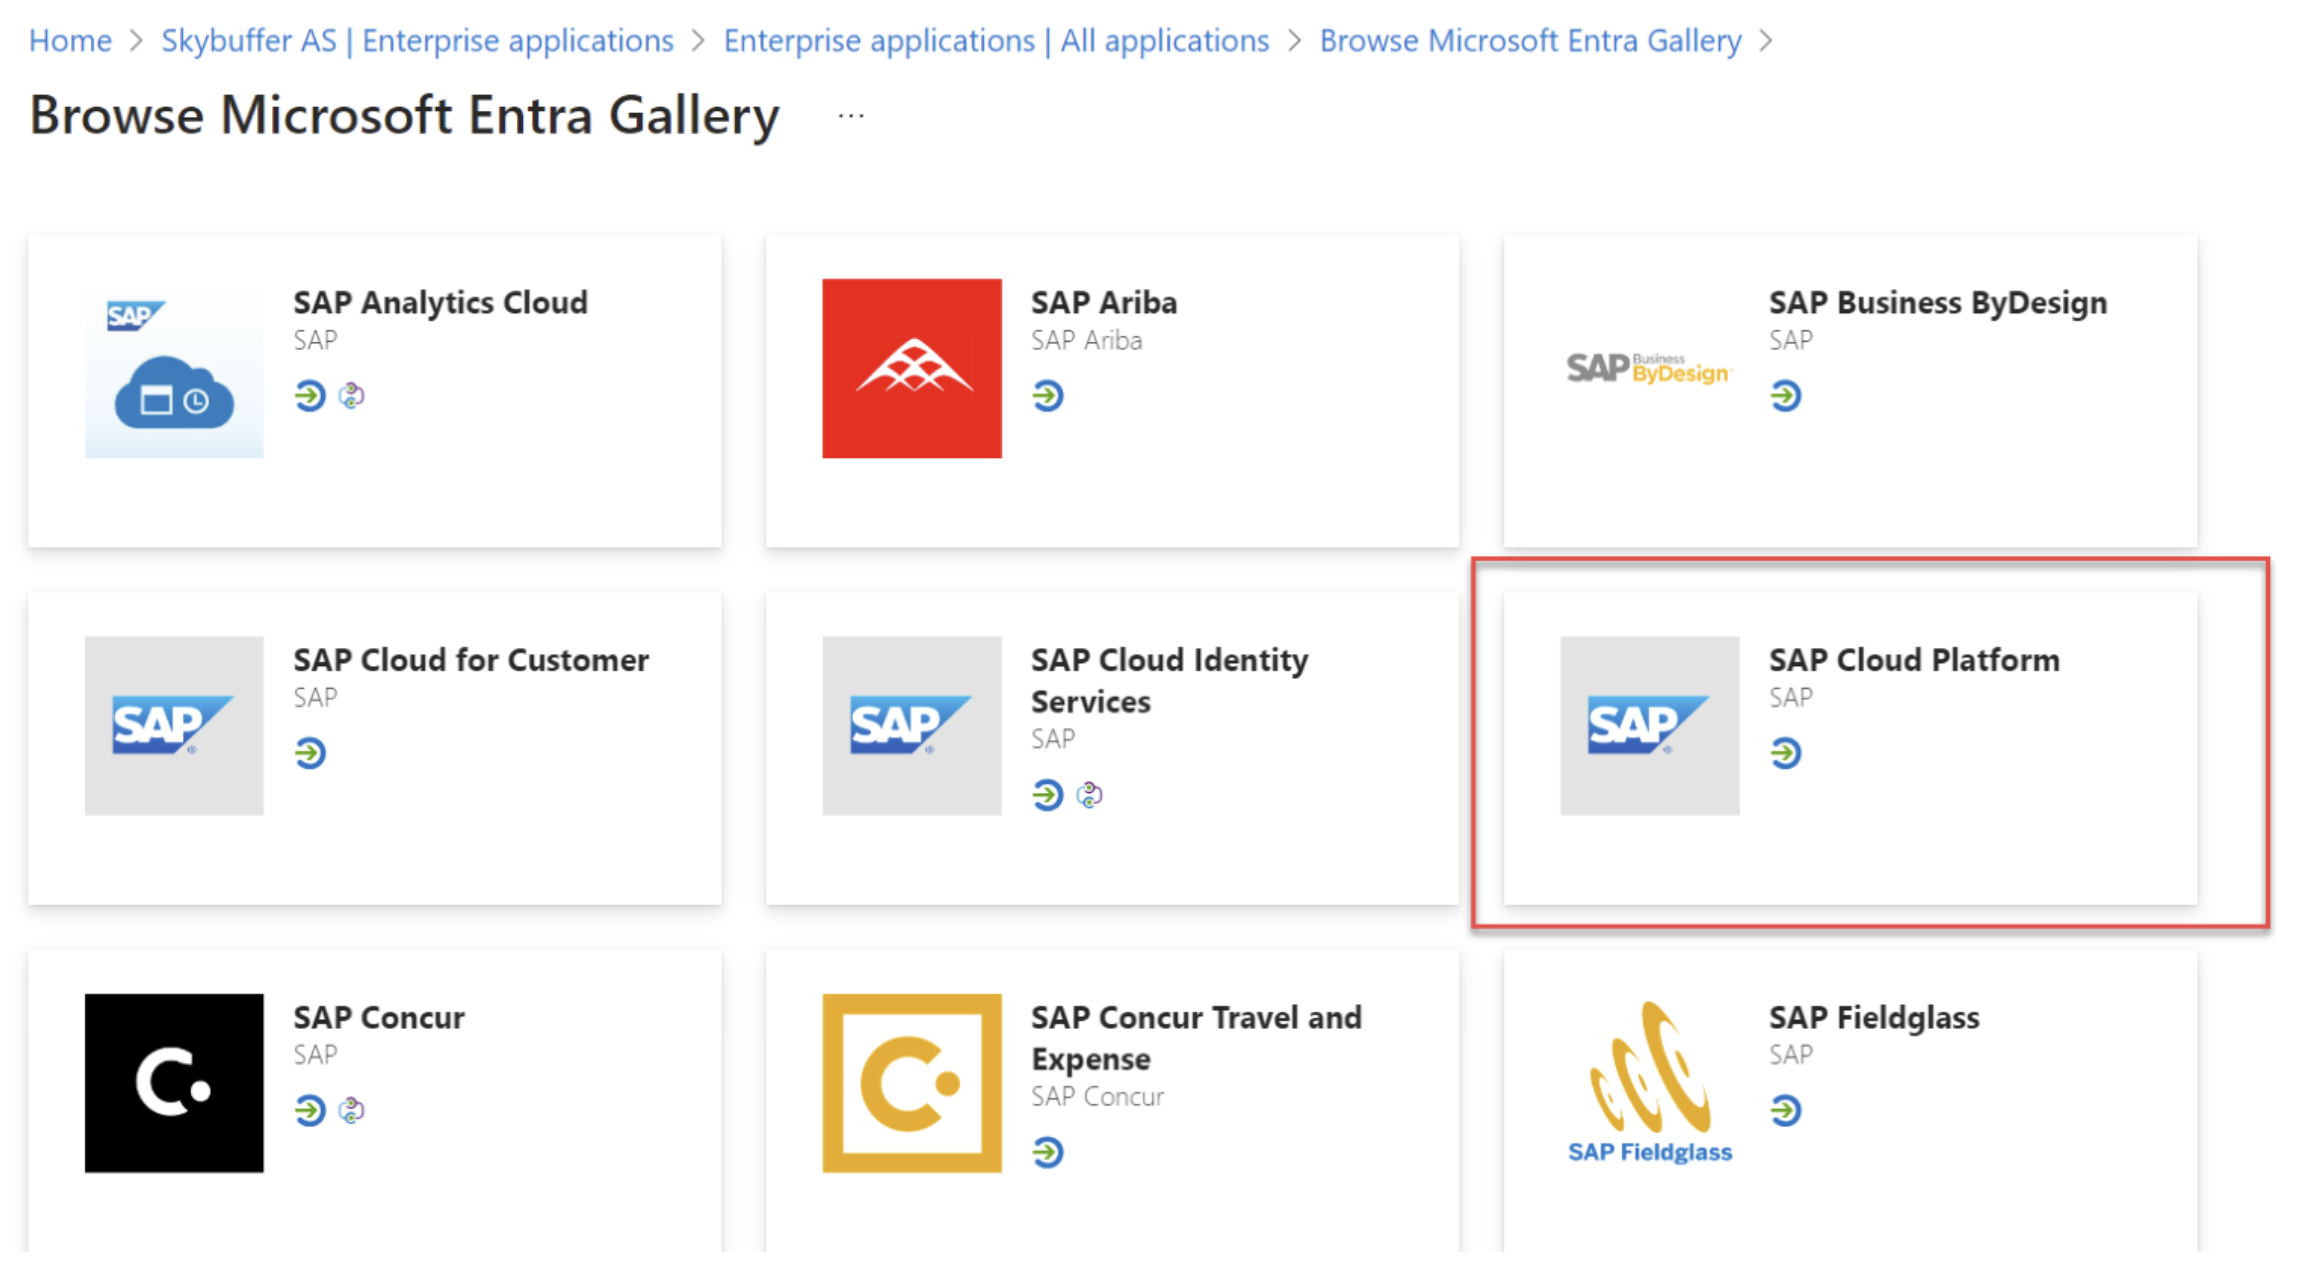
Go to Enterprise Applications and click New Application.

Select SAP Cloud Platform as a template.
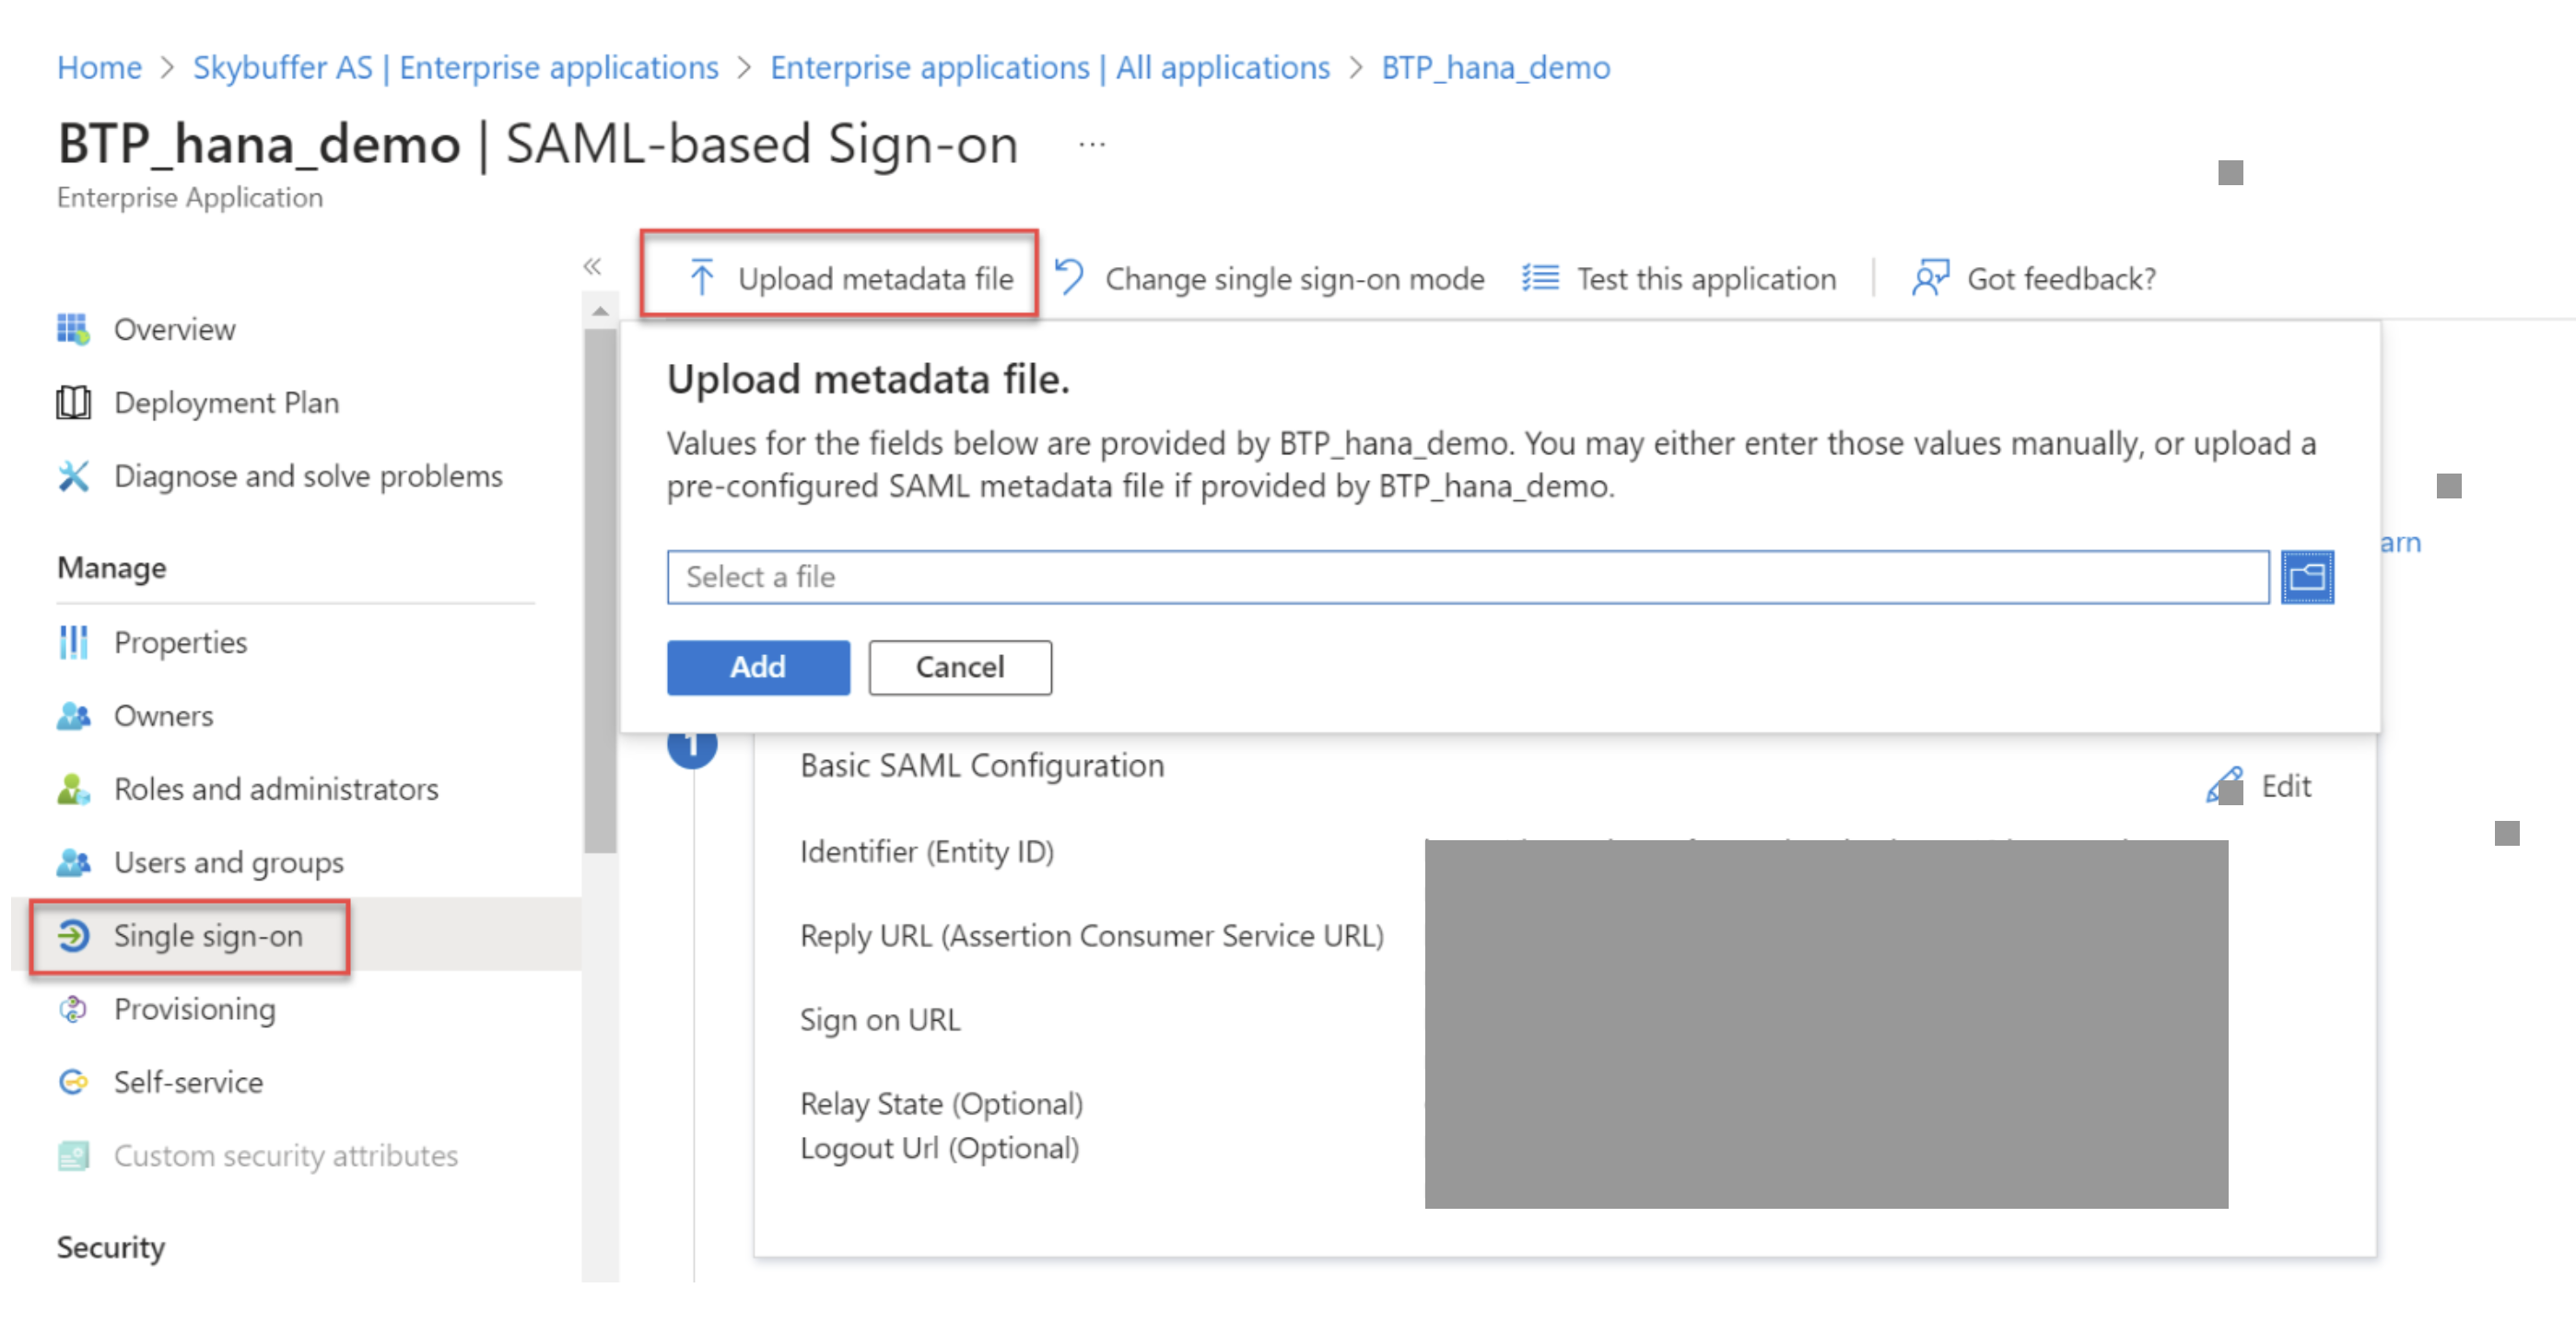
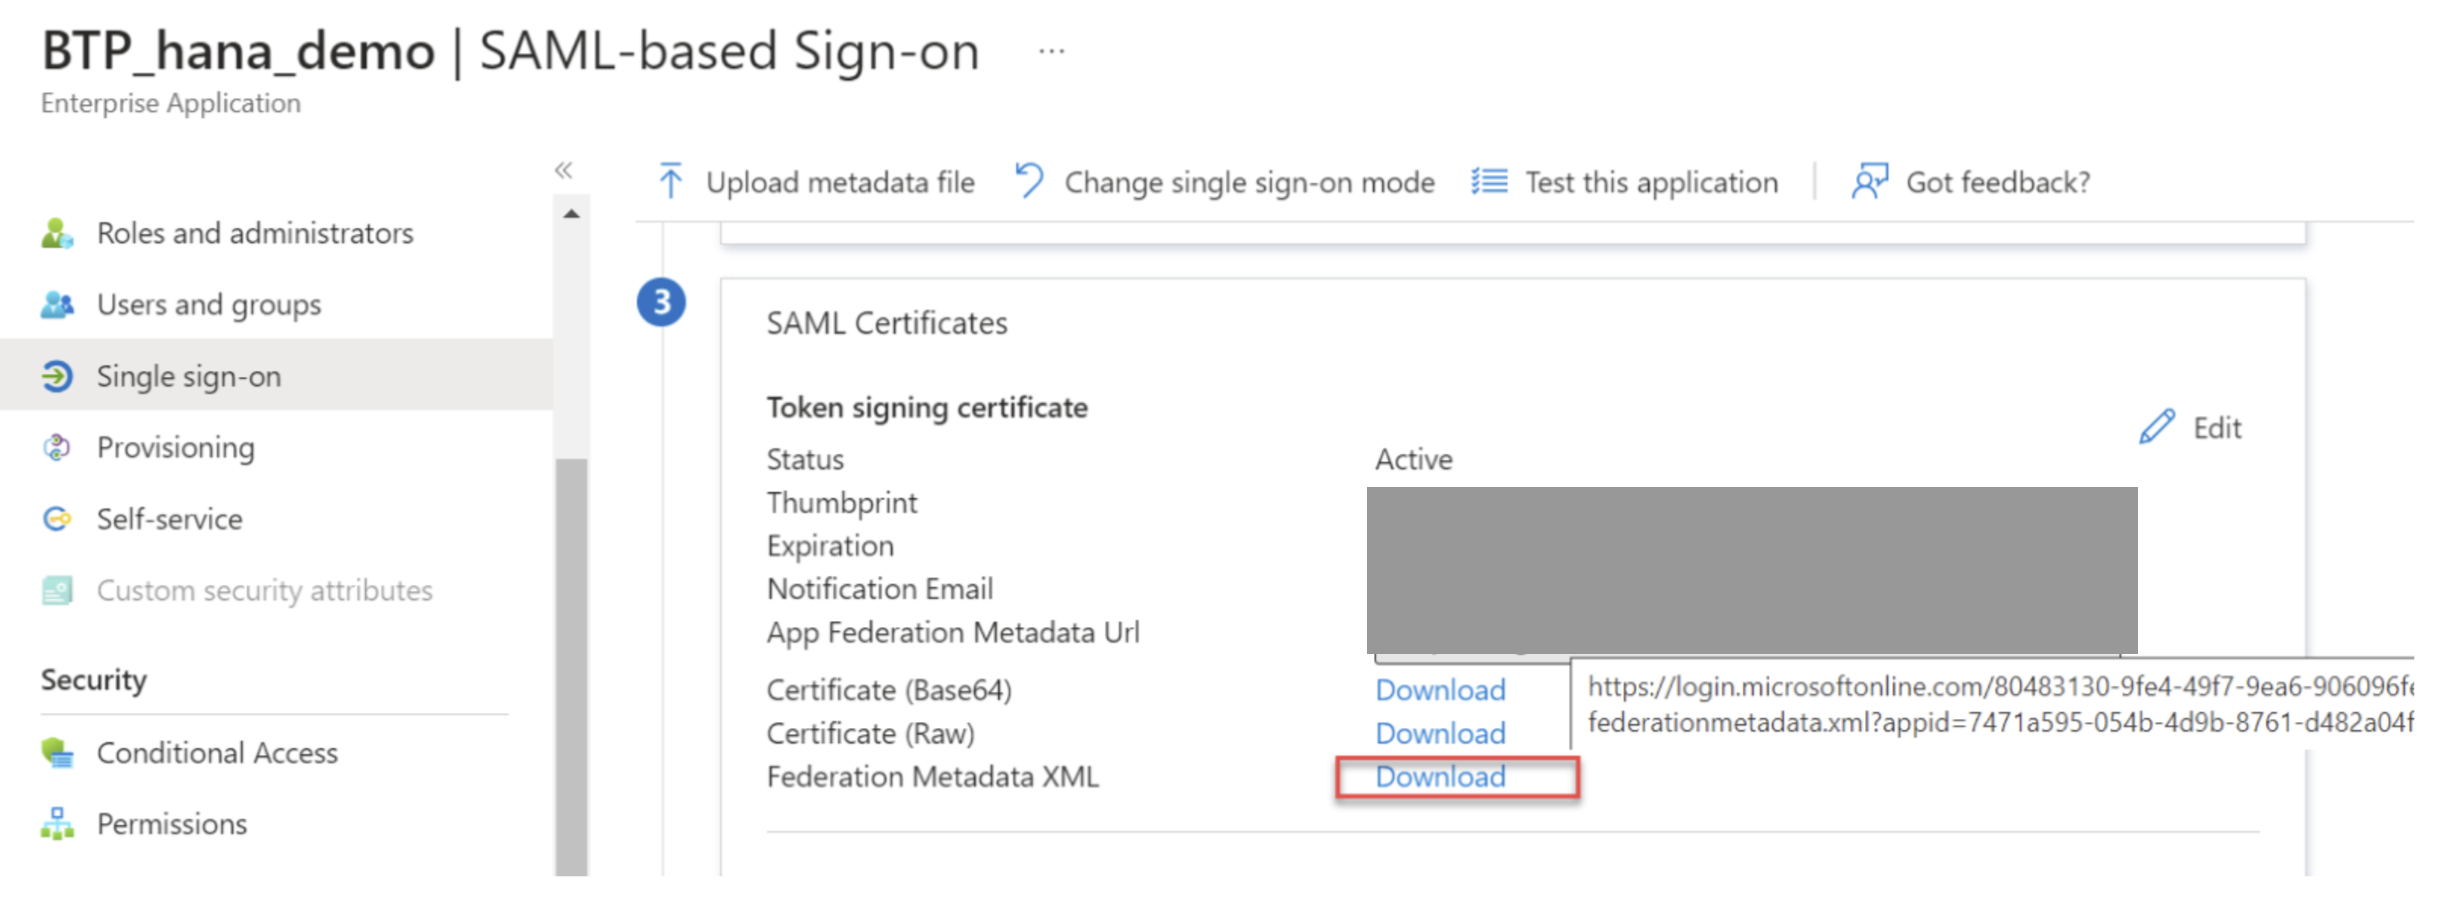
Open the Single Sign-On section and upload the metadata XML from BTP.
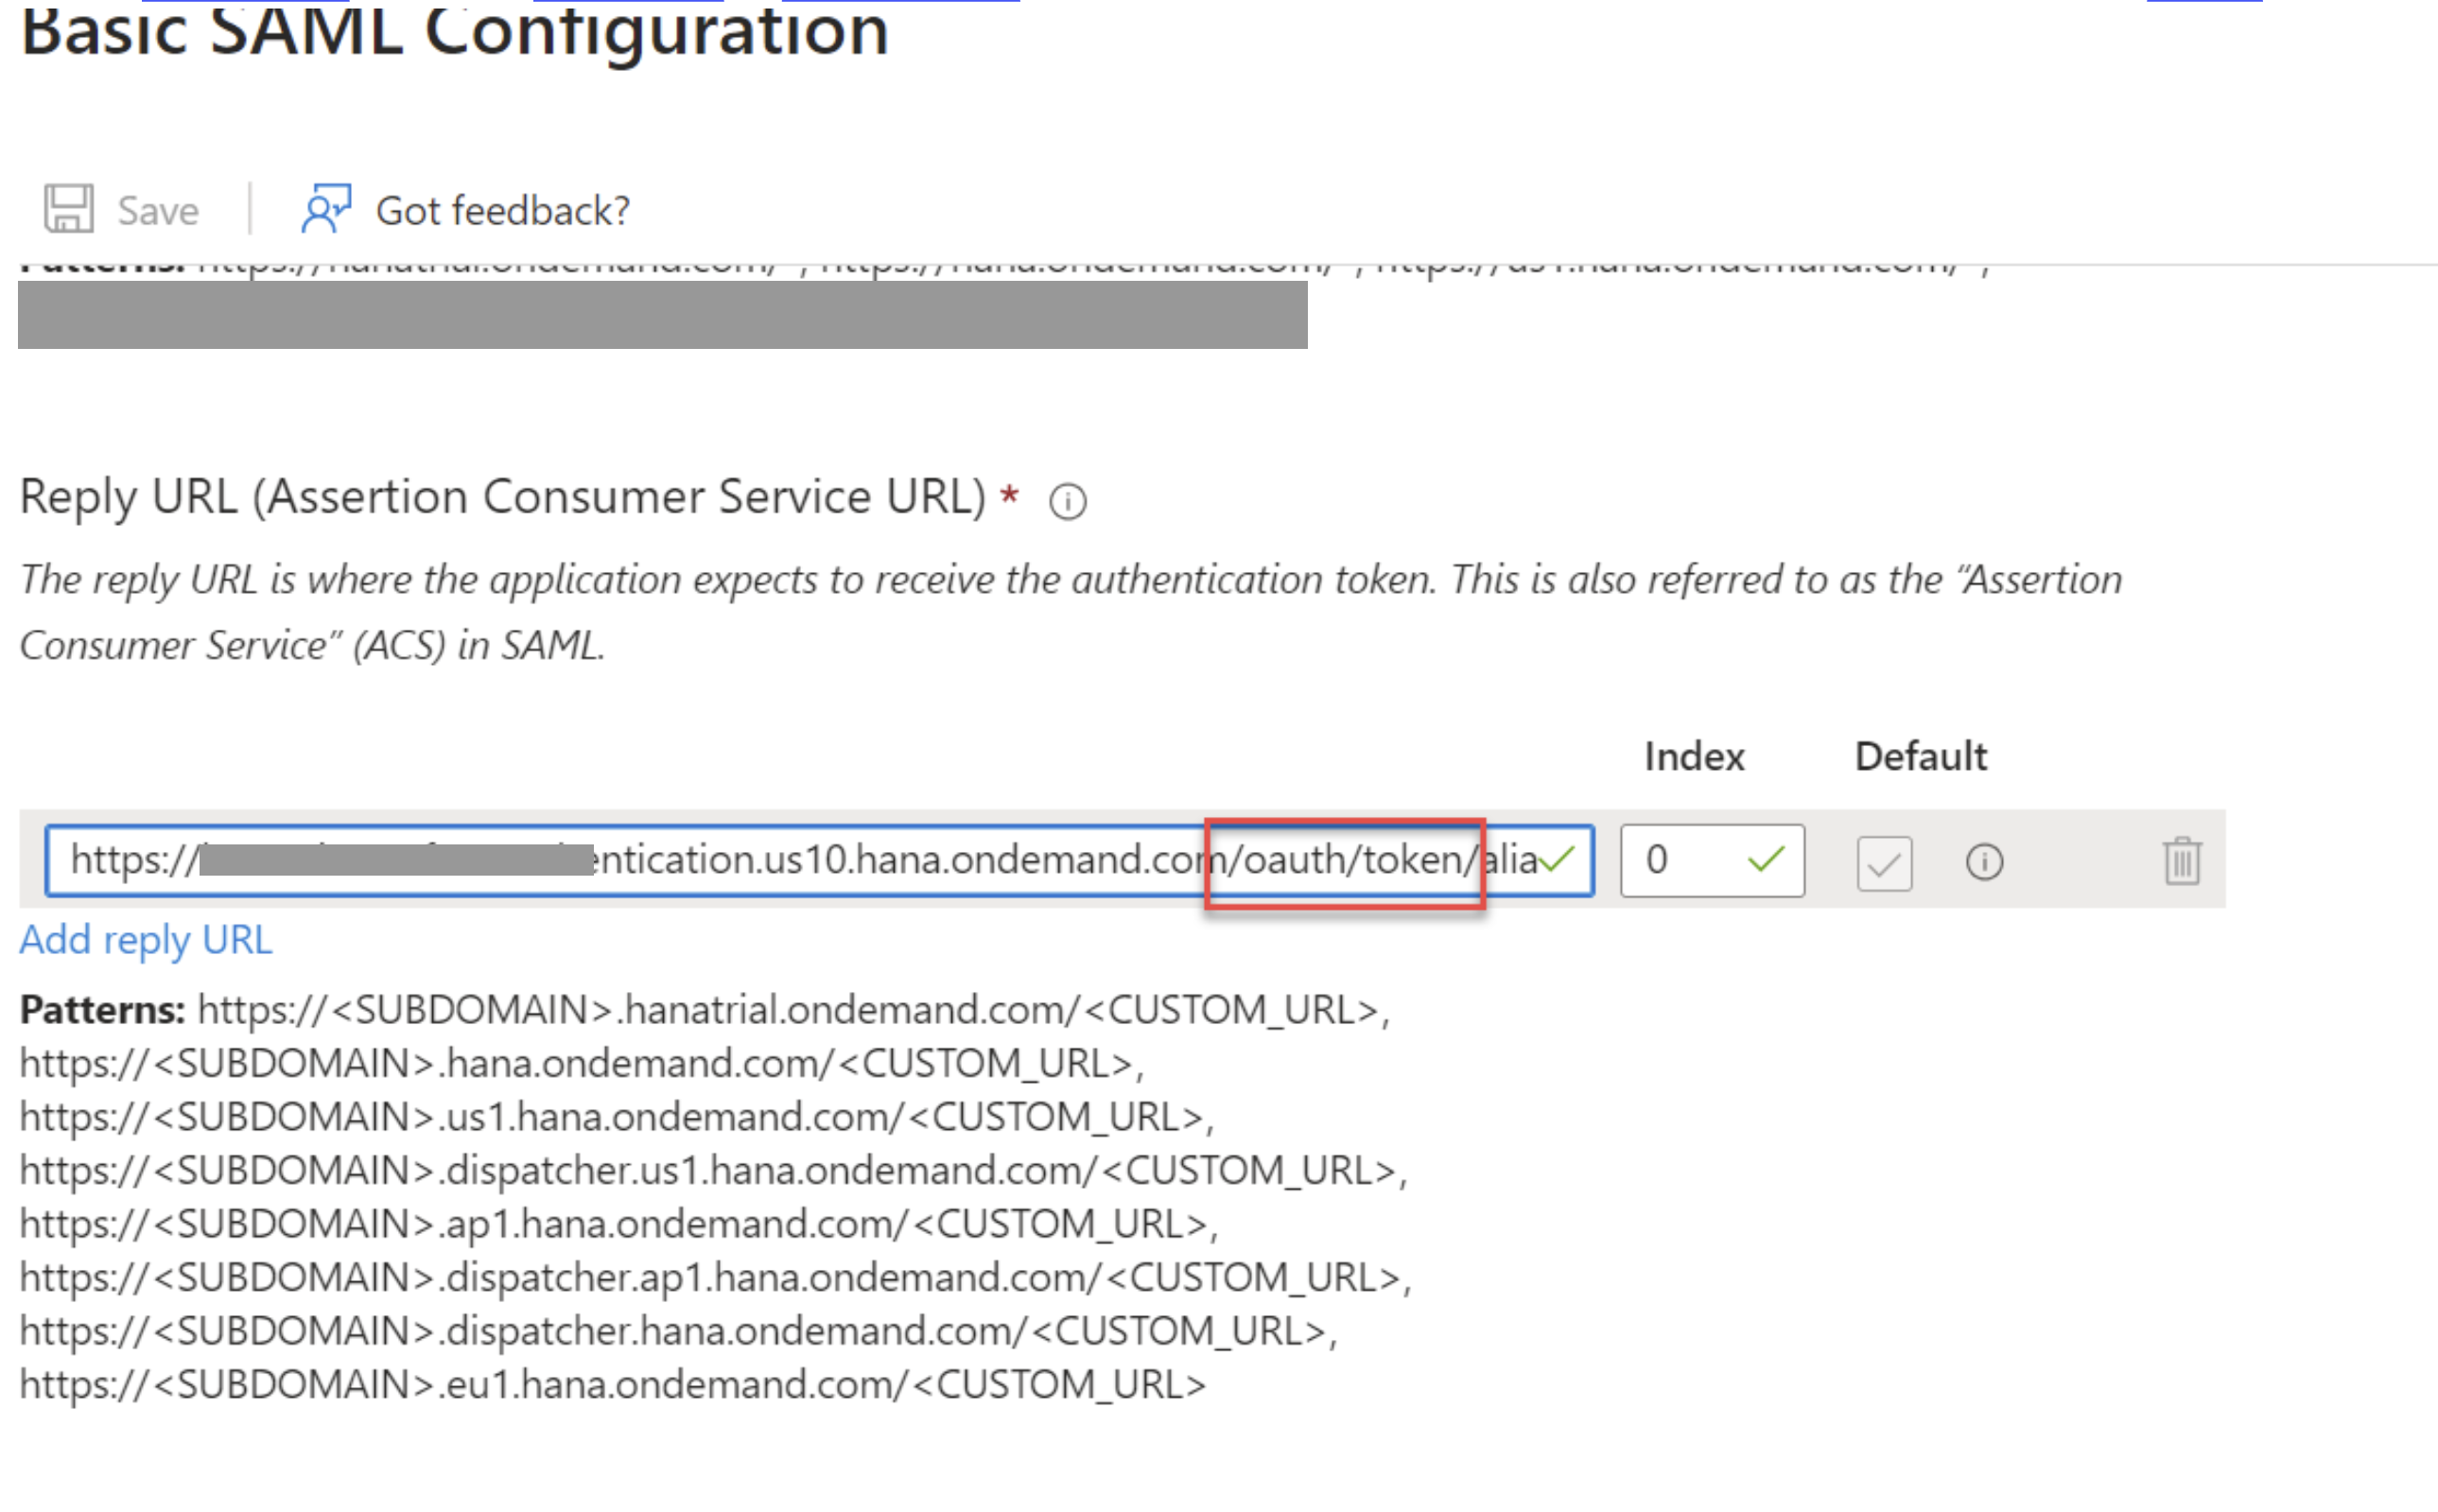
In the Reply URL, replace /SSO... with /oauth/token as specified in the XML.
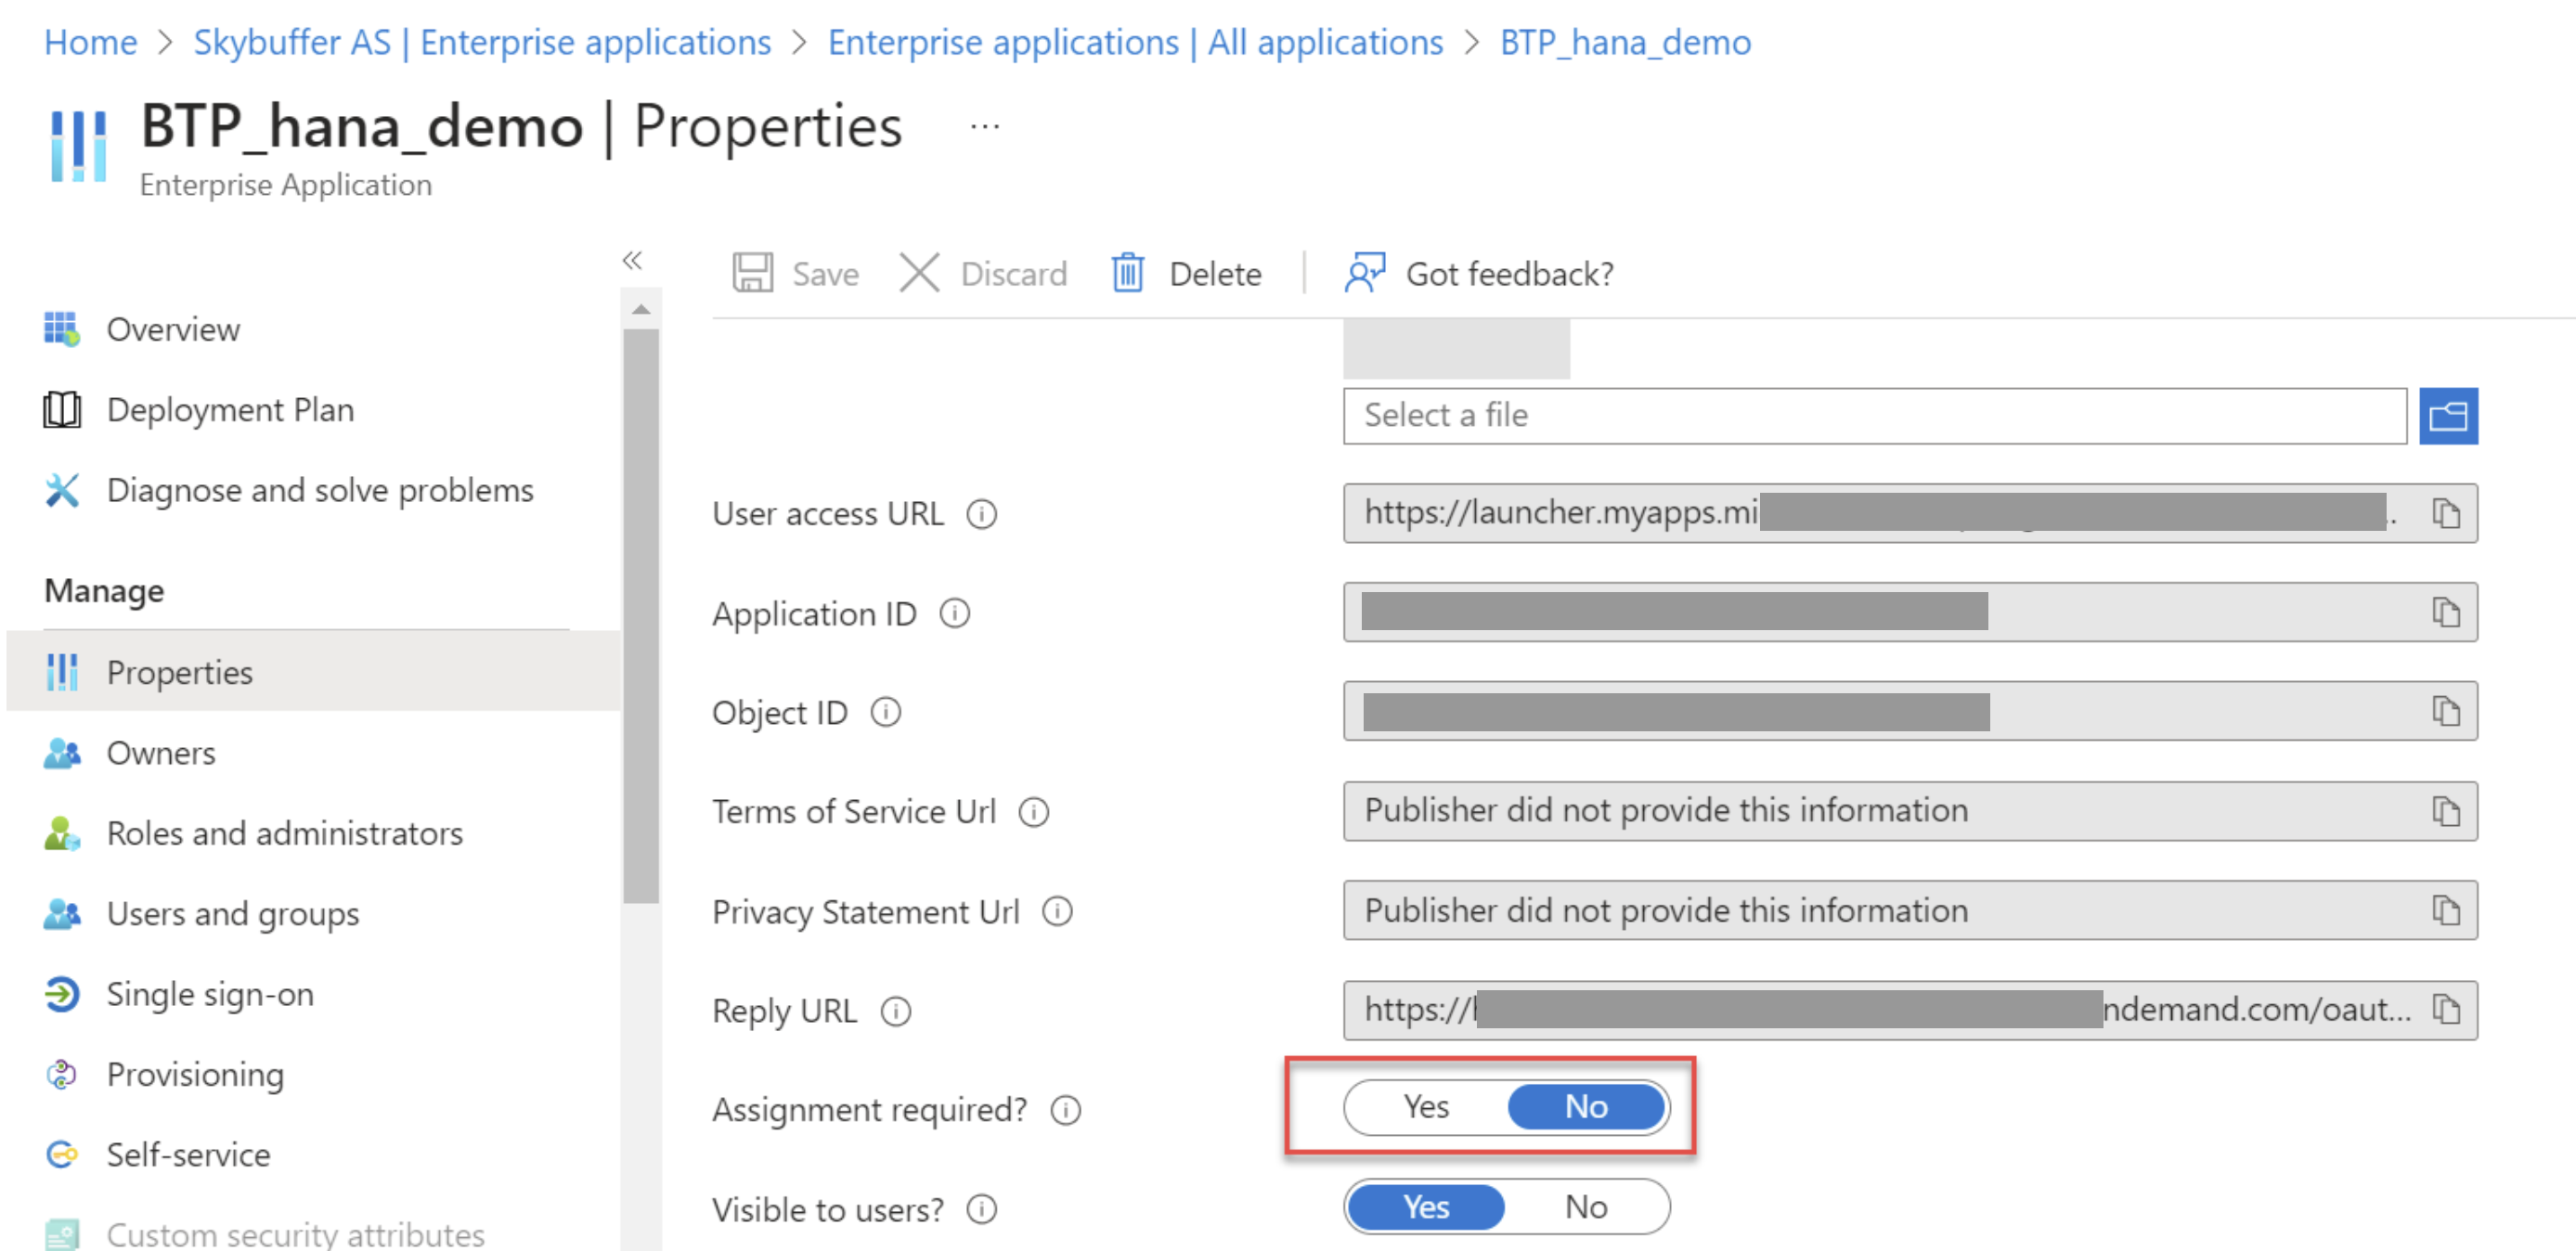
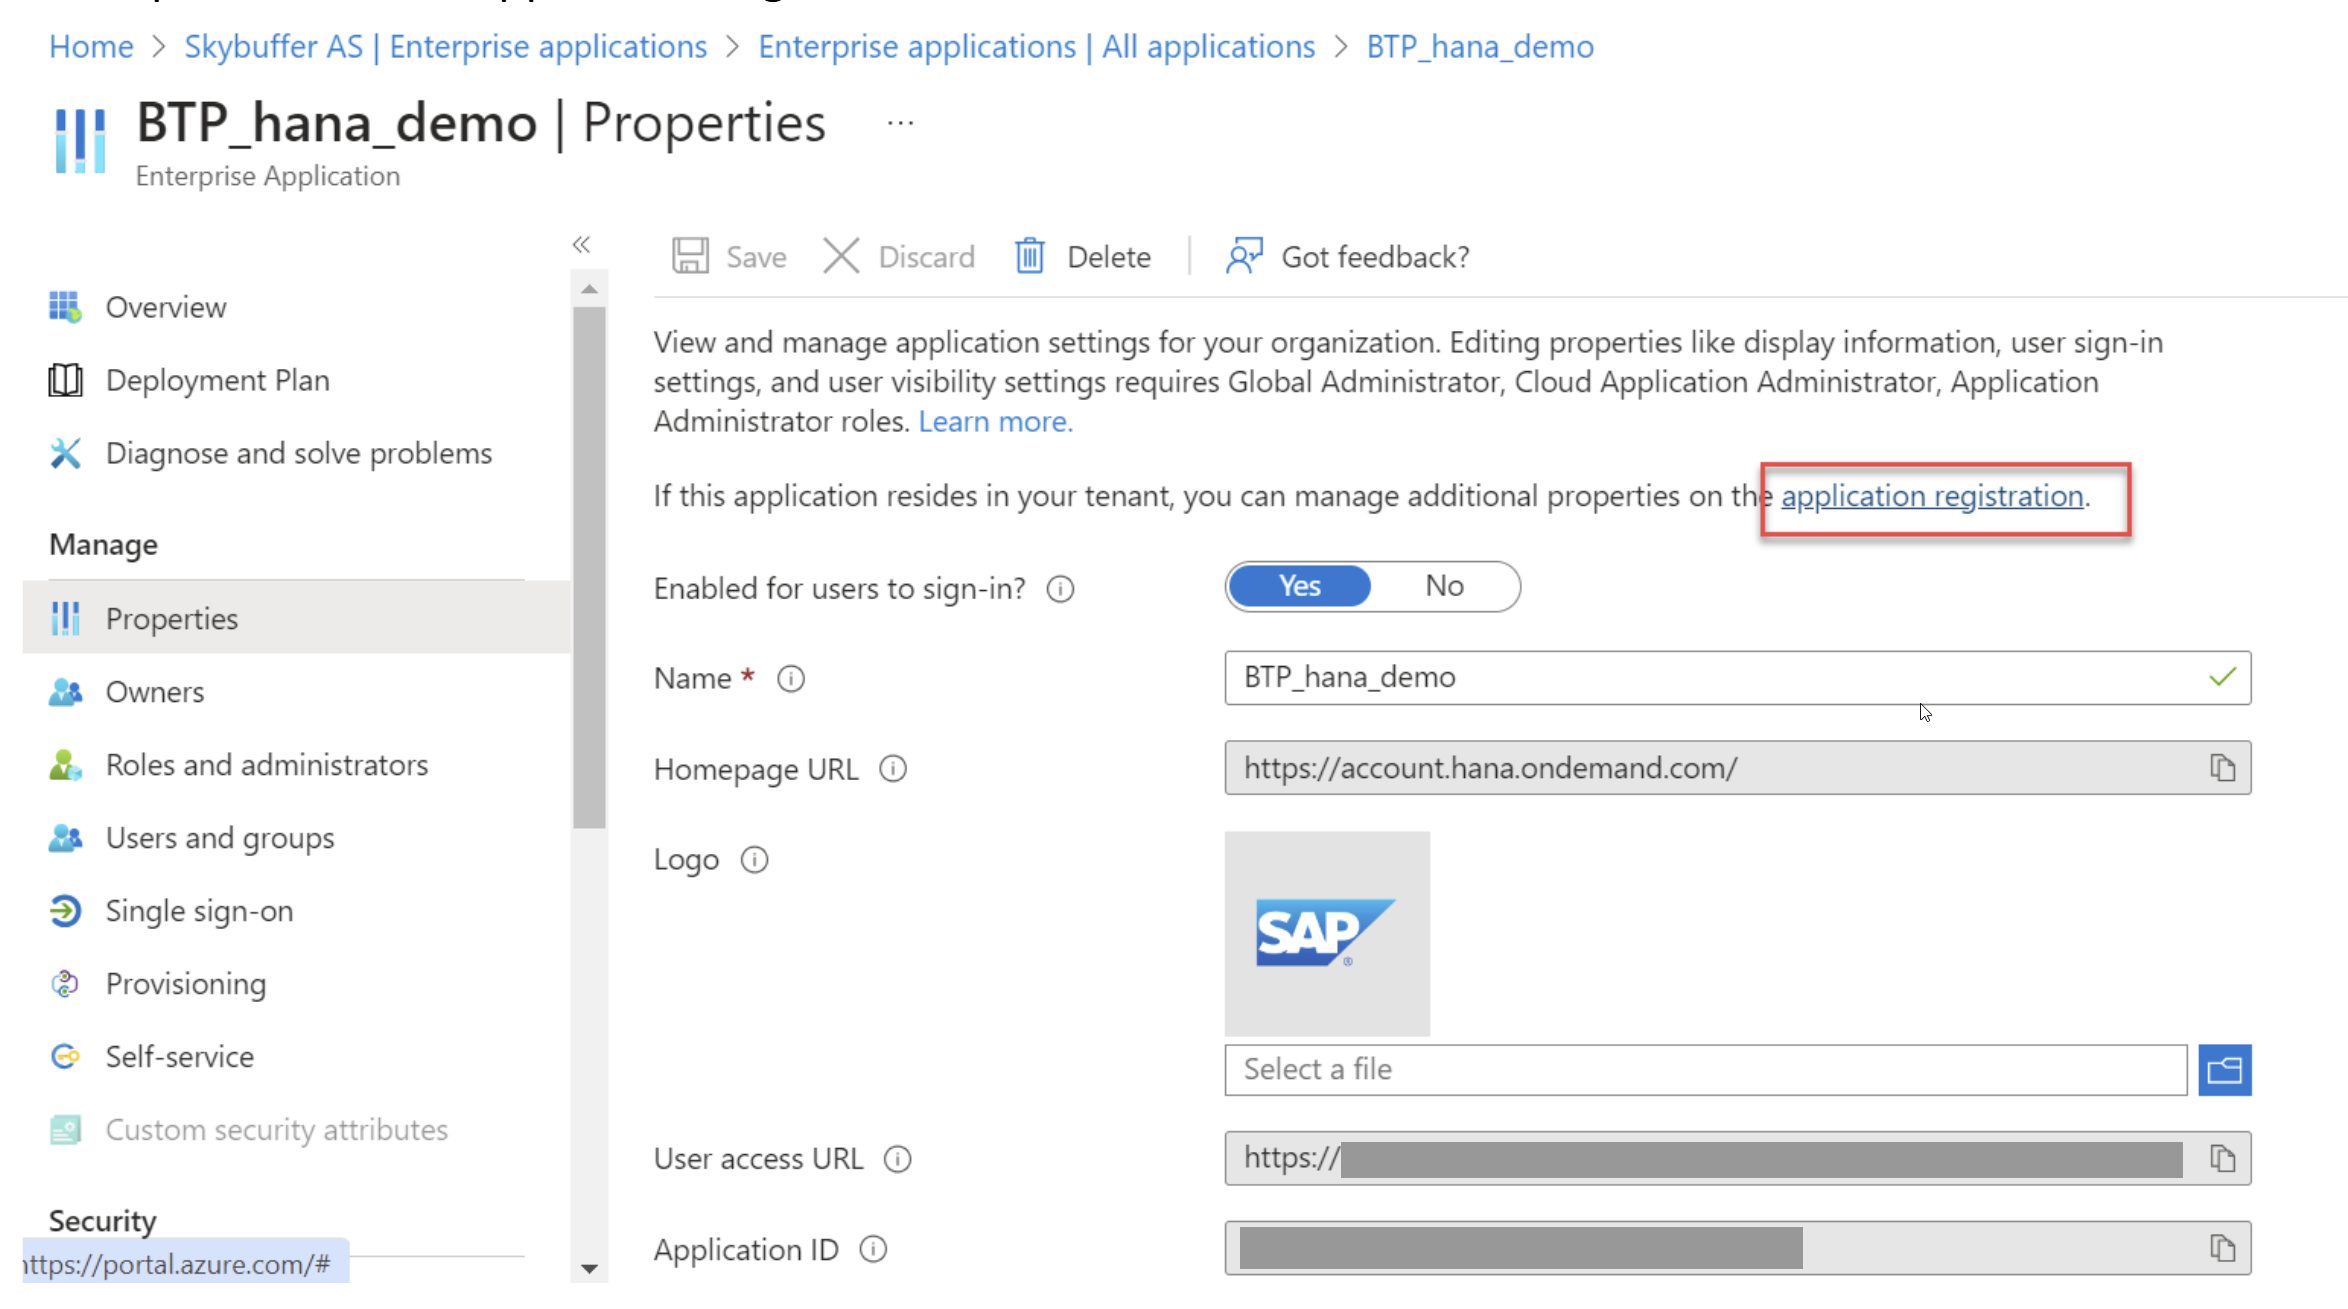
(Optional) In Properties, set Assignment required to No.
Now proceed to the application registration:
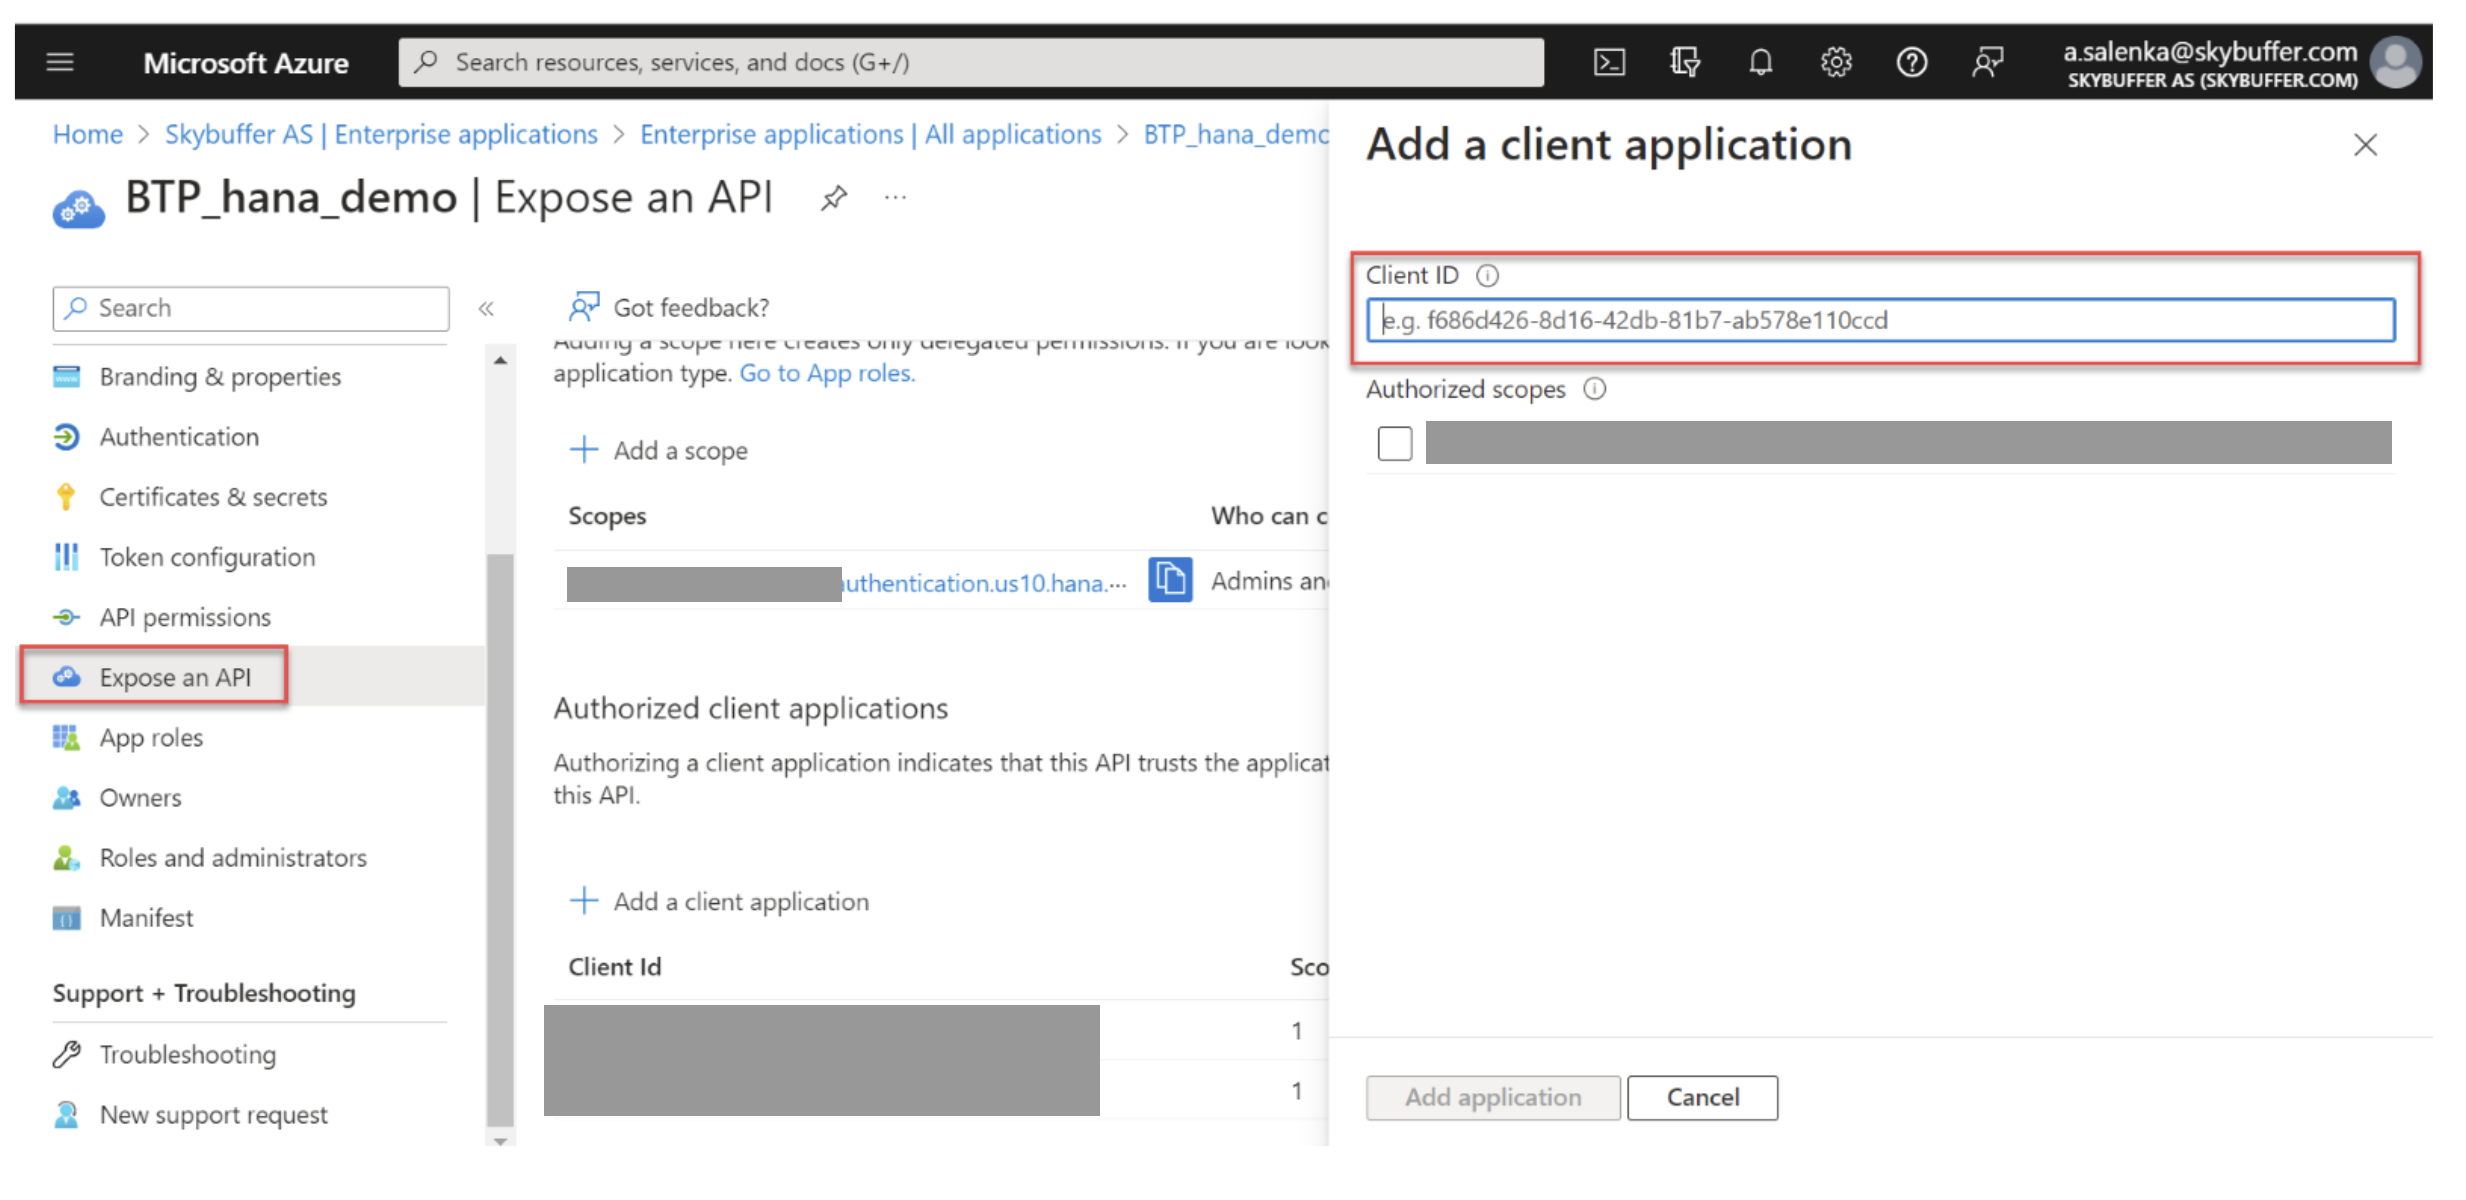
Register Application for API Access
In Expose an API, click Add a Client Application and enter the Bot App ID.
Return to Enterprise Applications, download the updated metadata XML.
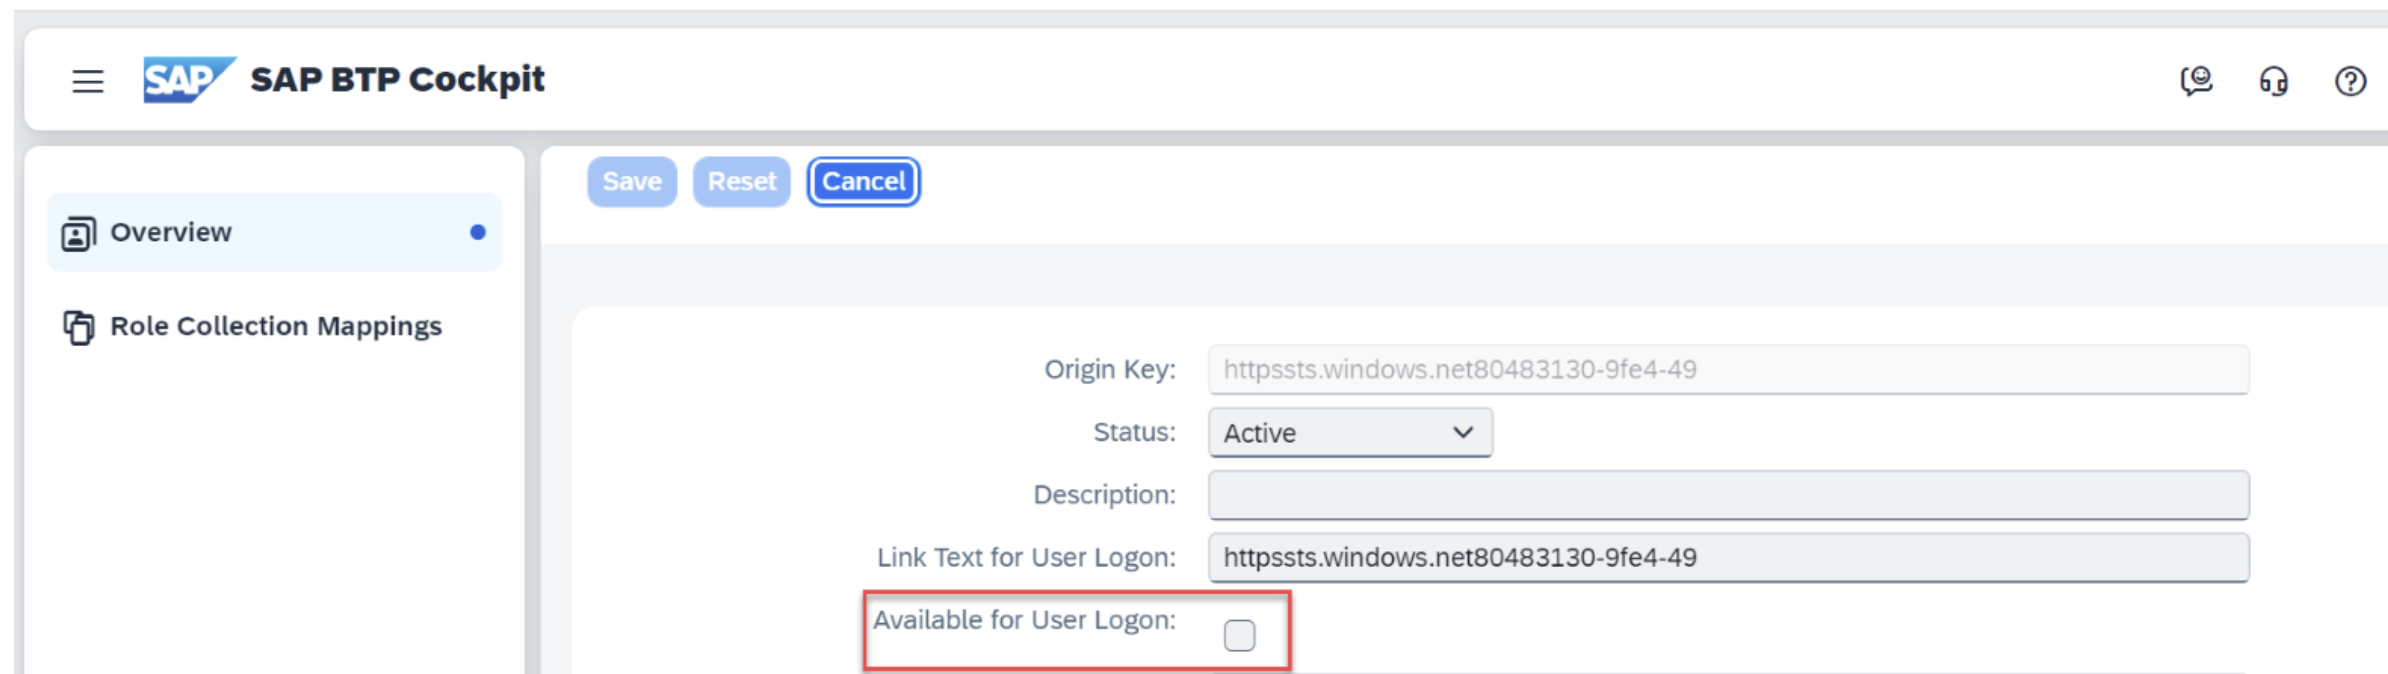
Go to SAP BTP, clik on New SAML Trust Configuration.
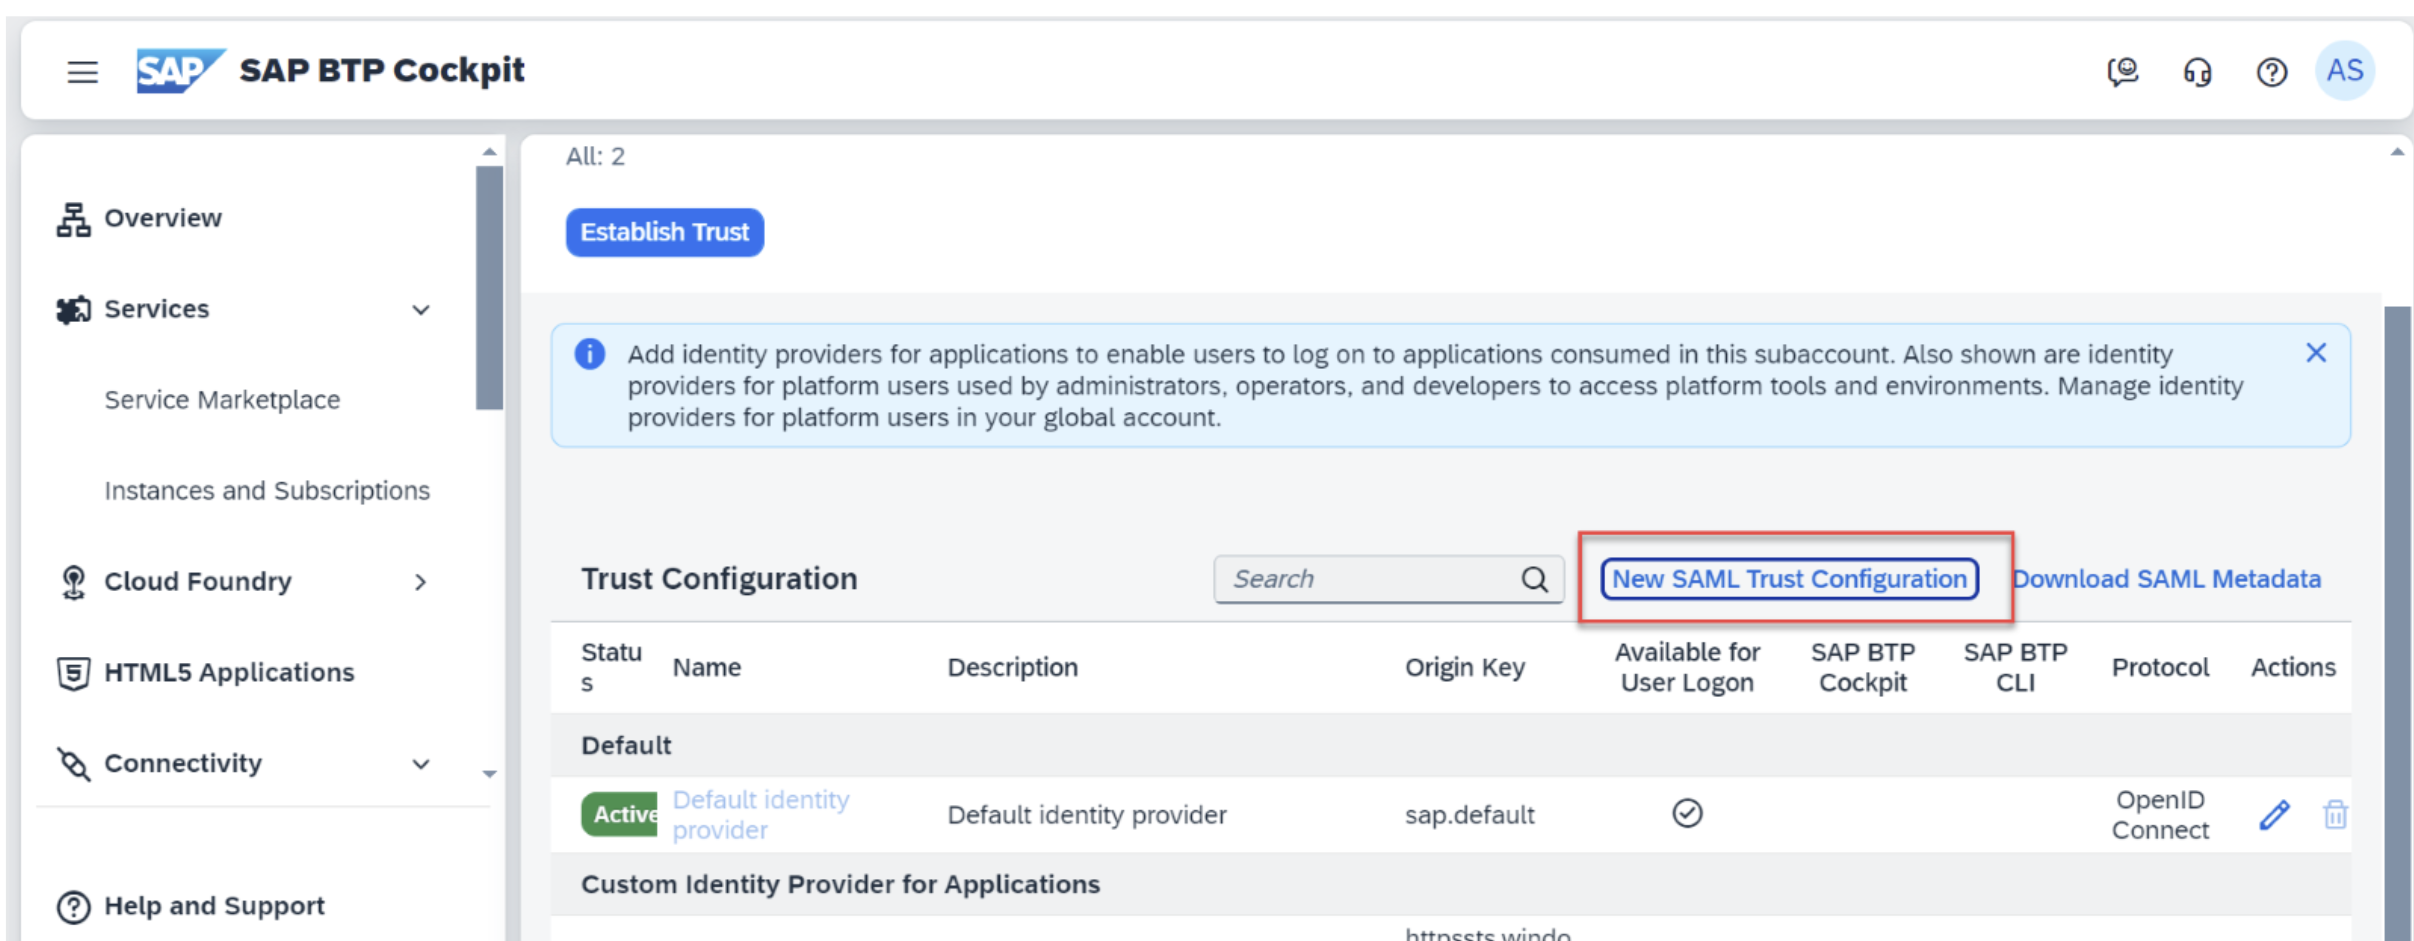
Upload the xml from Azure and save the configuration.

Disable this identity provider for User Logon (used only for on-behalf scenarios).
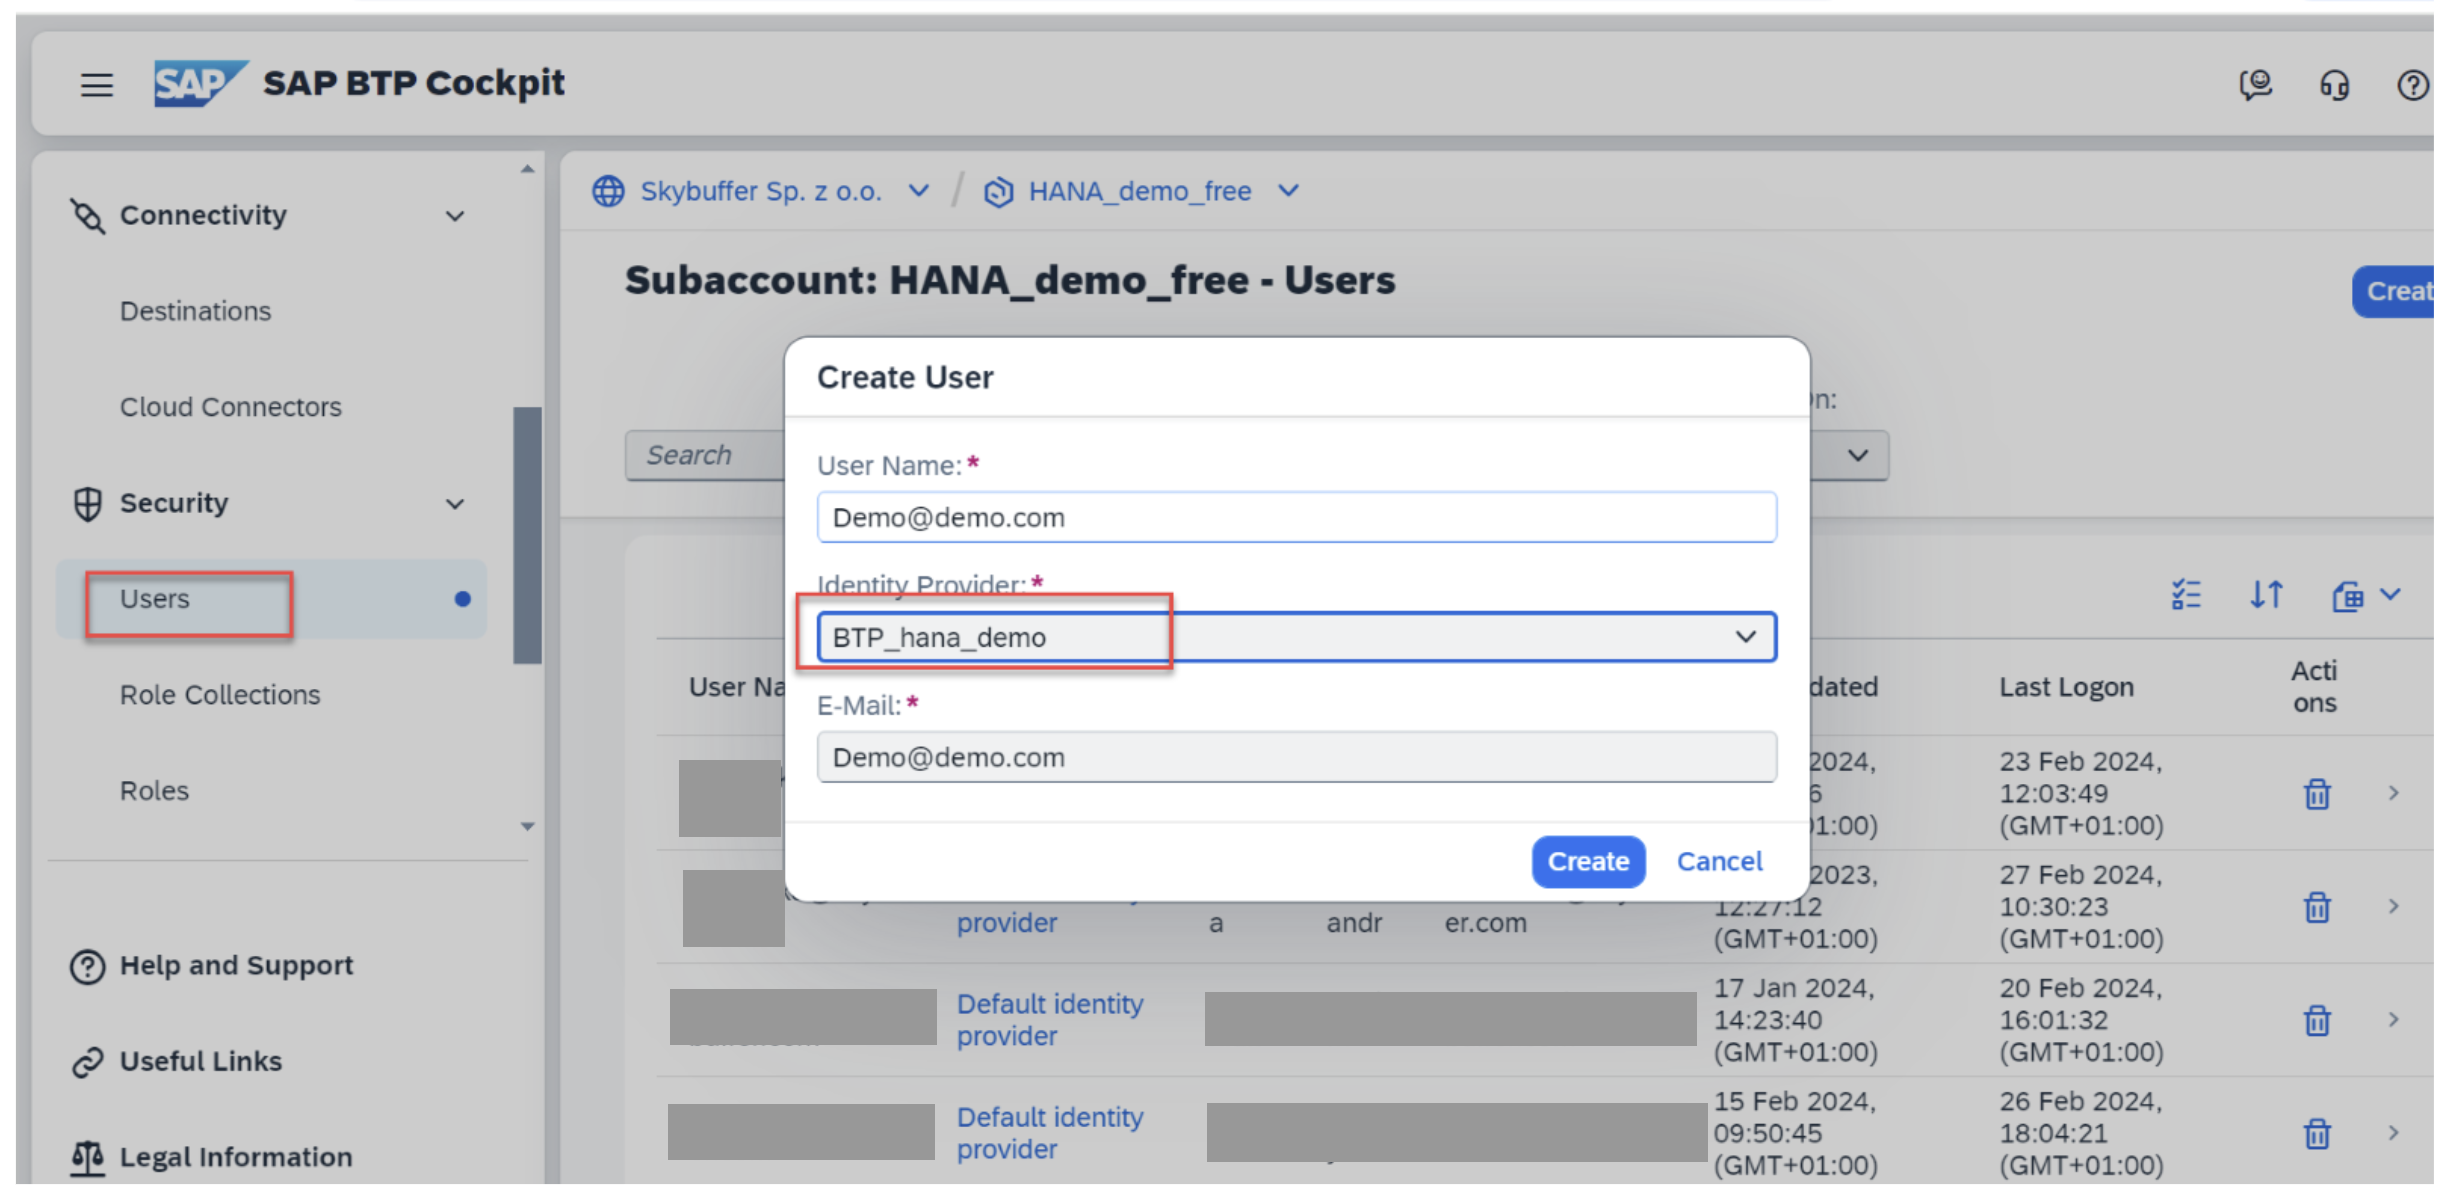
User Setup
Due to current limitations, shadow user creation is not supported.
Manually create users in the BTP subaccount. No role collections are required.
At this point, Principal Propagation SSO is configured on SAP BTP and ready for use in Skybuffer AI SAP Destinations and Identity Provider setup.
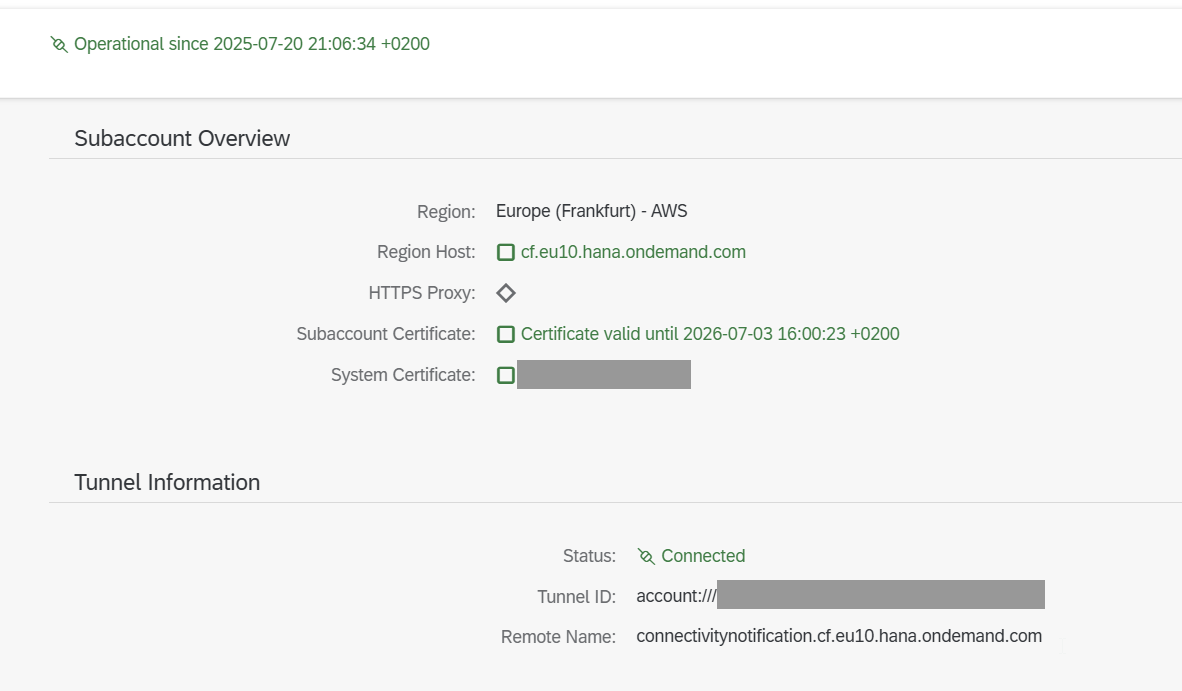
Step 9. Configure SAP Cloud Connector
Ensure that:
- The subaccount is connected.
- Tunnel connection status is Connected
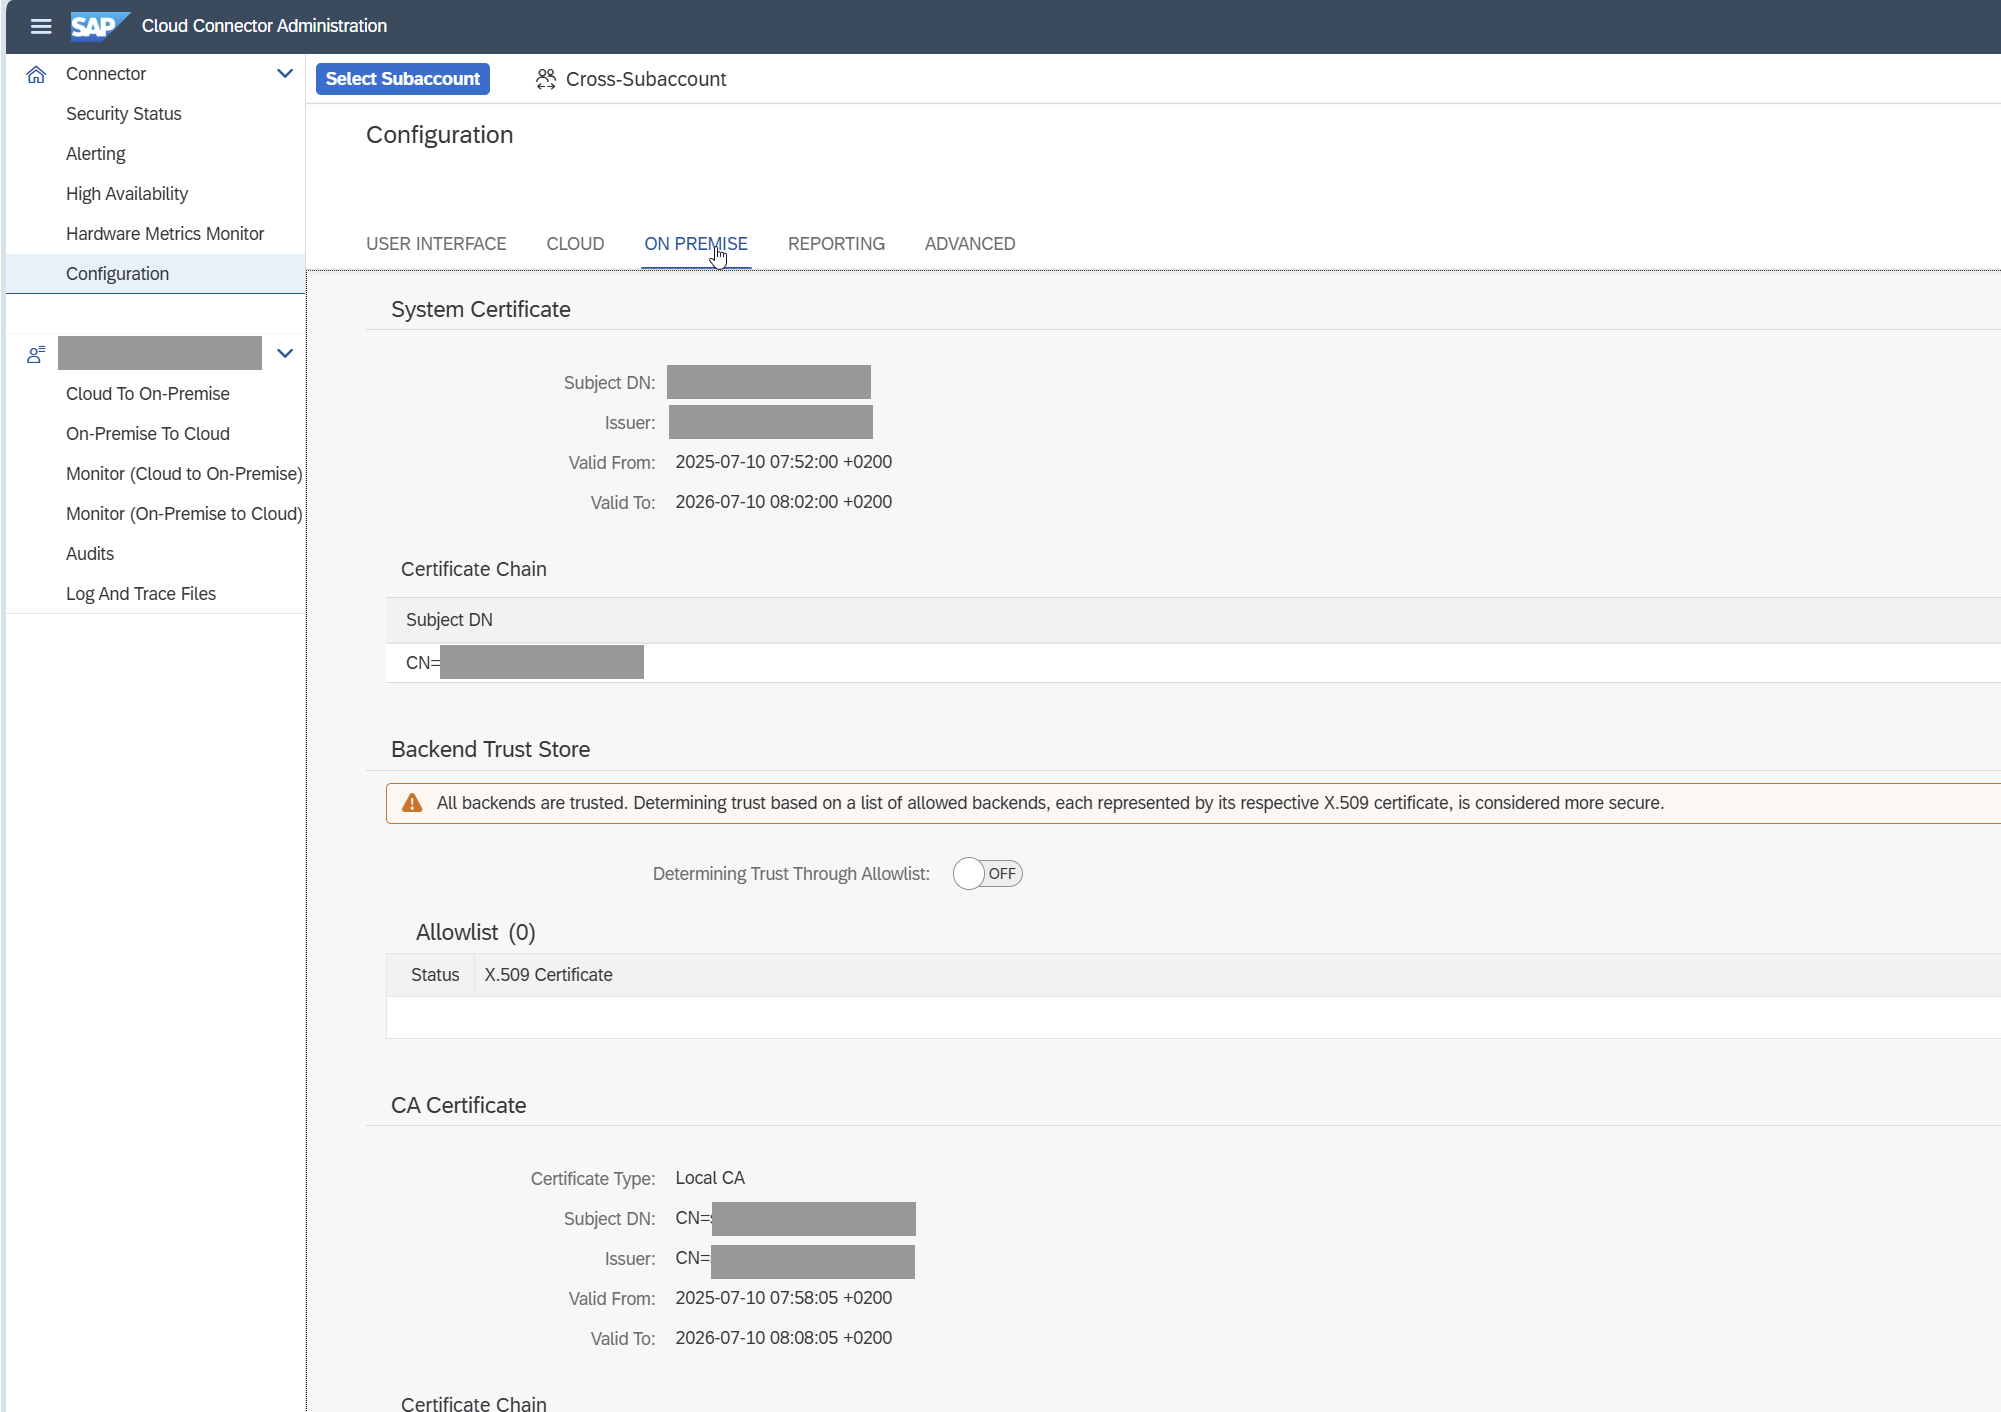
System and Certificate Verification
Navigate to Configuration -> On-Premise.
Confirm that the system and CA certificates are generated, valid, and use distinct CN values.
Download the certificate and upload it to STRUST -> SSL System Server.
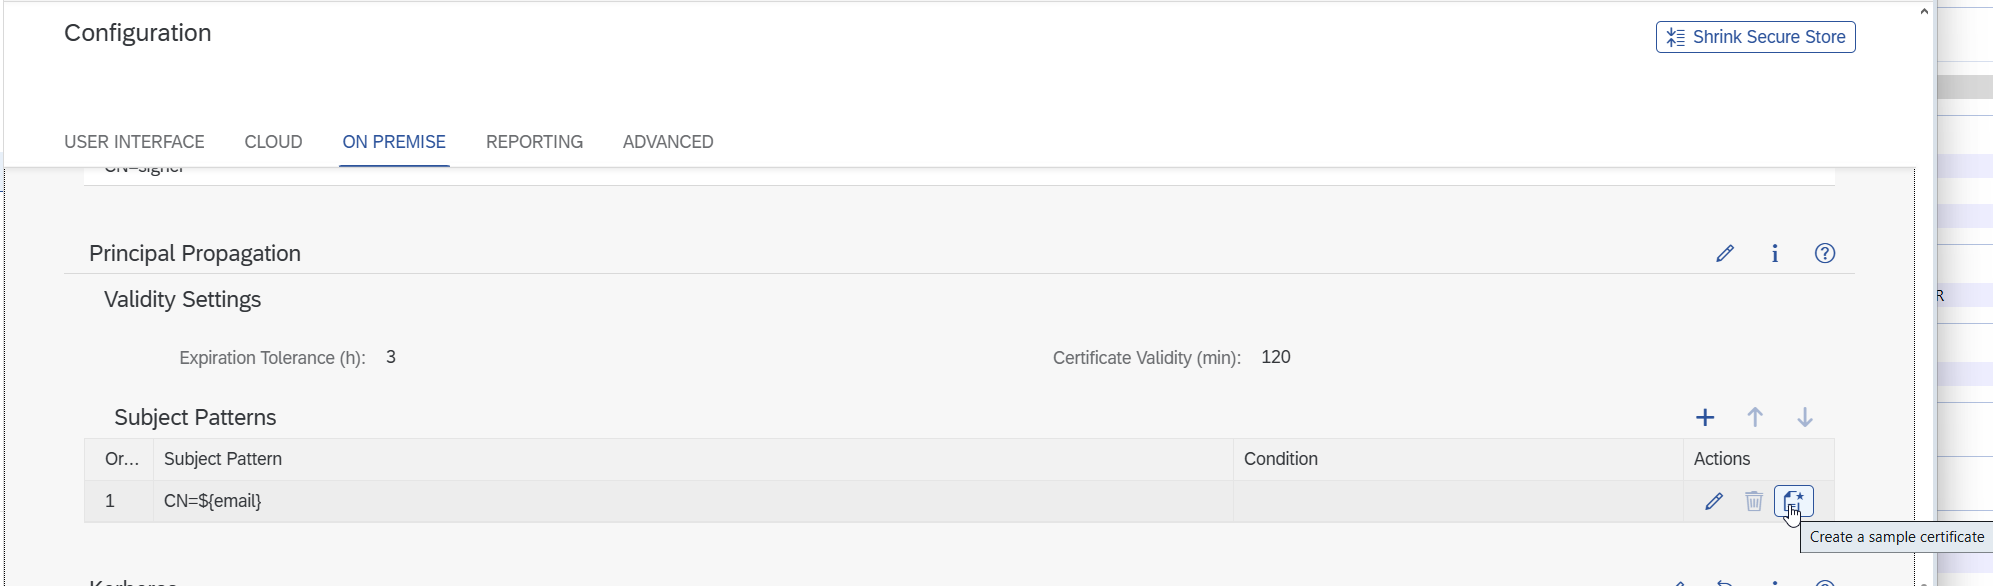
Configure Principal Propagation Pattern
For Principal Propagation additionally create pattern = $email, and download a sample certificate.

Go to Subaccount -> On-Premise -> Principal Propagation -> Synchronize.
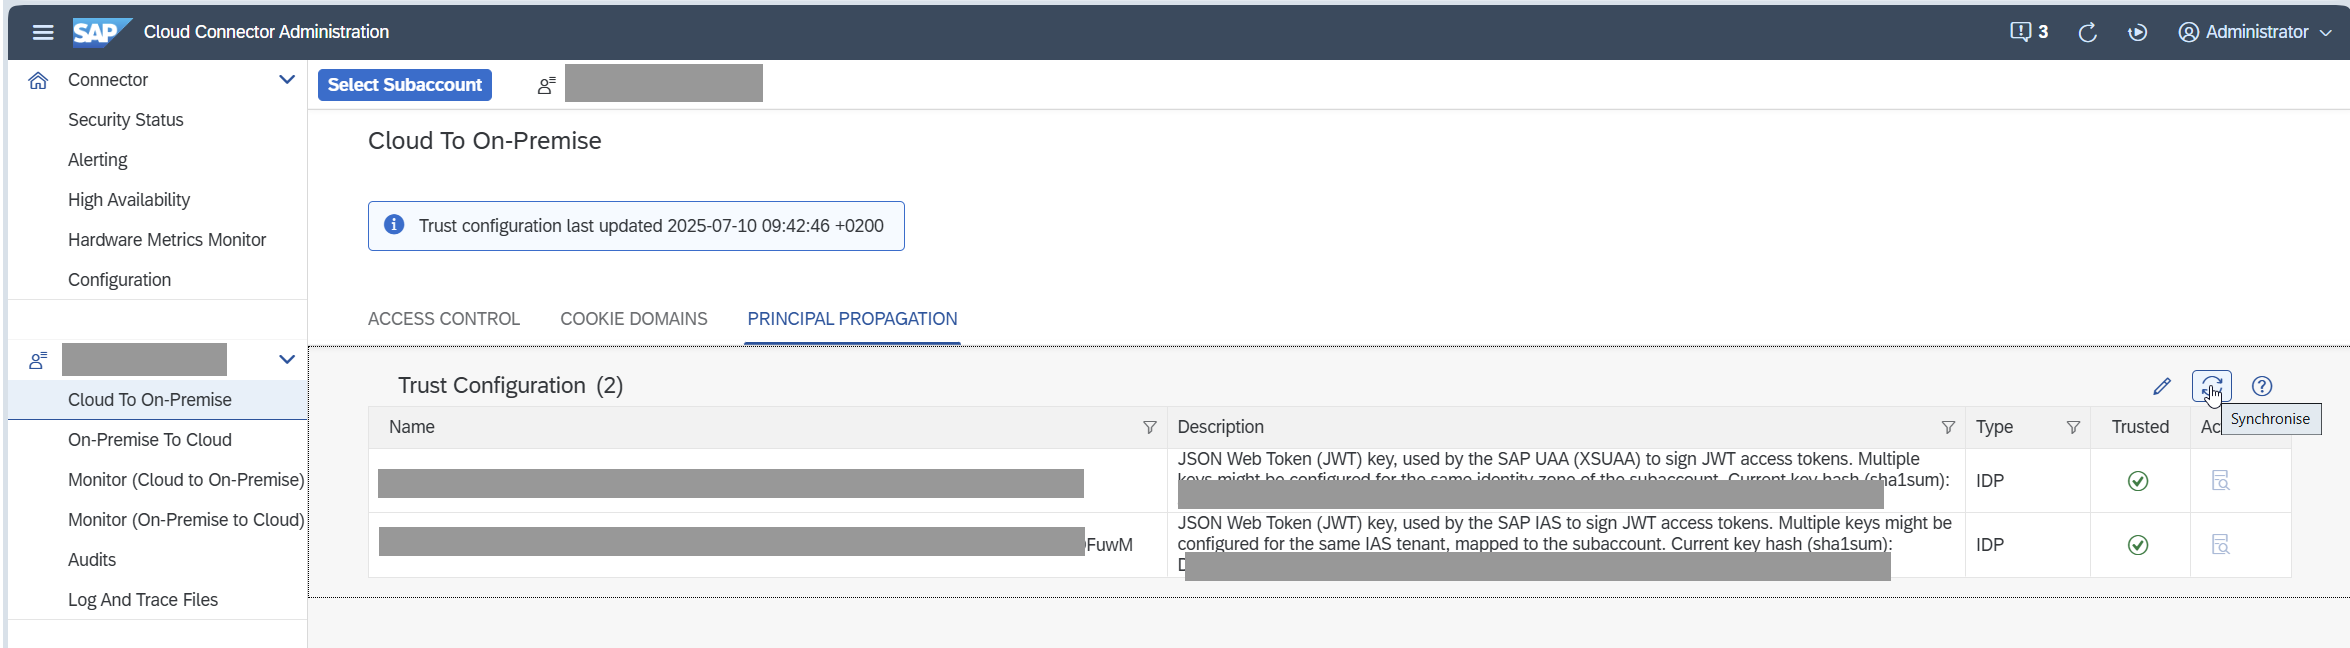
You should now see the newly created Identity Provider (IDP) from the BTP trust setup.
Step 10. Final Configuration on On-Premise SAP System
After the Cloud Connector setup, the connection should be active using Principal Propagation.
Test the Certificate for Principle Propagation in SAP system (optional)
Download a sample certificate from the Cloud Connector.
Enter the email of the target user in the SAP system.

Download the generated certificate.
Log into the SAP system and run the relevant transaction.

If authentication fails, verify that the appropriate rule exists for the user.
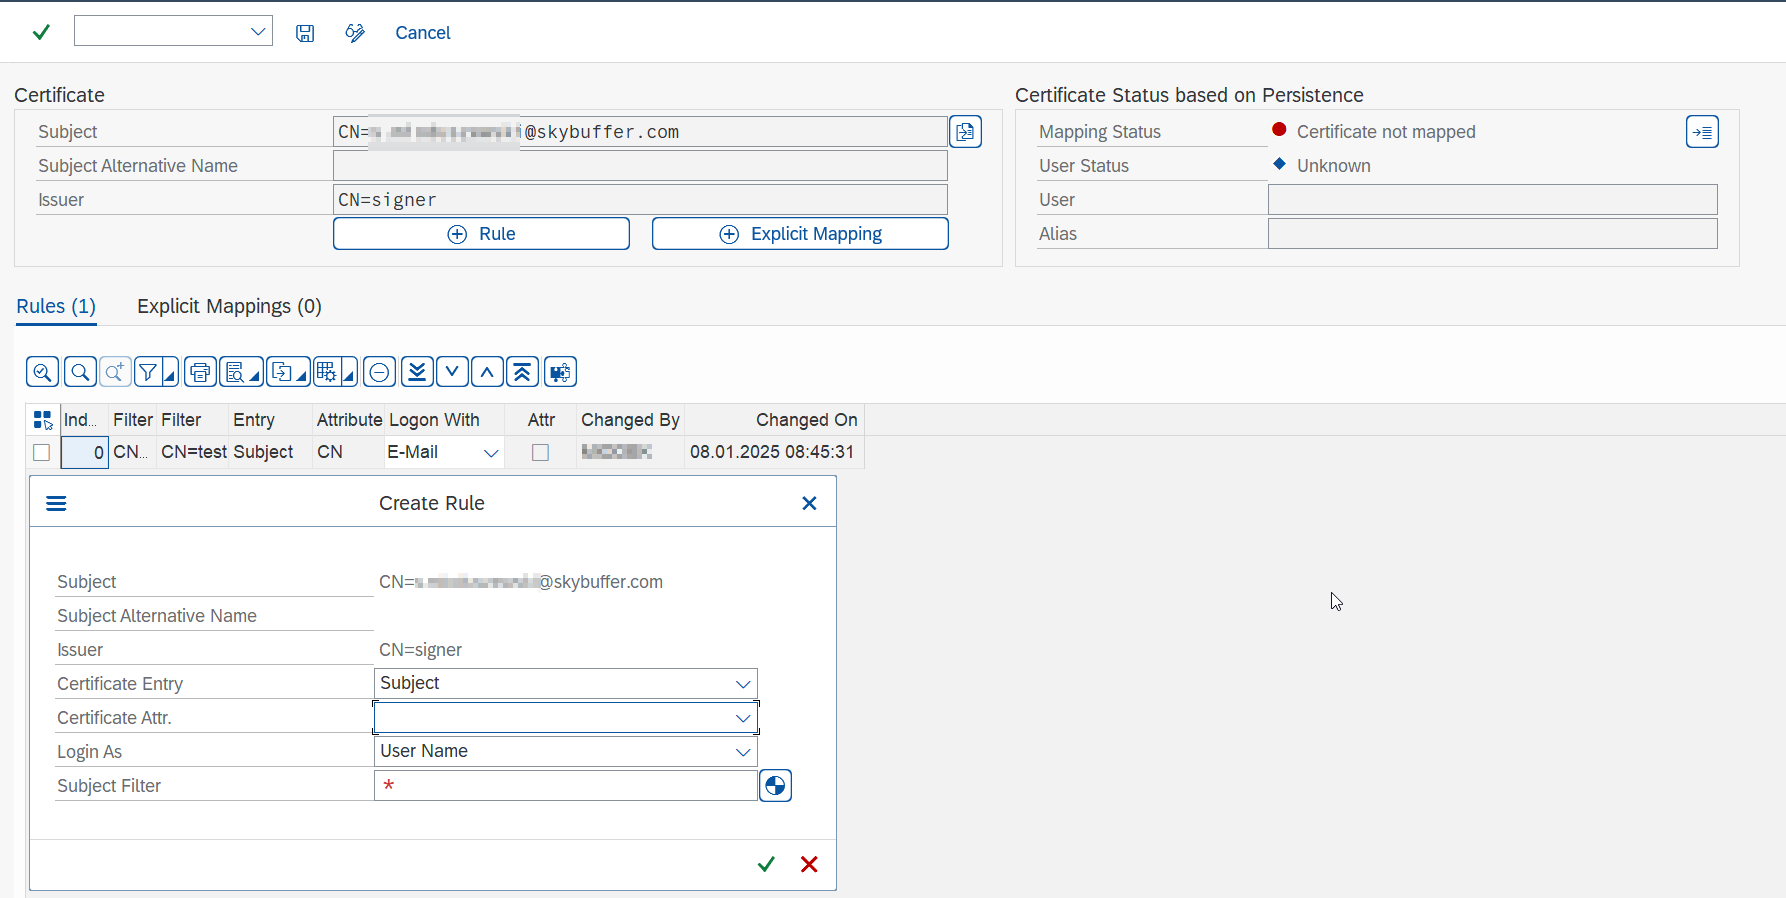
Adjust settings for an e-mail.
![]()
Configure ABAP Parameters
Ensure that the ICM is configured to request a client certificate.
HTTPS port configuration contains VCLIENT=1
icm/server_port_1 = PROT=HTTPS, PORT=8001, TIMEOUT=30,PROCTIMEOUT=60, VCLIENT=1
or the HTTPS port configuration does not contain VCLIENT parameter as the default value is 1:
icm/server_port_1 = PROT=HTTPS, PORT=8001, TIMEOUT=30,PROCTIMEOUT=60
The ICM process will not ask for client certificate when HTTPS port configuration contains parameter VCLIENT=0 or global ICM parameter icm/HTTPS/verify_client is set to 0:
icm/server_port_1 = PROT=HTTPS, PORT=8001, TIMEOUT=30,PROCTIMEOUT=60,VCLIENT=0
or
icm/HTTPS/verify_client = 0
If icm/HTTPS/verify_client is set to 0, the VCLIENT=1 parameter must be added to the HTTPS port configuration:
icm/HTTPS/verify_client = 0
icm/server_port_1 = PROT=HTTPS, PORT=8001, TIMEOUT=30,PROCTIMEOUT=60, VCLIENT=1
as individual port configuration overrides the global parameter.
Troubleshooting and References