Channel Creation
Step 1. Open the AI Agent Configurator application in the AI Agent group.

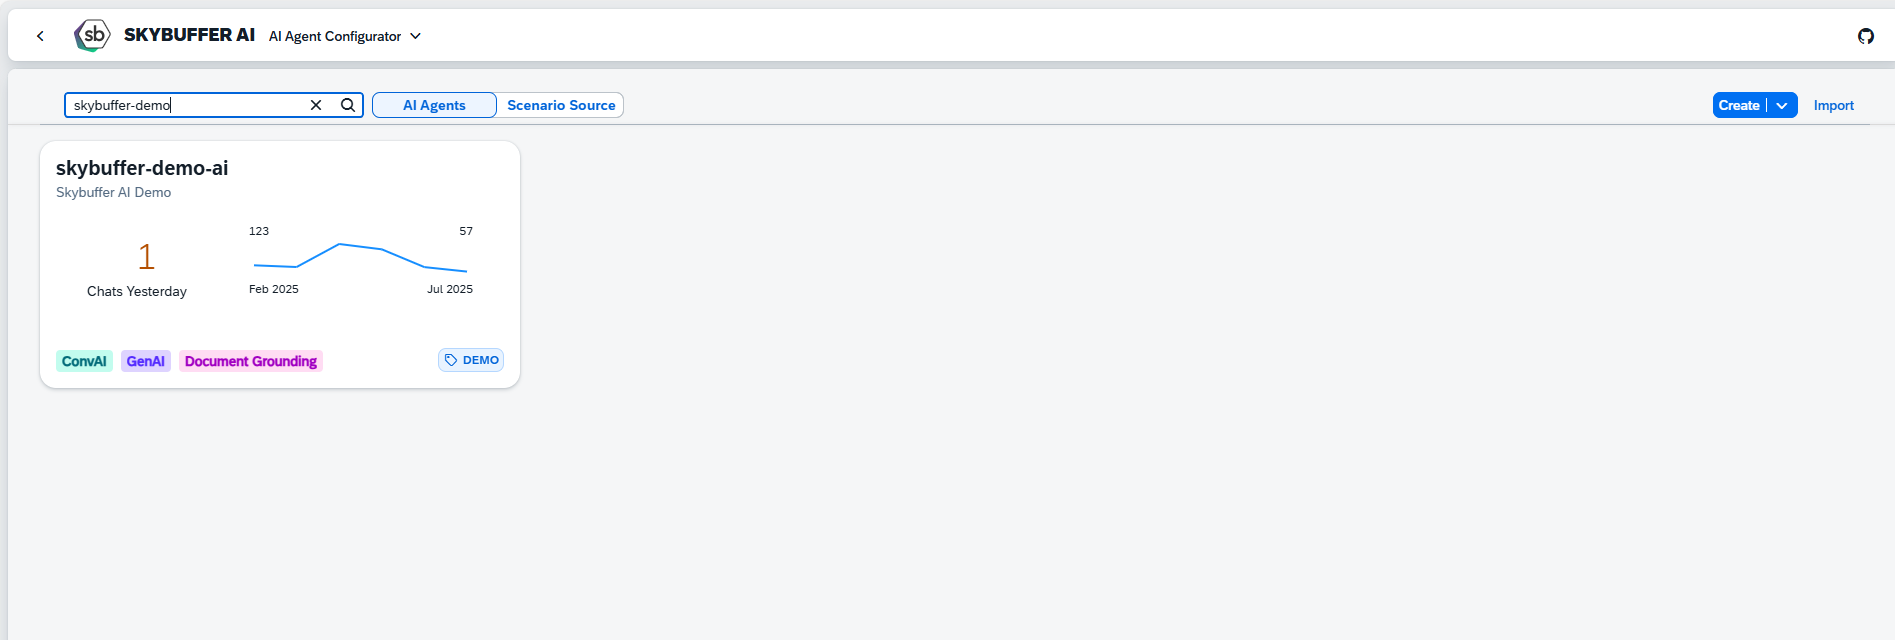
Step 2. After opening the application, you will see a screen displaying all available AI Agents. Each tile represents one Agent, including its name, description, and deployment status. Click on the Agent you want to work with to proceed.
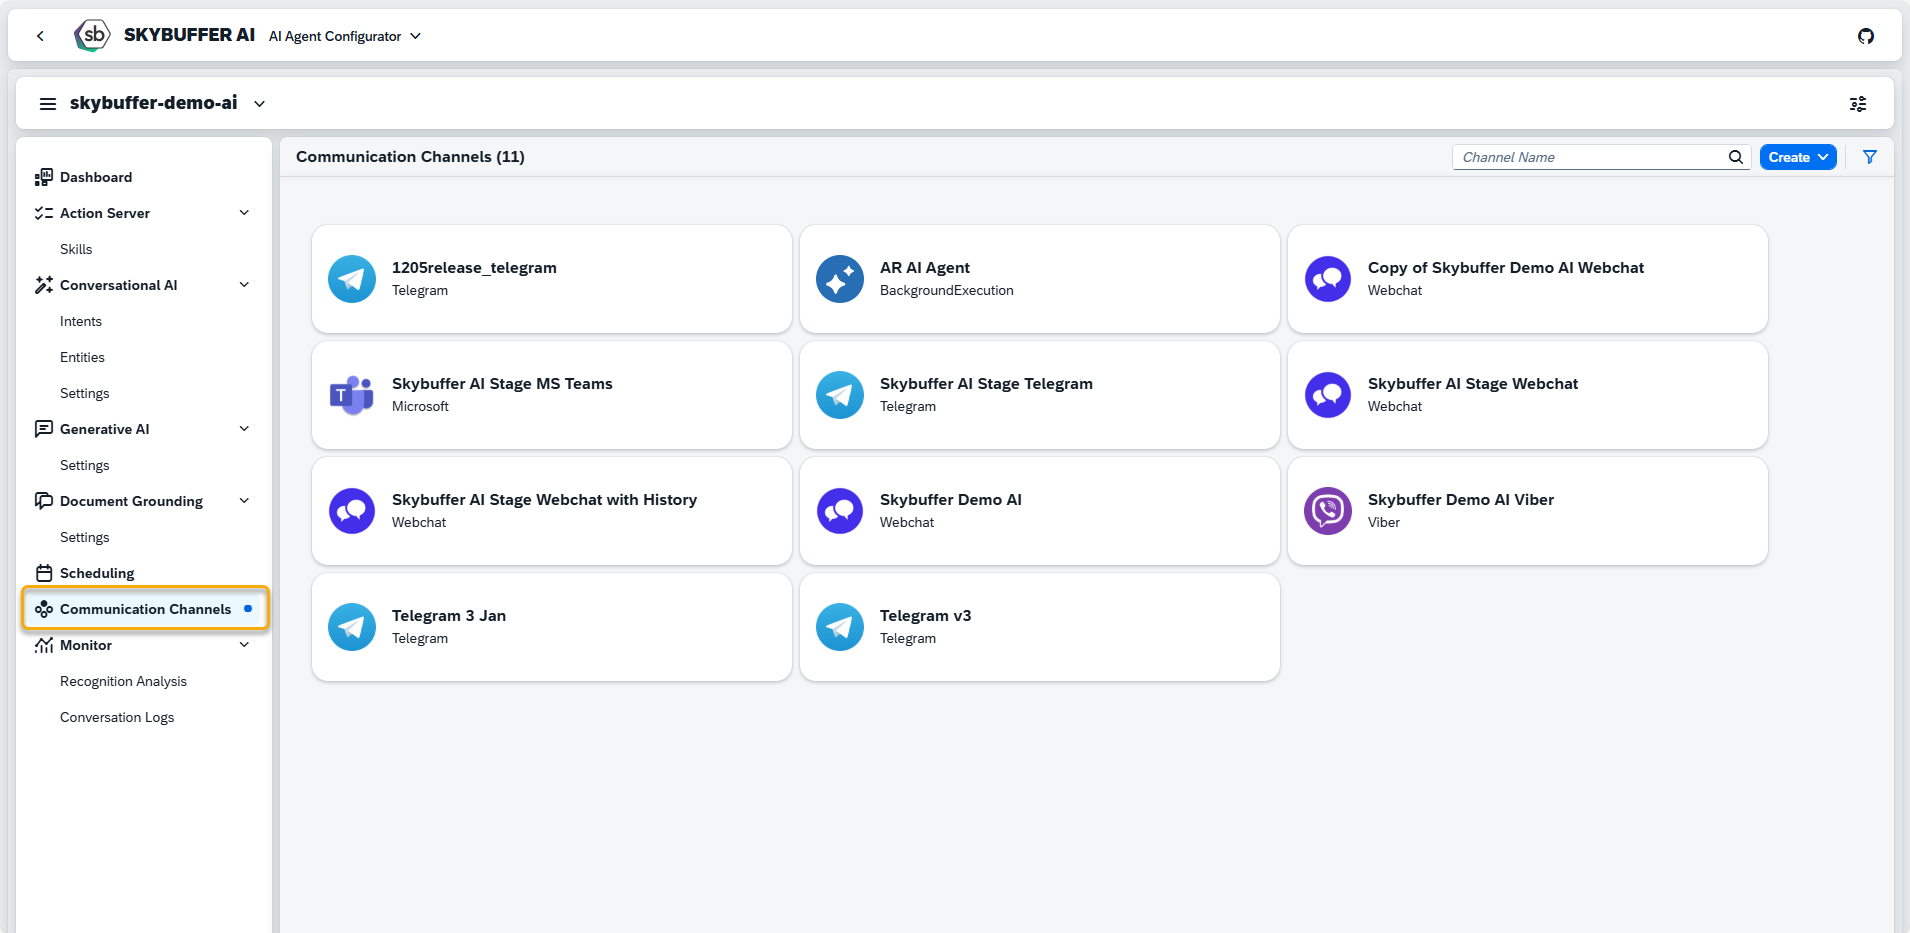
Step 3. Open the Channel management application- Communication Channels.
Step 4. Channel creation.
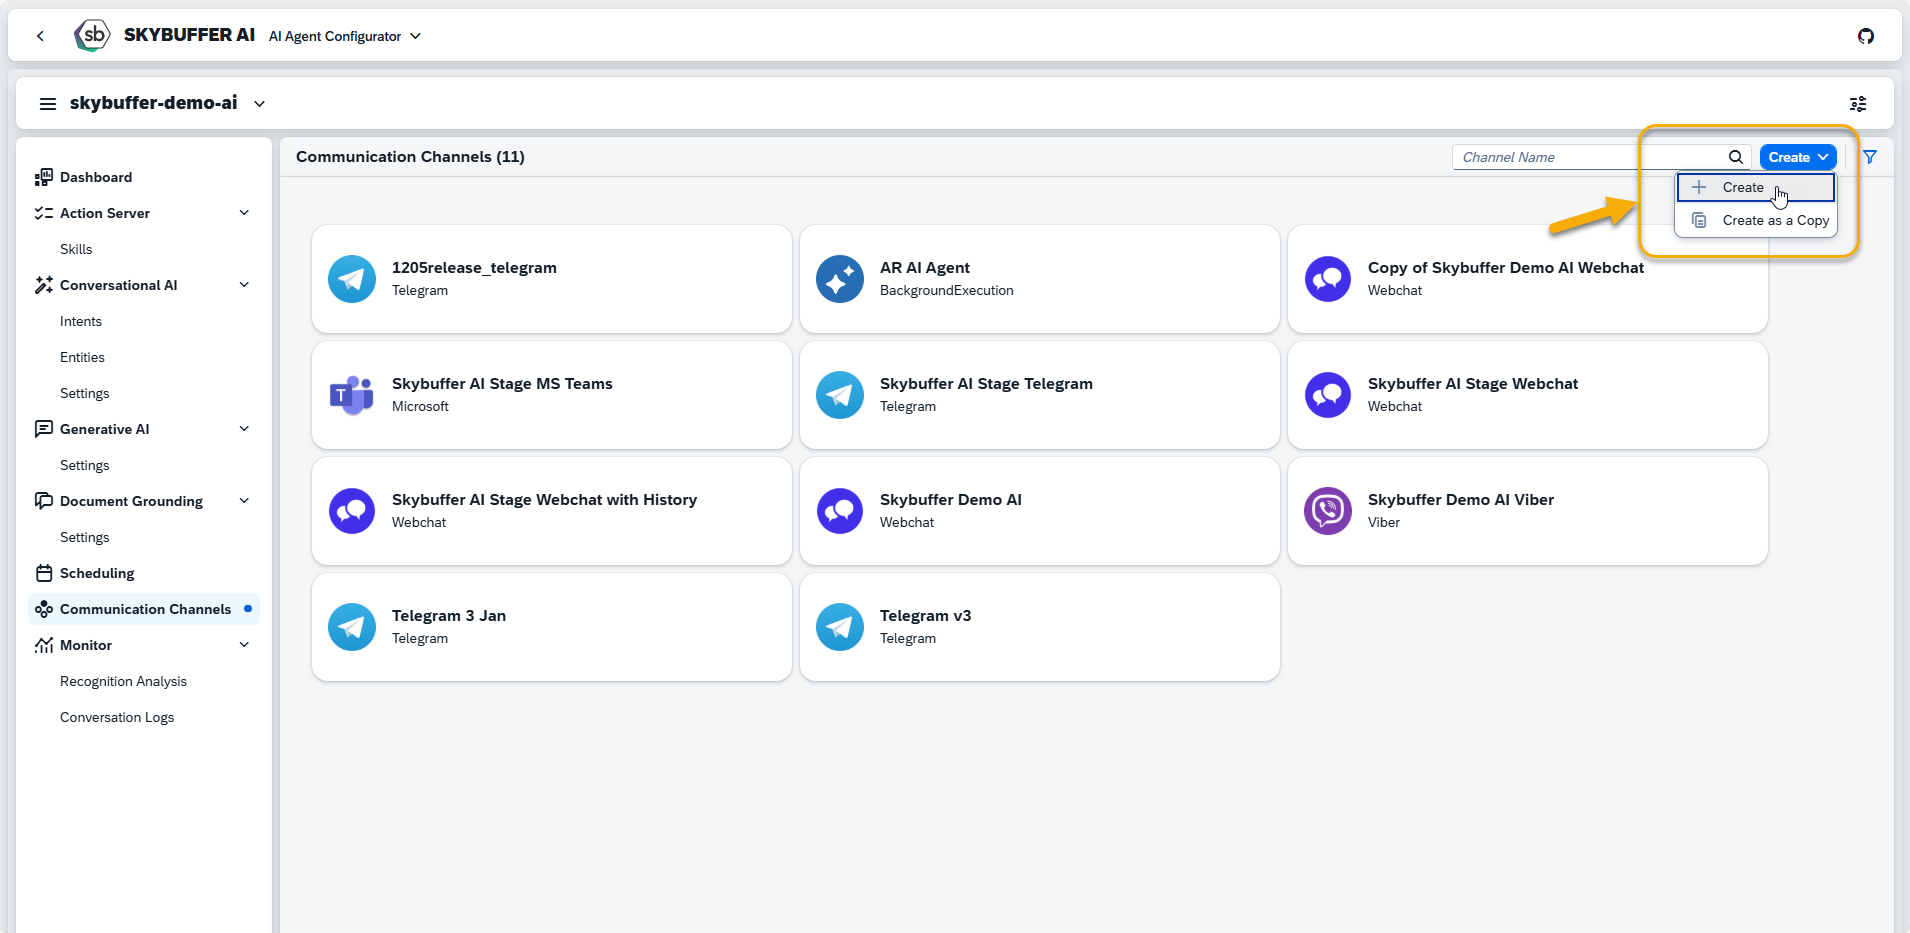
You can create a new Channel from scratch or Copy the Existing Channel.
To create a new Channel, click the Create button:
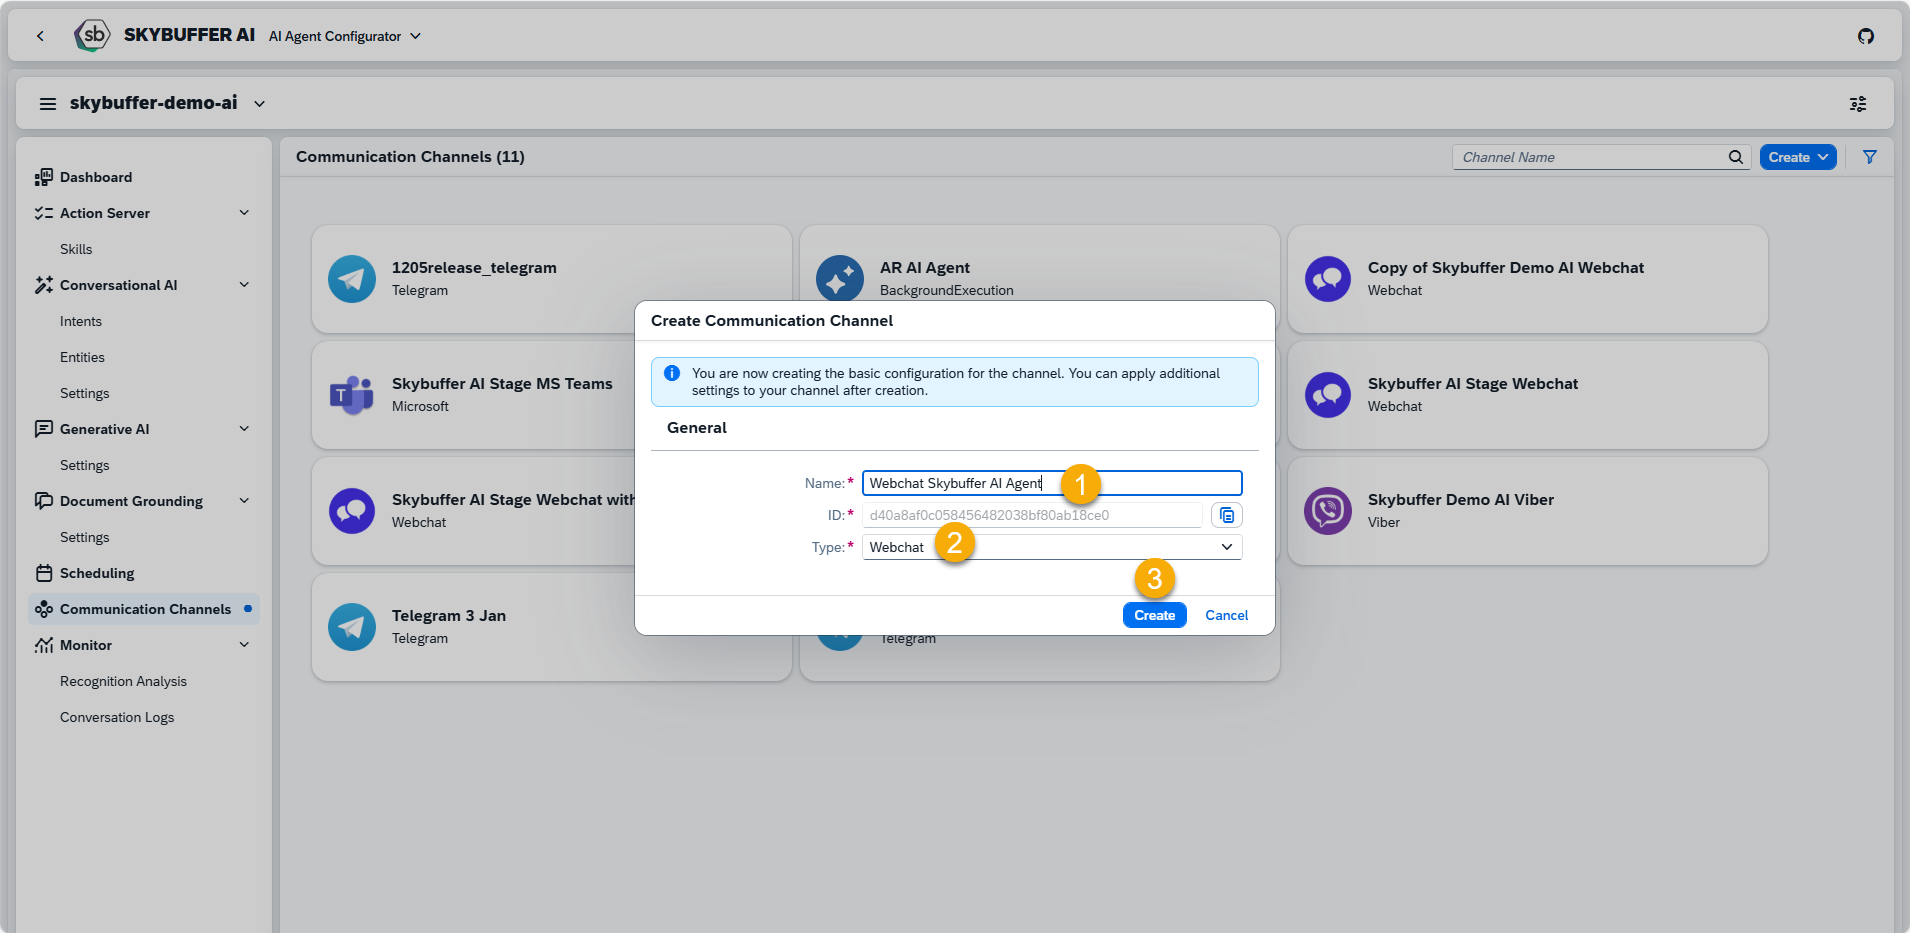
Step 5. Initial Parameters
Fill in the initial parameters for the new Channel. The form includes:
- Channel Name — follow your organization’s naming convention.
- Channel ID — this field is auto-generated.
- Channel Type — select from a list of available types (e.g., Webchat, Microsoft, Telegram).
Press the Create button:
NOTE: A Webchat Channel with default settings is automatically created when a new AI Agent is created.
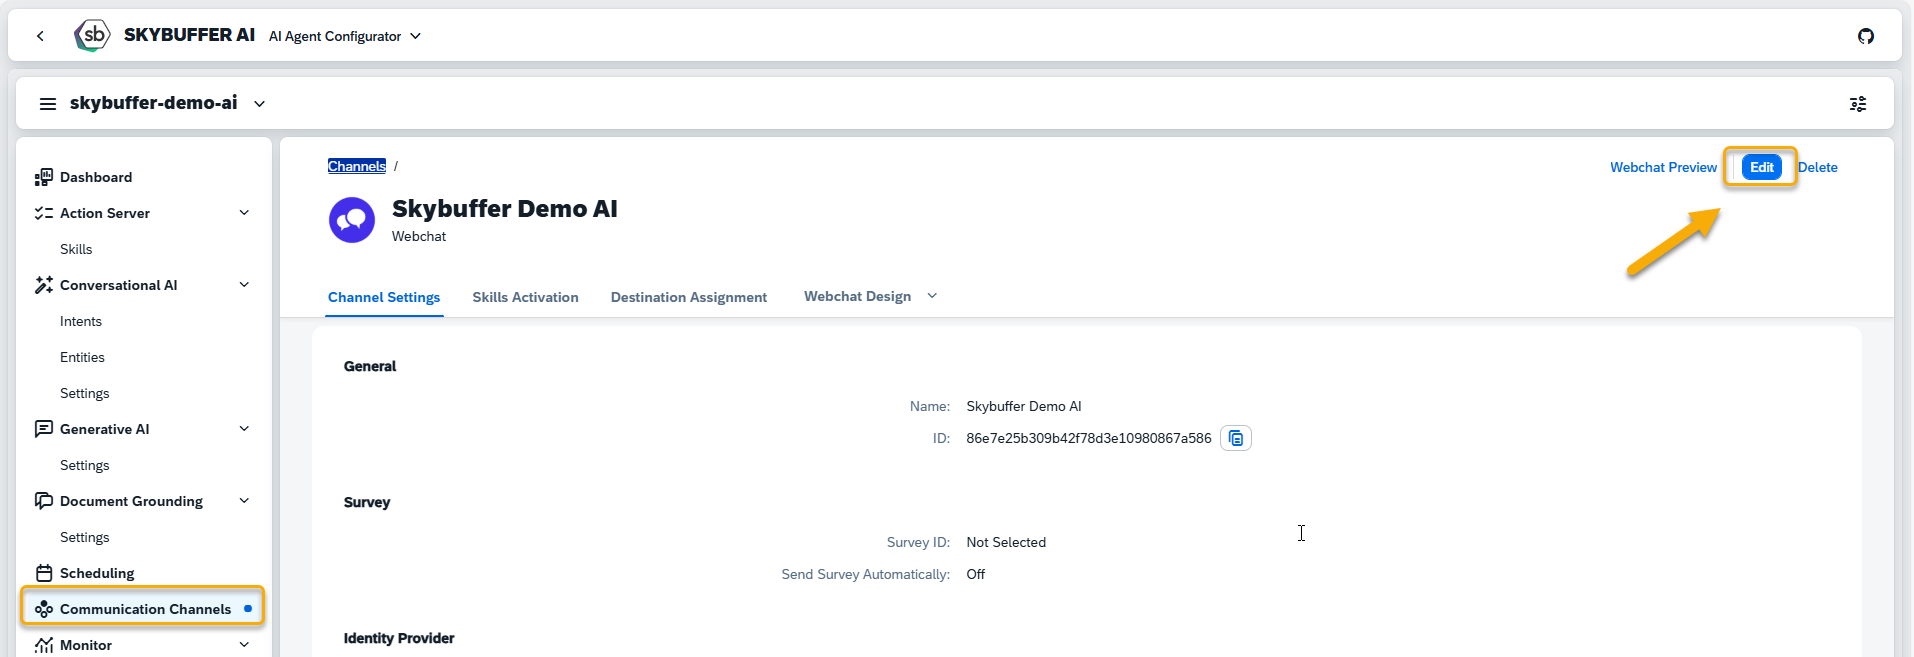
Step 6. Channel Settings.
To configure additional settings for your Webchat Channel, click the Edit button.

Within the Webchat Channel type, you can choose from several survey options:
- Survey ID — select a previously created survey form from the drop-down menu.
NOTE: Surveys must be created in the Survey Craft application.
- Send Survey Automatically — choose either Off or When chat ended.
- Identity Provider Application — select an existing SSO setup from the drop-down list or choose None.
Click Save to complete Channel creation.
Step 7. Tools Activation
Once your Channel is created, you can activate or deactivate Tools defined within your AI Agent.
For more information, visit: Tools Activation.
Step 8. Destination Assignment
This setting allows you to assign destinations to tools that have backend-connected actions.
For more information, visit: Destination Assignment.
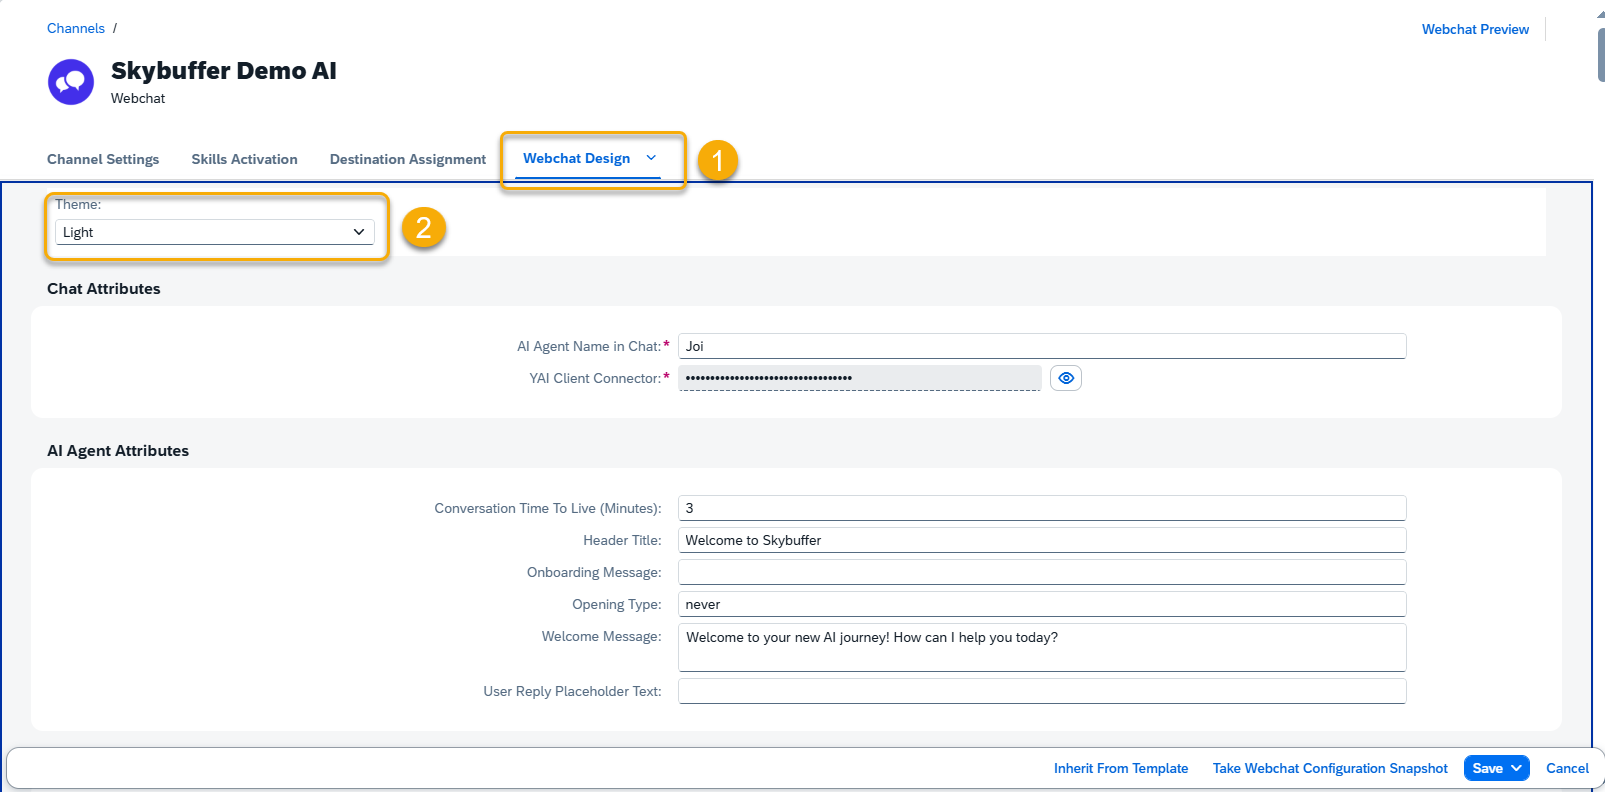
Step 9.Webchat Design (Webchat Channel type only)
This section contains the connector settings and style properties for each Webchat element (e.g., size, color, font).
To edit styles click the Edit button, select the Webchat Design section from the top bar (1) and choose the Theme you want to edit. The active theme will be marked Default, others will be labeled Maintained.
Theme is a saved set of style properties. For example, a Dark Theme could use darker colors for the Webchat window.
NOTE: it is not recommended to save the Dark Theme as default.
Key configurable features include:
- Chat Attributes
- AI Model Attributes (conversation lifetime, welcome message, header)
- Chat Settings (open mode, file sending toggle, pop-up messages toggle)
- Expander Settings (style of the button used to open Webchat)
- Messages Settings (initial message, busy indicator, voice message toggle)
- User Authentication Settings
- Style Settings (fonts, colors, window and message styles)
- Pop-up Message Style
- Adaptive Card Style (font, color, size, background, separators, icons)
- Audio Settings
- Amazon and Google Settings
- Survey Style (font and background colors, scale icon files)
- Memory Parameters (initial memory parameters sent by the AI Agent)
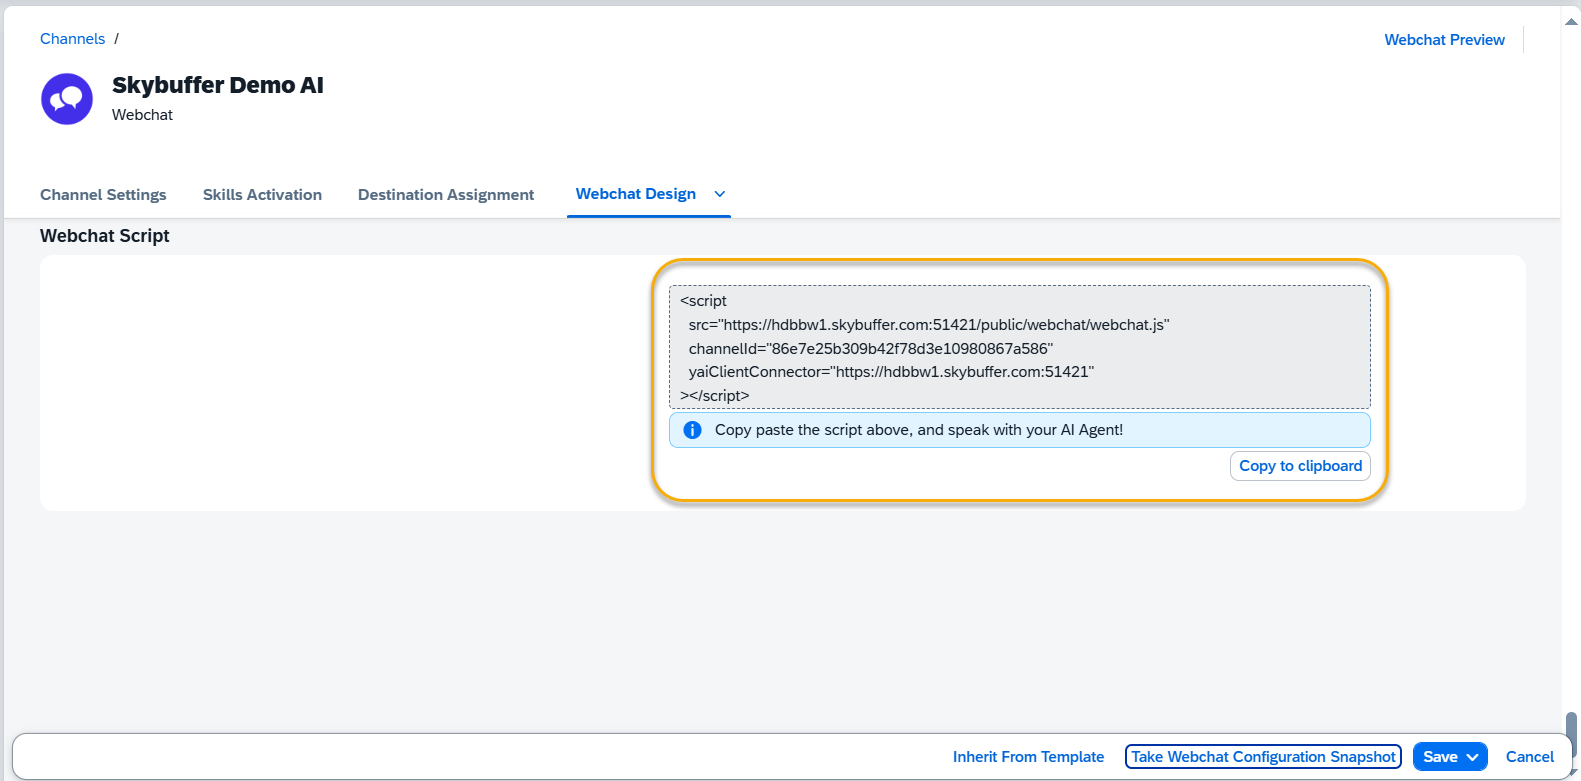
- Webchat Script
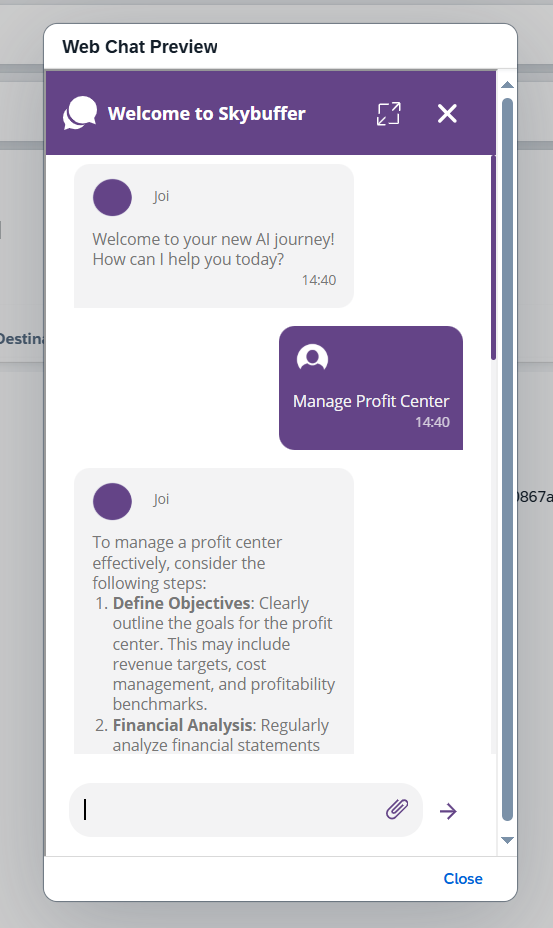
Step 10. Webchat Preview
Click the Webchat Preview button in the top right corner. This preview acts as a mini-website with the Webchat component and uses the current style settings.
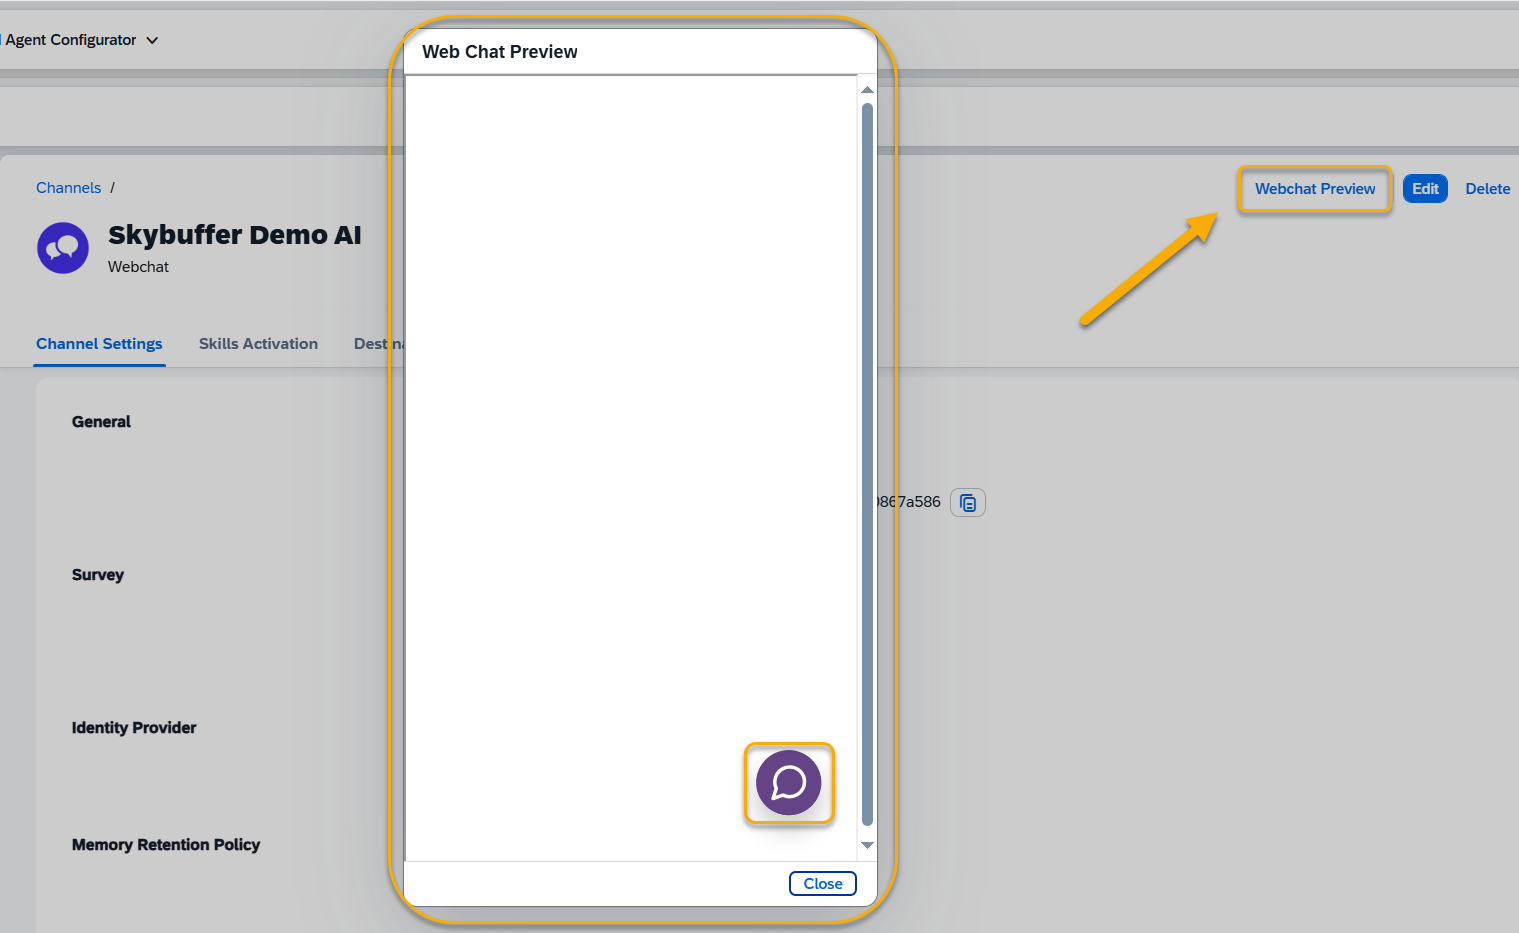
You can send messages in preview mode, but for full functionality, tools must be activated and destinations assigned.
Step 11. Webchat Style Templates
You can save a set of style properties as a named template to reuse across Channels.
One template can be set as the default for a given tenant.
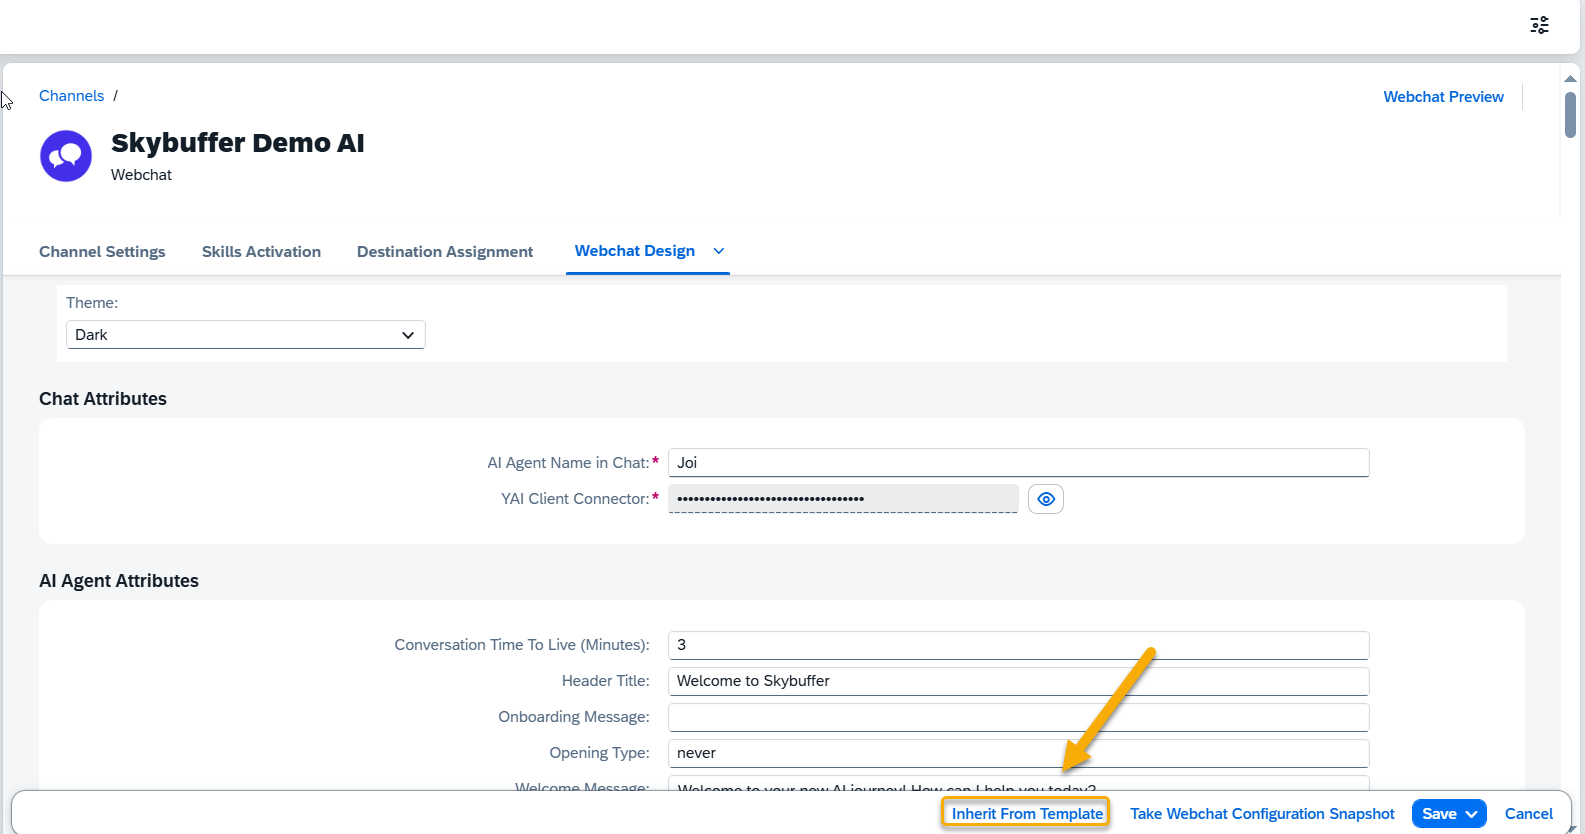
Step 12. Inheriting Style from Template
When creating a new Channel, you can use the tenant’s default style or apply a different template.
To apply a different template click Inherit From Template at the bottom of the page and select a template from the drop-down list.
Click the template name to apply it.

Step 13. Creation of a New Template
Every time you create and save a new Webchat, a new template is automatically generated using the same name.
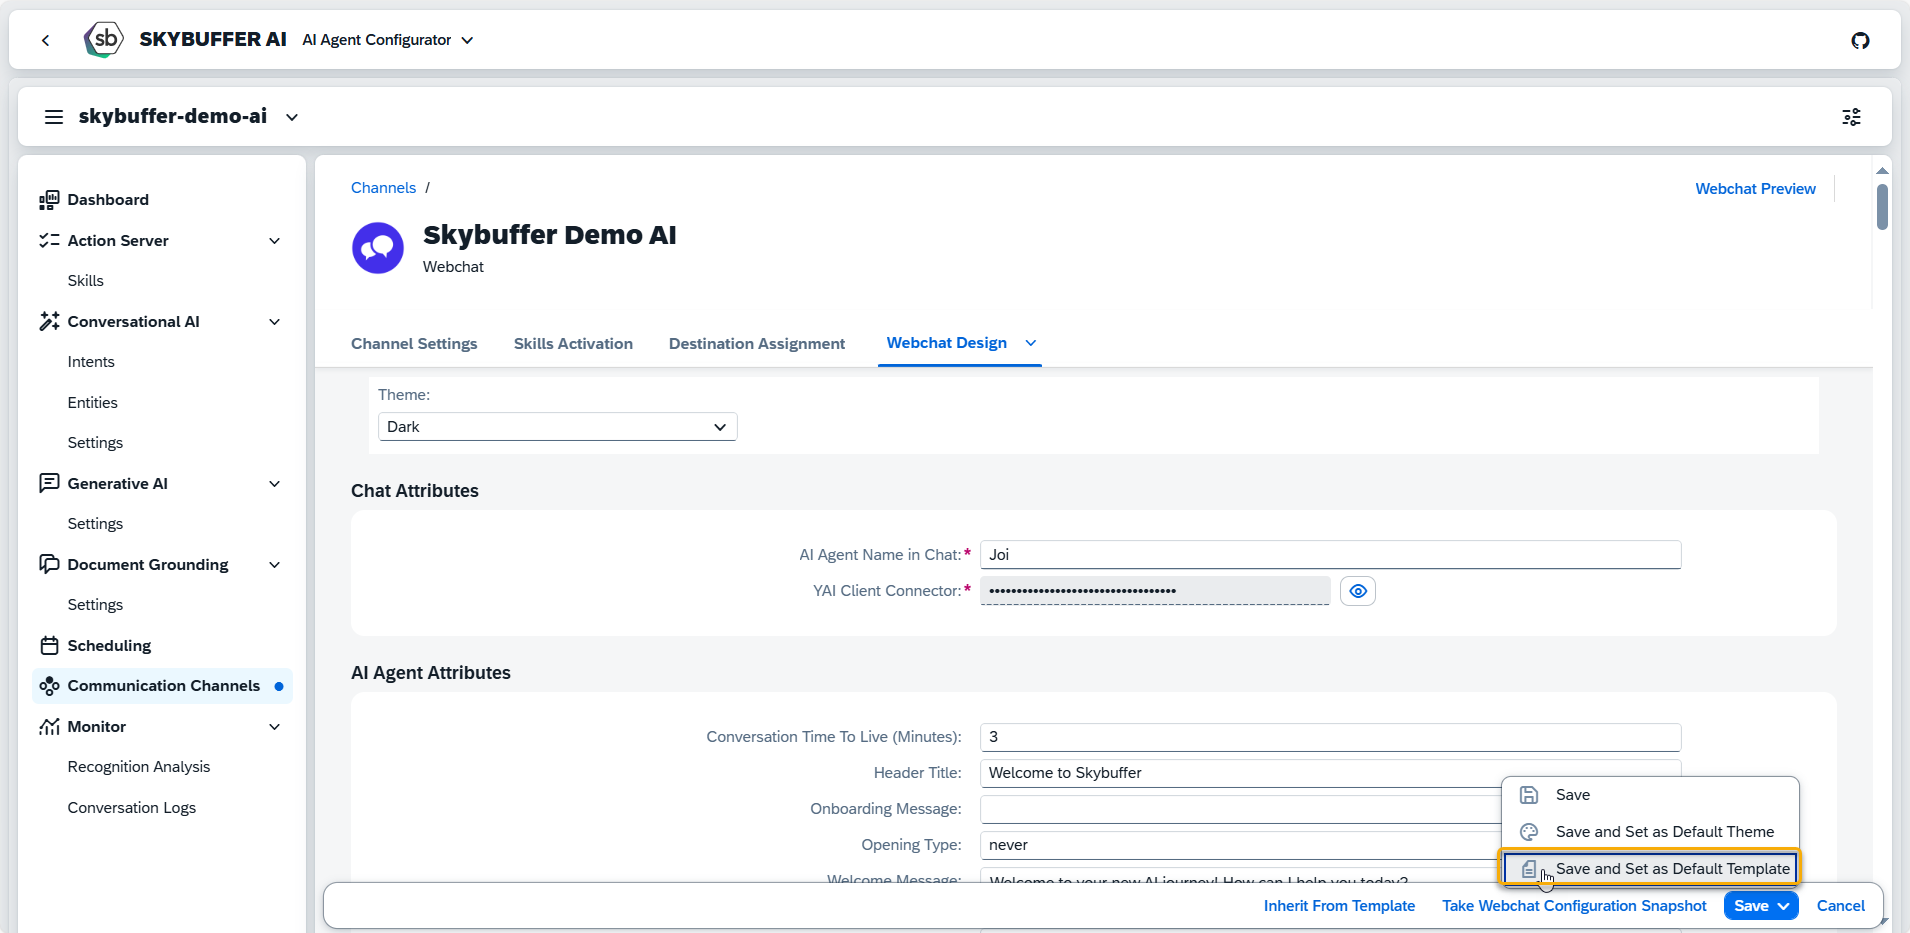
Step 14. Setting Template as Default
To set the current style set as the default for the tenant, choose Save and Set as Default.
The default template is automatically applied to newly created Channels.
Step 15. Taking Configuration Snapshot
In order to take a Configurating Snapshot click on Take a Configurating Snapshot button at the bottom of the page and than click on Copy to clipboard.
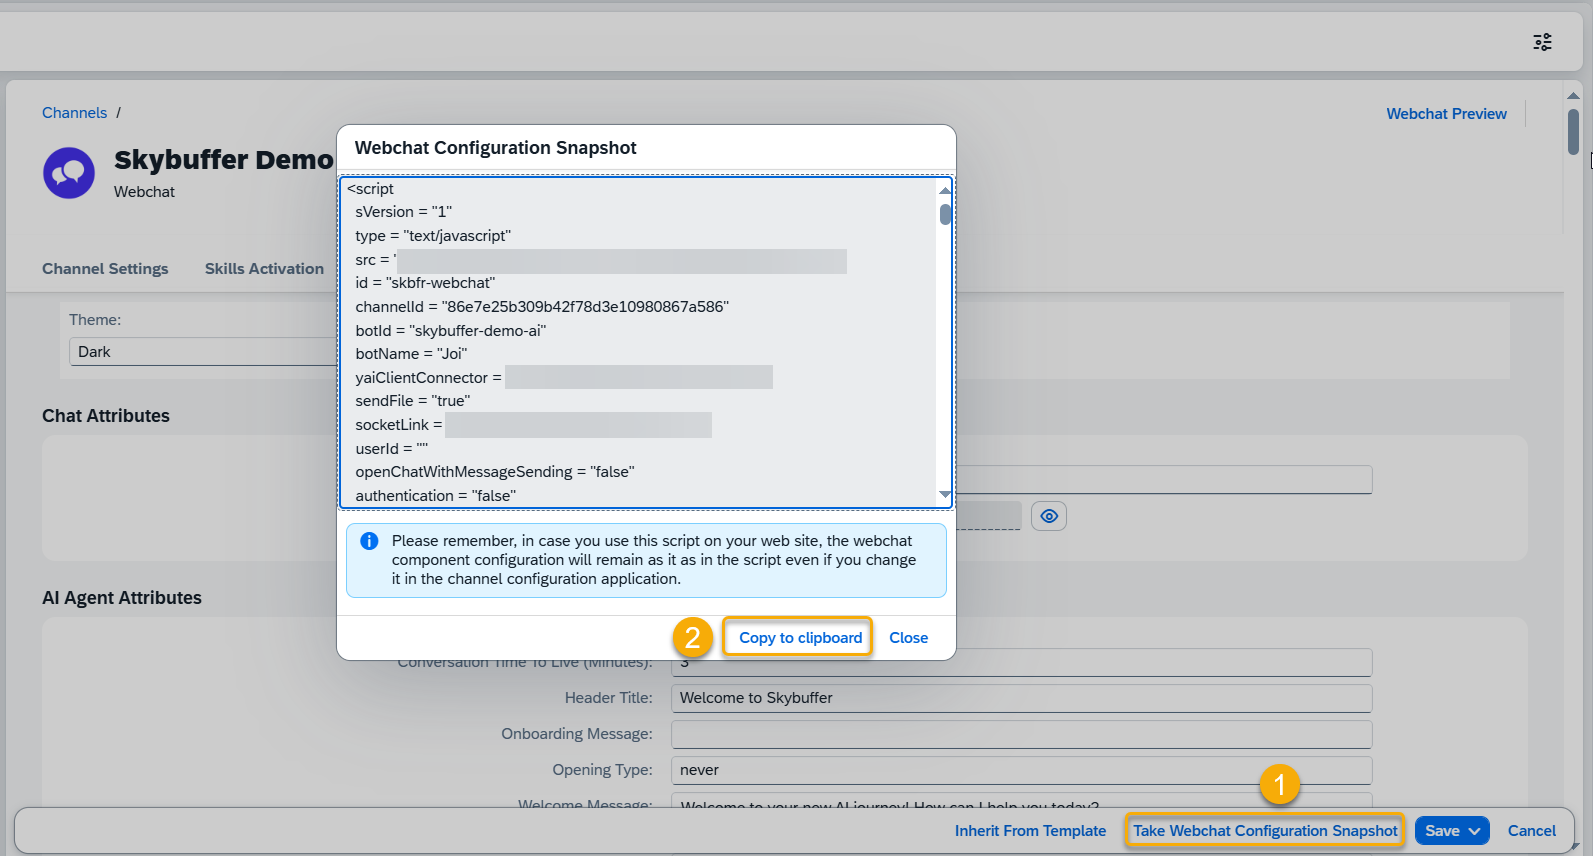
Step 16. Copy the script to your webpage
Once all properties are set, copy the script from the Webchat Script field and paste it into your website. This only needs to be done once.