Models Hub
Models Hub is an application to create different types of destinations: AI, Shared Location and Translation.
Step 1. Open the Models Hub application in AI Agent group:

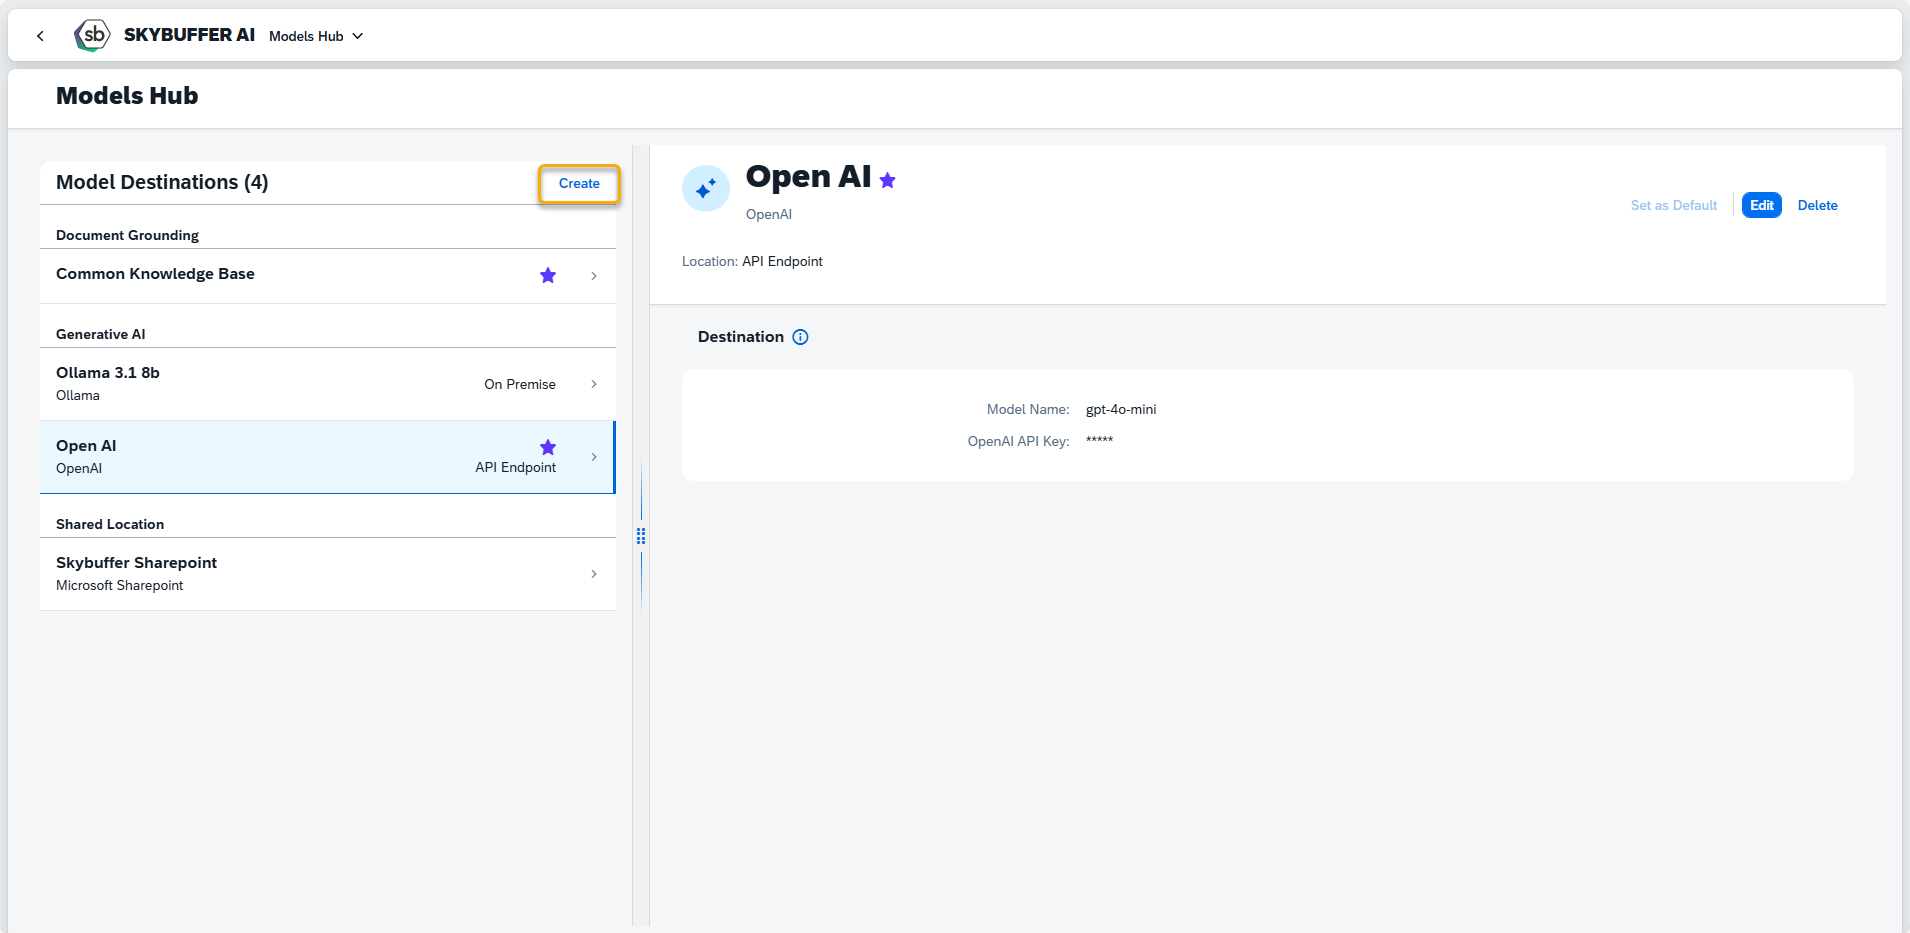
Step 2. To add a new connection, press the Create button:
There are several types of destination available:
- AI – For AI destinations such as Generative AI model destinations or Document Grounding space destinations.
- Shared Location – For document storage locations, primarily used for conversion in the Document Grounding Hub (e.g., Microsoft SharePoint or other shared repositories).
- Translation – For Translation connections
Step 3. Creating AI Destination
Generative AI Destination
For guidance and some hints, click the Information icon
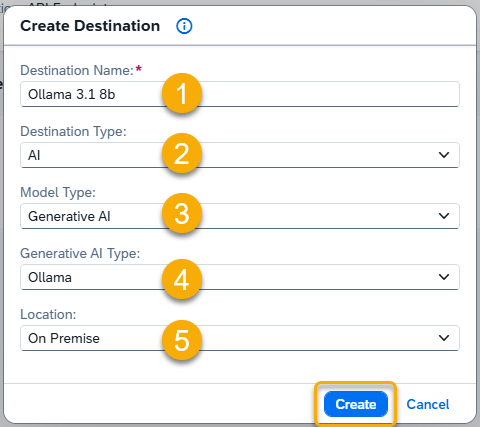
Destination Name: Enter a unique name to easily identify this model destination. (1)
Destination Type: AI (2)
Model Type: Generative AI (3)
Additional Fields for Generative AI
If you select Generative AI, the following additional fields will appear:
- Generative AI Type: Choose either Ollama or OpenAI. (4)
- Location: (5)
- For Ollama: Select from On-Premise, SAP AI Core, or SAP Generative AI Hub.
- For OpenAI: Choose either SAP Generative AI Hub or API Endpoint (if you plan to use your own OpenAI API key).
Press the Create button.
Once you destination is created, fill in the remaining parameters.
Parameters to be filled in for Ollama:
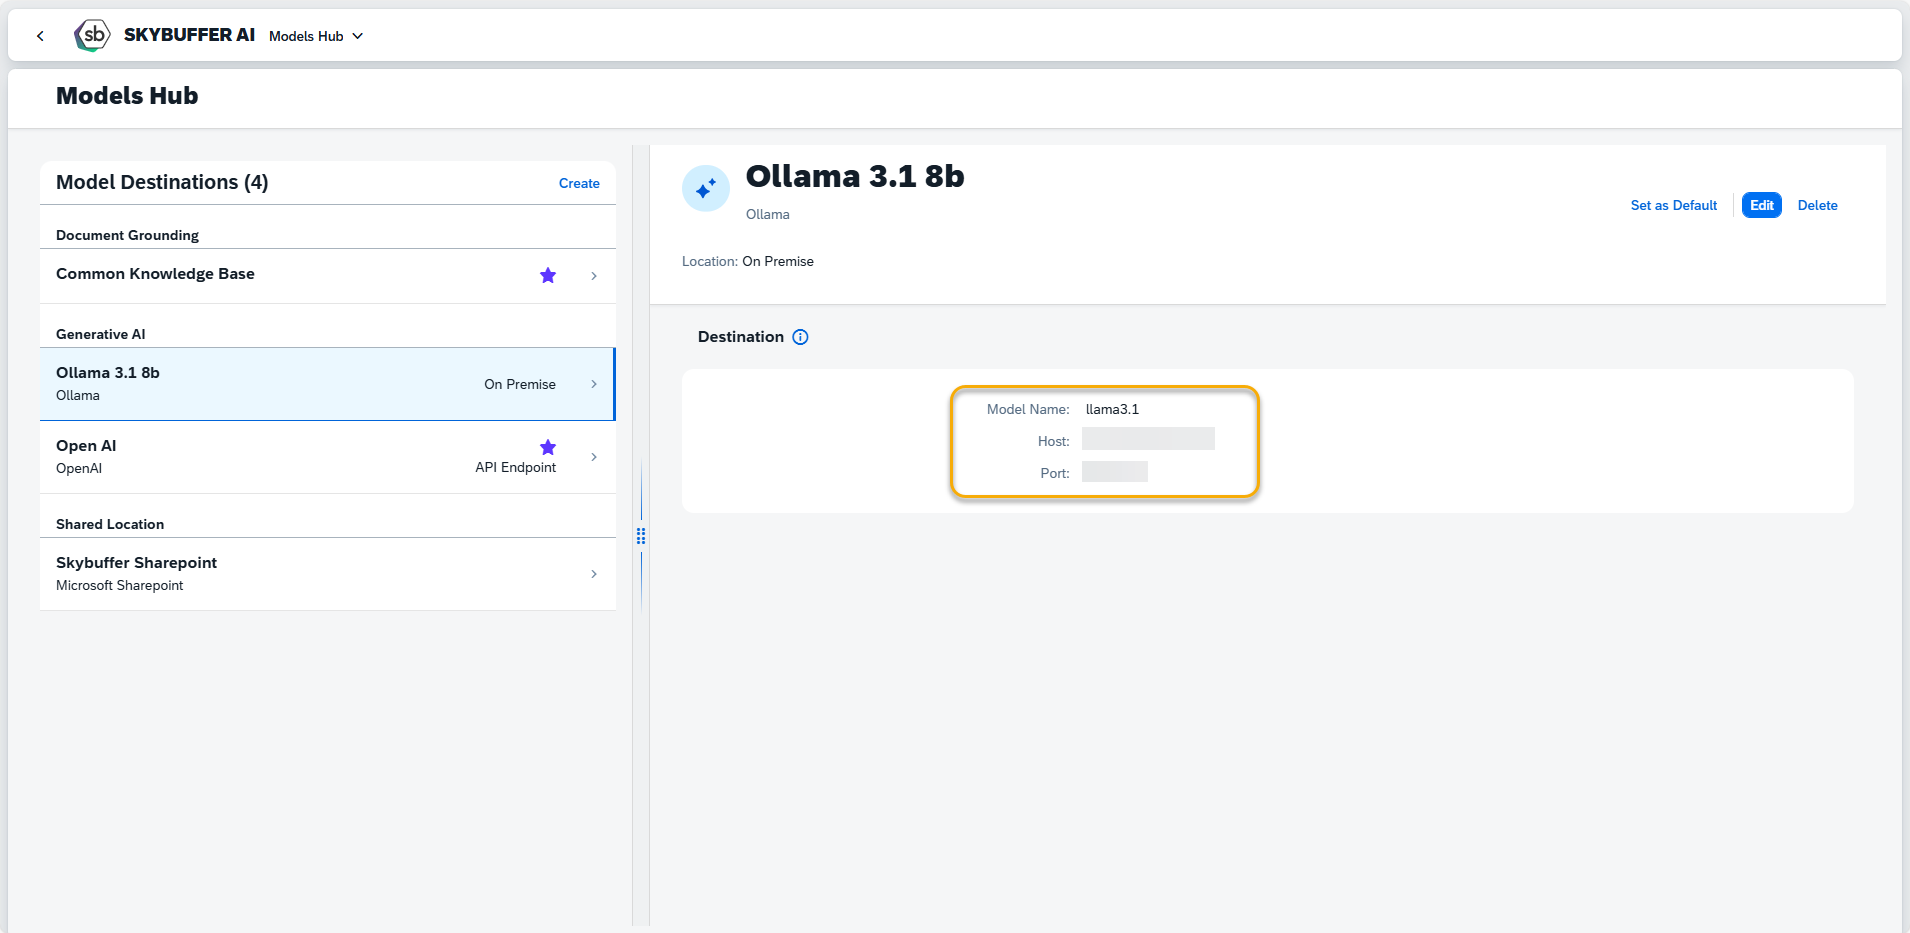
Model Name: Refer to this library and input the model name from the variants installed in your environment.
Host: Enter the server address or hostname where the model is deployed (e.g., 123.456.78.90 or modelserver.domain.com).
Port: Specify the port number required for connecting to the model (e.g., 8080).
Parameters to be filled in for OpenAI:
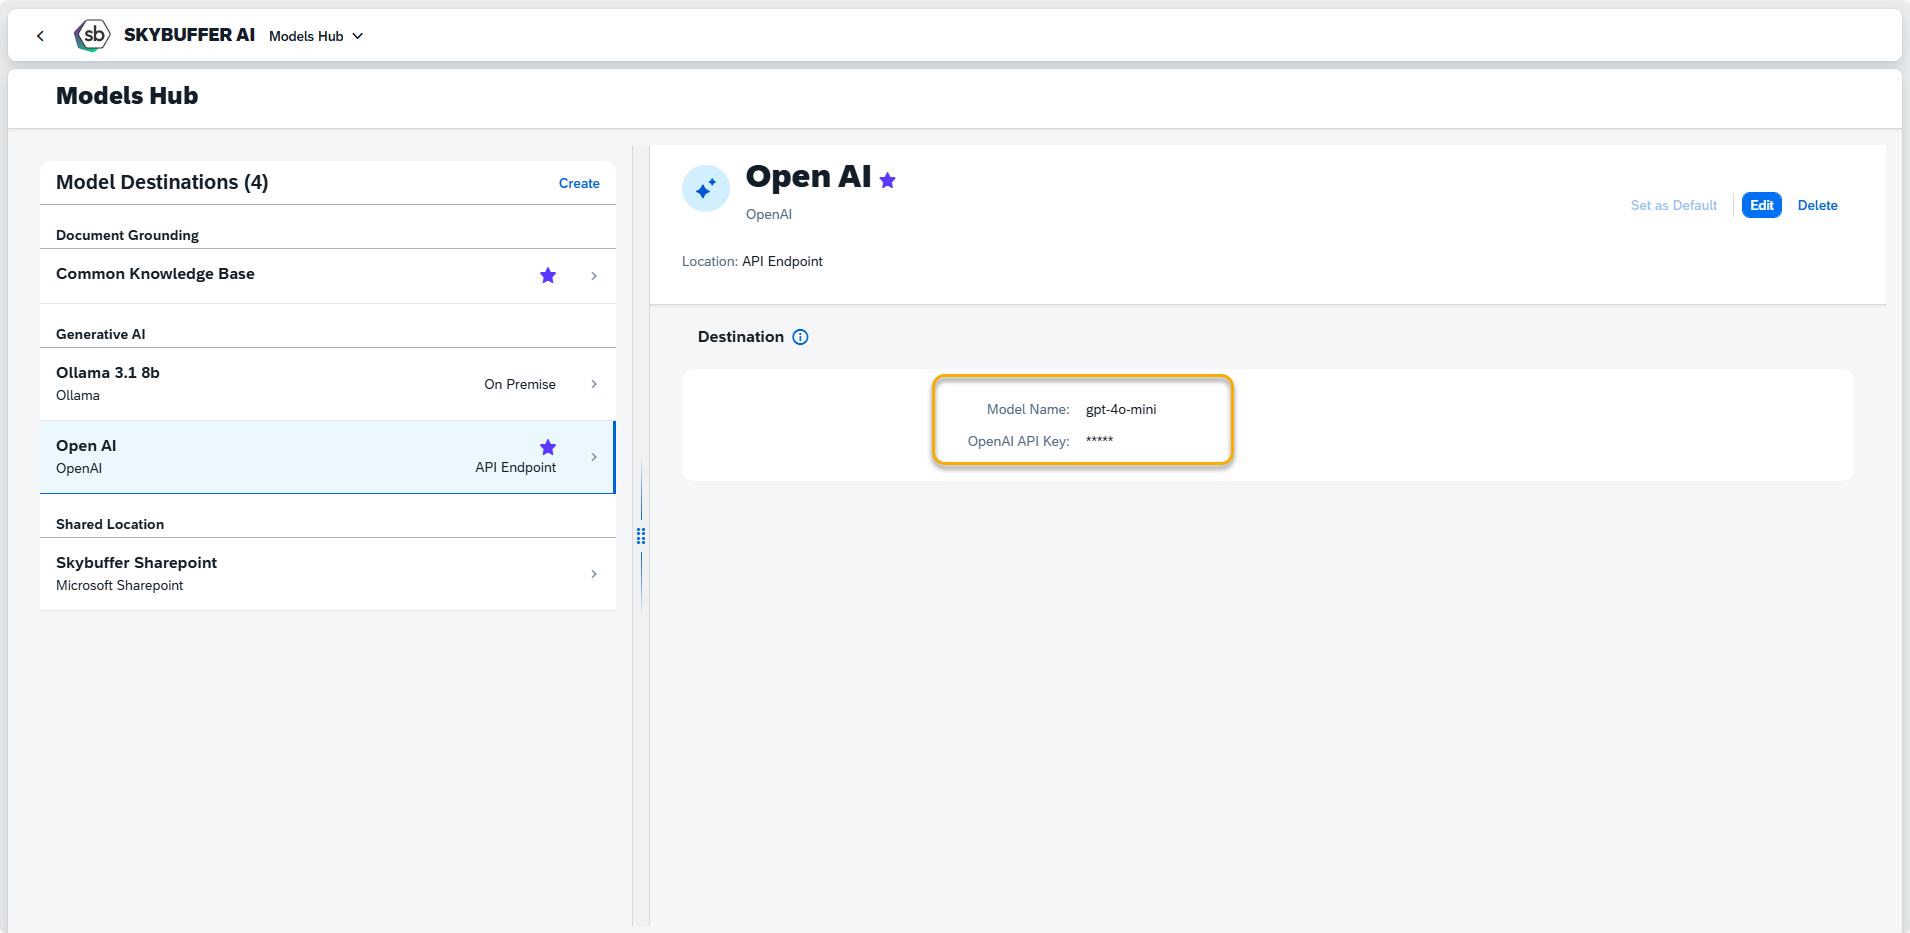
Model Name: Specify the name of the OpenAI model you wish to connect to, such as gpt-4, text-davinci-003, or other available models. For a full list of OpenAI models, refer to the OpenAI Models documentation.
OpenAI API Key: Enter your unique OpenAI API key to authenticate and enable access to OpenAI’s models. This key is required for all API requests.
Create Document Grounding Destination
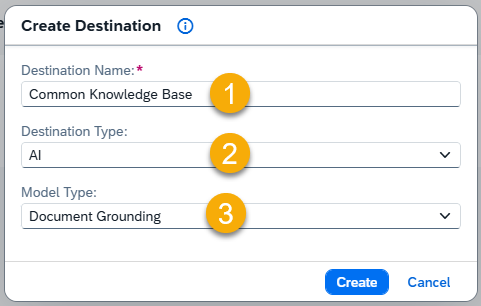
Destination Name: Enter a unique name to easily identify this model destination. (1)
Destination Type: AI (2)
Model Type: Document Grounding (3)
Press the Create button.
Once you destination is created, fill in the remaining parameters.
Parameters to be filled in for Document Grounding:
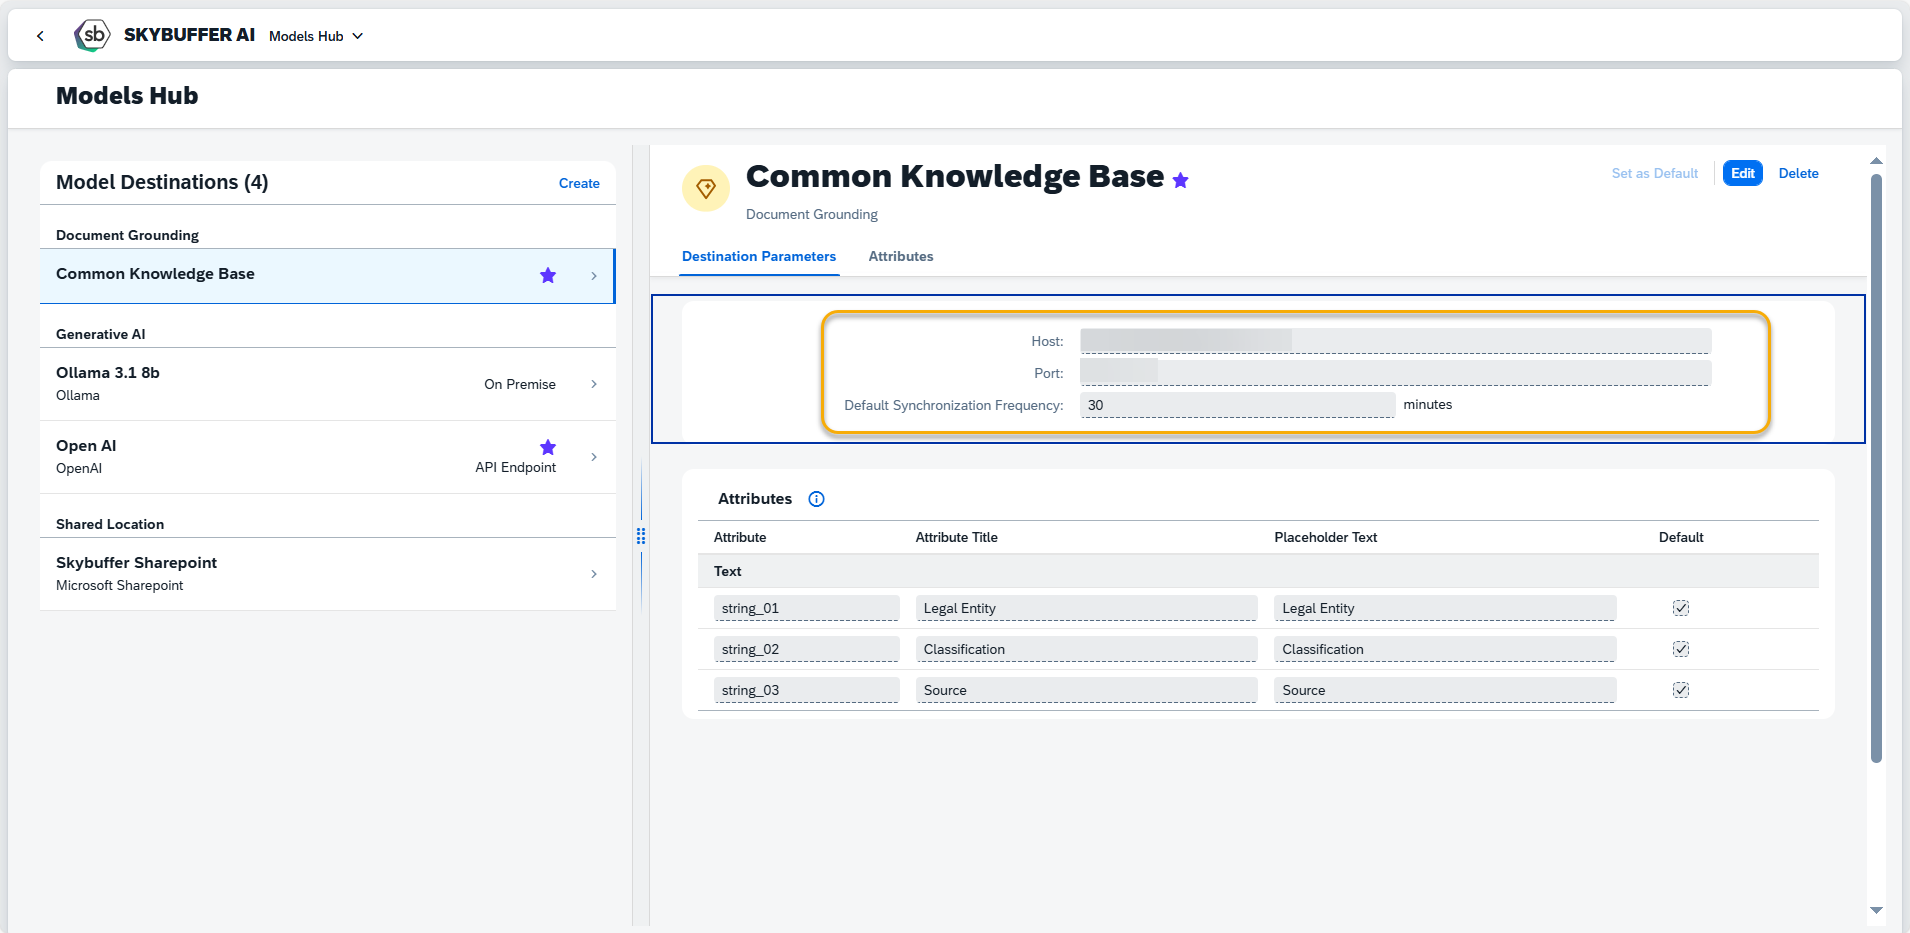
Fill in information about Host and Port and set Default Synchronziation Frequency if you would like to use Link-Based Retrieval in which your documents are beiong uploaded from the Shared Location and synchronized automatically to the latest version.
Configuring Aliases for Document Grounding Attributes
The Document Grounding system supports up to 48 attributes per document (16 Text, 16 Number, and 16 Date attributes) to aid in filtering and search functions.
To configure aliases:
Add an Alias
Click the Add Attribute button to assign an alias to an attribute for the selected Document Grounding destination.
Provide an Attribute Title
Enter an alias name for each attribute to simplify identification.
Set Placeholder
Define placeholder for each attribute to guide users during document upload.
Set Default Attribute
Mark attributes as default to make it visible by default in the document upload view and overview in the Document Grounding Hub.
Step. 4 Create Shared Location Destination
NOTE: Before using this Destination you need to complete SharePoint Integragtion Process. Detailed instructions about how to do MS SharePoint Location Setup are available here: HOW-TO: MS SharePoint Location Setup
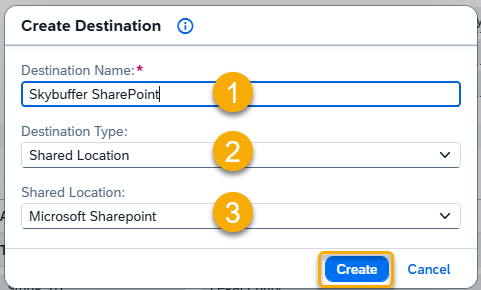
Destination Name: Enter a unique name to easily identify this model destination. (1)
Destination Type: Shared Location (2)
Shared Location: Microsoft Sharepoint (3)
Press the Create button.
Once you destination is created, fill in the remaining parameters.
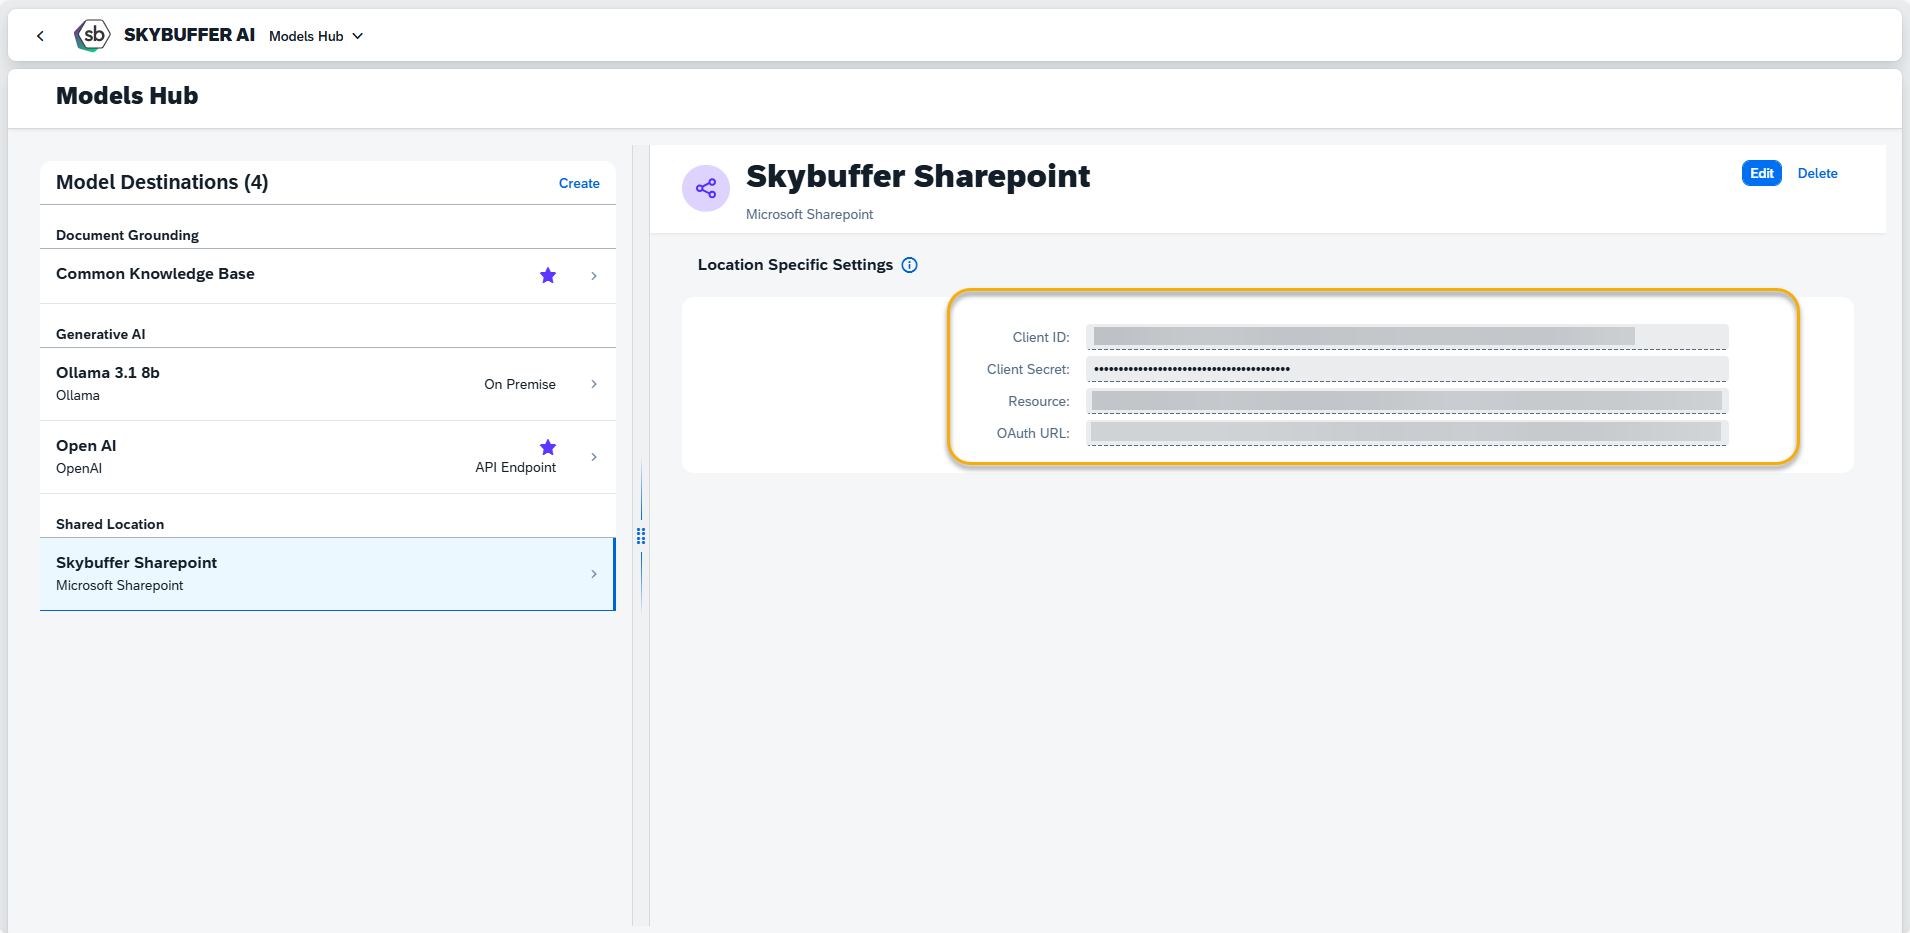
Use data from SharePoint Integration Process to fill in the necessary paramentrs.
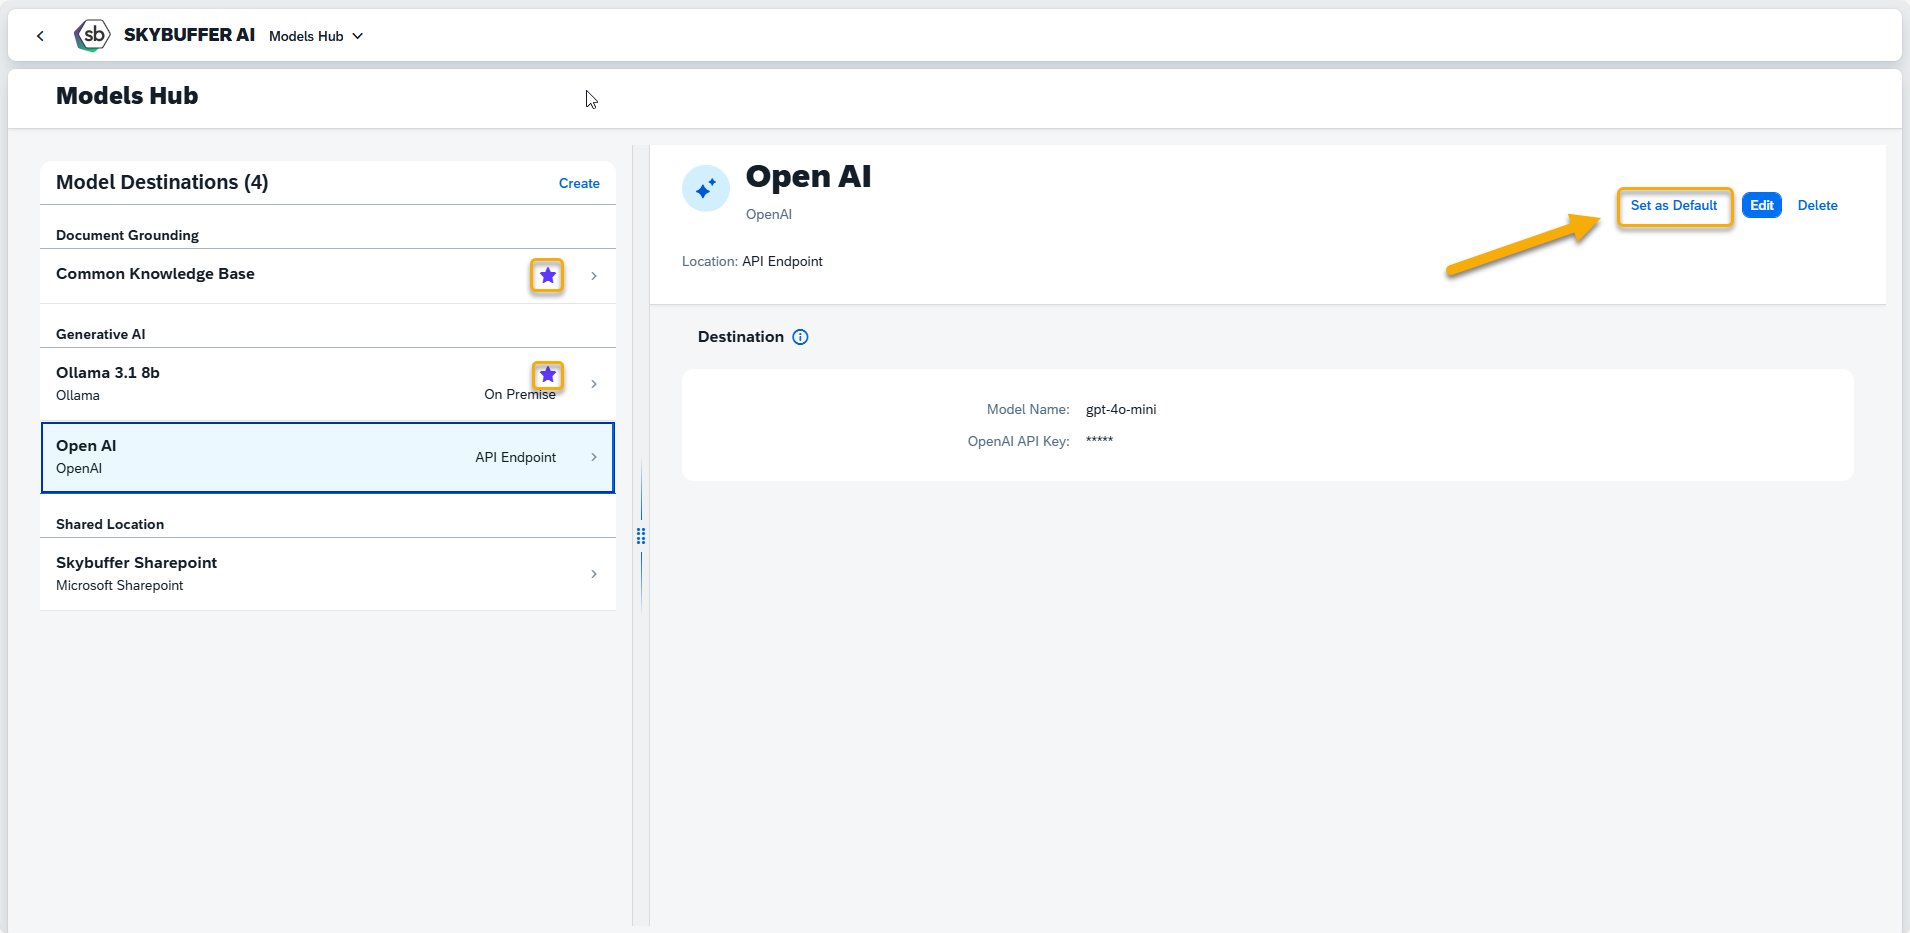
Step 5. Setting up Default Model Destiantion
You can set your Model Destination as Default by pressing the button in the top right-hand corner. Default Destiantions are marked with a star and will be usedduring AI Agent creation as preselected destination.
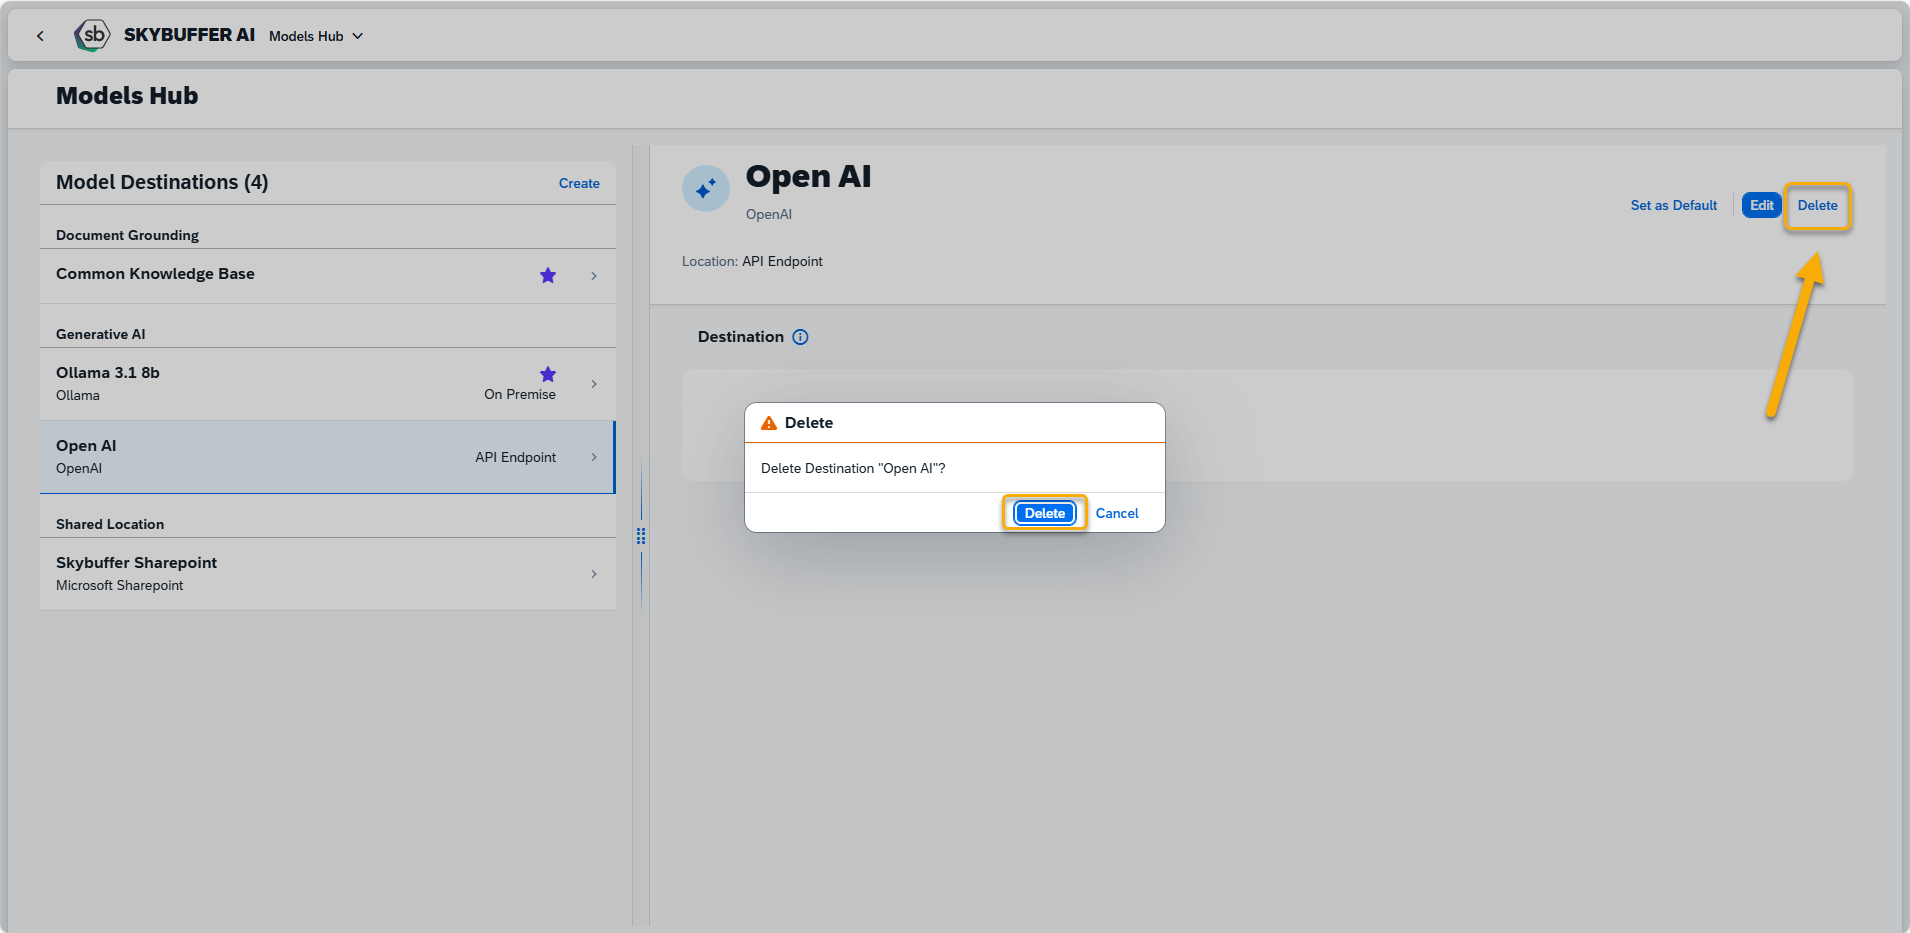
Step 6. Model Destination Deletion