Document Grounding Hub
Document Grounding Hub serves as a library for RAG documents. You can browse existing files using various filtering options or upload new ones.
Step 1. Open the Document Grounding Hub application in the AI Agent group:

Here is the main view of the application :
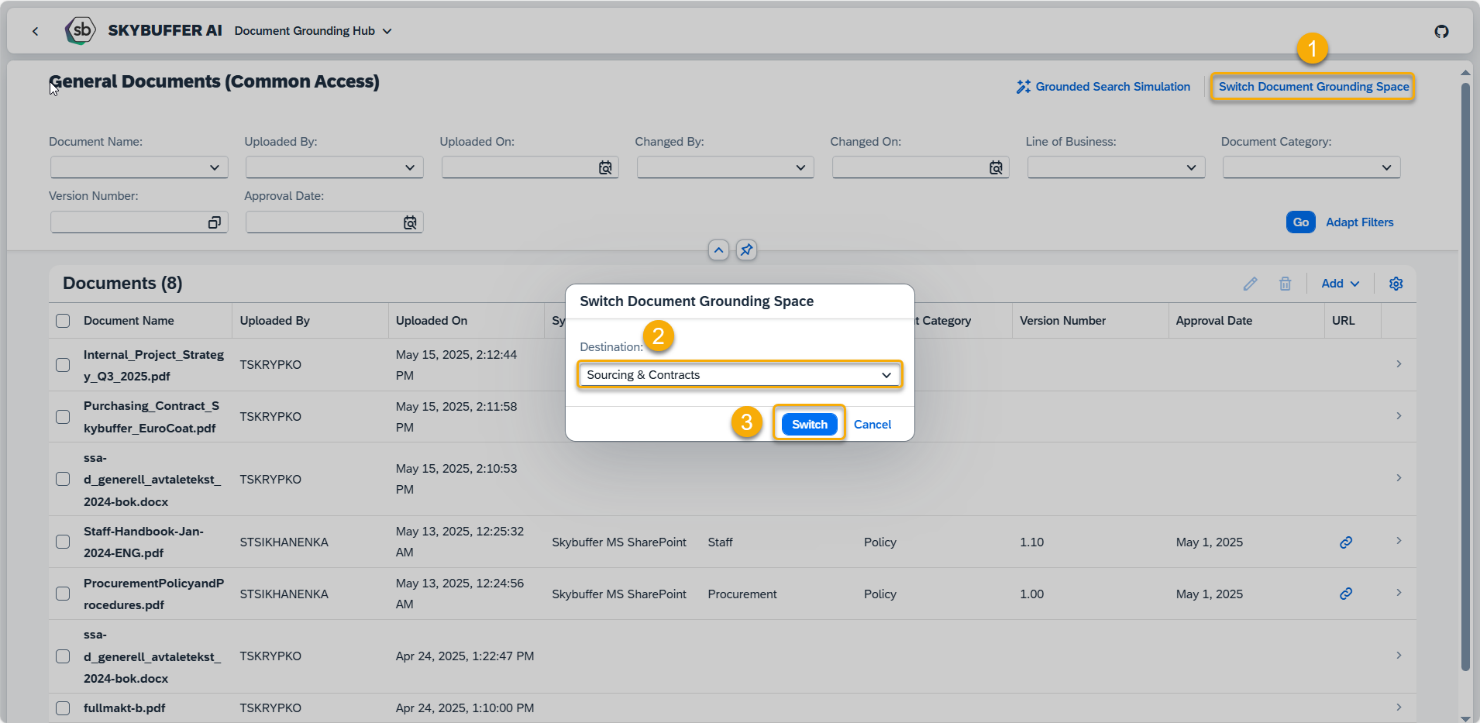
Step 2. Switch Document Grounding Space
Document Grounding Spaces are declared in Models Hub. Multiple destinations (connections) may be available, each containing a different set of files.
To switch the Document Grounding Space:
(1) Click the Switch Document Grounding Space button in the top-right corner.
(2) Select your Destination.
(3) Press the Switch button.
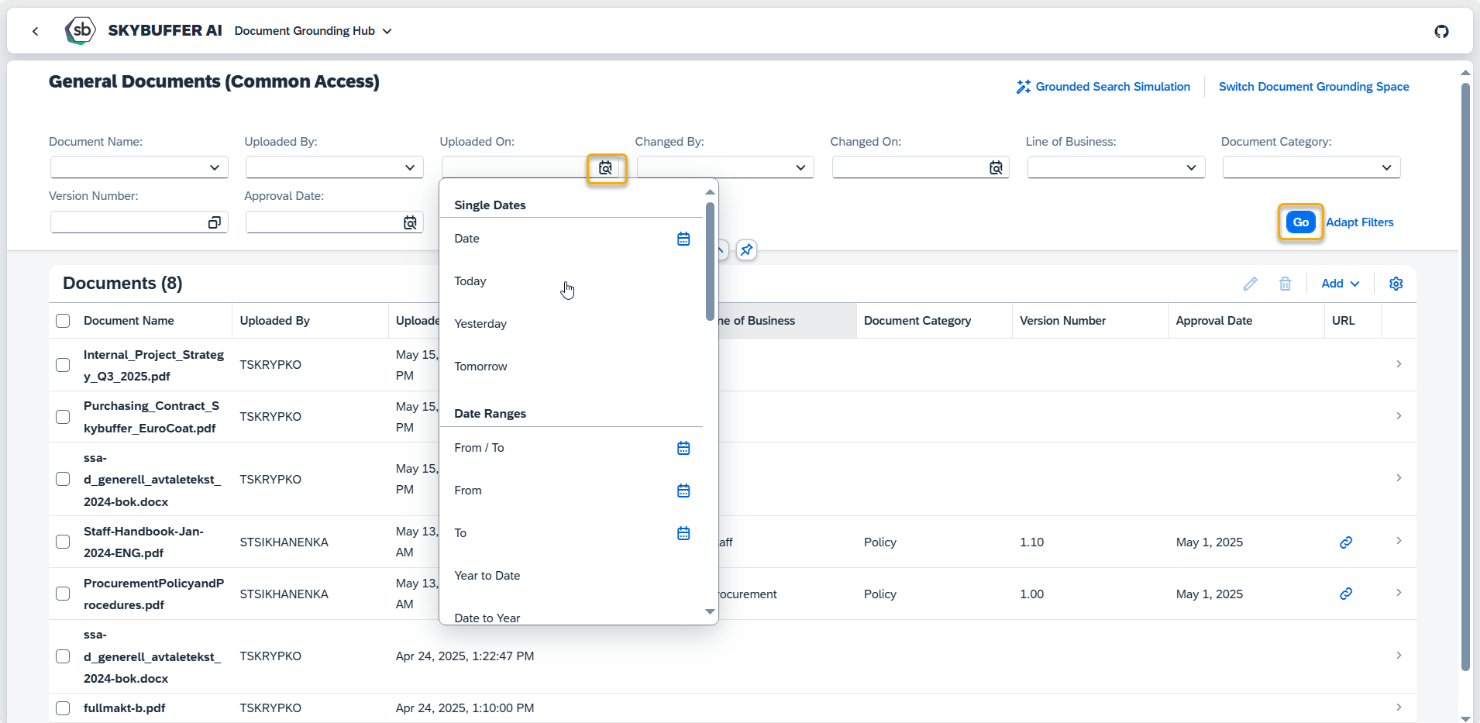
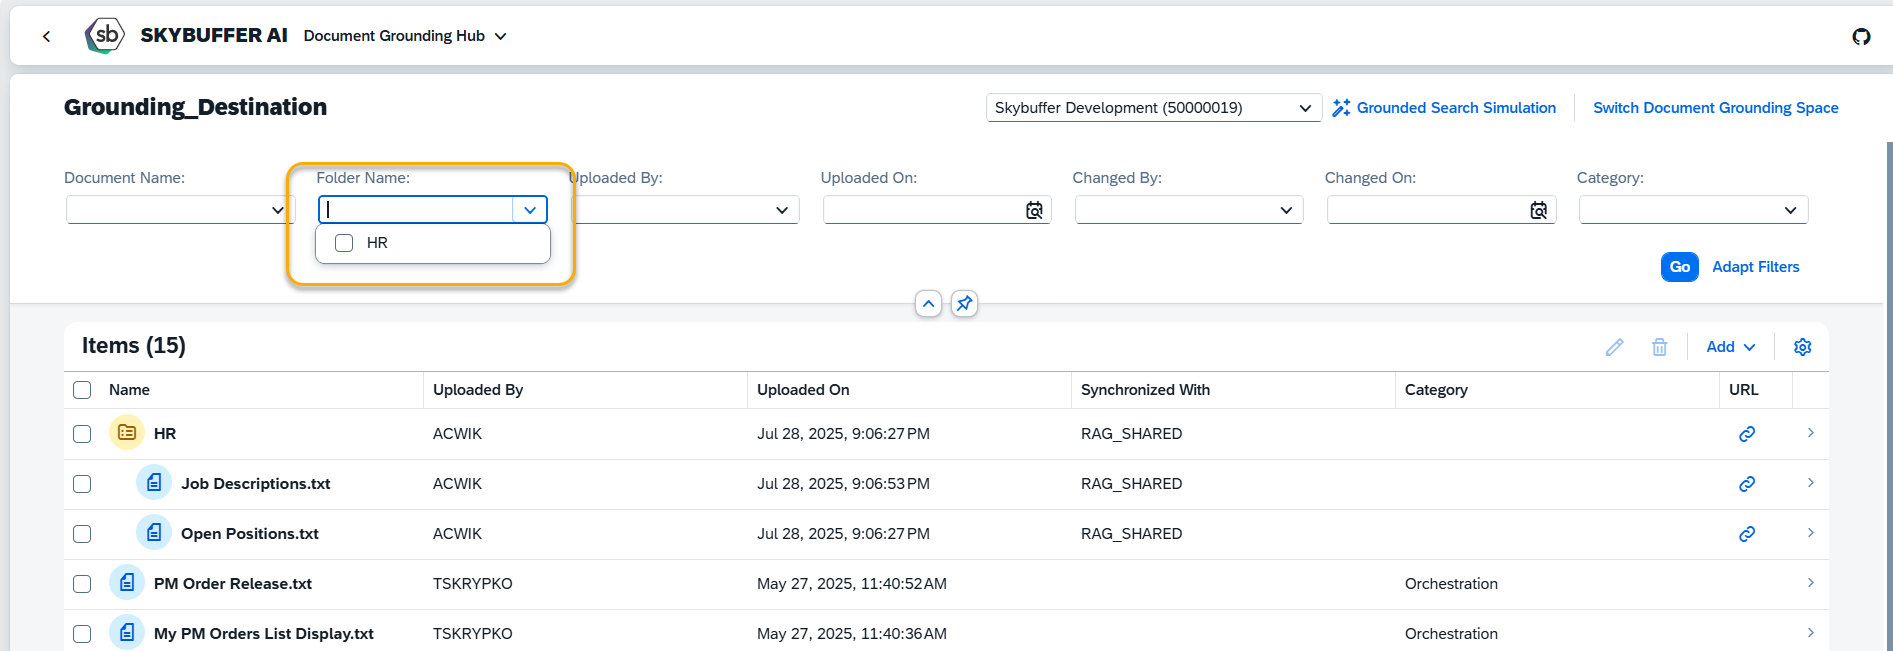
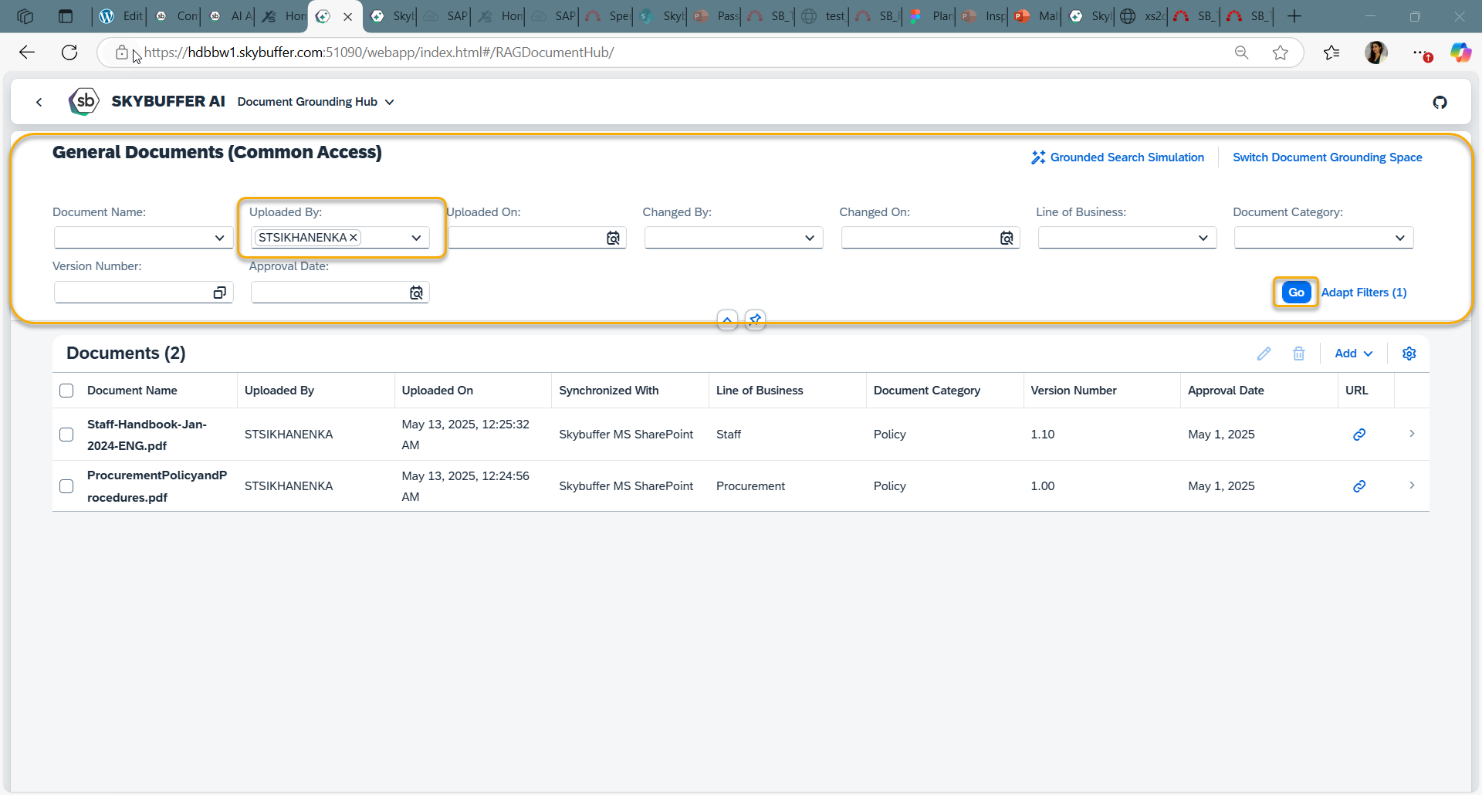
Step 3. Filtering options
Press the icon on the right side of each filter to see possible options or type in a value for search. You can also start typing in, and matching options will appear.
Press the Go button or press Enter on keyboard to see the search results:
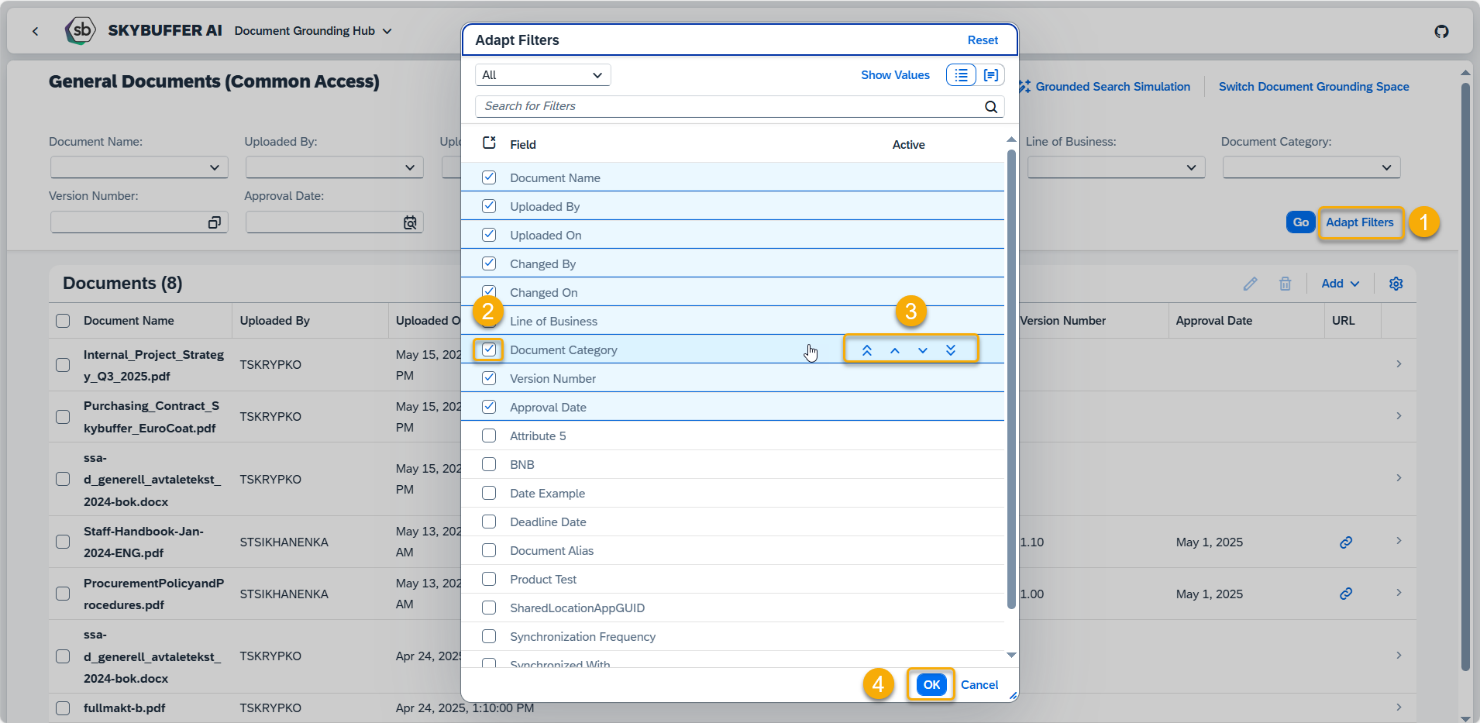
Click Adapt Filters to choose which filters should be visible.
Tick or Untick Fields to show/hide them.
Use up/down arrows to change order of filters.
Finally, press OK to save changes.
Step 4. Documents Table & View Settings
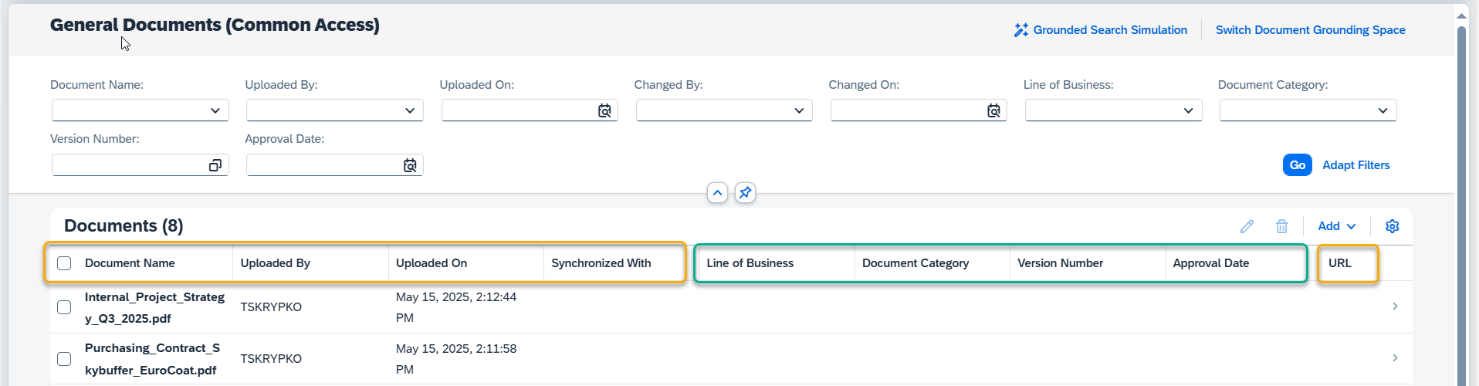
Yellow columns are standard. Green columns are destination-specific, corresponding to attributes defined for each destination. Attribute settings are managed in the Models Hub application.
To customize the table view:
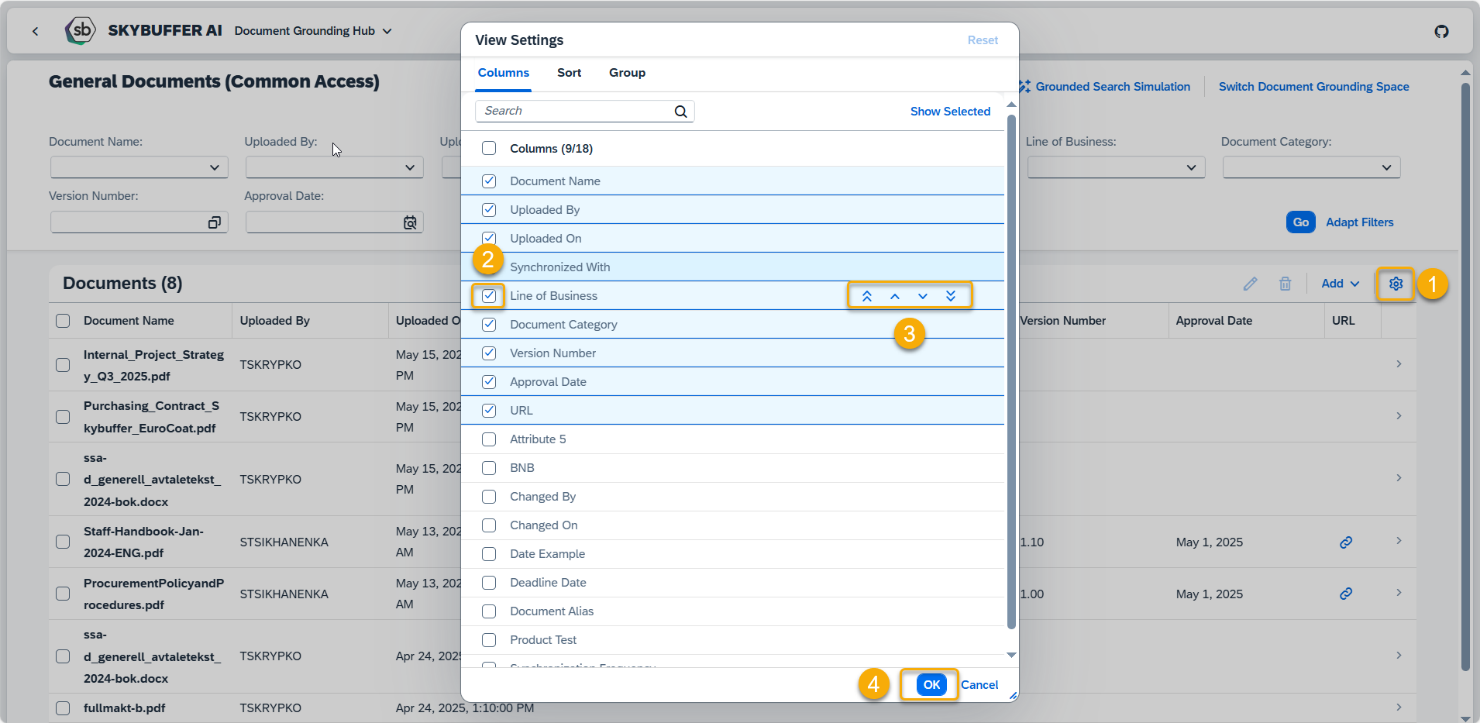
(1) Click the settings icon in the top-right corner of the table. The View Settings panel will open.
(2) Hover over a column name and use the drag controls to change the order.
(3) Select columns to show or hide.
(4) Click OK to confirm changes.
Step 5. Uploading Documents to Document Grounding Hub
You can upload your files to Document Grounding Hub using two methods: Manual Upload or Automated Link-Based Retrieval.
In order to add a file, click on the Add button in the top right corner of the Document Grounding Hub:
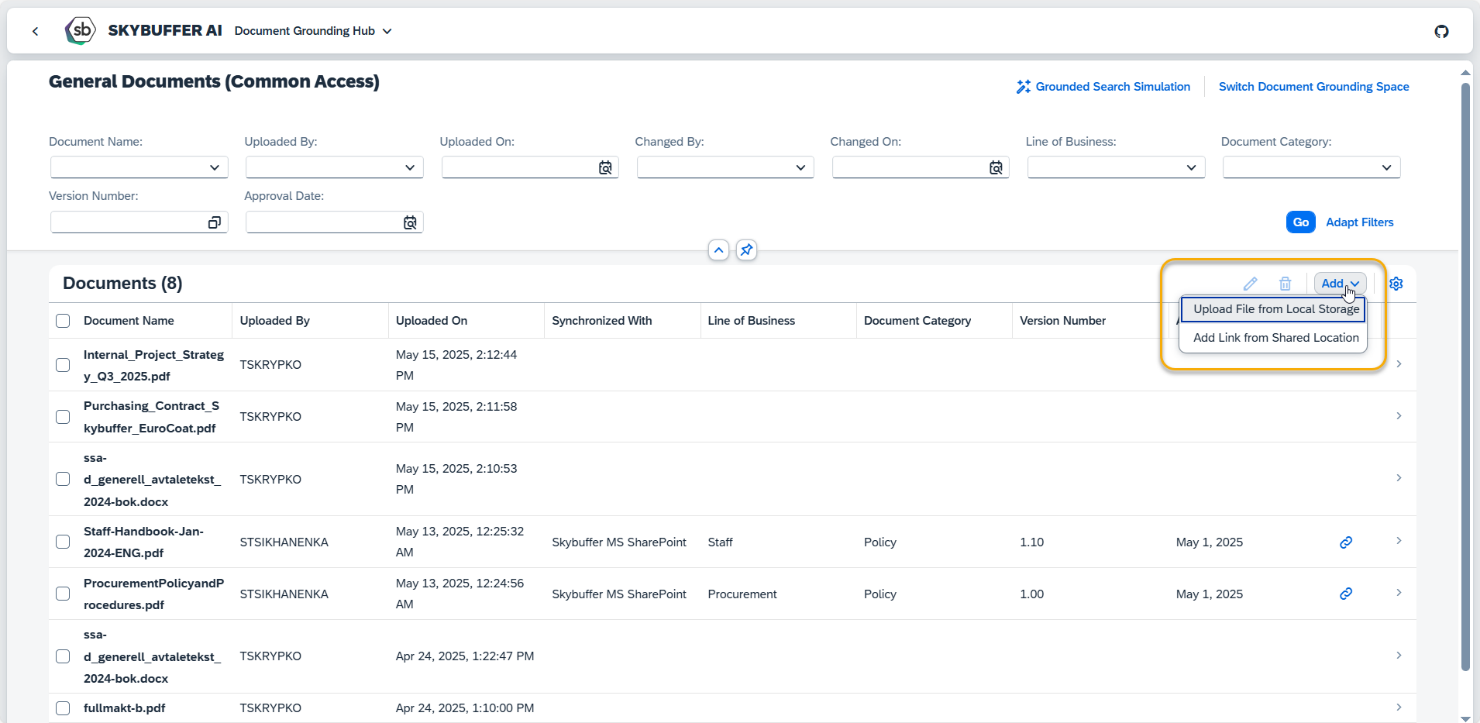
Option 1. Upload File from local Storage
This method allows you to upload a document directly from your local storage. If the document is updated, you must reupload it to ensure the latest version is available.
How It Works:
You choose a file from your device and upload it for processing.
Best For:
Static documents that are not updated frequently.
How to Upload a Document Manually:
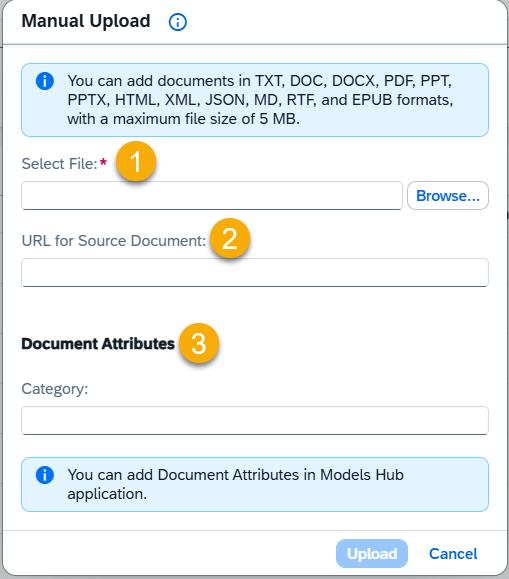
(1) Select file – Select the document file from its location on your computer.
(2) URL for Source Document – Add a URL link if you want the document accessible in AI Agent scenarios via a web link (Optional).
(3) Document Attributes – enter values for any document attributes.
NOTE: Attribute configurations are managed in the Models Hub application
Click Upload to send the document to the Document Grounding System and start vectorization process.
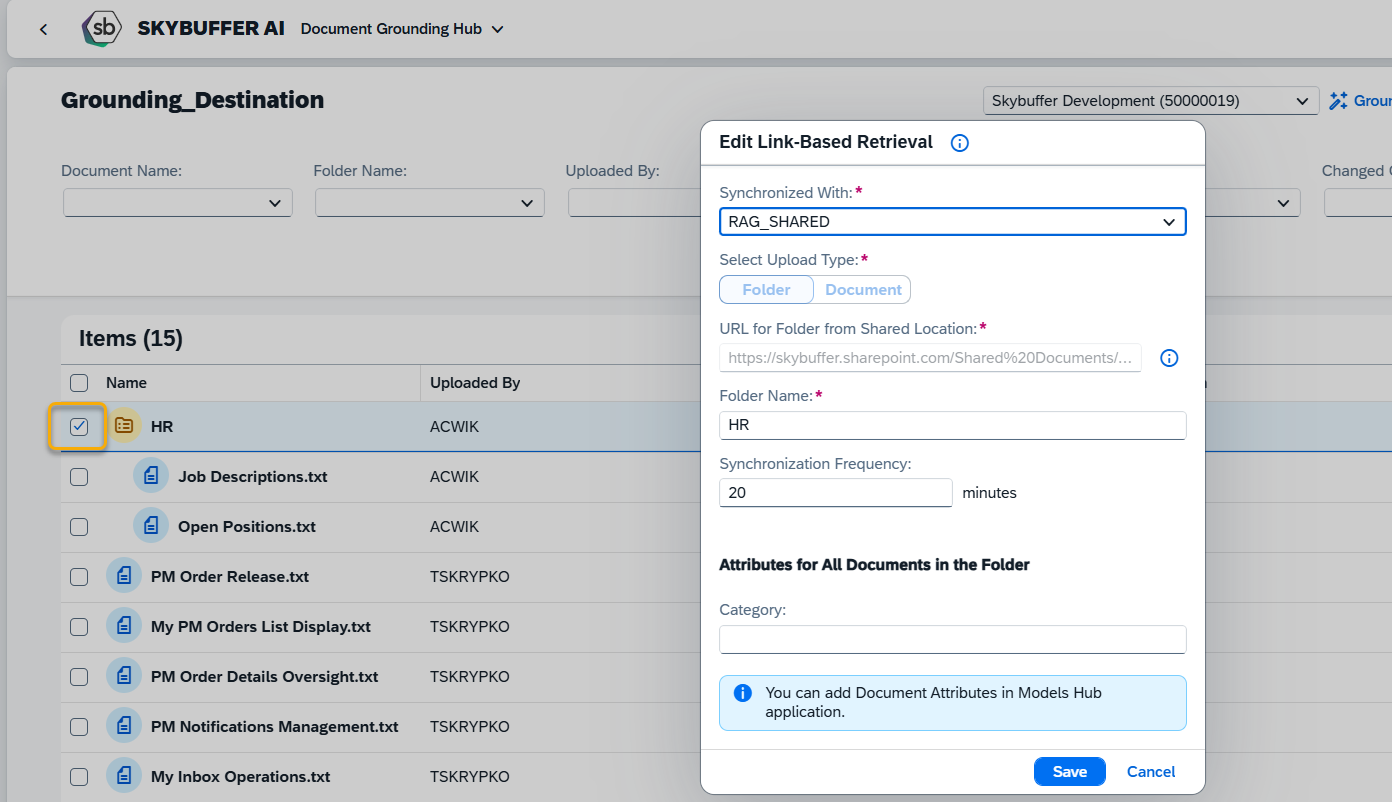
Option 2. Add Link from Shared Location
With this method, the system automatically retrieves and synchronizes the latest version of a document/folder from a shared storage location (e.g., SharePoint). This ensures that your content is always up to date without manual uploads.
How It Works:
Once you provide the document/folder link, the system will periodically check for updates and synchronize the content automatically.
When to Use:
This is ideal for dynamic documents/folders that are regularly updated and need to be kept in sync without manual intervention.
How to Set Up Automated Link-Based Retrieval:
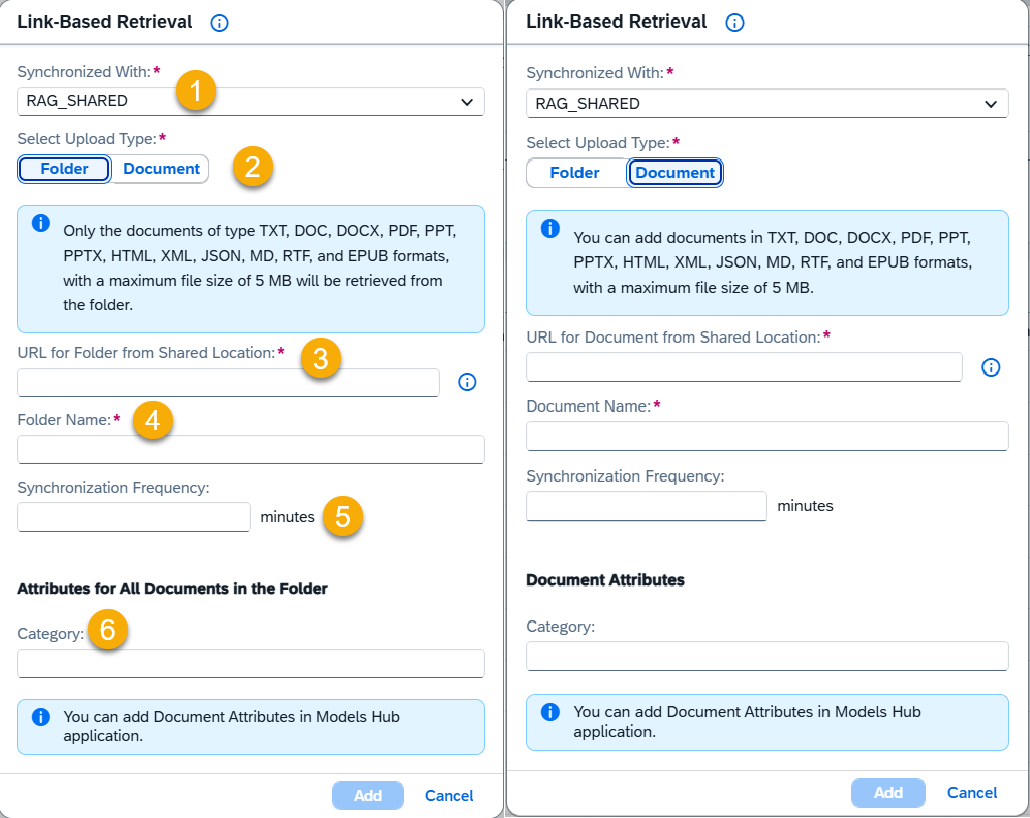
(1) Synchronized With – Choose the destination where your content will be synchronized. This must be configured in the Models Hub
(2) Select Upload Type – Choose whether you’re uploading a file or a folder
(3) URL for Document from Shared Location – Open your document or folder in browser and copy the link.
(4) Document Name – This will be automatically extracted from the provided SharePoint link.
(5) Synchronization Frequency – The system applies a default sync frequency, but you can adjust it to match your document’s update cycle.
(6) Category – You can add custom metadata for your document or folder here. If uploading a folder, all new files synchronized through it will inherit these attribute values.
NOTE: Document attributes are managed in the Models Hub for your selected Destination.
Possible errors during document upload:
While uploading documents to the Document Grounding Hub, it is possible encounter the following types of errors:
- Unauthorized – Occurs when the user does not have the correct permissions or their session has expired.
- Internal Server Error – Indicates a problem with the backend system, such as a database failure. This error is typically temporary and may require admin support.
- Error While Parsing – Happens when the system is unable to read or interpret the uploaded file, often due to an unsupported or corrupted file format.
- RAG Error – Arises when the system has trouble breaking the document into smaller parts for processing, possibly due to file structure or content issues.
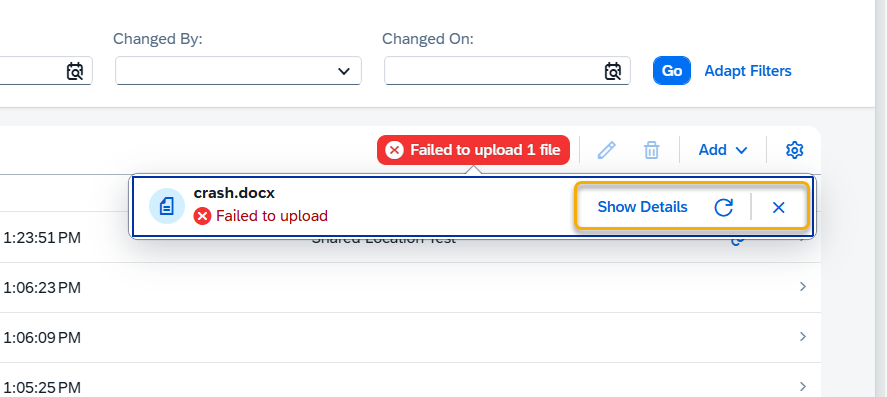
If your file upload fails, or if you want to cancel the upload for any reason (for example, if the file was added by mistake), you can cancel the upload by clicking the X button.
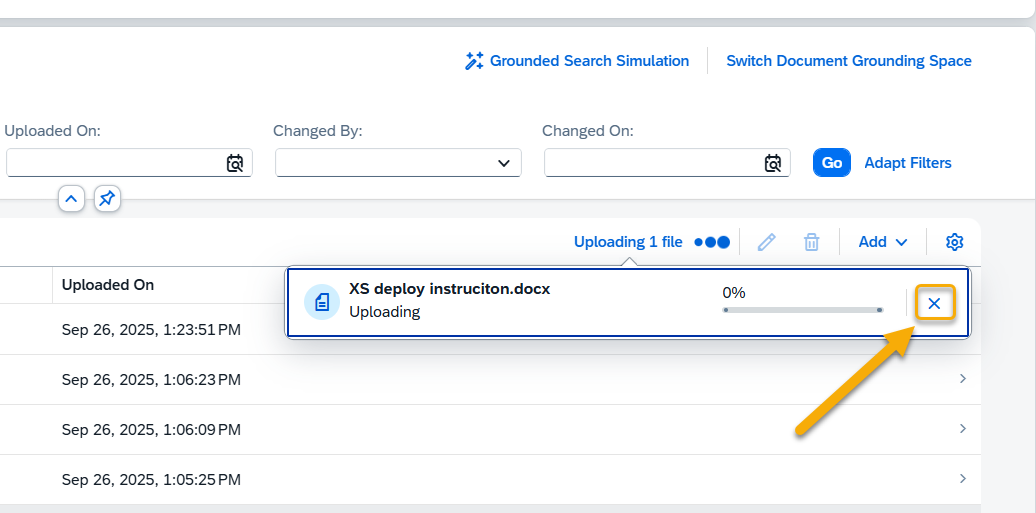
If your upload was unsuccessful for any reason, you can re-upload the file, view details about why the upload failed, or cancel and remove the file.
Step 6. Preview File
Click on the row containing the document you want to preview.
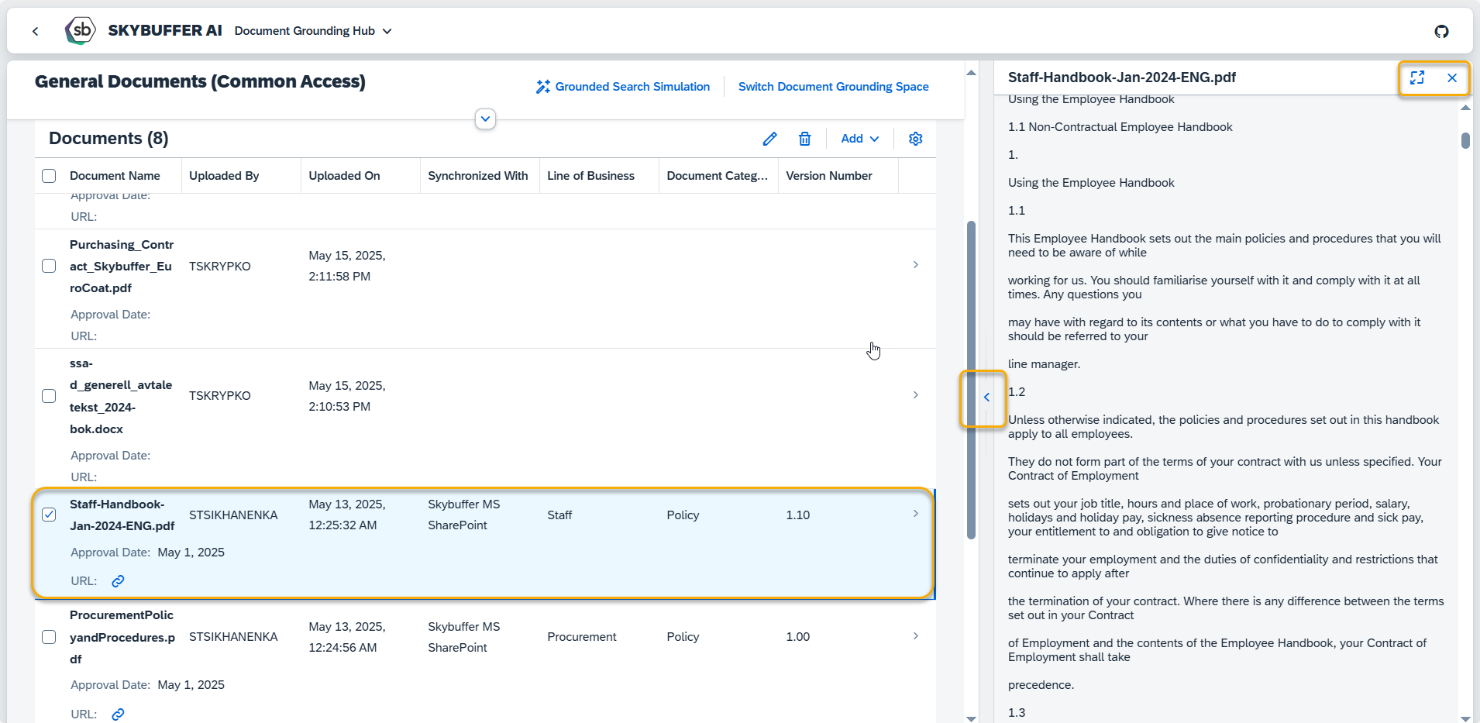
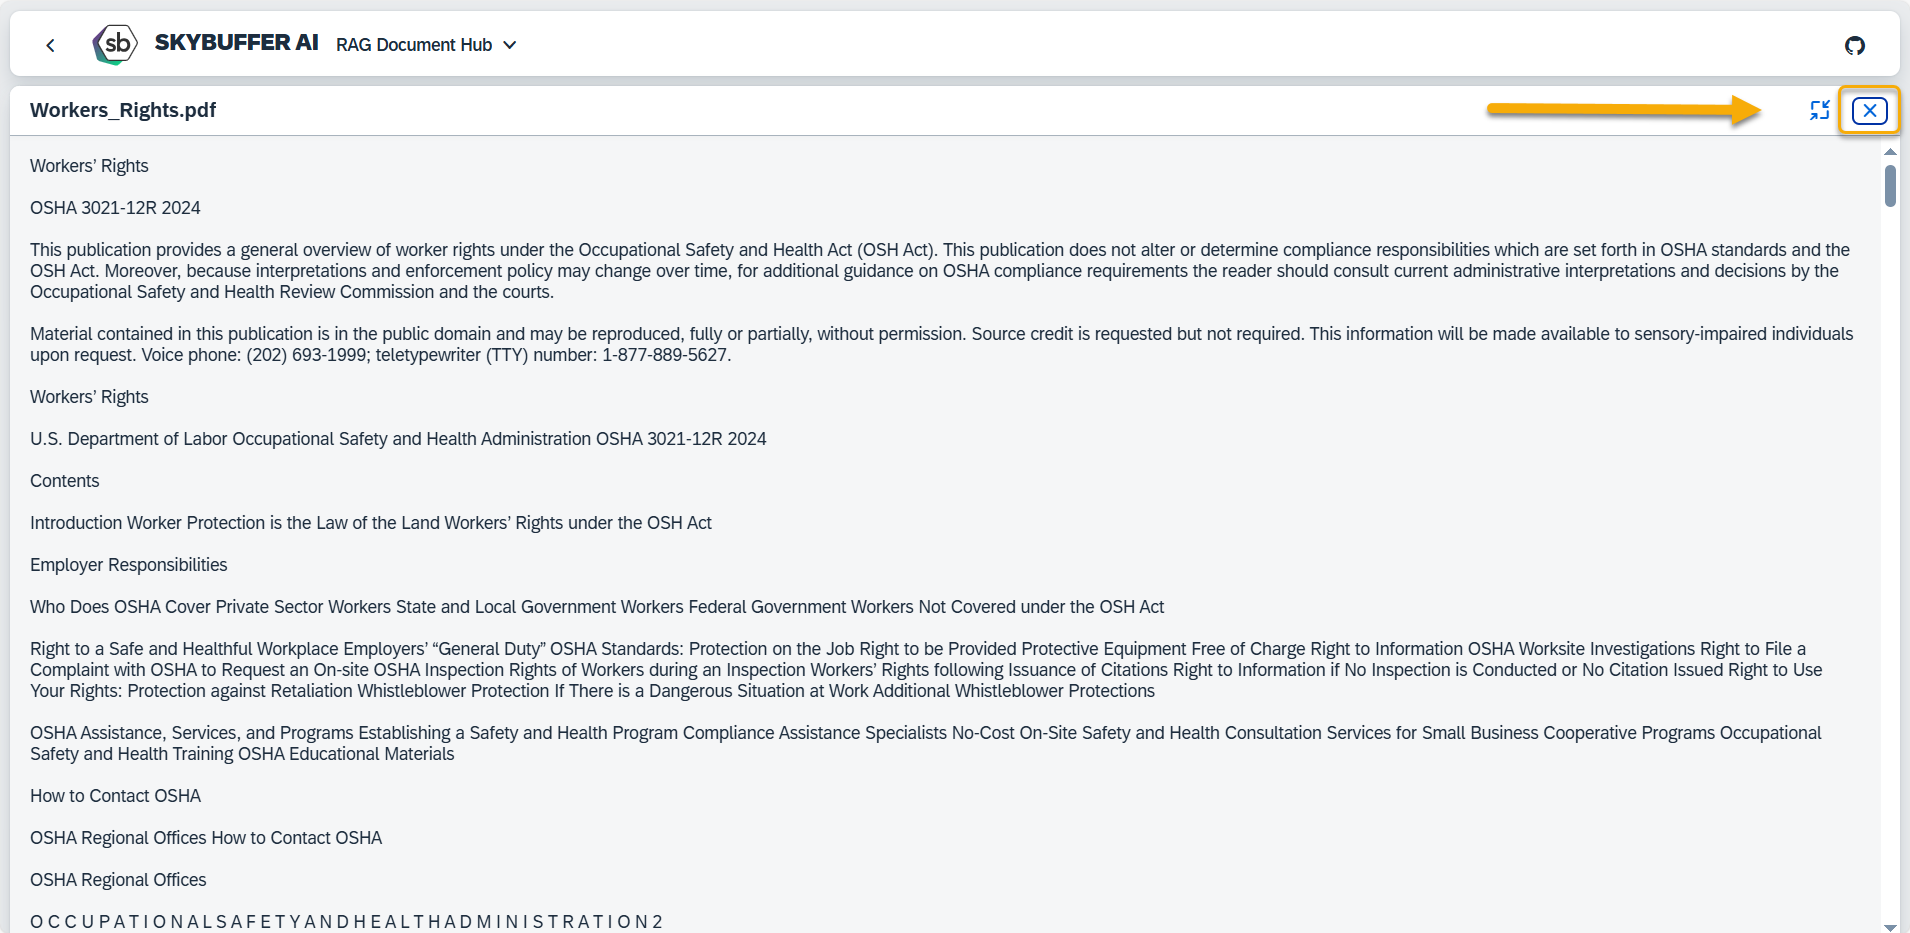
Use the controls to resize the preview window (arrow on the left side) or enter full screen (top-right corner icon).
Click the X icon in the top-right corner to close the preview.
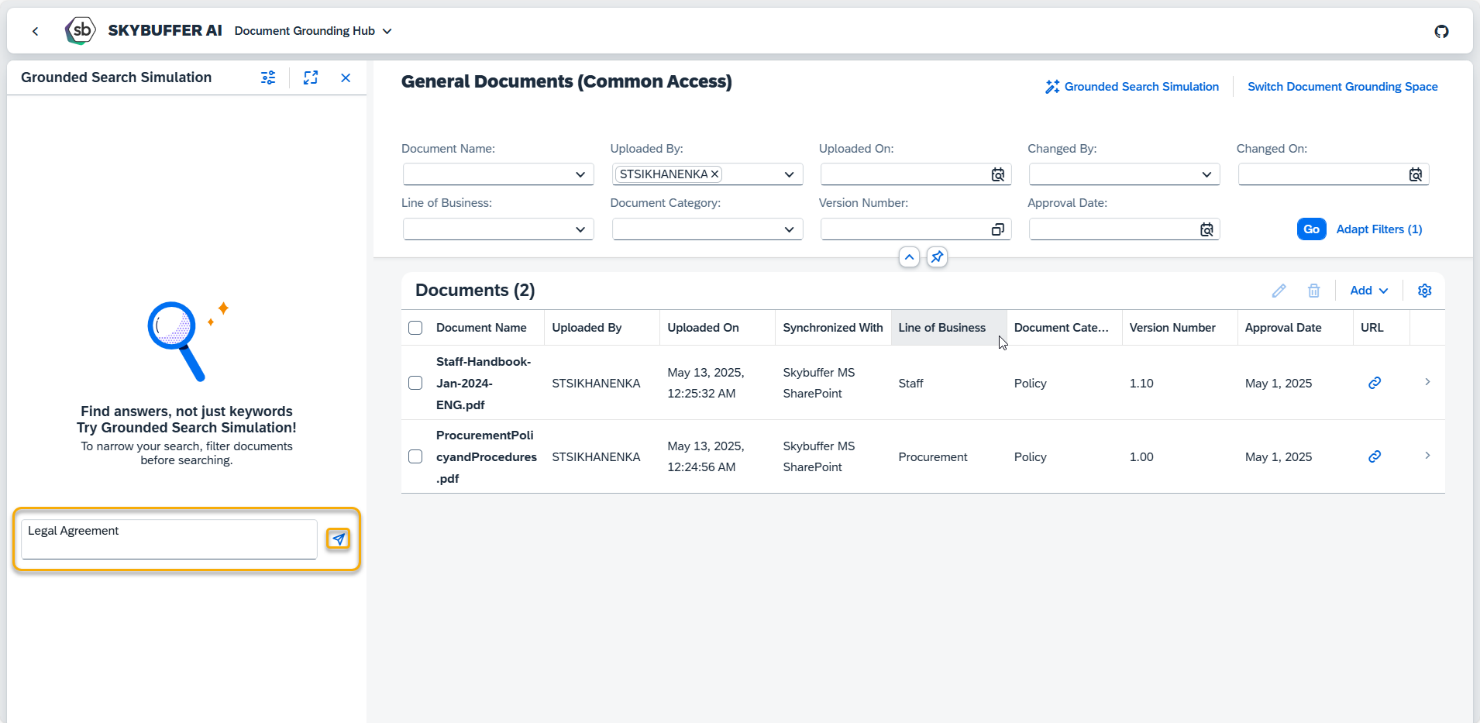
Step 7. Search within document
You can search information by direct quote or logical meaning, using Grounded Search Simulation functionality. Press the Grounded Search Simulation button.
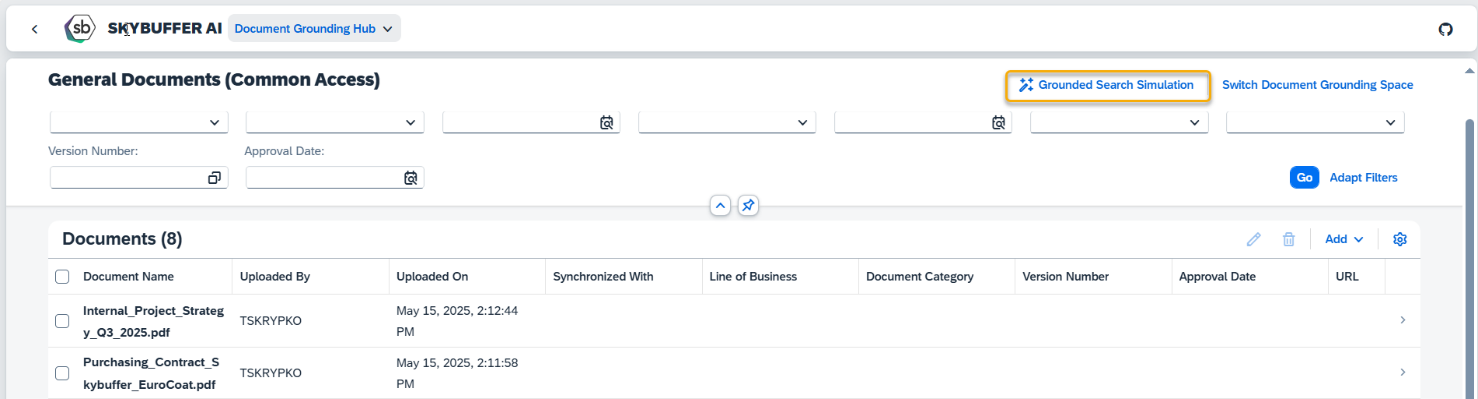
Use filters to pre-filter source documents. Only visible documents (documents that are result of filtering) will be used for retrieving the Grounded Search results.
Write a search phrase in the search field, and press Enter. Or press the arrow icon.
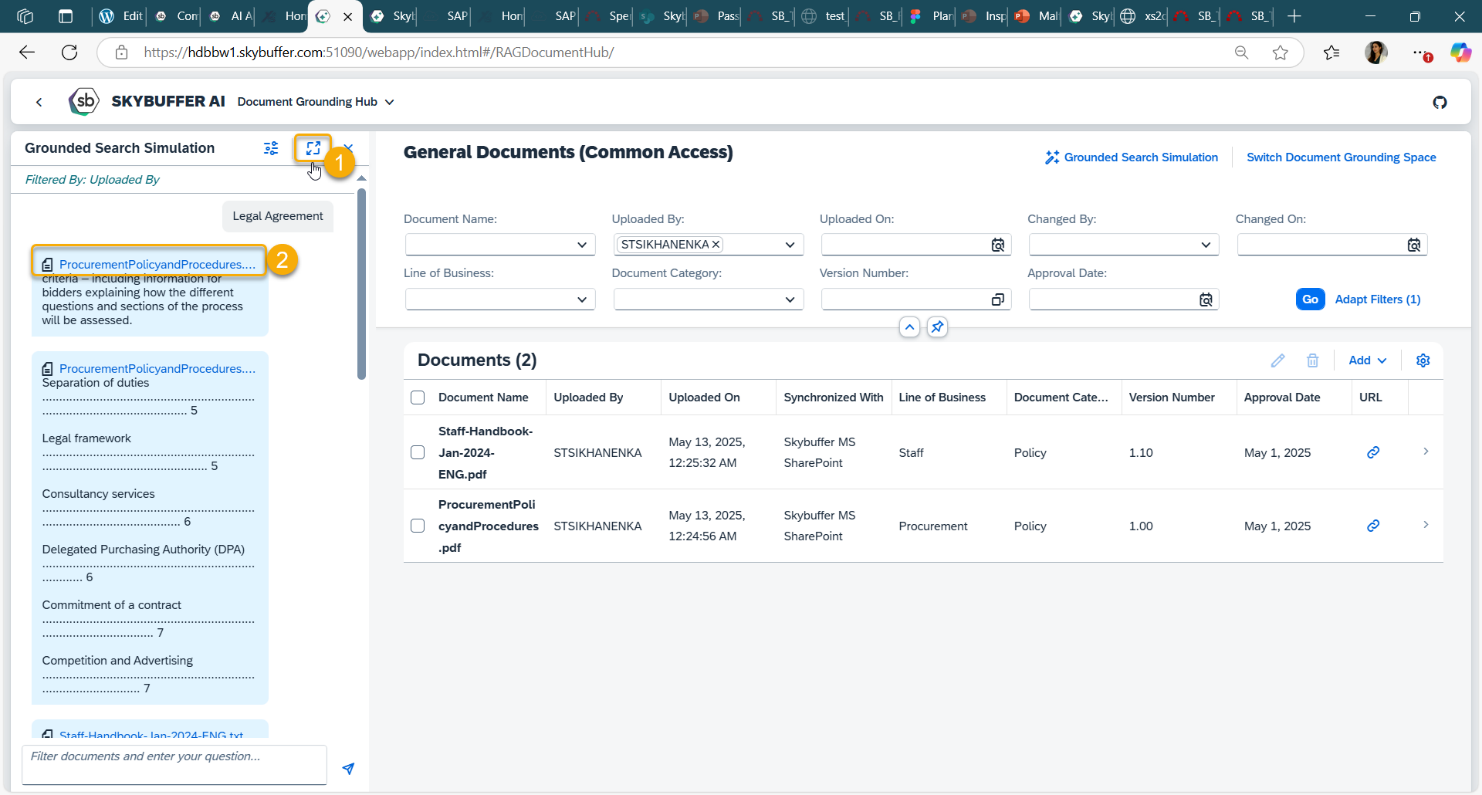
Press the window resize button (1) to set Grounded Search Window to Fullscreen.
Press the blue document name in results (2) to open source document in preview mode.
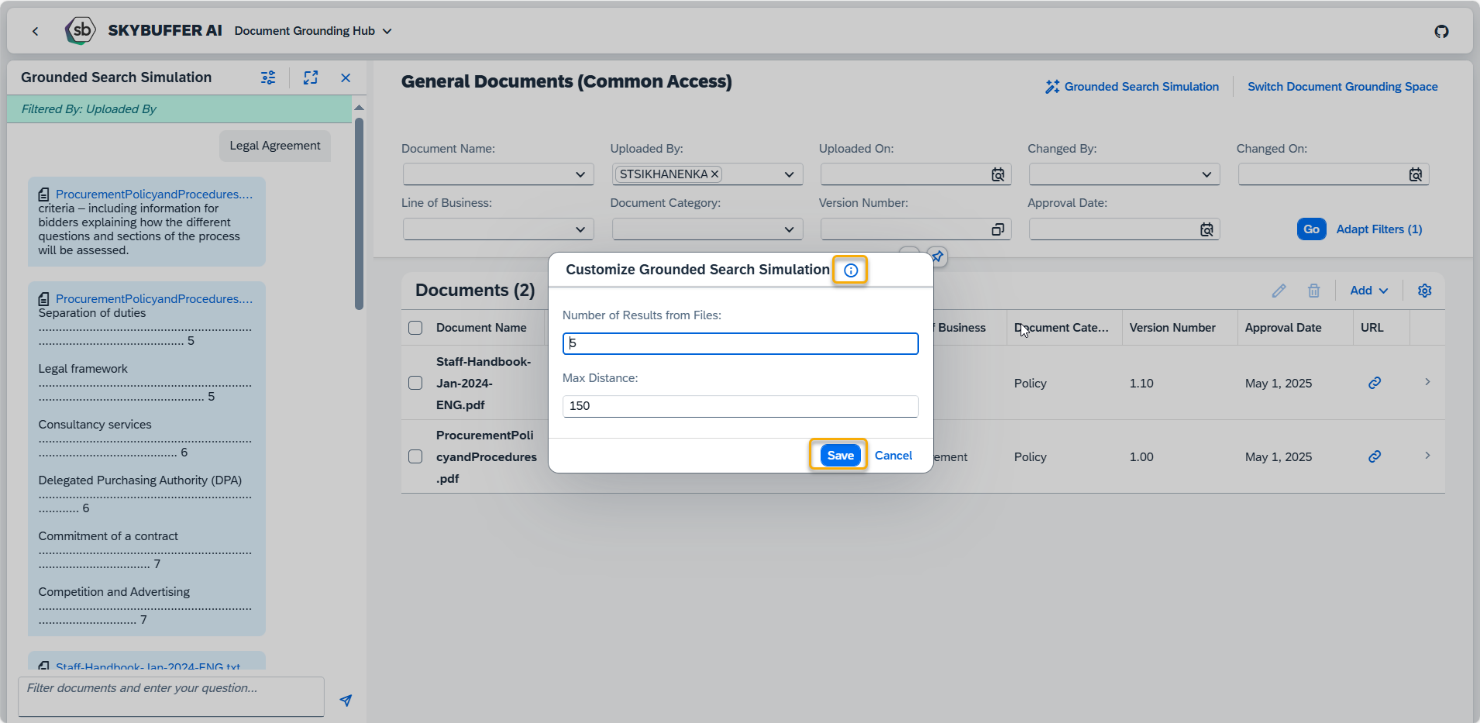
You can modify number of results and search accuracy ( strictness) by pressing the settings button:
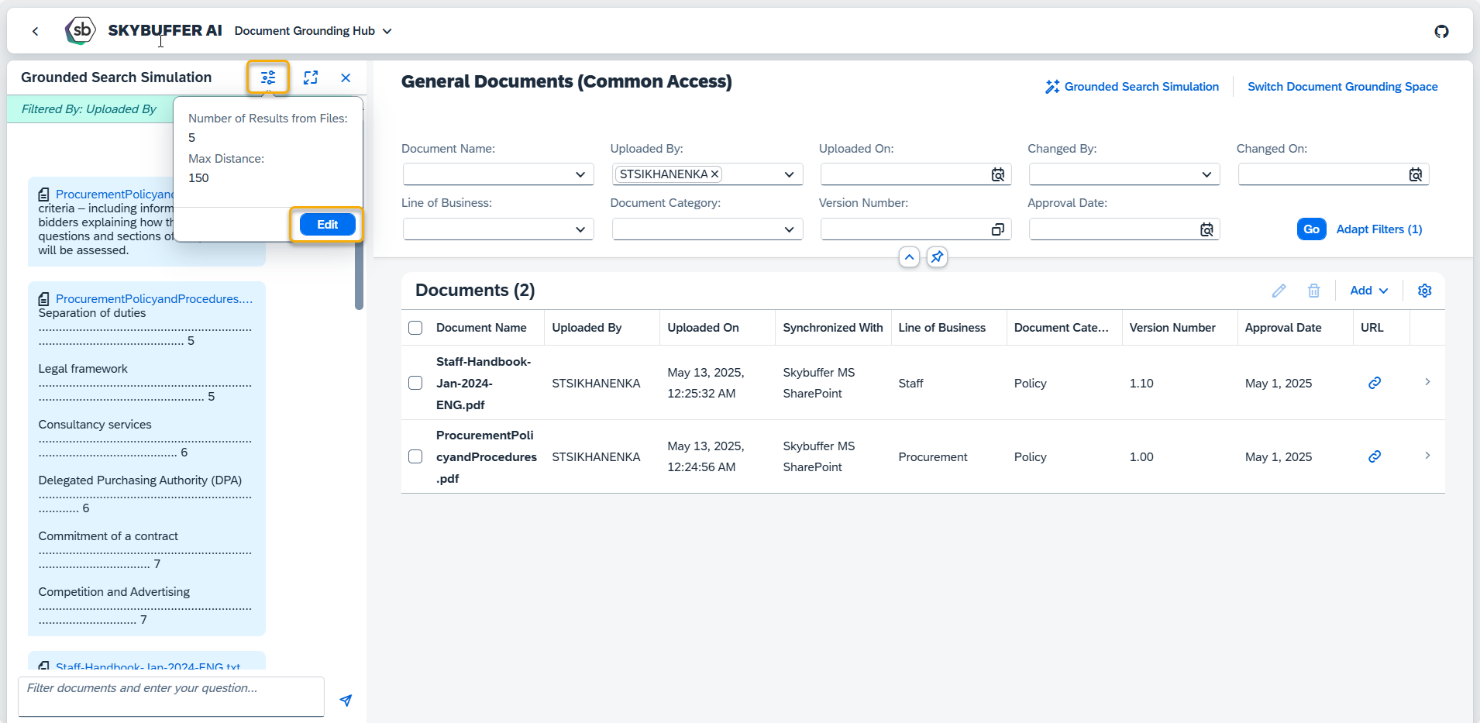
Access the help dialogue by pressing the i Icon.
Edit the values, and press Save.
Step 8. Edit File/Folder
Select the file you want to edit and click the Edit button:
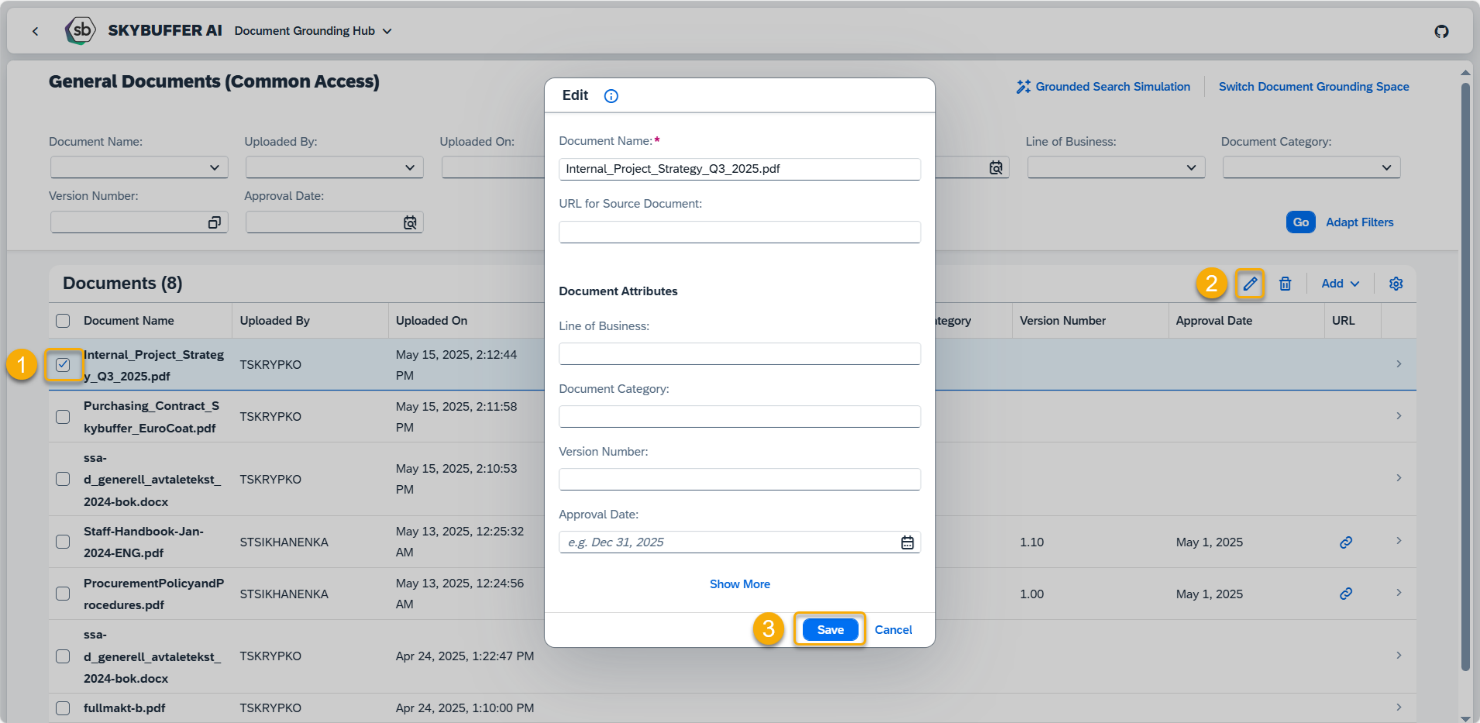
You can also edit folder details by clicking next to its name:
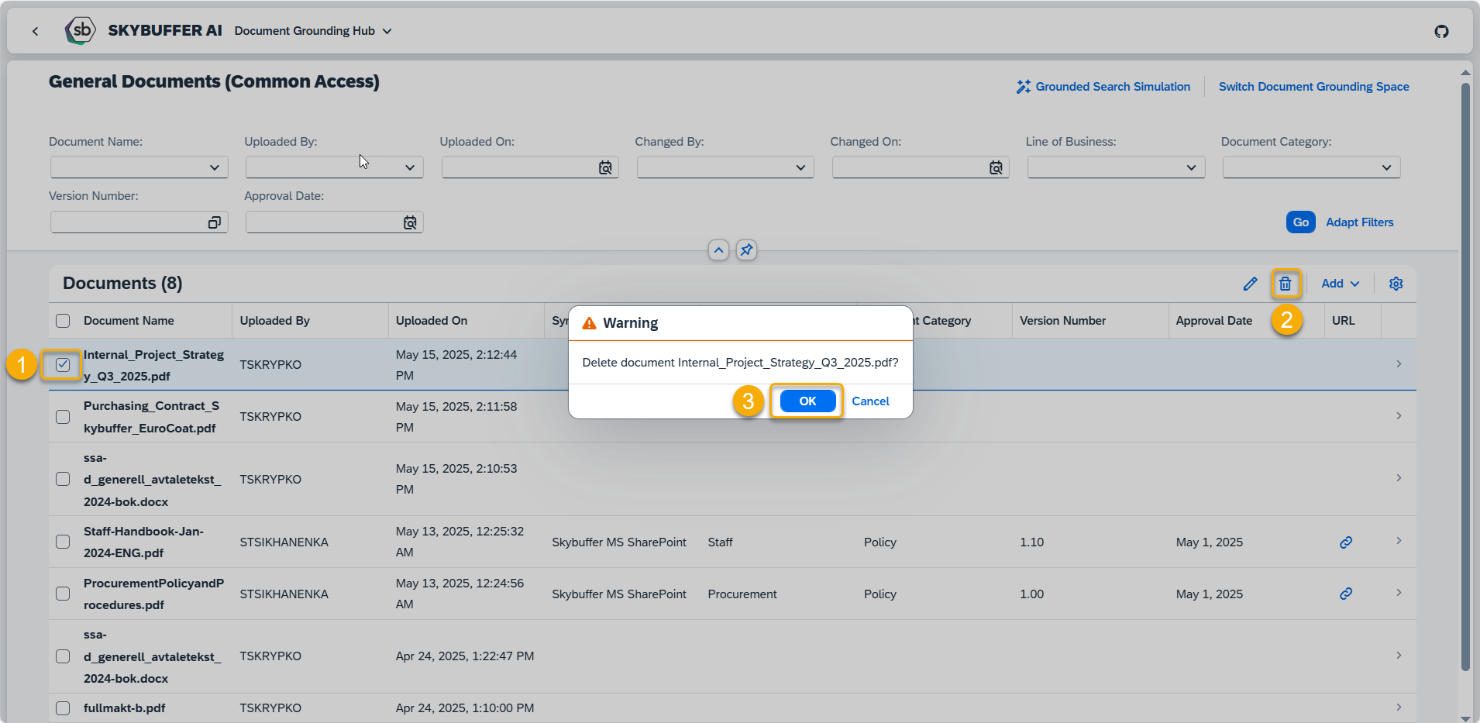
Step 9. Delete File/Folder
Select one or multiple files and press the Bin button. Confirm deletion when prompted.