Channel Creation
Step 1. Open the AI Agent Configurator application in the AI Agent group.
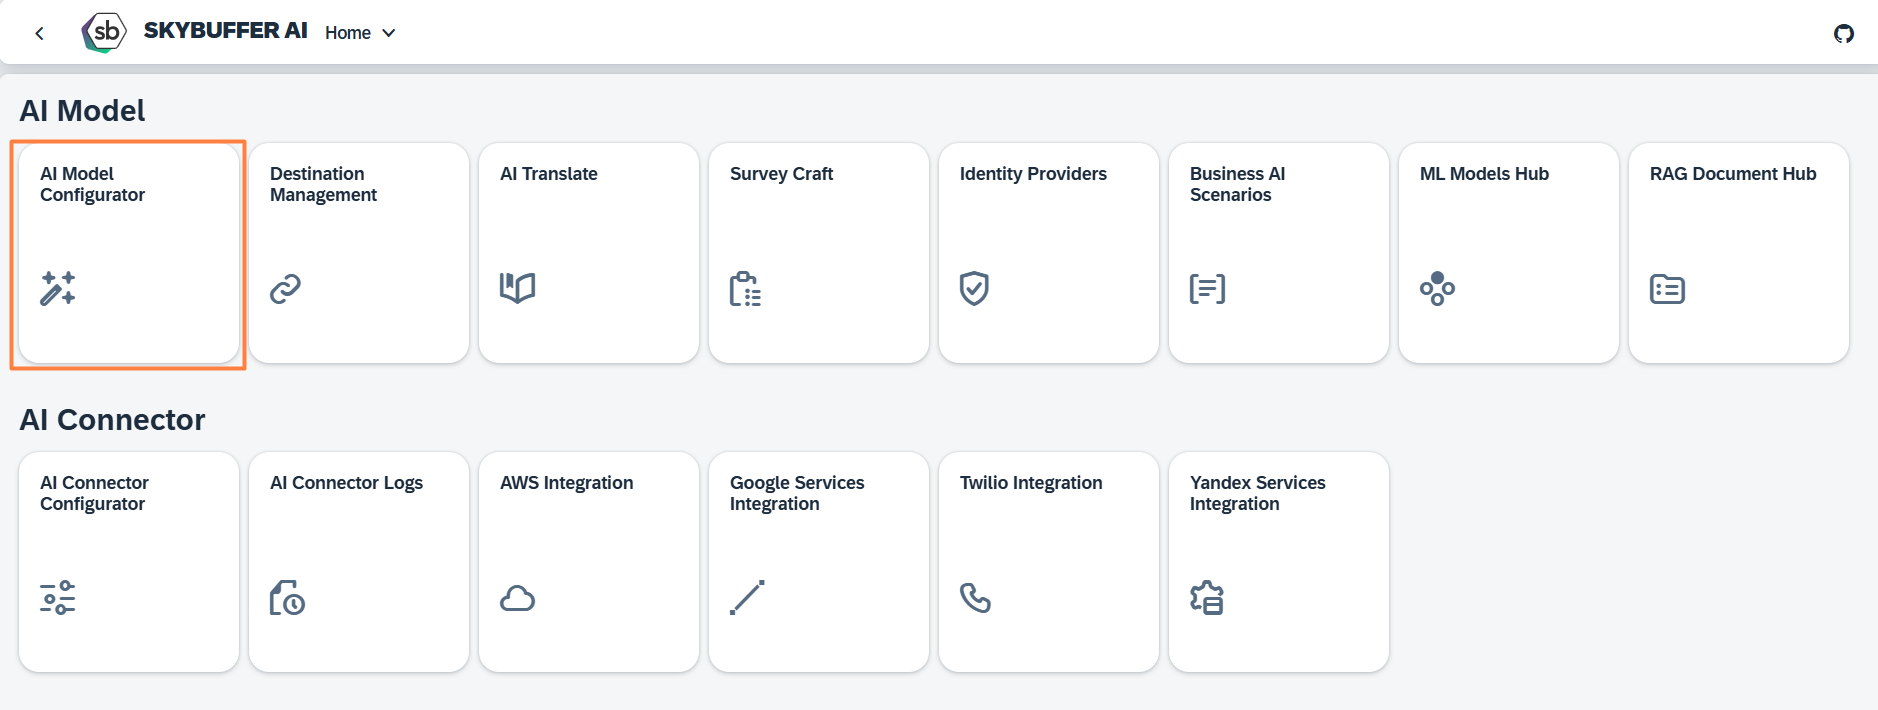
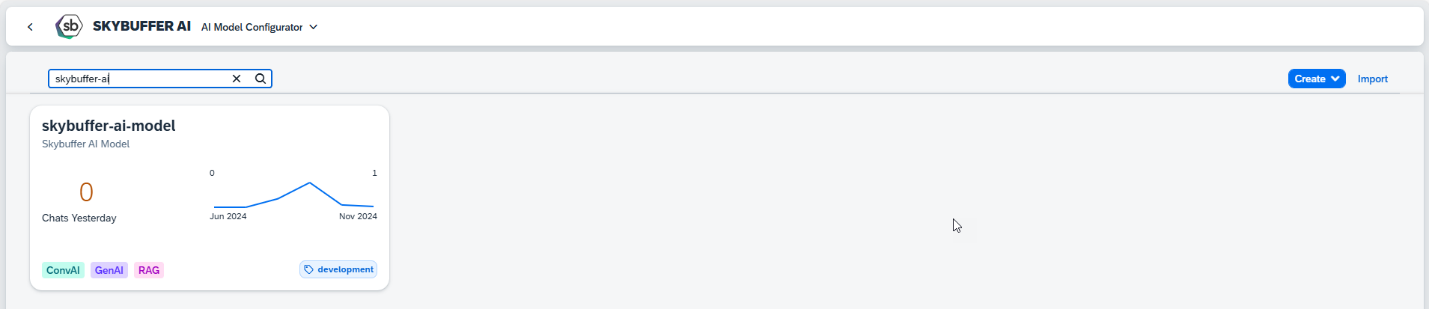
Step 2. After opening the application, you will see a screen displaying all available AI Agents. Each tile represents one Agent, including its name, description, and deployment status. Click on the Agent you want to work with to proceed.
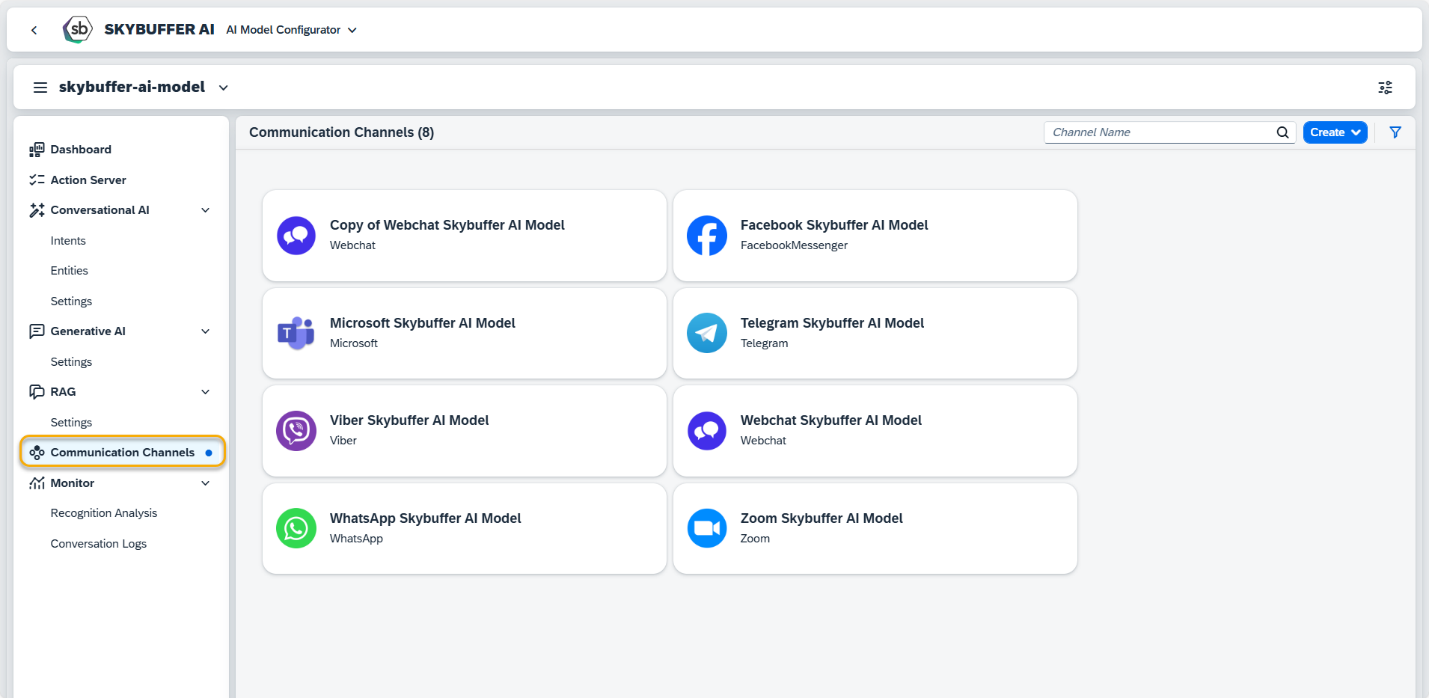
Step 3. Open the Channel management application- Communication Channels.
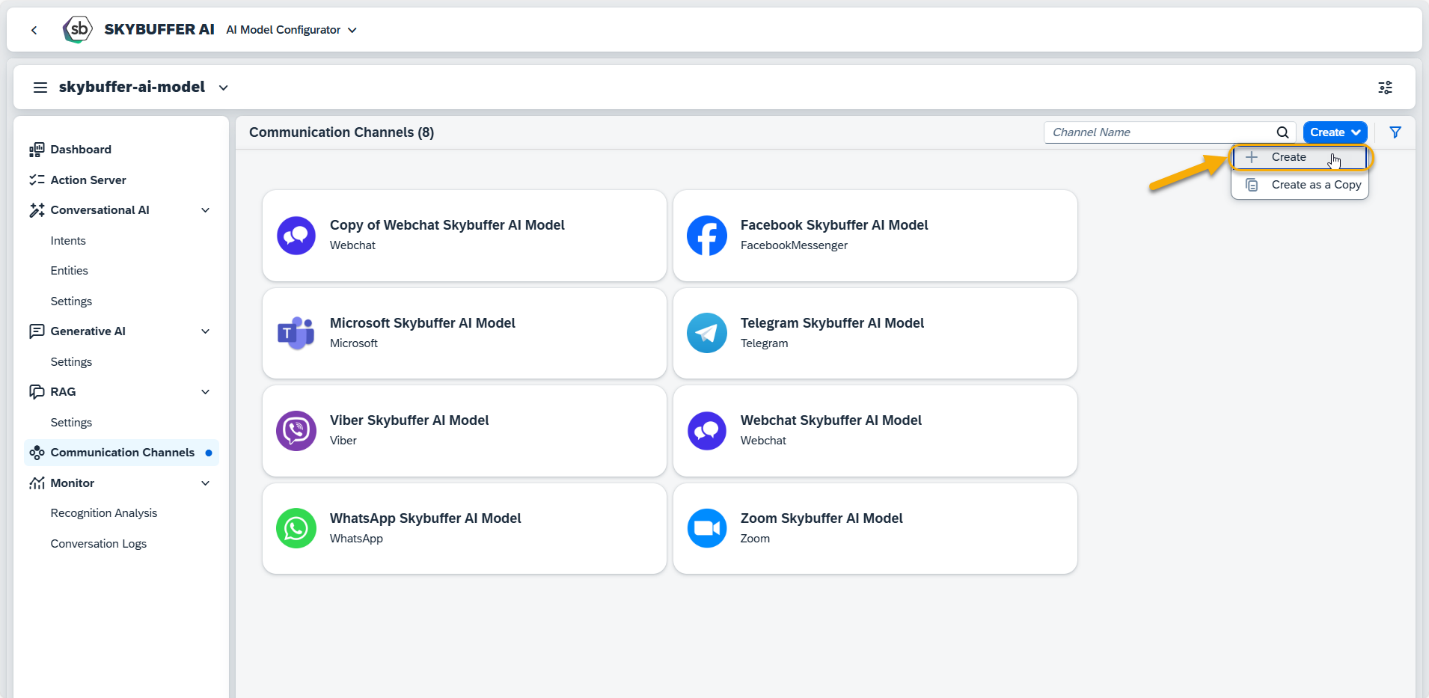
Step 4. Channel creation.
You can create a new Channel from scratch or Copy the Existing Channel.
To create a new Channel, click the Create button:
Step 5. Initial Parameters
Fill in the initial parameters for the new Channel. The form includes:
- Channel Name — follow your organization’s naming convention.
- Channel ID — this field is auto-generated.
- Channel Type — select from a list of available types (e.g., Webchat, Microsoft, Telegram).
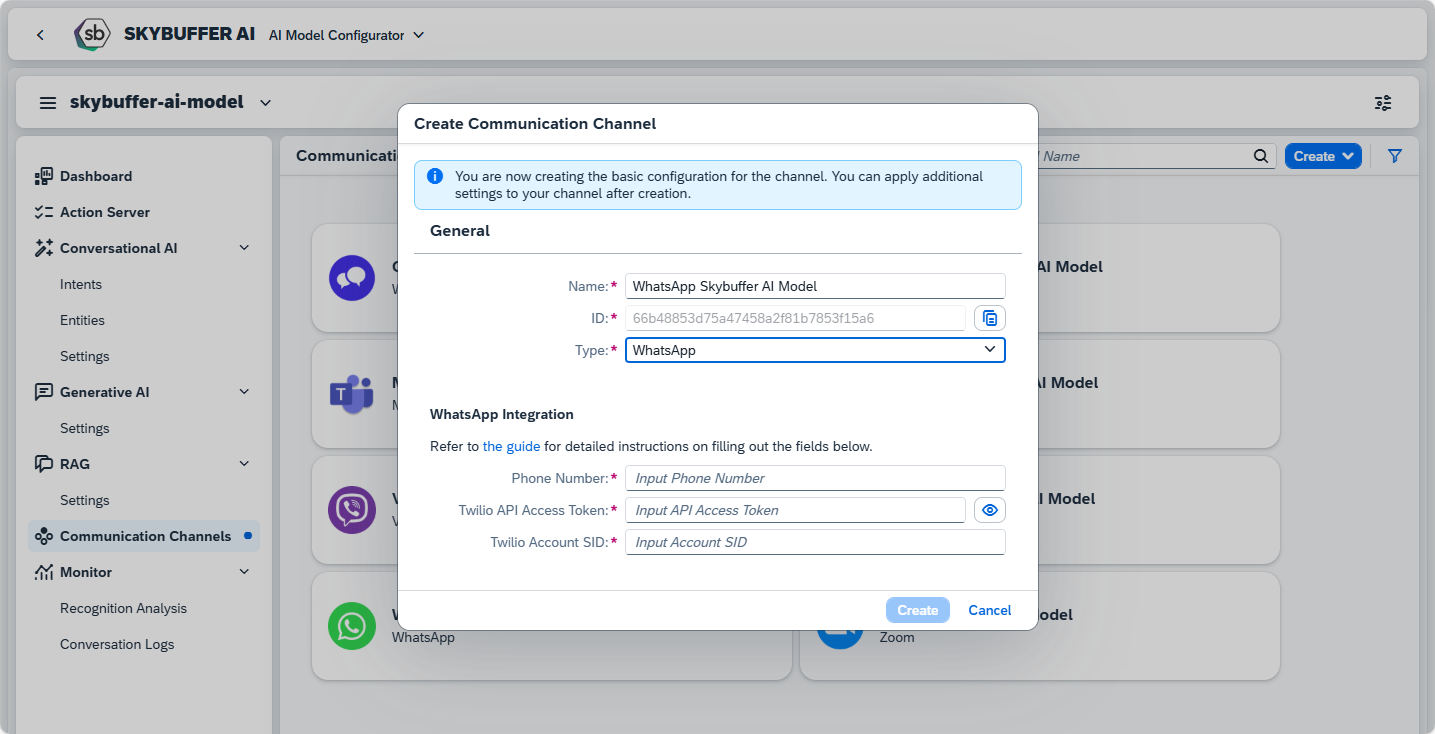
To fill out the fields for WhatsApp Integration refer Steps 6 – 7.
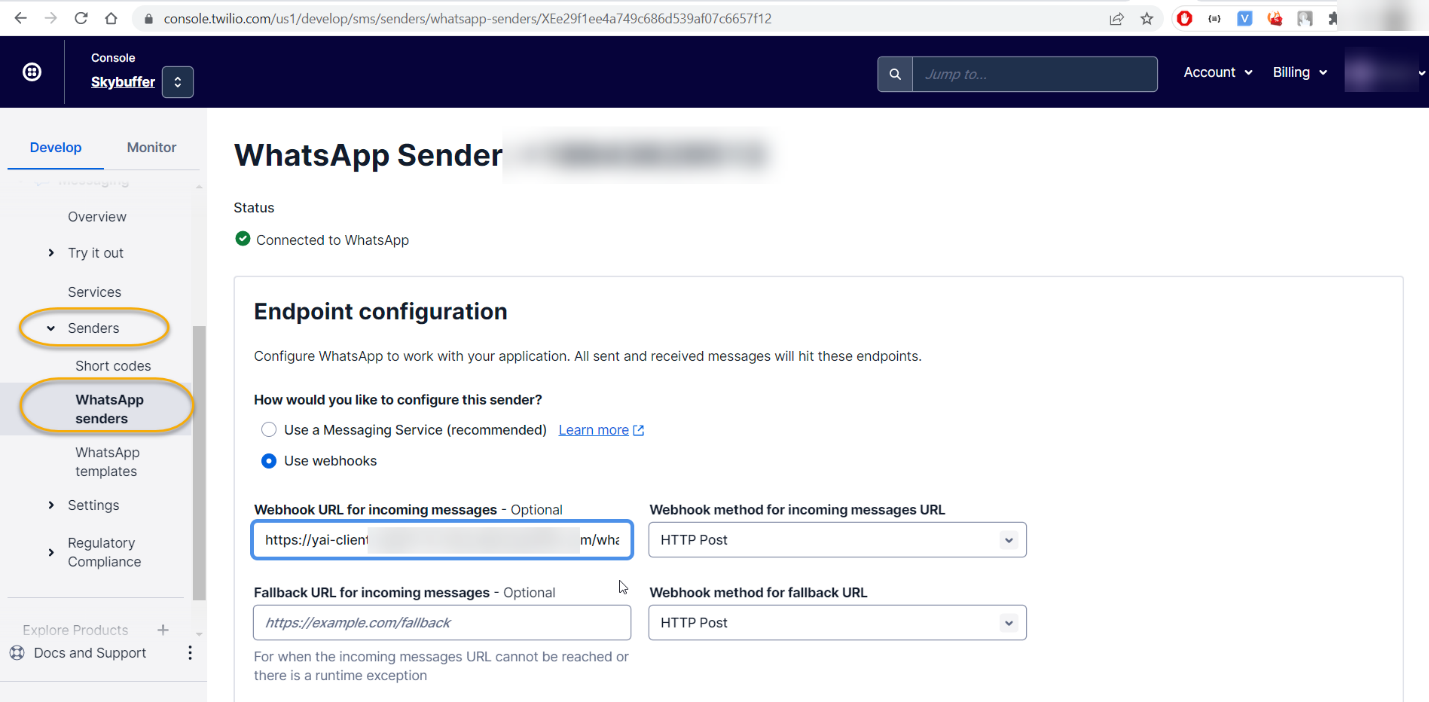
Step 6. Access the Twilio account.
In the Console view, navigate to Develop >Messaging > Senders >WhatsApp Senders.

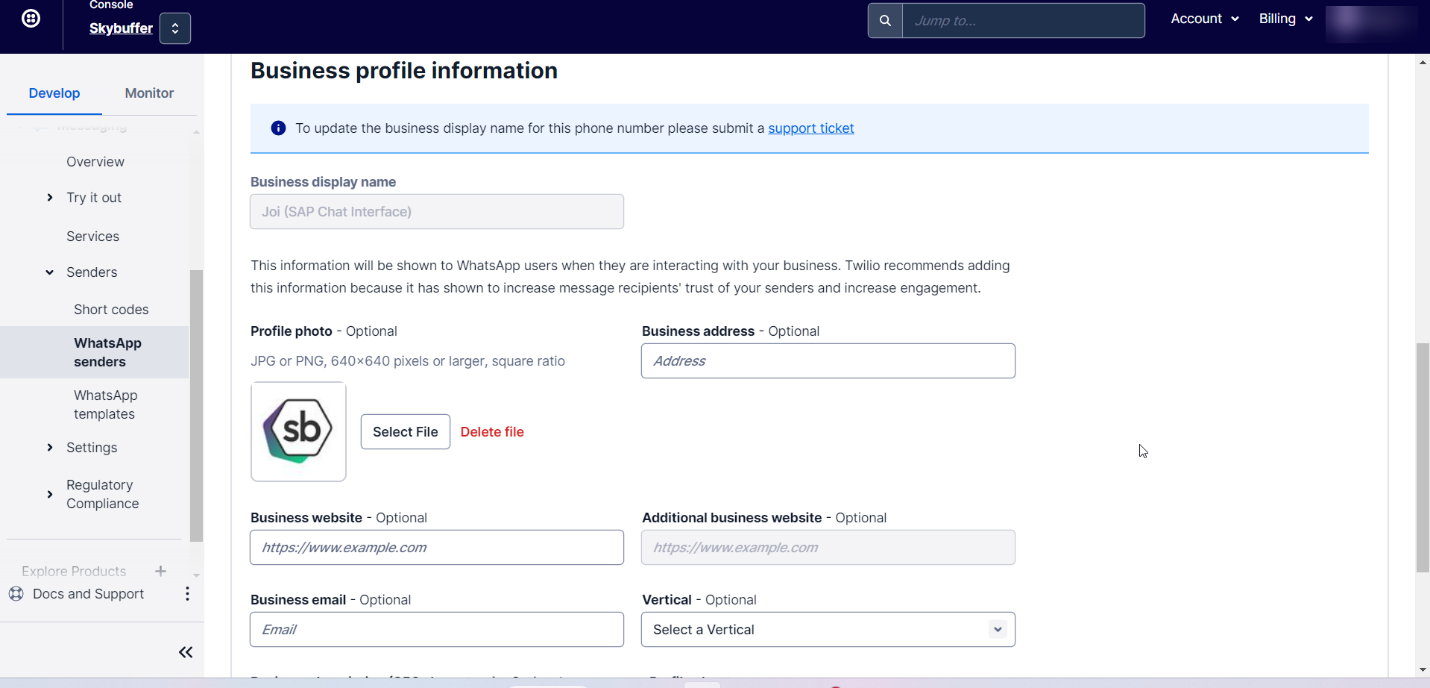
Step 7. Create New Sender:
Select a phone number:

Fill in the Business Profile information:
Endpoint Configuration:
Webhook URL for incoming messages field: the schema is https://<bot-url>/<Channel-id>
Copy Phone Number, Twillio API Access Token and Twillio Account SID, and paste it into Skybuffer AI.
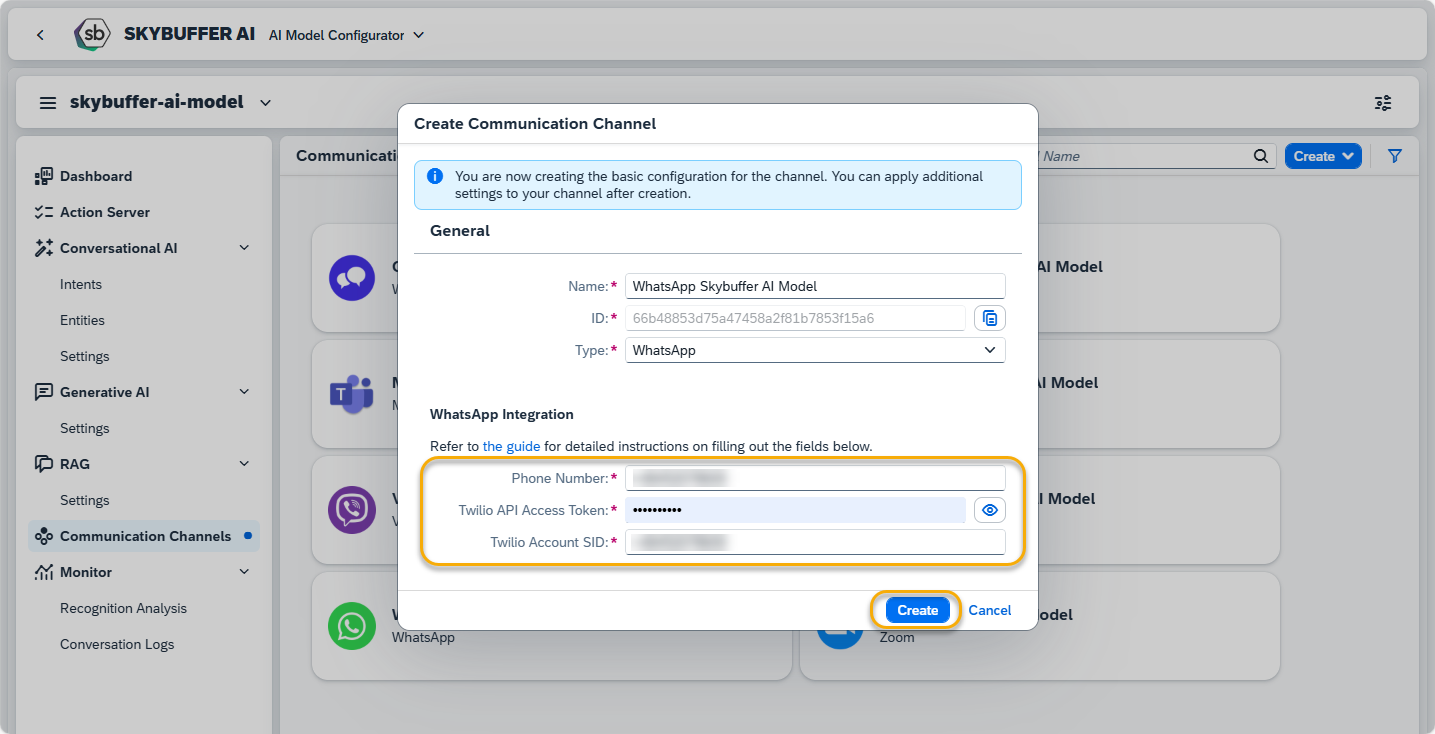
Press Create to finish initial setup in Communication Channels application.
Step 8. Skills Activation
Once your Channel is created, you can activate or deactivate skills defined within your AI Agent.
For more information, visit: Skills Activation.
Step 9. Destination Assignment
This setting allows you to assign destinations to skills that have backend-connected actions.
For more information, visit: Destination Assignment.