Channel Creation
Step 1. Open the AI Agent Configurator application in the AI Agent group.

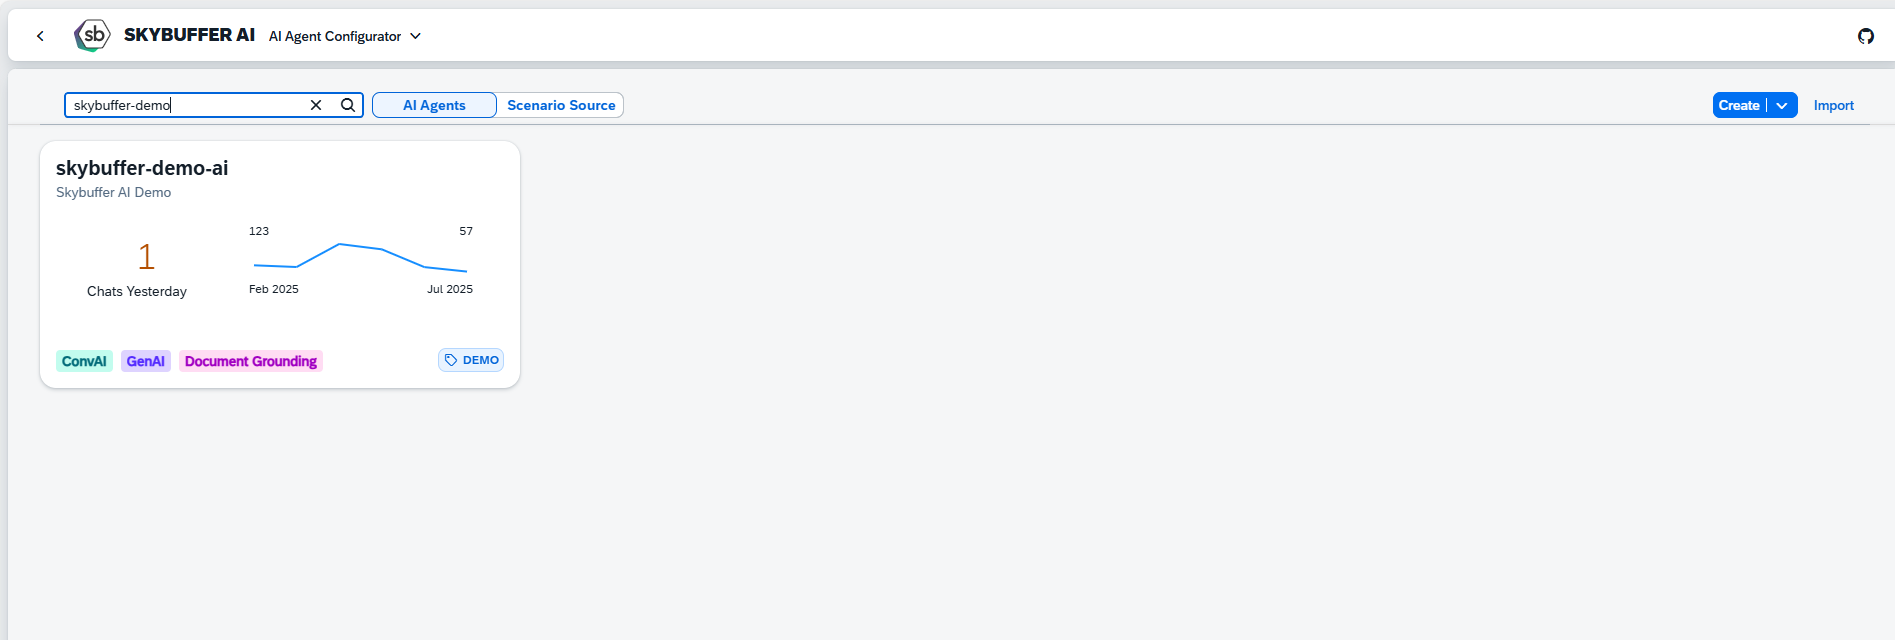
Step 2. After opening the application, you will see a screen displaying all available AI Agents. Each tile represents one Agent, including its name, description, and deployment status. Click on the Agent you want to work with to proceed.
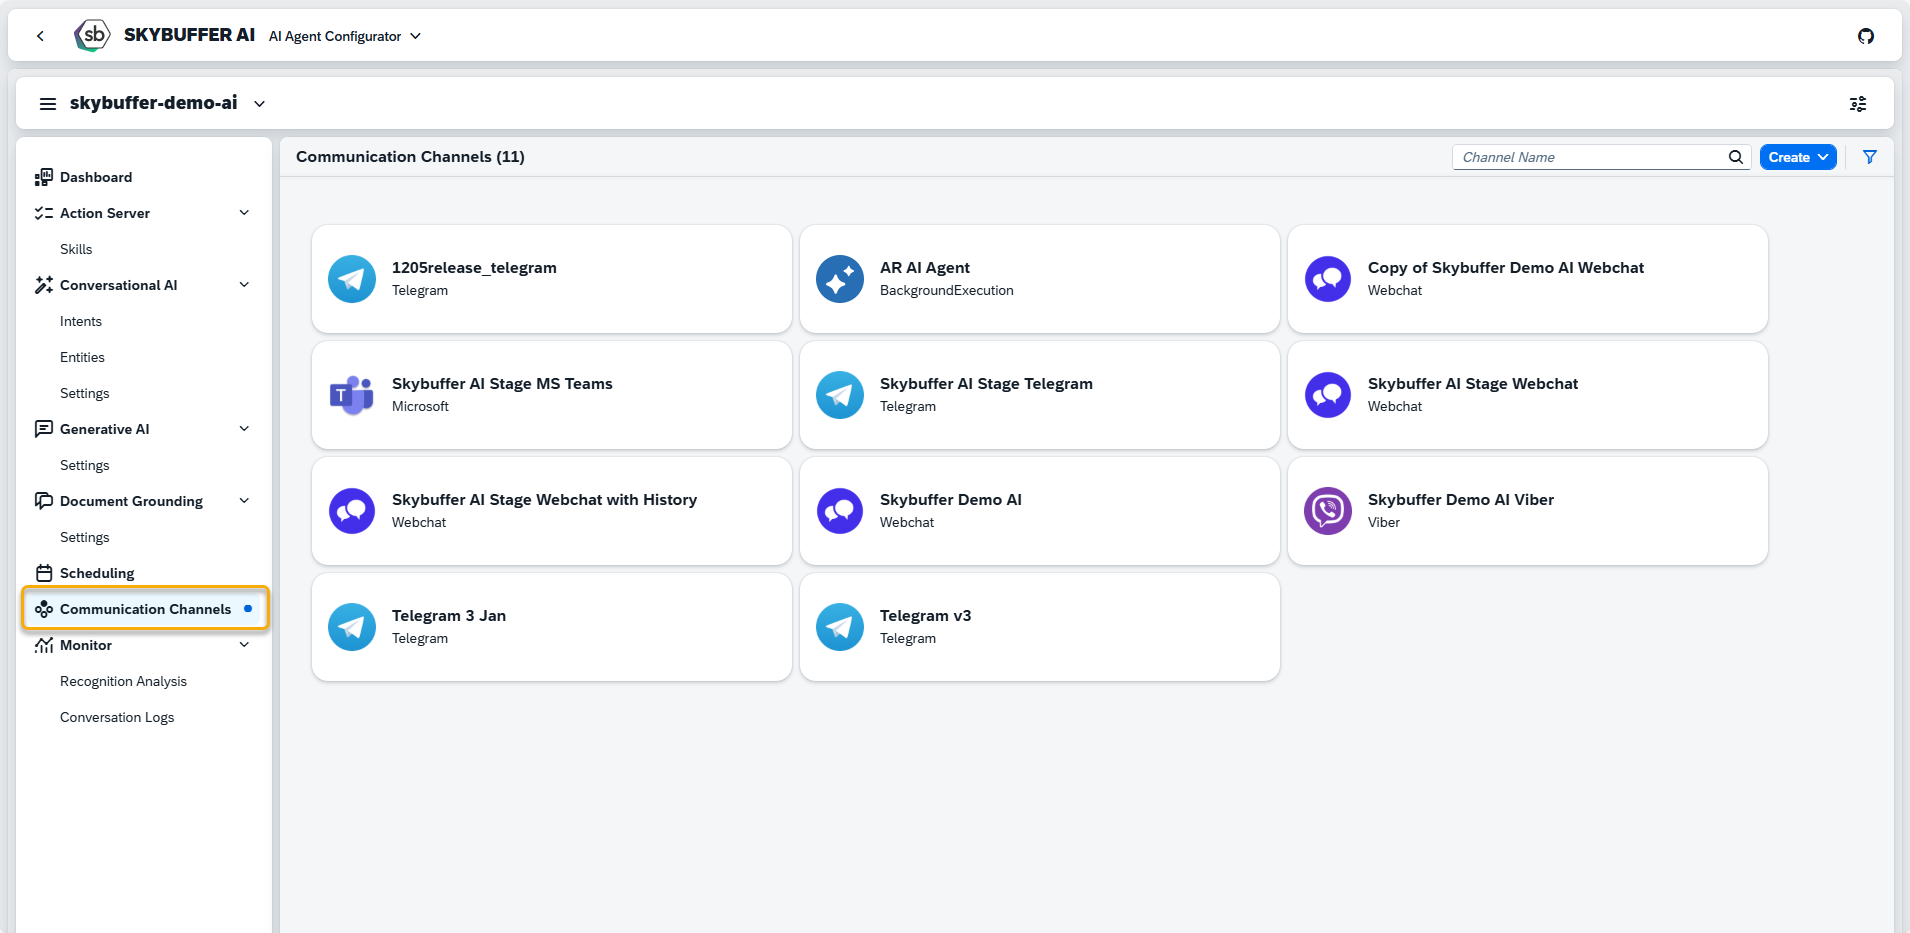
Step 3. Open the Channel management application- Communication Channels.
Step 4. Channel creation.
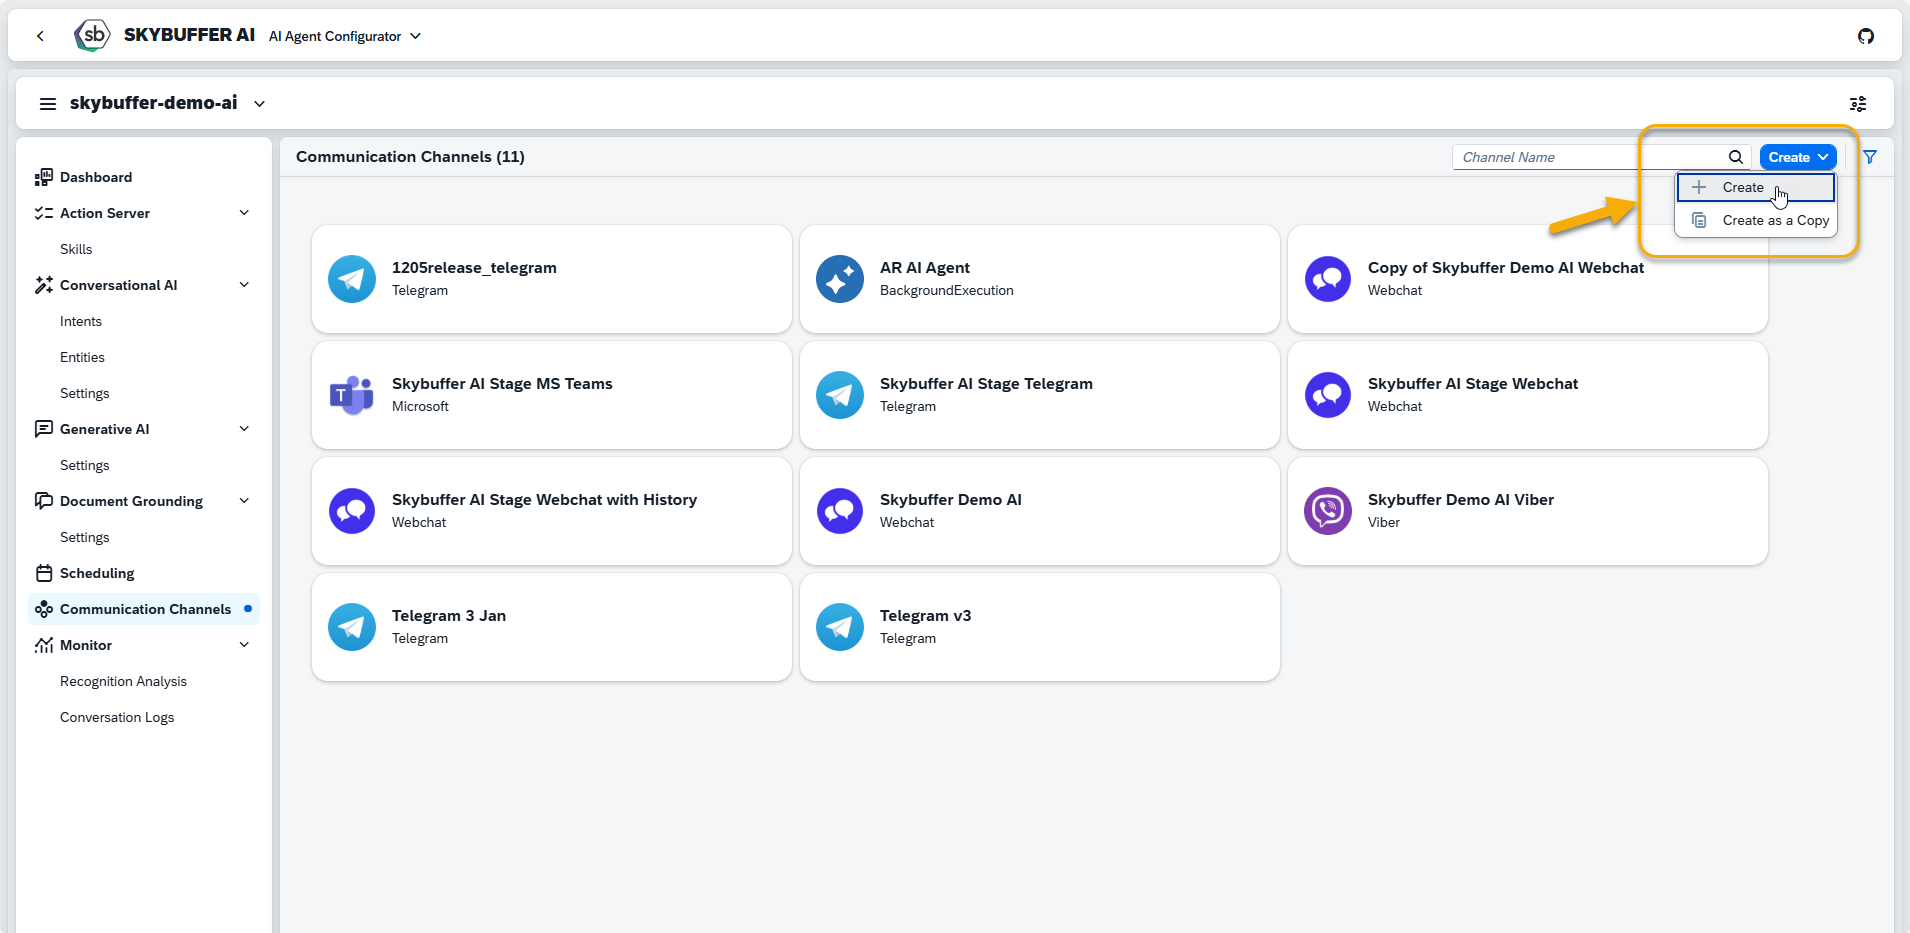
You can create a new Channel from scratch or Copy the Existing Channel.
To create a new Channel, click the Create button:
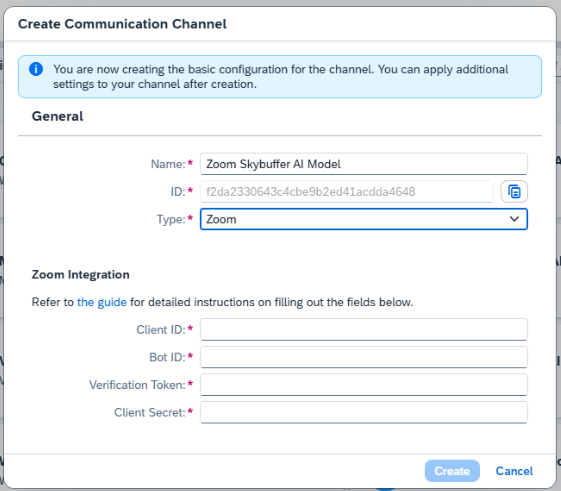
Step 5. Initial Parameters
Fill in the initial parameters for the new Channel. The form includes:
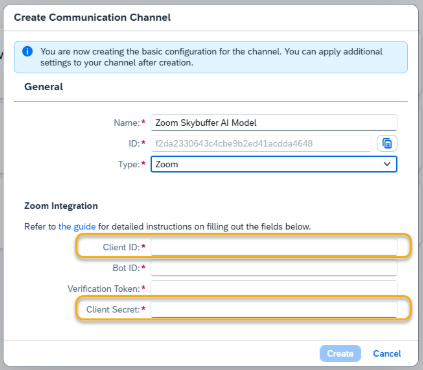
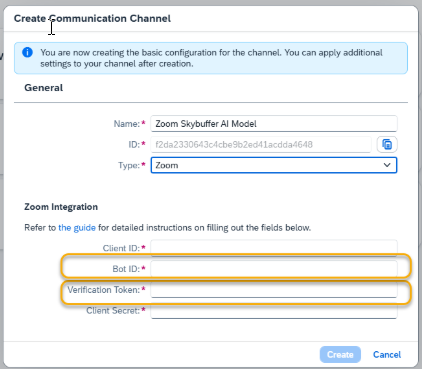
- Channel Name — follow your organization’s naming convention.
- Channel ID — this field is auto-generated.
- Channel Type — select from a list of available types (e.g., Webchat, Microsoft, Telegram).
To fill out the fields for Zoom Integration refer Steps 6 – 12.
Step 6. Go to https://marketplace.zoom.us/.
Select Develop at the top right-hand corner, and then Build App.
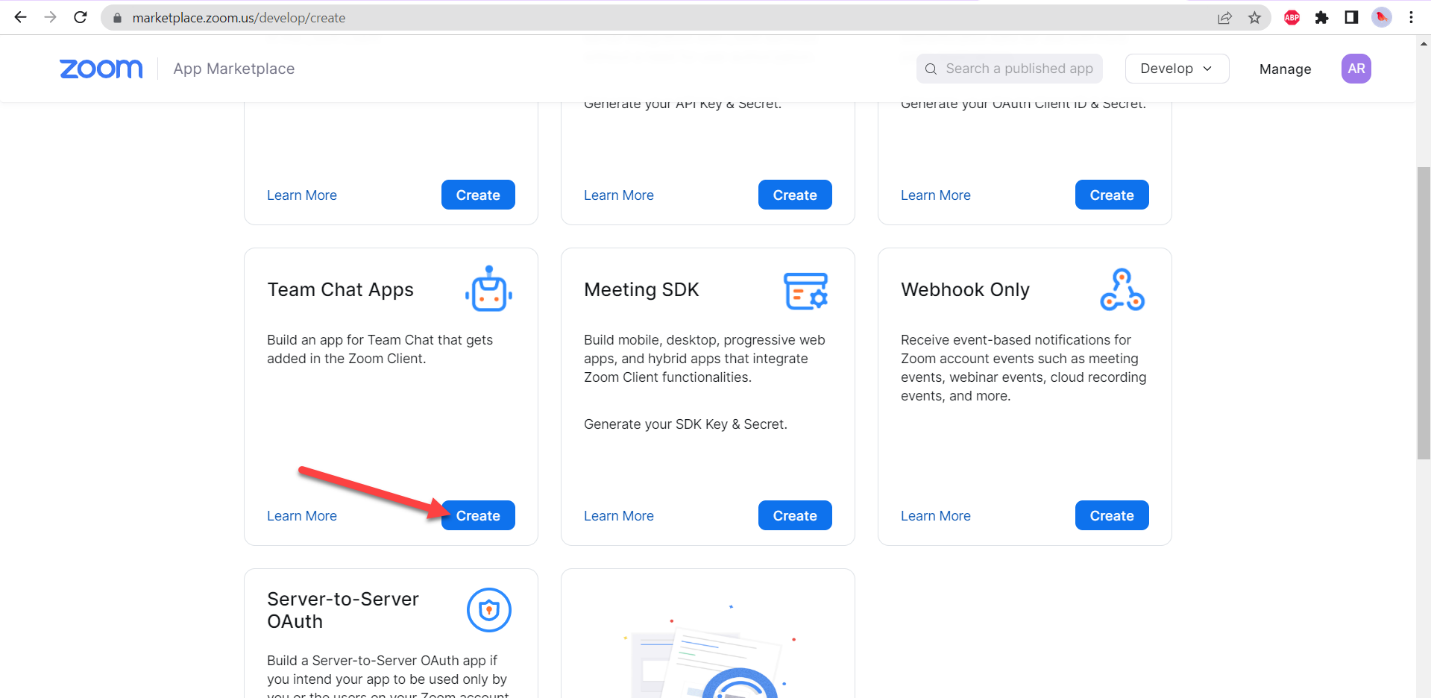
Step 7. Select Team Chat Apps, click Create.
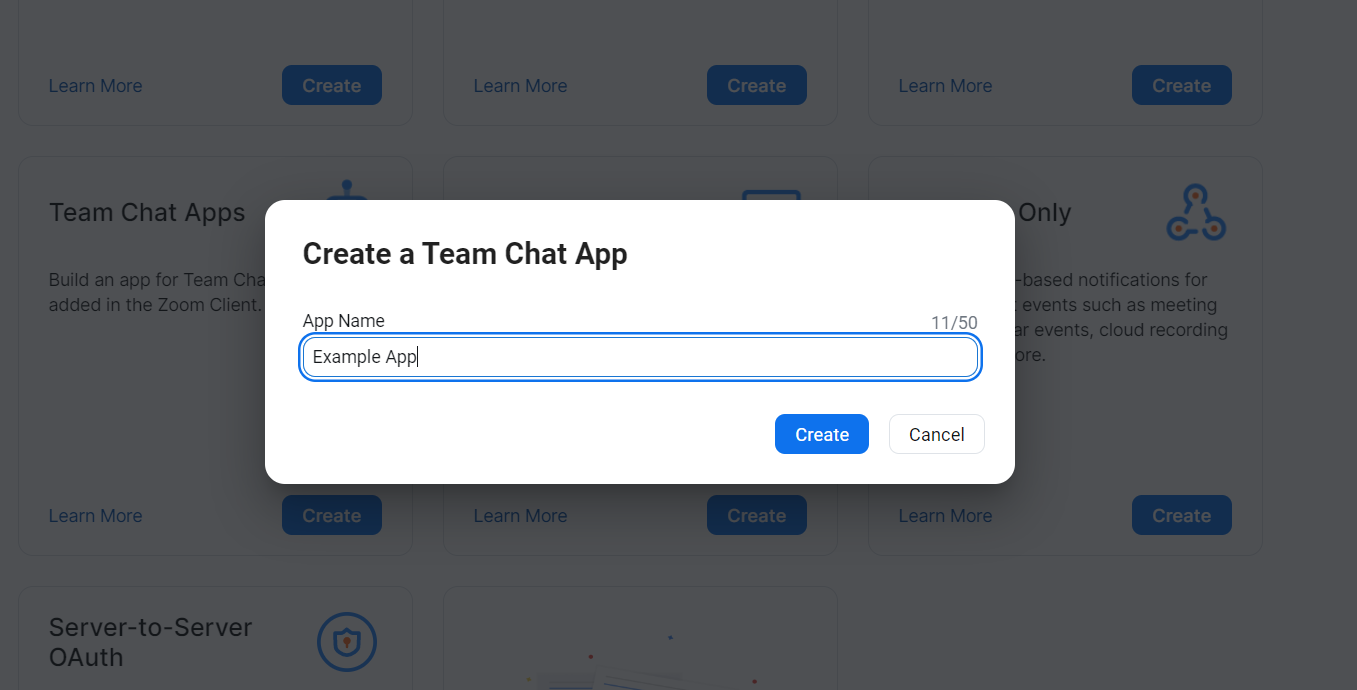
Step 8. Select the name for the app:
Step 9. App Credentials:
Client ID – paste it into the Client ID field in Skybuffer AI Channel settings.
Client Secret – paste it into the Client Secret field in Skybuffer AI Channel settings.
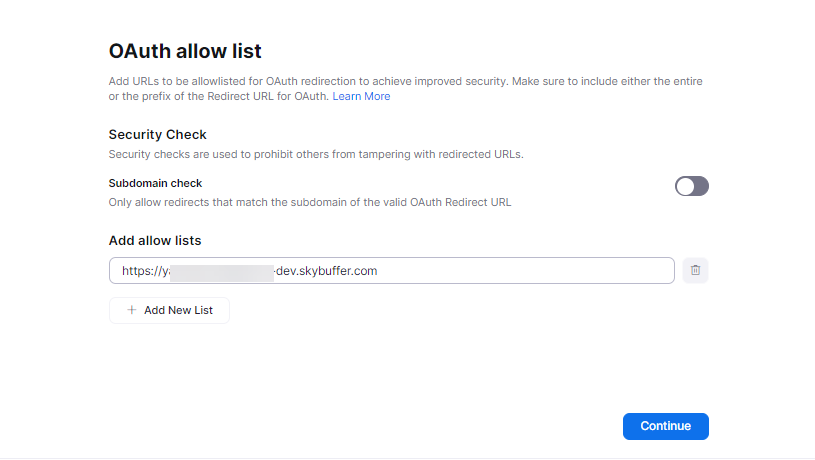
Redirect URL for OAuth – <Bot webhook base URL>/zoom_auth – fill in the field according to this schema:
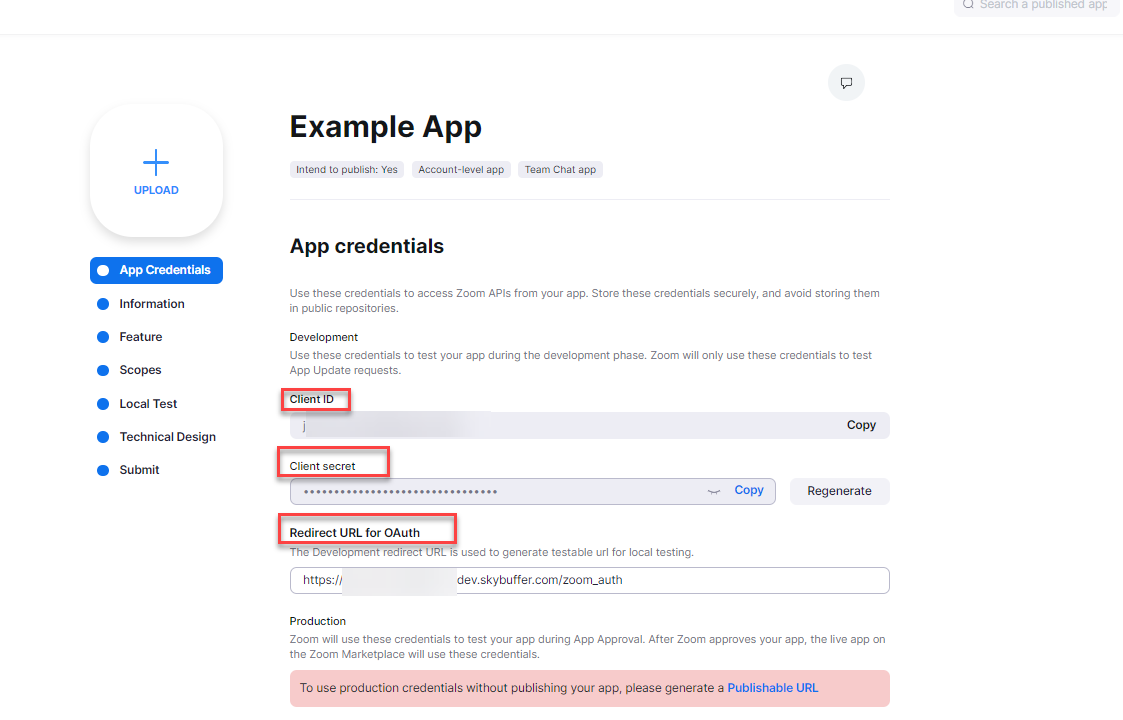
OAuth allow list – add the base webhook URL (same as in the redirect URL) to this list.
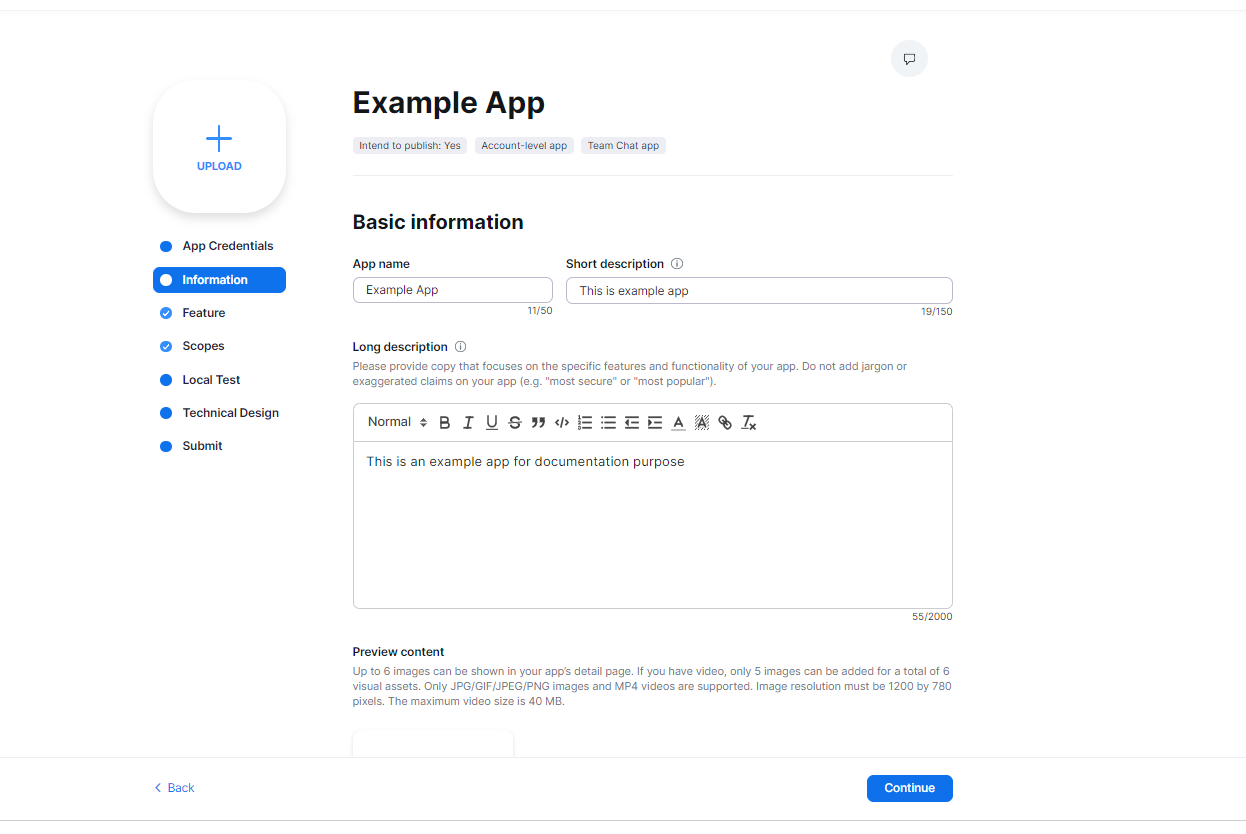
Step 10. Basic Information
Fill in the App name, Short description, and other data.
Step 11. Feature tab
Add the following features:
Verification token – paste it into Skybuffer AI Channel settings.
Bot JID (production) – paste it into Skybuffer AI Channel settings – field Bot ID.
Save your entries on Skybuffer AI.

Step 12. (optional) Fill in the remaining tabs, save your entries and publish the app.
Step 13. Tools Activation
Once your Channel is created, you can activate or deactivate tools defined within your AI Agent.
For more information, visit: Tools Activation.
Step 14. Destination Assignment
This setting allows you to assign destinations to tools that have backend-connected actions.
For more information, visit: Destination Assignment.