Services to Be Enabled:
HANA Cloud – https://discovery-center.cloud.sap/serviceCatalog/sap-hana-cloud
Cloud Foundry Runtime – https://discovery-center.cloud.sap/serviceCatalog/cloud-foundry-runtime
Authorization and Trust Management Service – https://discovery-center.cloud.sap/serviceCatalog/authorization-and-trust-management-service
Connectivity Service – https://discovery-center.cloud.sap/serviceCatalog/connectivity-service
Destinations Service – https://discovery-center.cloud.sap/serviceCatalog/destination
Job Scheduling Service – https://discovery-center.cloud.sap/serviceCatalog/job-scheduling-service
Object Store Service (currently supported Amazon S3 as a backend) – https://discovery-center.cloud.sap/serviceCatalog/object-store
AI Core Service – https://discovery-center.cloud.sap/serviceCatalog/sap-ai-core (Optional Service)
AI Launchpad Service – https://discovery-center.cloud.sap/serviceCatalog/sap-ai-launchpad (Optional Service)
Service Plans:
| Service | Service Technical Name | Plan |
| SAP AI Core | aicore | extended |
| SAP AI Launchpad | ai-launchpad | standard (Application) |
| SAP HANA Cloud | hana-cloud-tools | tools (Application) |
| SAP HANA Cloud | hana-cloud | hana-td |
| SAP HANA Schemas & HDI Containers | hana | hdi-shared |
| Job Scheduling Service | jobscheduler | standard |
| Connectivity Service | connectivity | lite |
| Authorization and Trust Management Service | xsuaa | application |
| xsuaa | broker | |
| xsuaa | space | |
| xsuaa | apiaccess | |
| Destination Service | destination | lite |
Roles to be assigned:
| Role Name |
| aicore_admin_applications_editor |
| aicore_admin_editor_all |
| aicore_admin_repositories_editor |
| aicore_admin_resourcegroups_editor |
| allow_all_resourcegroups |
| connections_editor |
| SAP HANA Cloud Instance Administrator |
| SAP HANA Cloud Instance Security Administrator |
| Subaccount Viewer |
| Subaccount Service Administrator |
| viewer |
| mlfunctions_editor |
| mloperations_editor |
| genai_manager |
| genai_administrator |
| resourcegroup_viewer |
Step 1. Assign Entitlements to Subaccount
Open the Entitlements section, and press the Edit button:

Press Add Service Plans:

Add service plans for all the services described in the sections of Services to be enabled:

Step 2. Installation of Components on Cloud Foundry Runtime:
You need to install and configure CLI interface for CF runtime, please refer to SAP documentation – https://help.sap.com/docs/btp/sap-business-technology-platform/download-and-install-cloud-foundry-command-line-interface
After this, multi-apps plugin should be installed – please refer to SAP documentation – https://help.sap.com/docs/btp/sap-business-technology-platform/install-multiapps-cli-plugin-in-cloud-foundry-environment
Log on to the Cloud Foundry Environment – https://help.sap.com/docs/btp/sap-business-technology-platform/log-on-to-cloud-foundry-environment-using-cloud-foundry-command-line-interface
Step 3. Download the installation archives
Download the installation archives provided by Skybuffer to your workplace with the installed CF CLI, and execute the following commands one by one:
cf deploy skybfrxts_<version>.mtar
cf deploy skybfryai_<version>.mtar
cf deploy skybfryai_py_ai_core_<version>.mtar
cf deploy skybfryai_rag_m_<version>.mtar
cf deploy skybfryai_rag_vector_<version>.mtar *
cf deploy botclientconnector_<version>.mtar
* This module can be installed in Cloud Foundry environment with HANA DB version higher than QRC 1/2024 for SAP HANA VECTOR functions support.
Step 4. Check the result
Log in to the Cloud Foundry Space and ensure that the applications are deployed and running:

NOTE: If interaction with SAP AI CORE is required, a service named AI_core must be configured before installing skybfryai_py_ai_core, skybfryai_rag_m and Botclientconnector MTARs.
Step 5. Preserving AI Connector link
To preserve the AI Connector link during the update of the AI Connector application and automatically revert to the previous link after installation, execute the following commands.
For getting list of routes and domains execute the following commands:
cf routes,
cf domains
cf map-route <APP_NAME> <DOMAIN> [–hostname HOSTNAME] [–path PATH]
Do not provide path if you want to change only hostname. Next step is to delete an old hostname.
cf delete-route <DOMAIN> [–hostname HOSTNAME] [–path PATH] [-f]
-f = force deletion
For example:
cf map-route botclientconnector cfapps.eu10-004.hana.ondemand.com –hostname botclientconnector-relaxed-meerkat-bj
cf delete-route cfapps.eu10-004.hana.ondemand.com –hostname skybuffer-sp–z-o-o–skybuffer-bot-skybuffer-ai-botclie25f4f193
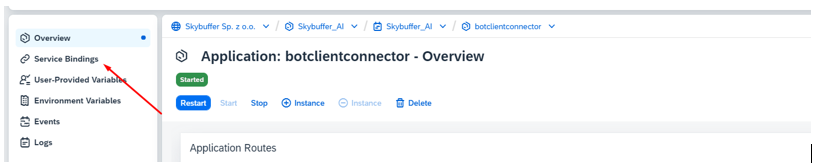
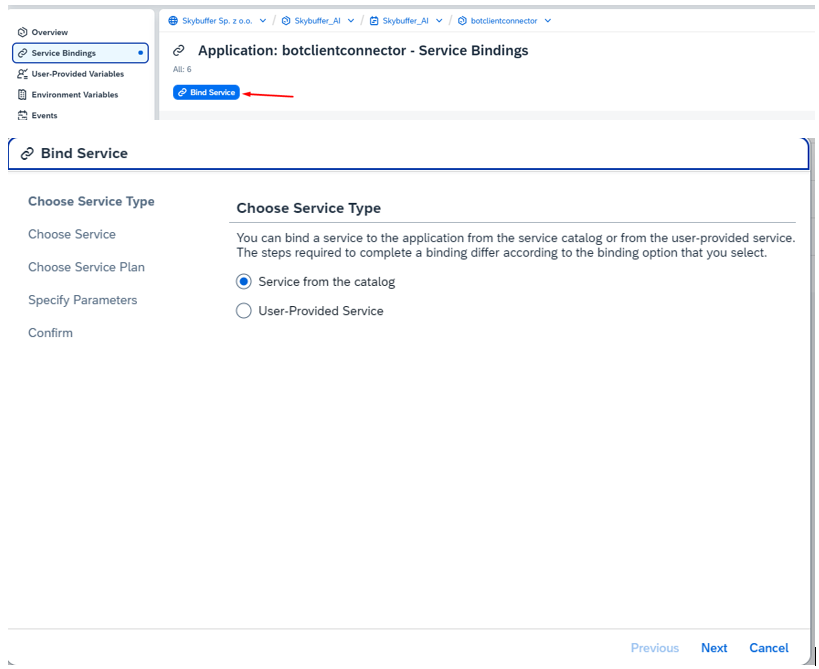
Optional service AI_Core should be bind manually:
Step 6. Post-Installation Steps
One-Time Tables Setup. Follow these steps to complete the one-time setup after installation:
Maintain Tenant Information
- Update the Tenant table in the SKYBFR_XTS schema with the required tenant details.
Assign Configuration for the RAG Application
- Update the EMB.CONF table within the SKYBFRYAI_RAG_M schema to assign the required configurations for the RAG embeddings API.
Ensure all entries are correctly maintained before proceeding with system usage.
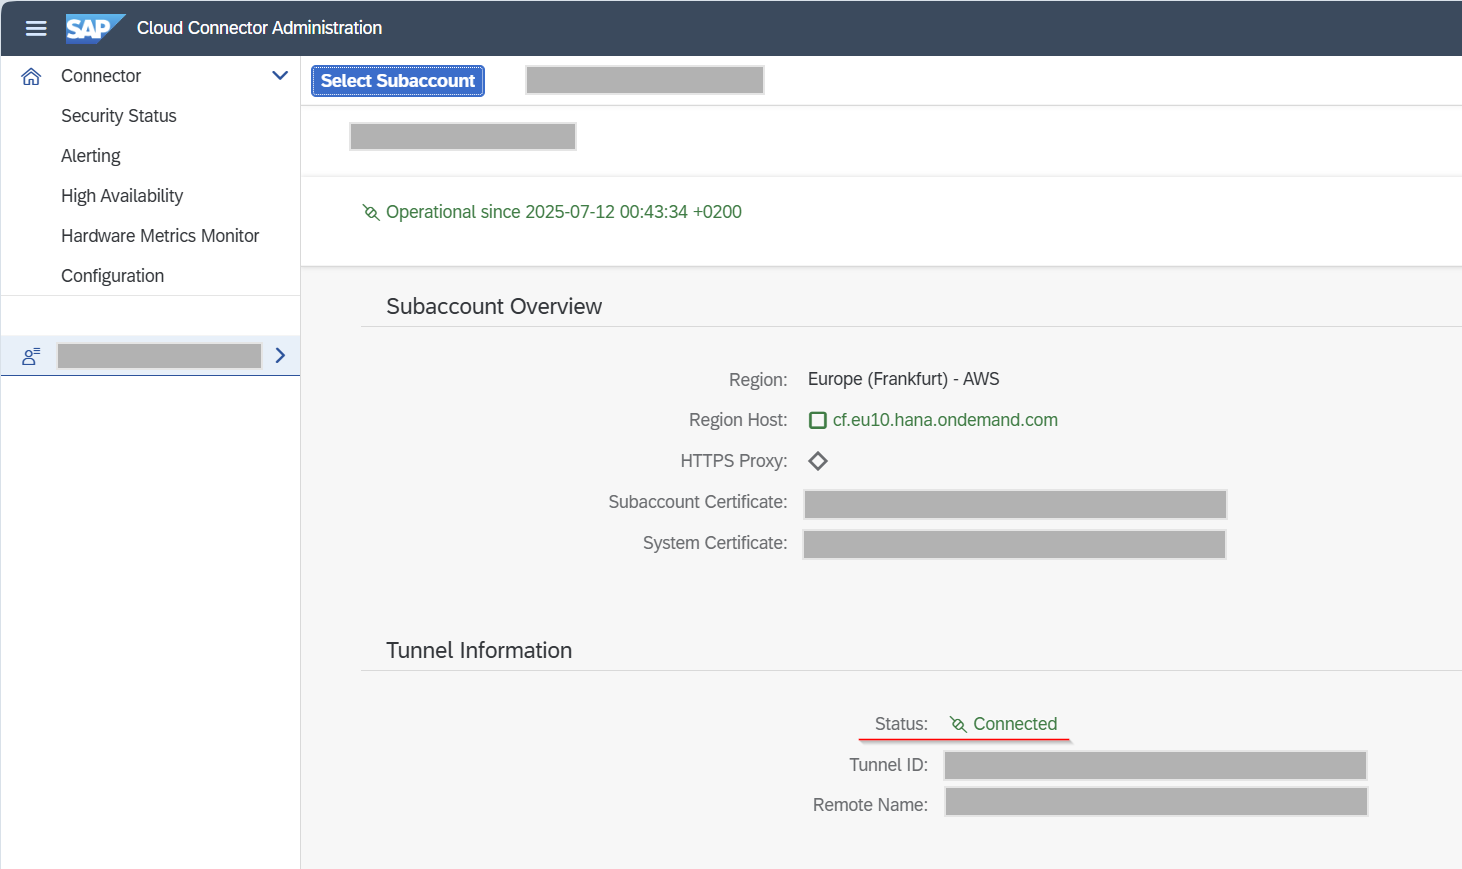
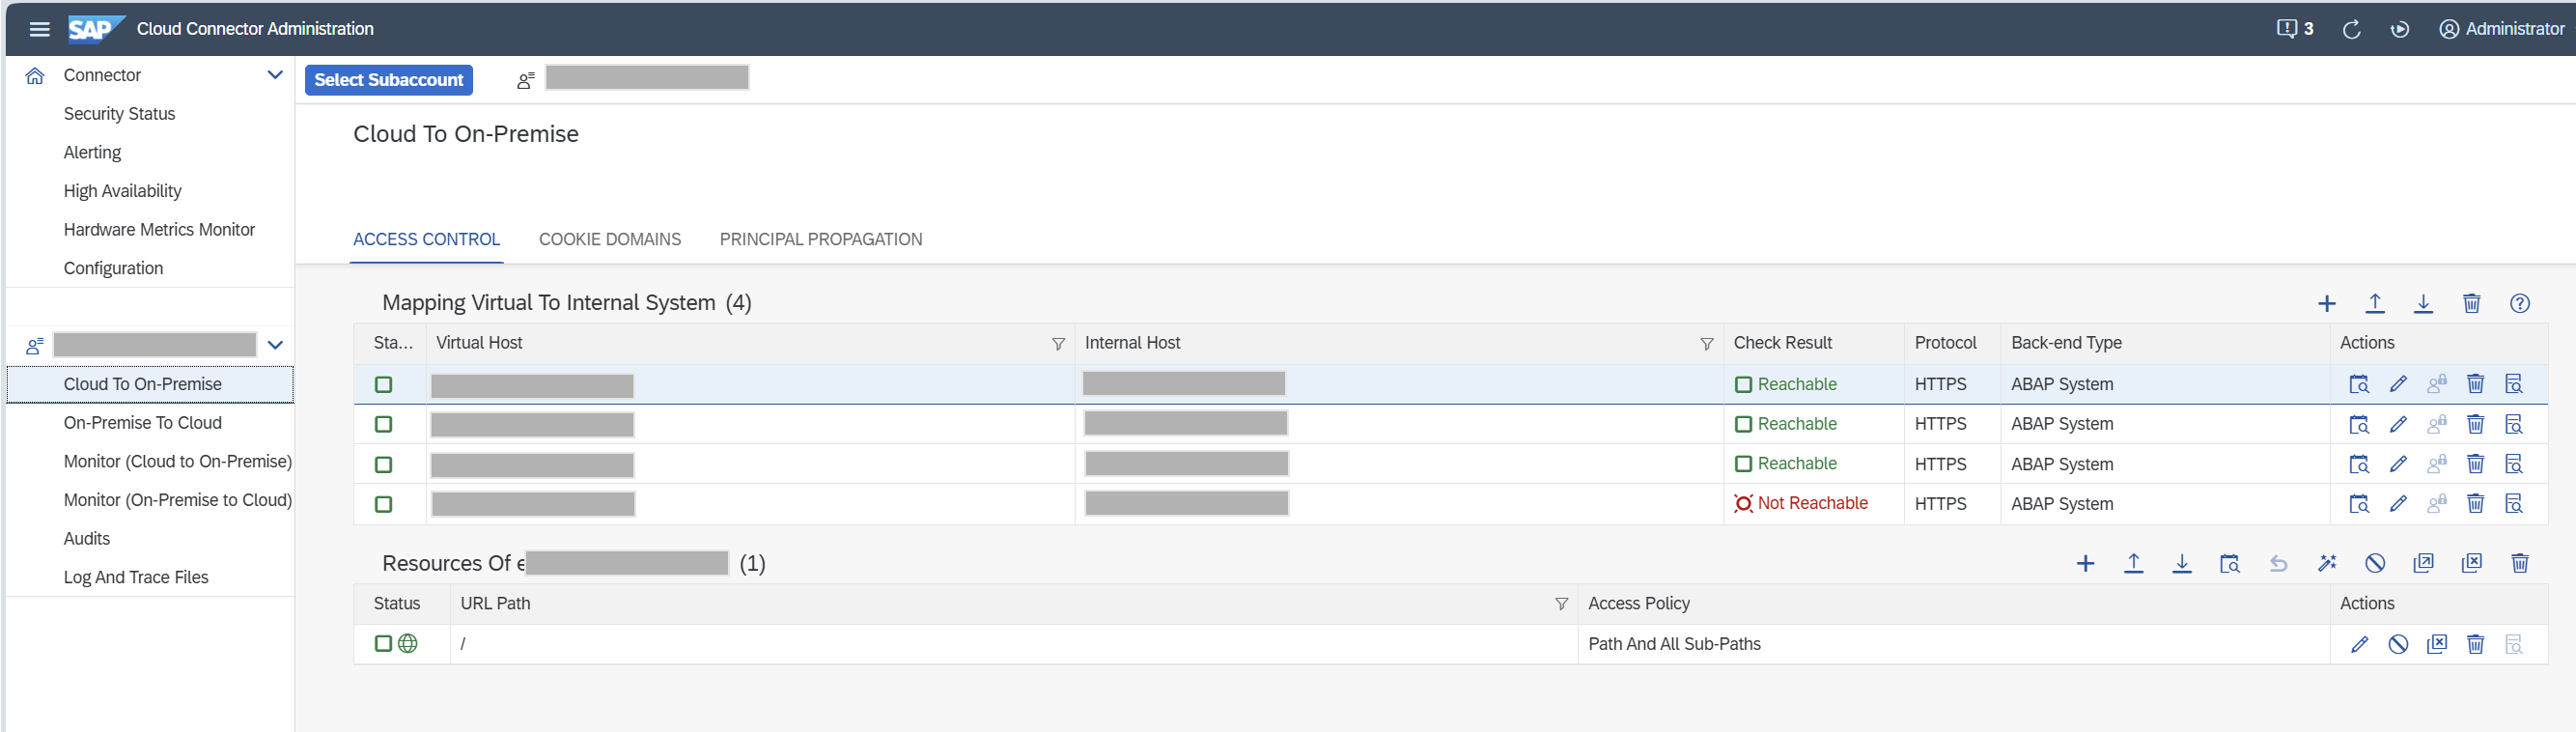
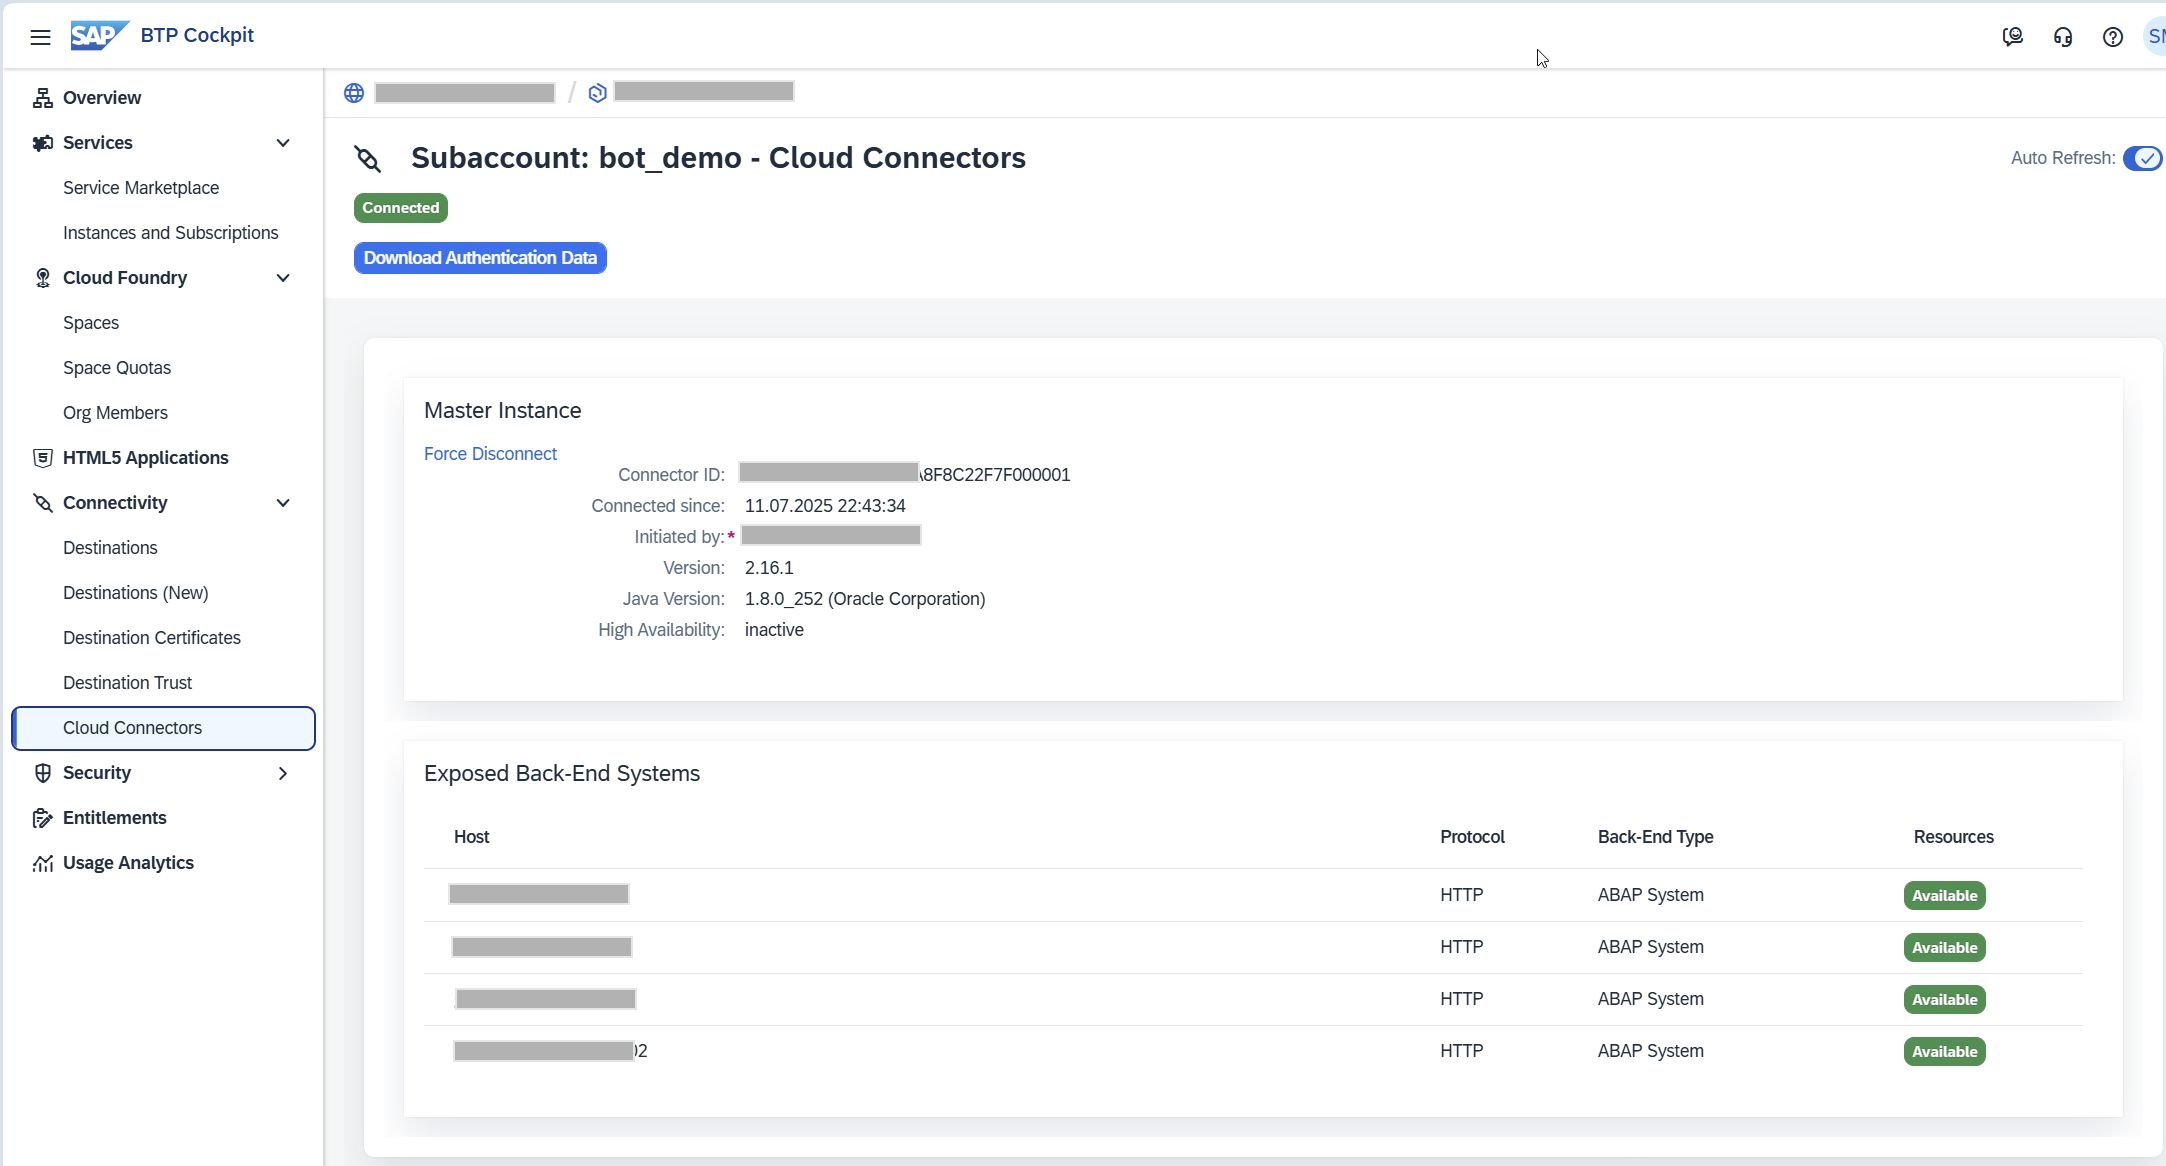
Step 7. Cloud Connector
If you plan to connect OnPremise system to BTP, Cloud Connector should be configured to provide Proxy Connection.
Verify that subaccount is connected and certificate is valid.
Verify connections to OnPremise systems.
Step 8. Destinations
To provide connection to OnPremise, seciont “Destination” should be configured.
Verify that cloud connector is successfully connected and got exposed back-end systems.
Go to section “Destinations” and setup connection depends of scenario.
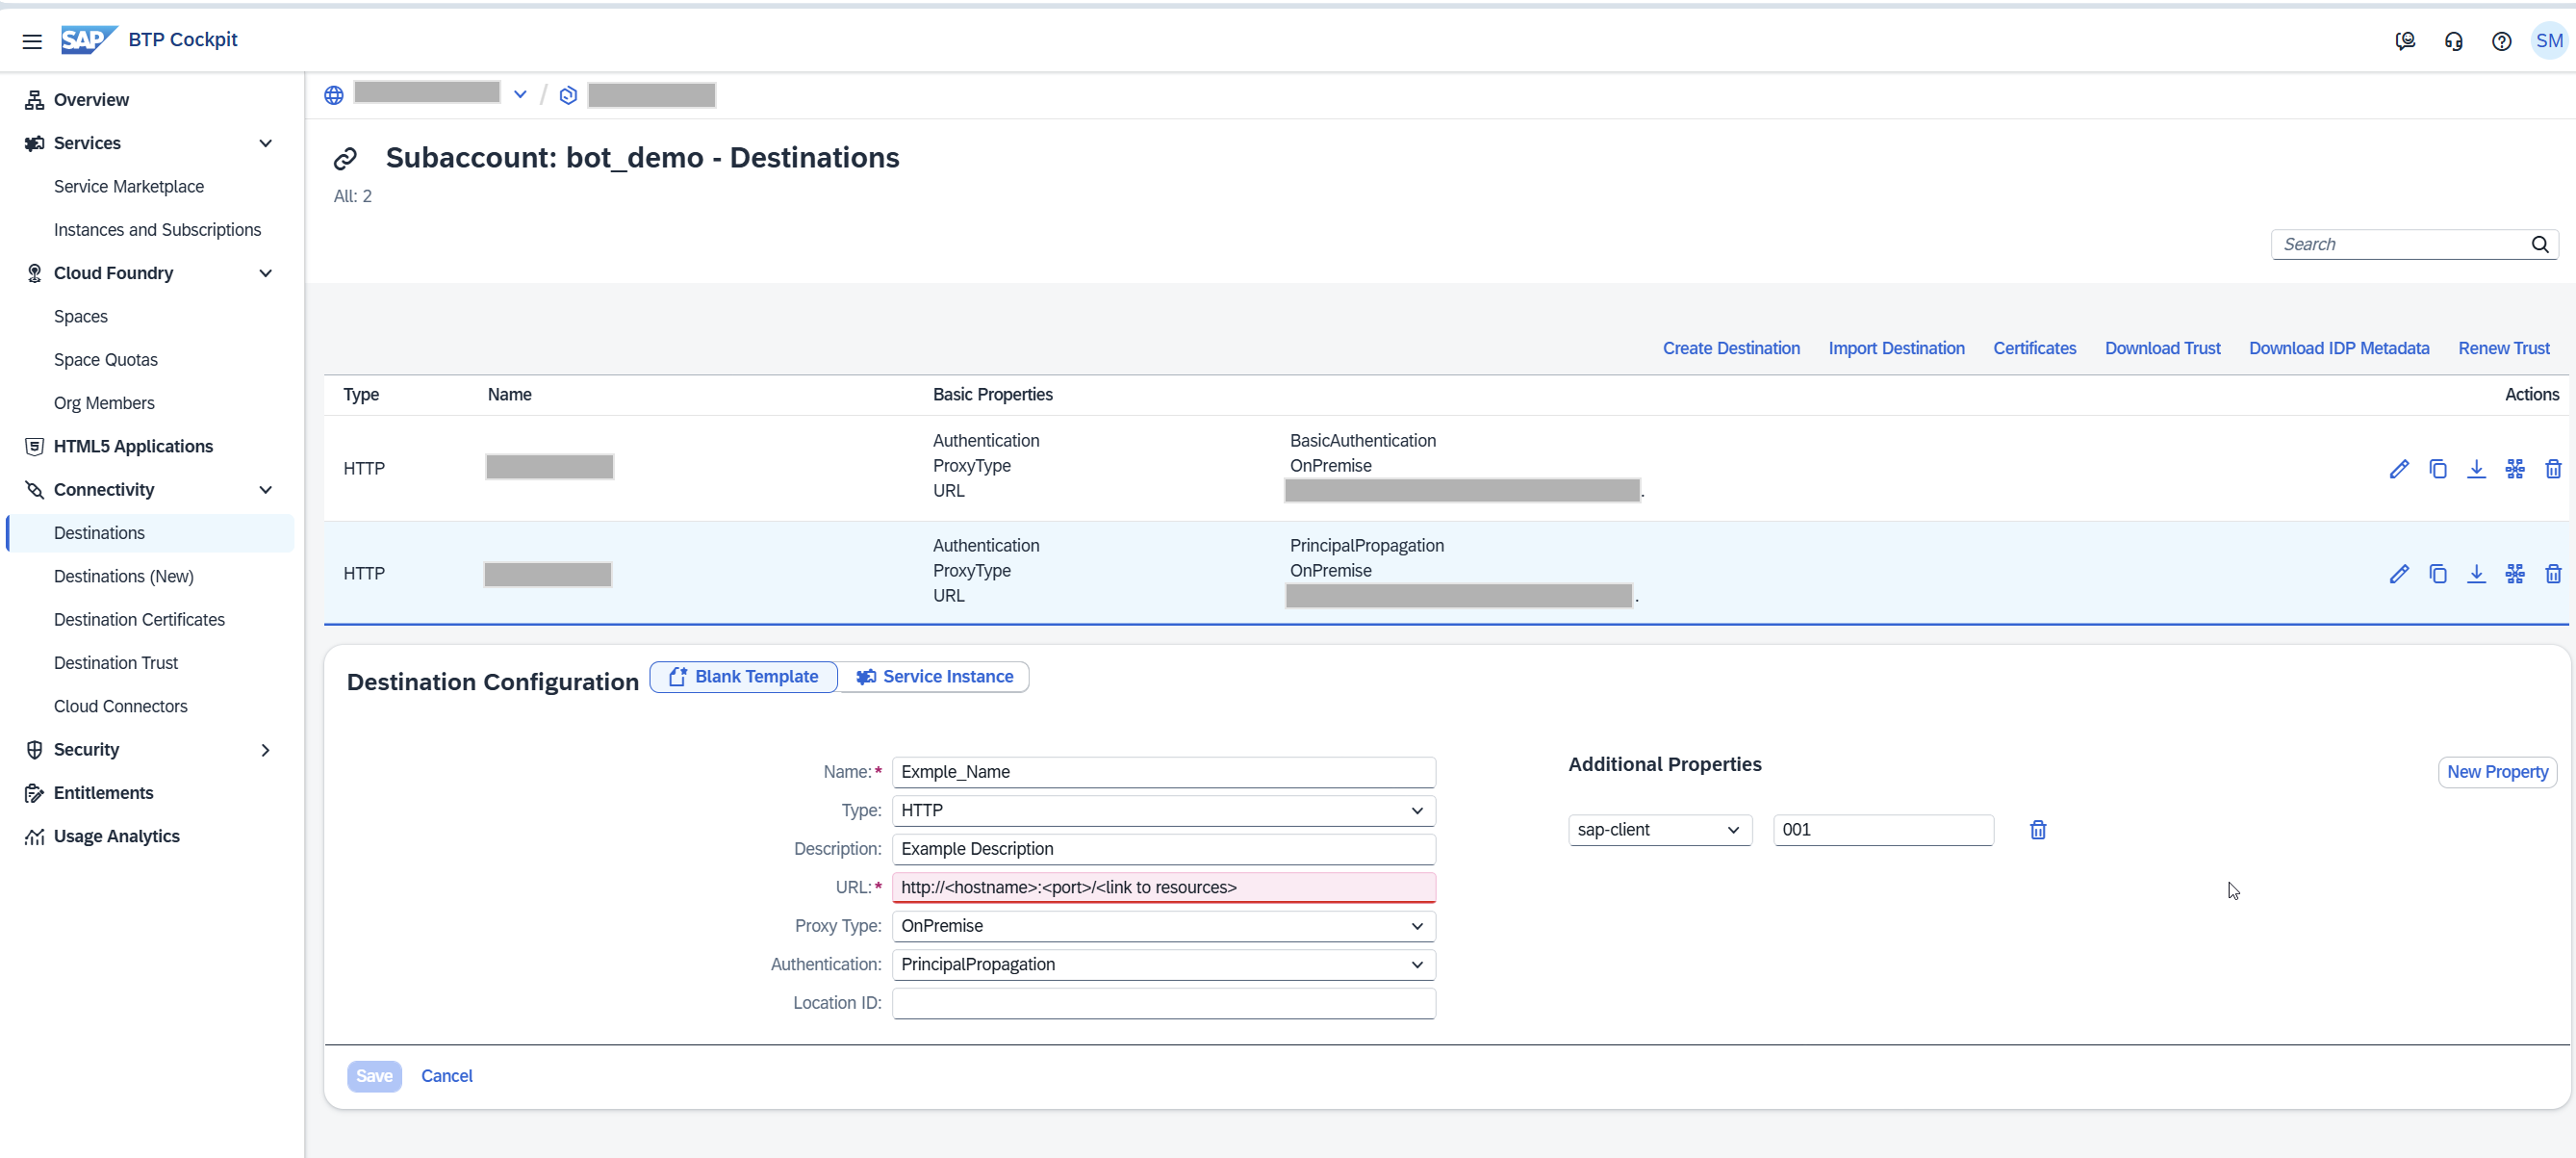
More about destination you can find here: https://help.sap.com/docs/connectivity/sap-btp-connectivity-cf/destination-service