Instructions for setting up Ollama server in SAP AI Core
SAP AI Core is a service of the SAP Business Technology Platform that is designed to handle the execution and operations of your AI assets. In our case, we use this service to train models to recognize intents and entities.
Prerequisites:
- You have an SAP Business Technology Platform account with space inside, and SAP AI Core service is already activated using any of the service plans (free one is available). If not, complete the steps for initial setup: https://help.sap.com/docs/sap-ai-core/sap-ai-core-service-guide/initial-setup
- You are subscribed to SAP AI Launchpad using any of the service plans (free one is available). If not, complete the steps for initial setup: https://help.sap.com/docs/ai-launchpad/sap-ai-launchpad/subscribe-to-sap-ai-launchpad
- Applications that need to interact with the Ollama server will need to obtain access tokens using SAP AI Core service instance and know the resource group name and the endpoints prefix. Therefore, they must be configured and bound to this service either manually or automatically during the deployment process. We will be considering this later in a separate paragraph.
Step 1. Create an SAP AI Core service instance
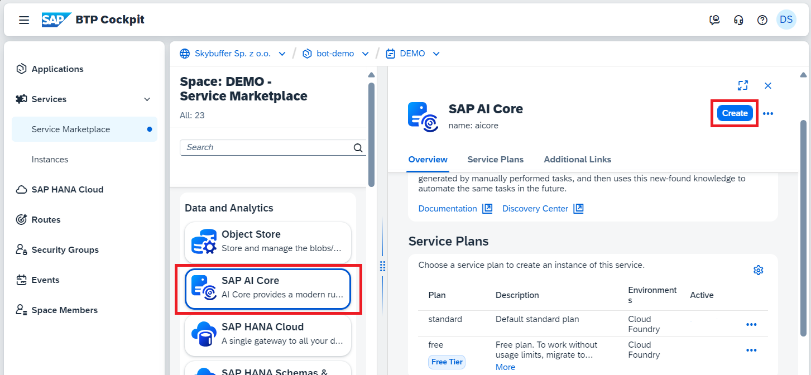
Inside your account and space, select the menu item of Service Marketplace and then SAP AI Core.
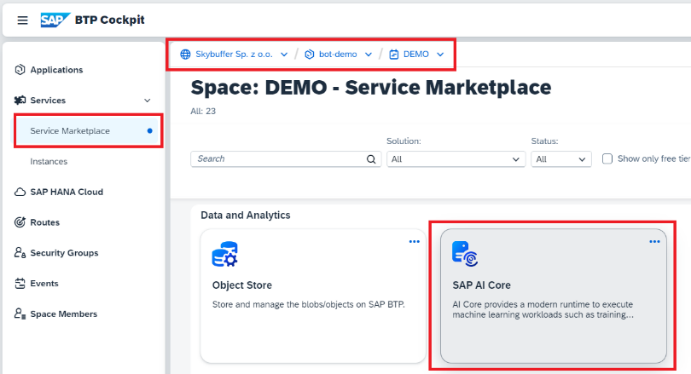
Press the Create button.
Select your plan and fill in the field of Instance Name with AI_core. Do not give other names to this service because the name is the essential key for further interaction between the application and the service.
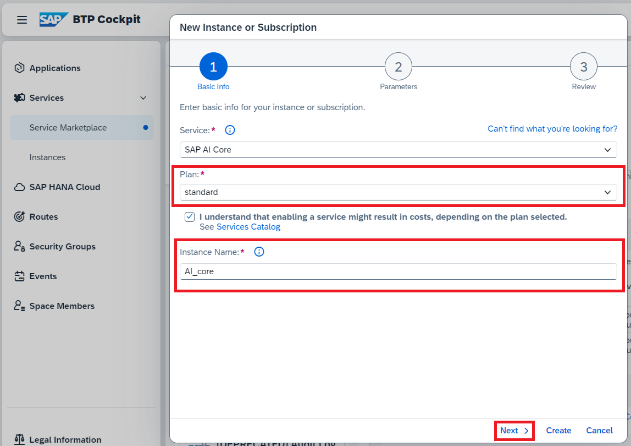
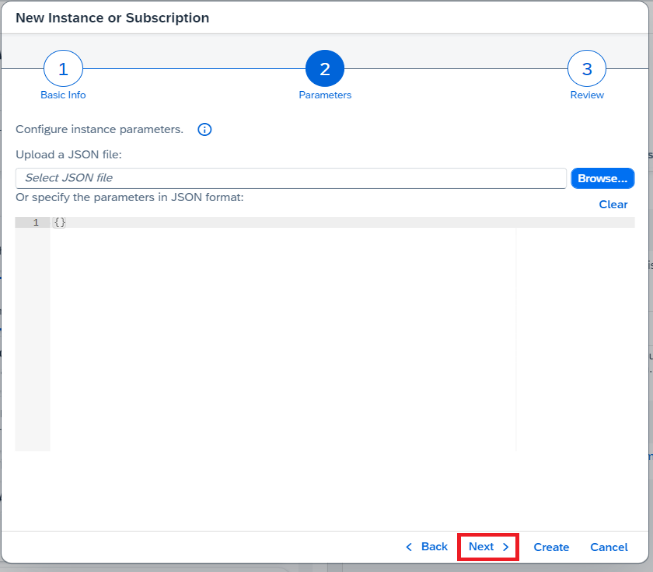
Follow the next steps on the pictures below:
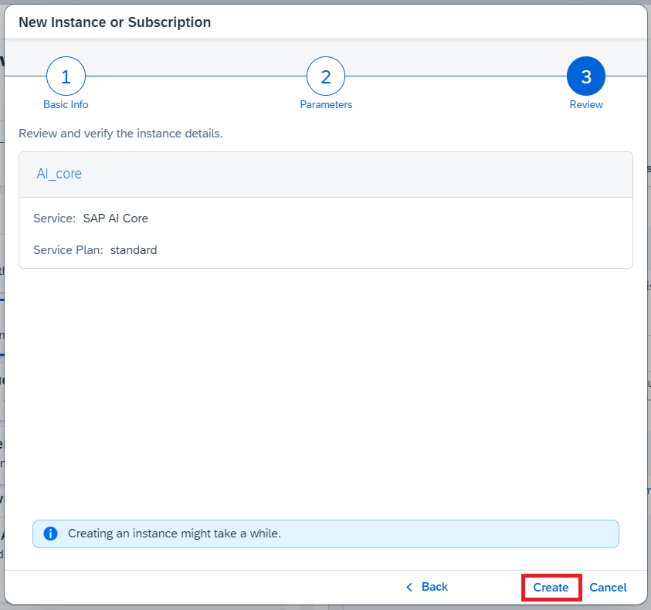
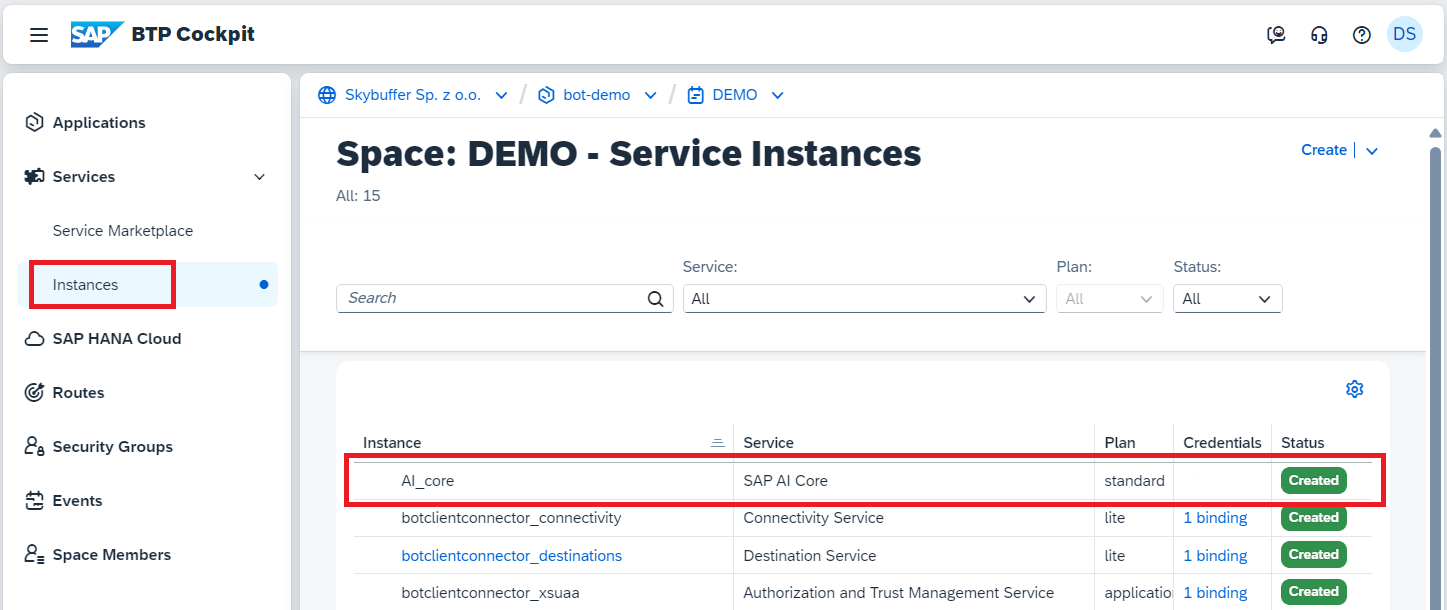
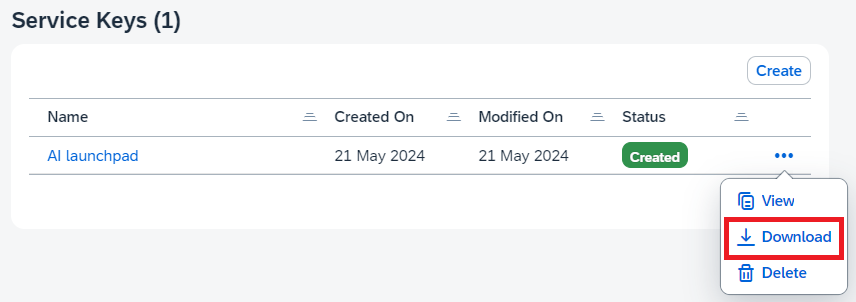
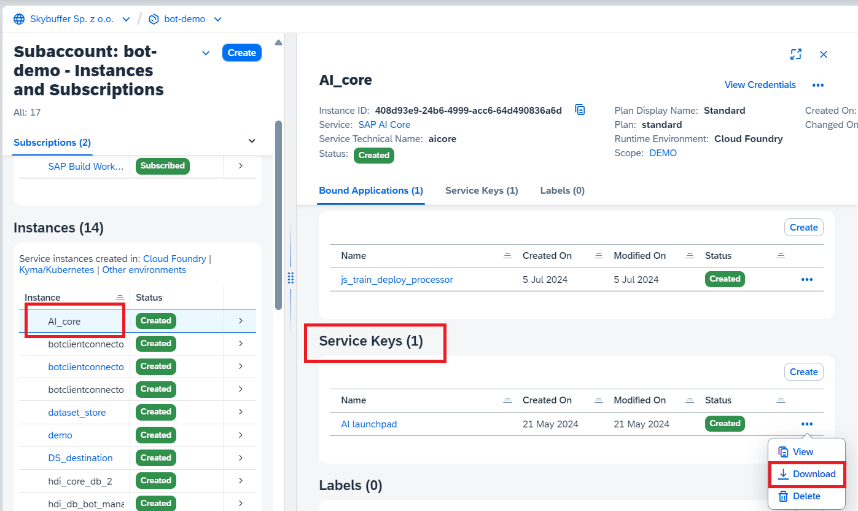
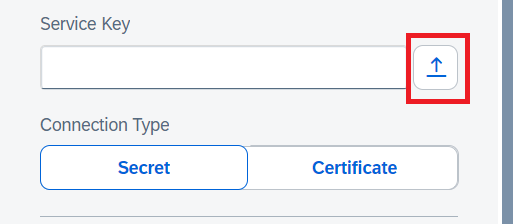
After completing this sequence, you may see an instance of service in your space. To get credentials, first you must create a service key and after that press the button of View Credentials:
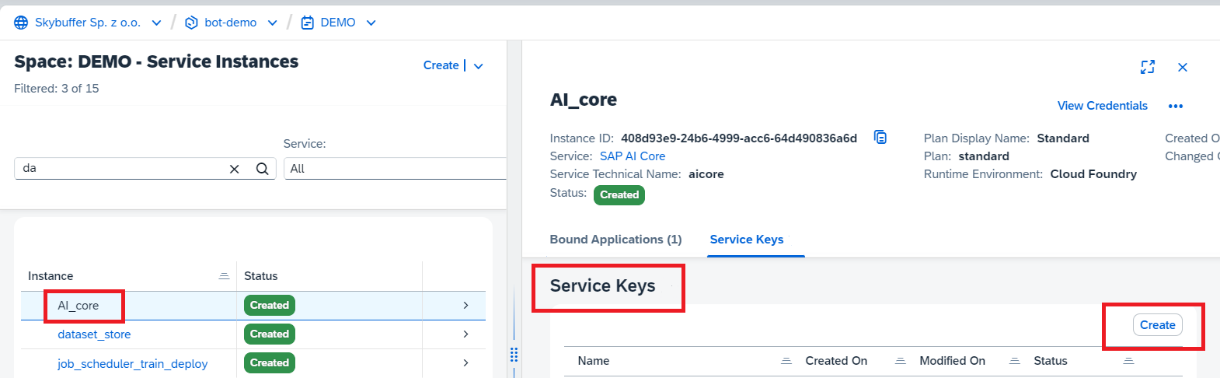
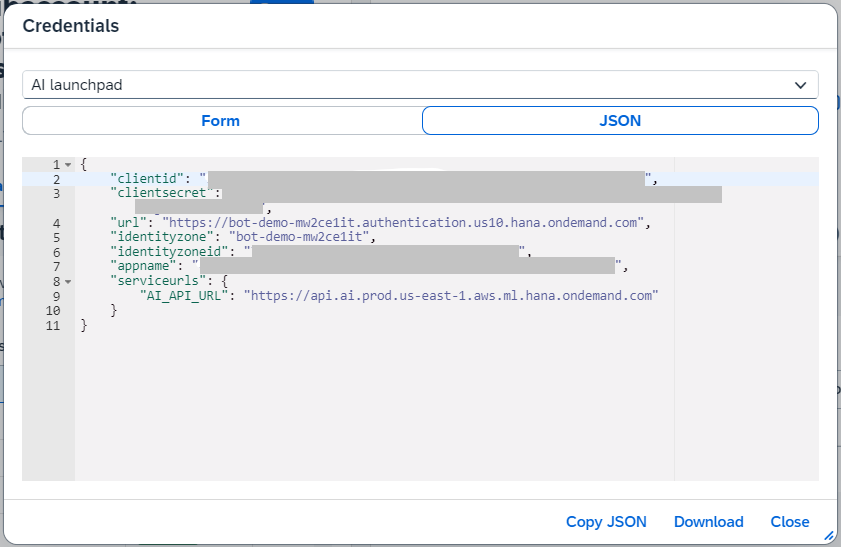
After the key is created, you can view the credentials data or download the service key as a text file.

Step 2. Create a workspace and a resource group
Download the service key for AI API Connection as a txt file.
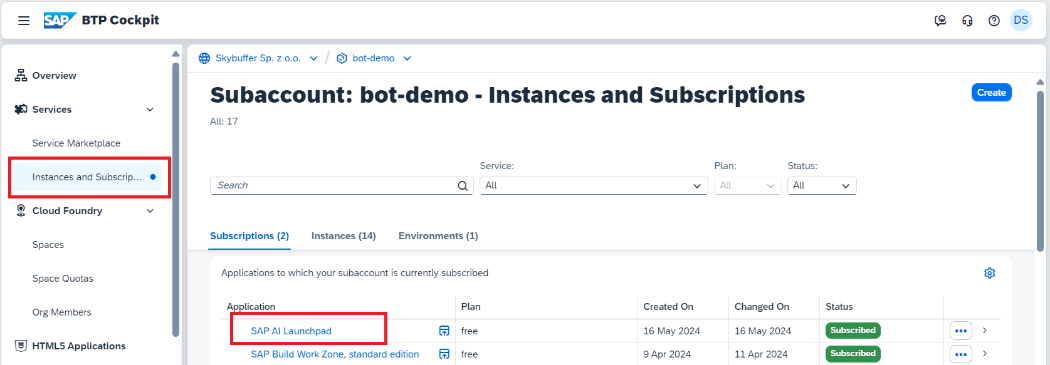
Inside your account and space, among Instances and Subscriptions, find SAP AI Launchpad and press on it.
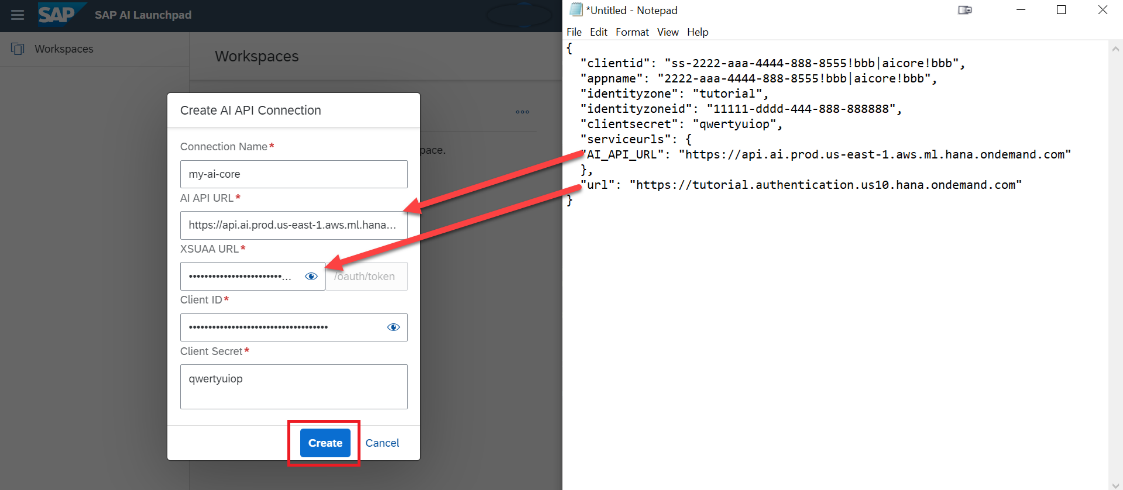
Create an AI API Connection using the txt file with the service key. The name of API Connection does not matter.
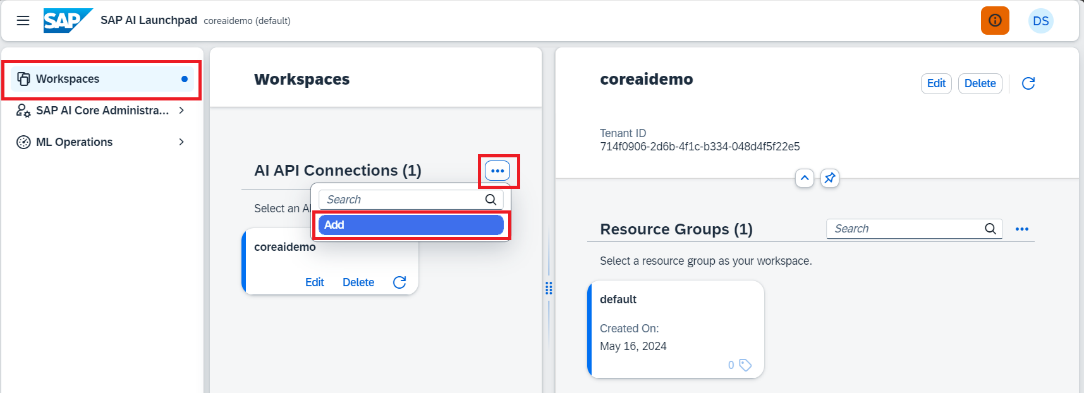
You can omit using the file and manually fill in all the fields:
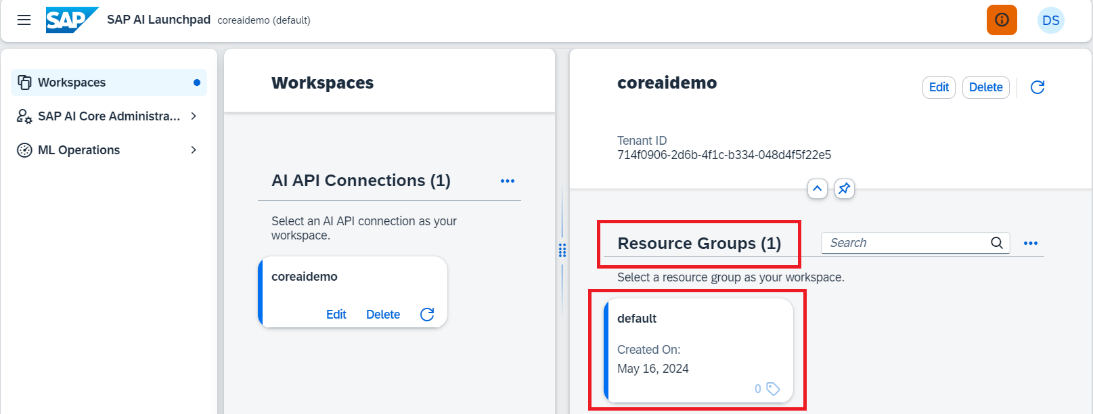
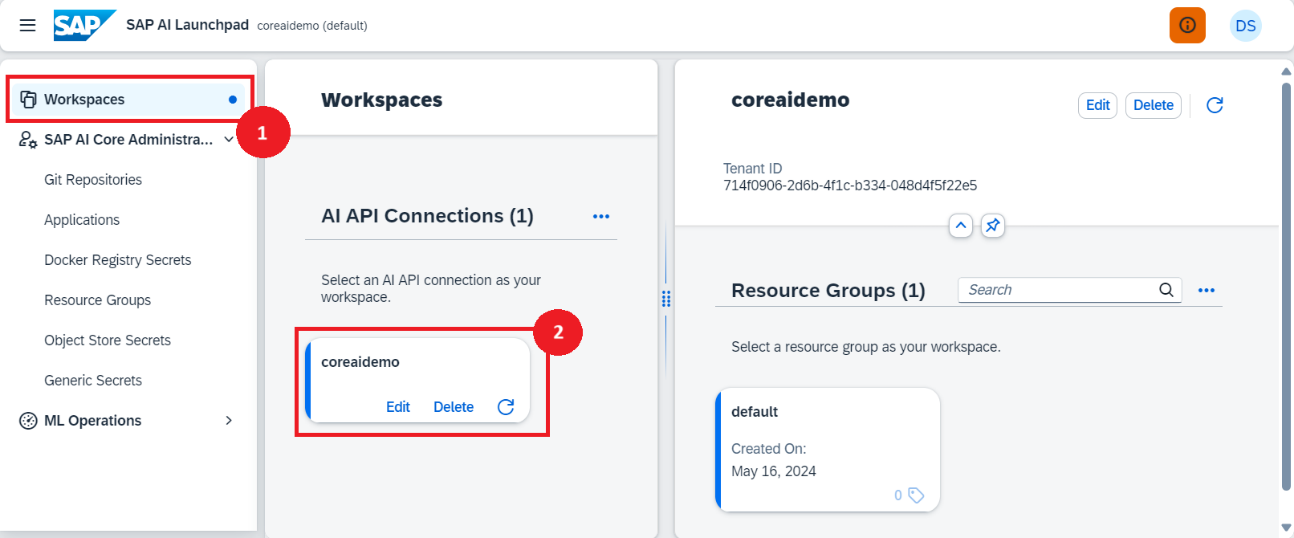
At least one resource group must be inside your workspace (AI API Connection). If not, create one, the name is of no importance, but here in this present document we will be using default.
Step 3. Integrate GitHub repository into your workspace
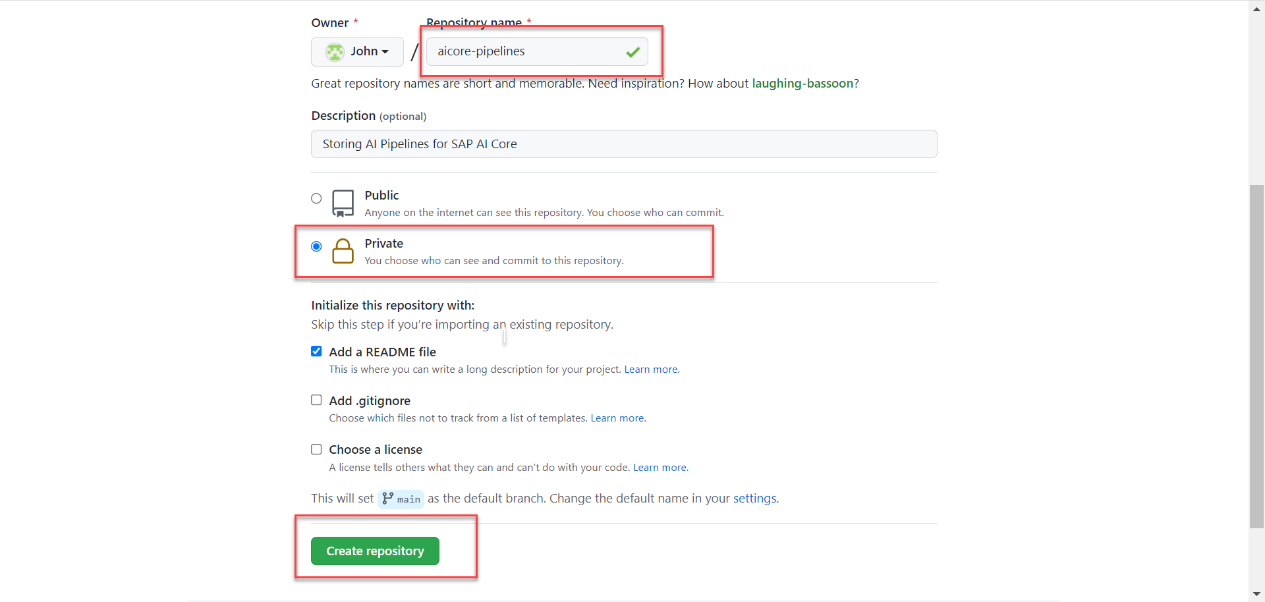
Log into the GIT account that you plan to use to store the training scenarios script files and create a new private repository there or use an existing one. If you don’t have one, you can create a free new account. In any case, the repository must be private, i.e. not accessible by other users by default.

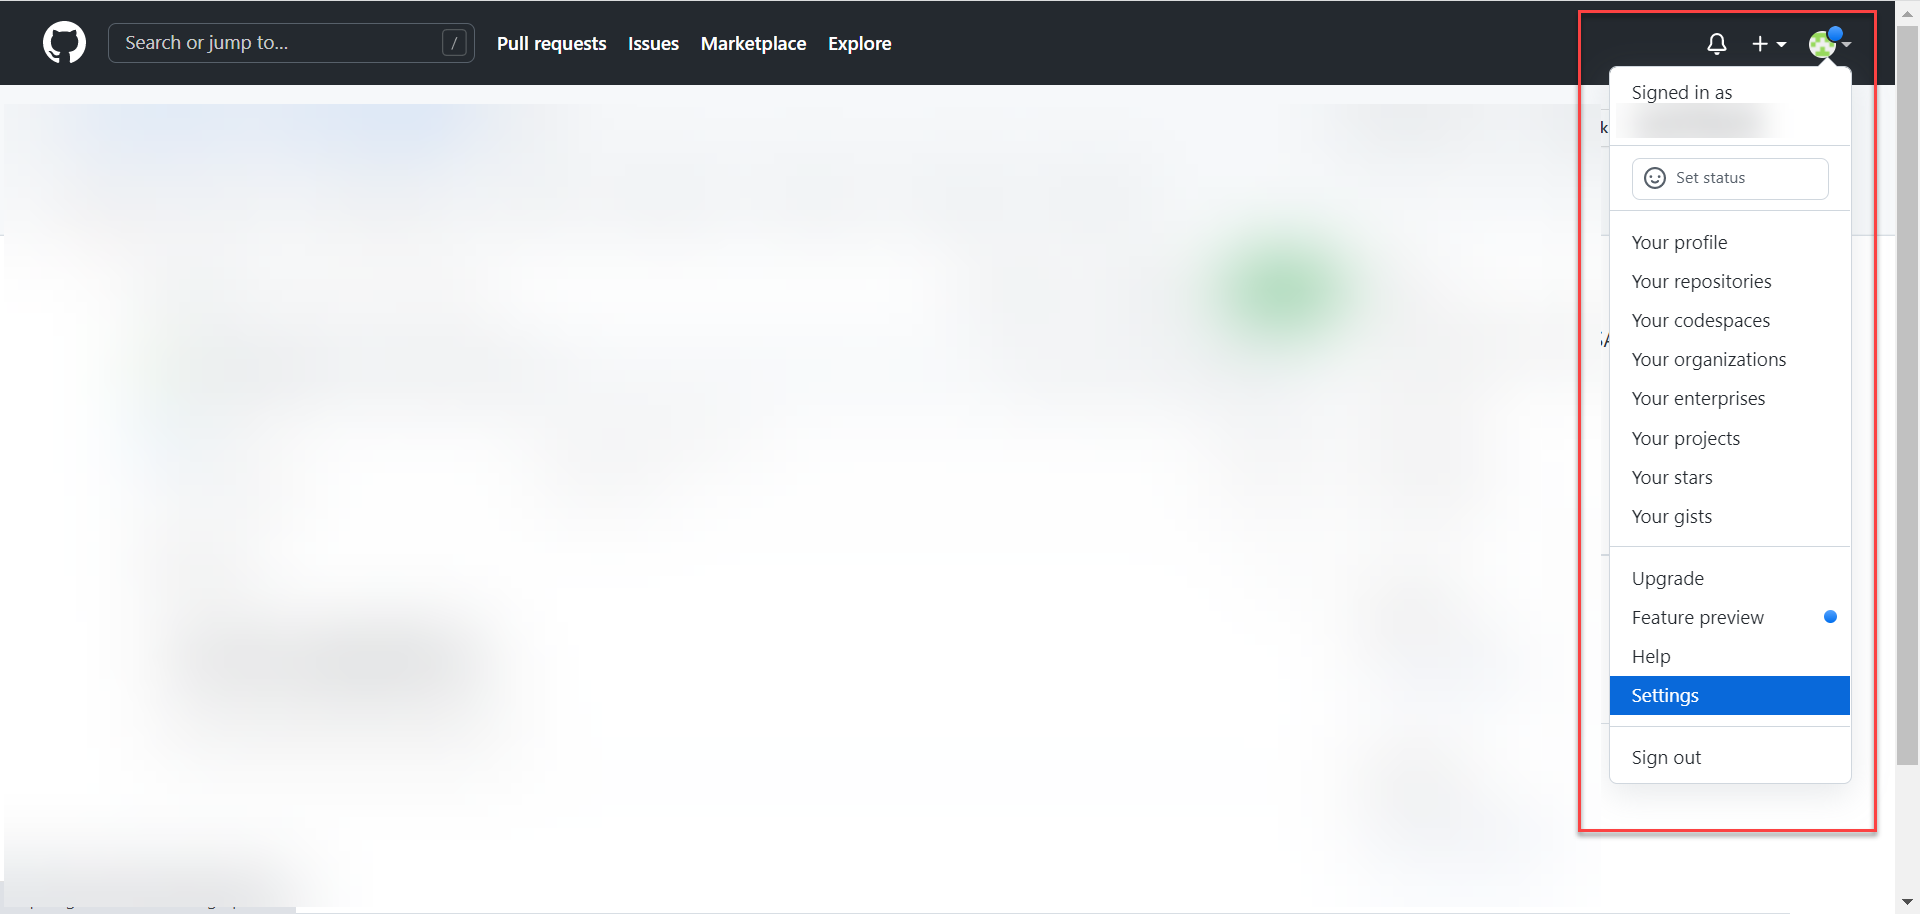
Click on your GitHub profile icon. Select Settings.
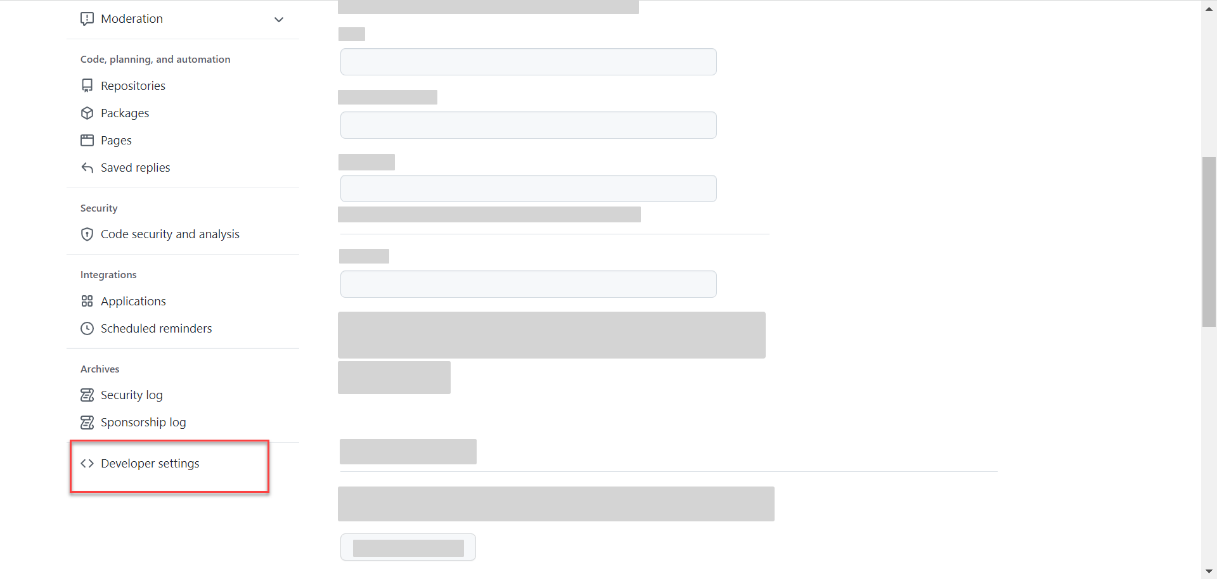
Click on Developer Settings from the left navigation pane.
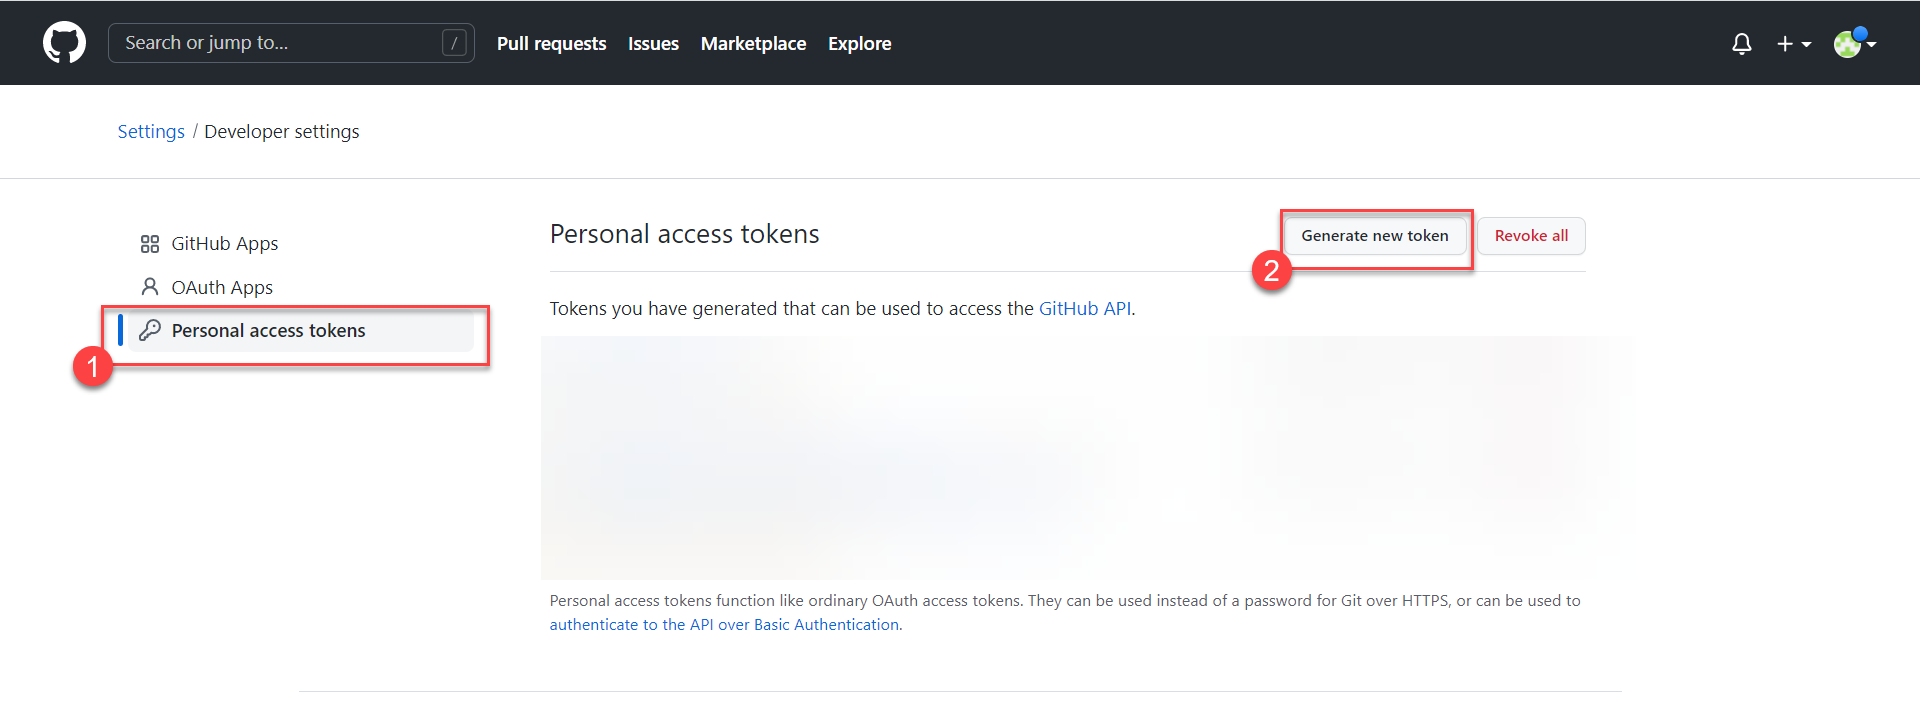
Click on Personal access tokens. Click on Generate new token. GitHub tokens are an alternative to sharing your GitHub credentials so that you can allow applications like SAP AI Core to access your GitHub repositories, without compromising your account security.
Select the checkbox of Full control of private repositories in the Select Scopes field.
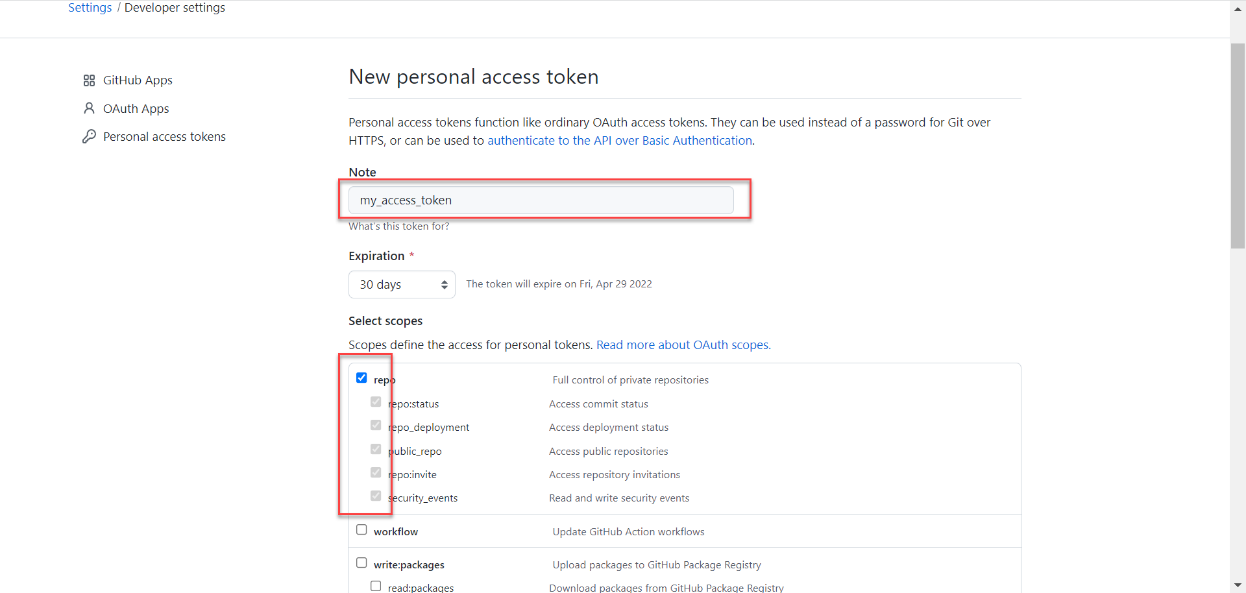
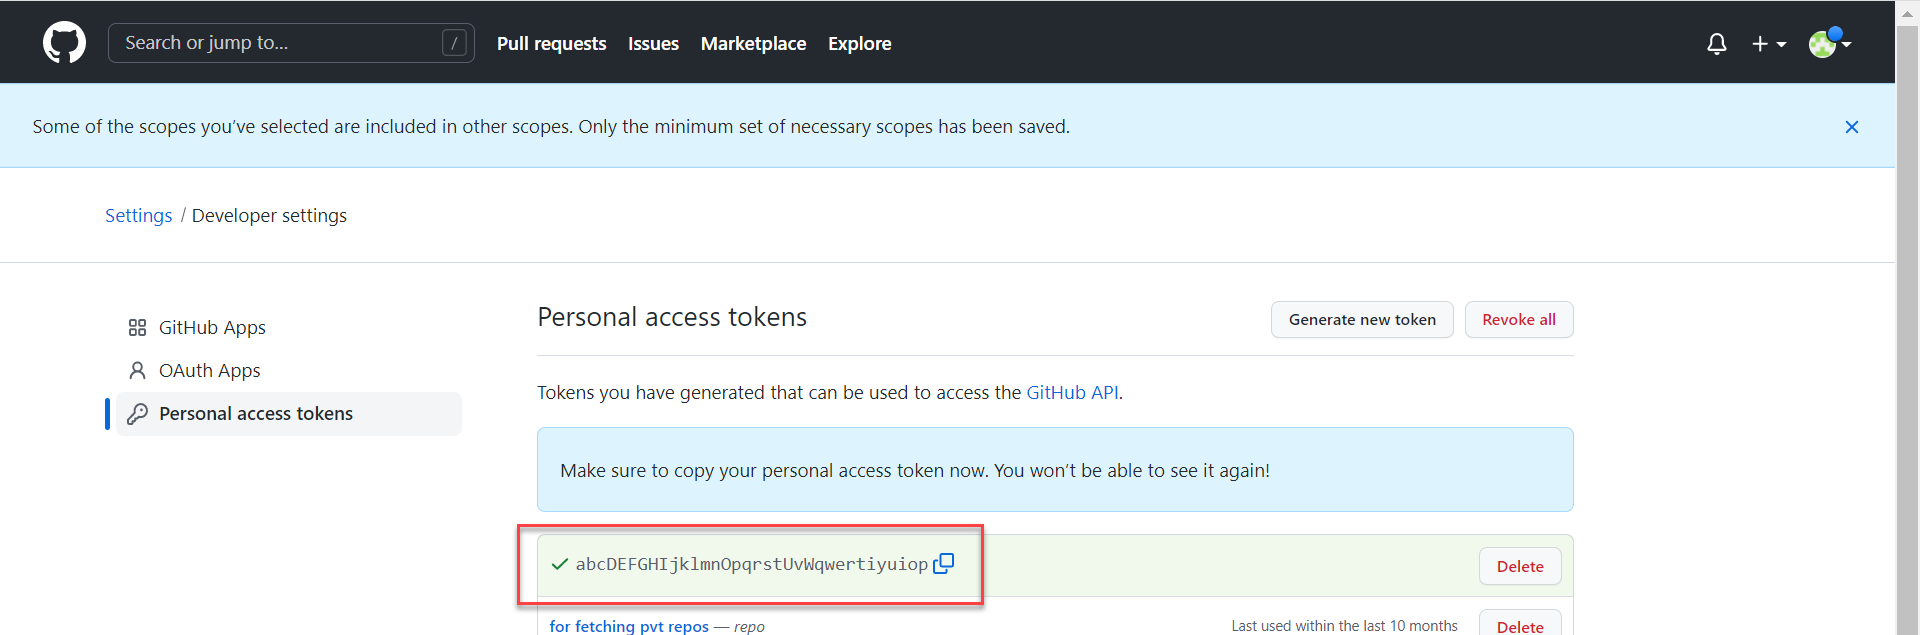
Scroll to the bottom of the page and click on Generate token.
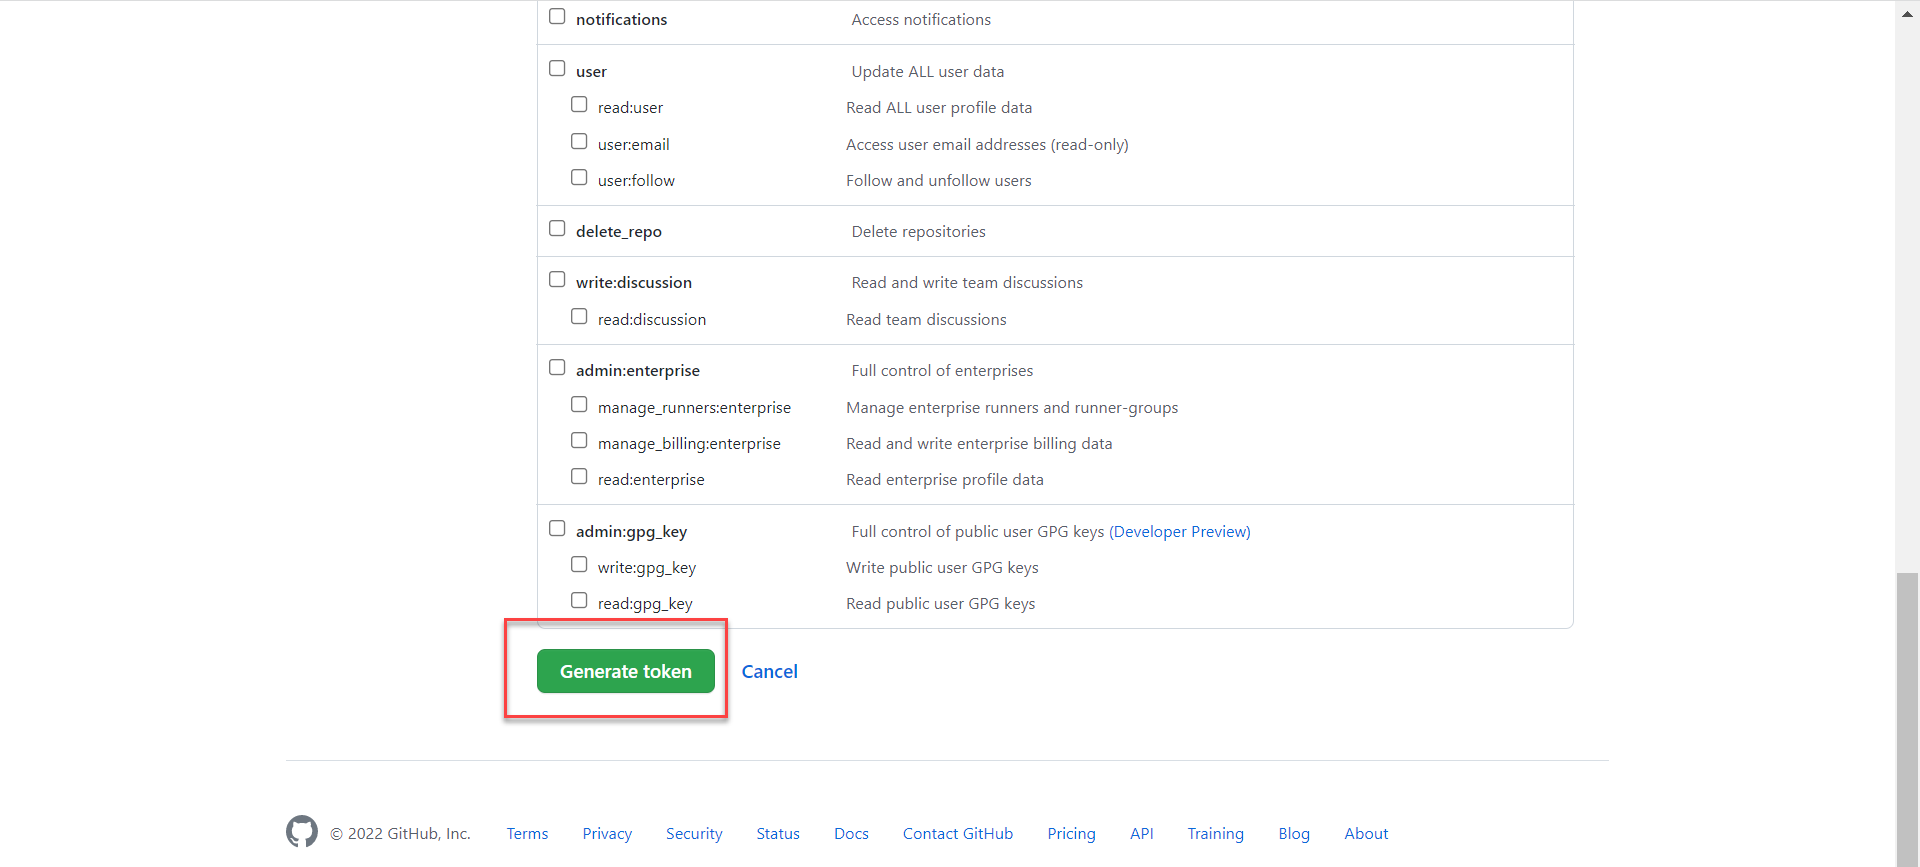
Store your generated access token locally.
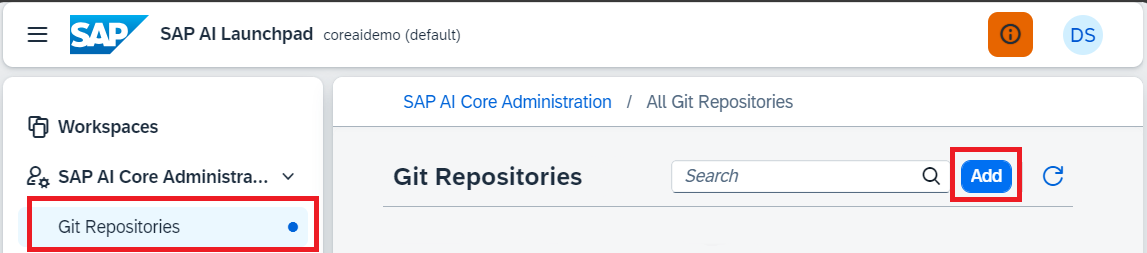
Select your SAP AI Core connection under the Workspaces app in the SAP AI Launchpad.
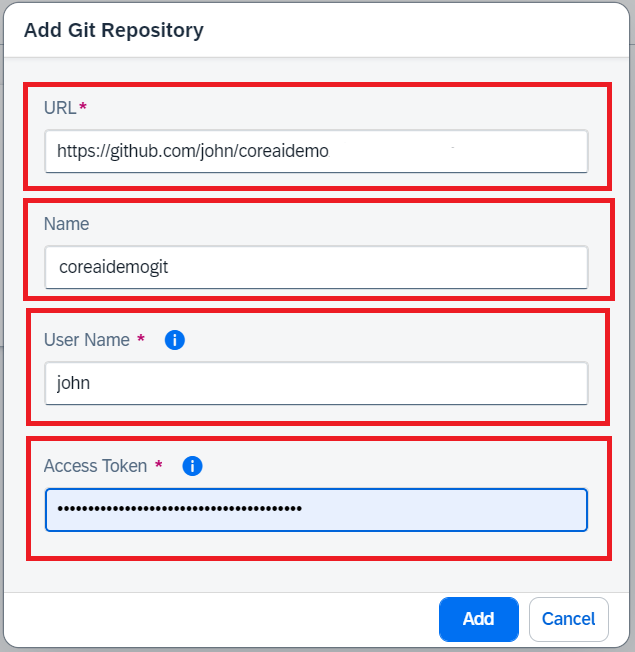
Use the following as references:
- URL: Paste the URL of your GitHub repository.
- Name: Name of repository to display. If not filled, then it uses the original repository name.
- Username: Your GitHub username.
- Access Token: Paste your GitHub Personal Access Token generated in the previous step.
You will see your GitHub onboarding completed in a few seconds. If not, then use the Refresh button.
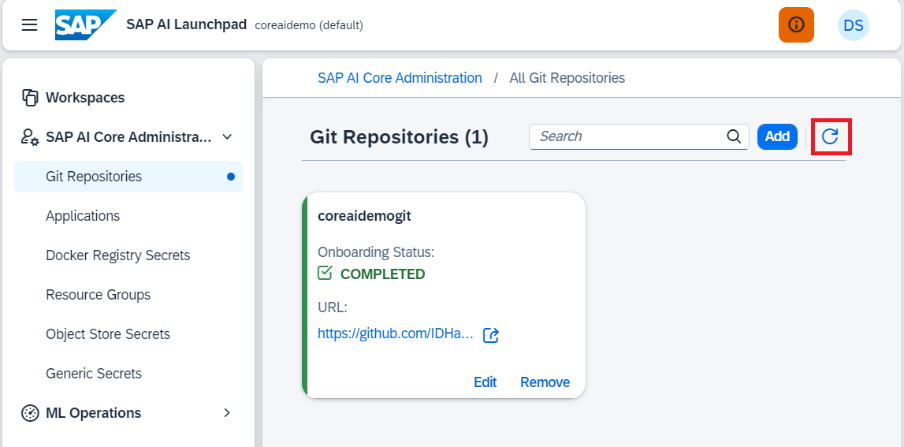
NOTE: These onboarding steps only store credentials to access the specified SAP AI Core instance within your GitHub account. Therefore, this Completed status does not guarantee that all the required files in your GitHub repository are accessible and correct.
Step 4. Place deployment files in GitHub
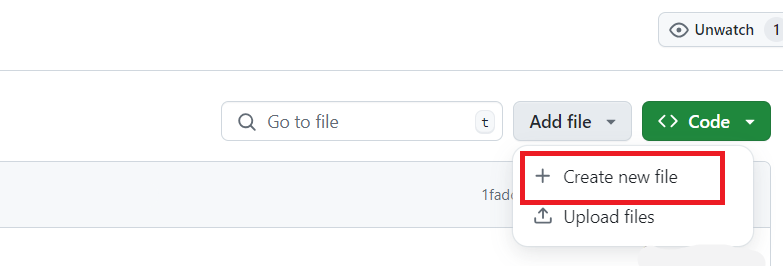
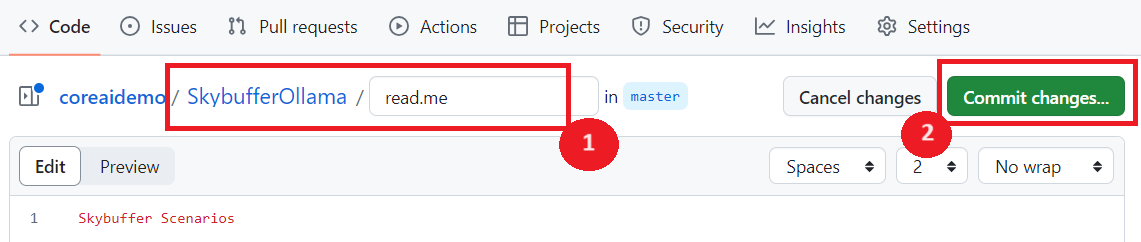
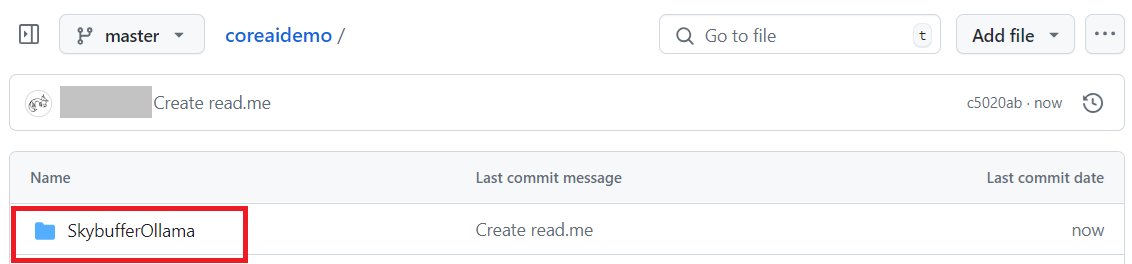
Create a new folder for deployment files with the name of SkybufferOllama. In GitHub there is no UI for creating a directory, so we will use the function of Create new file and in the file name will go the directory name. After the directory creation this temporary file may be deleted.
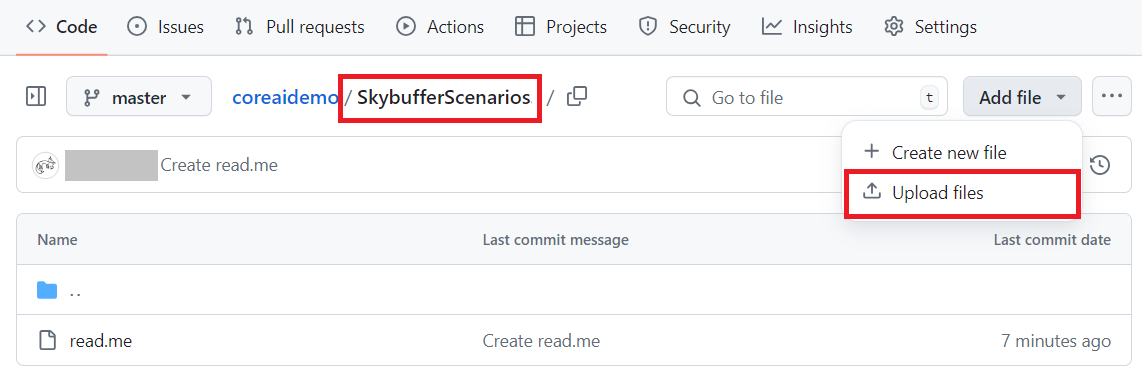
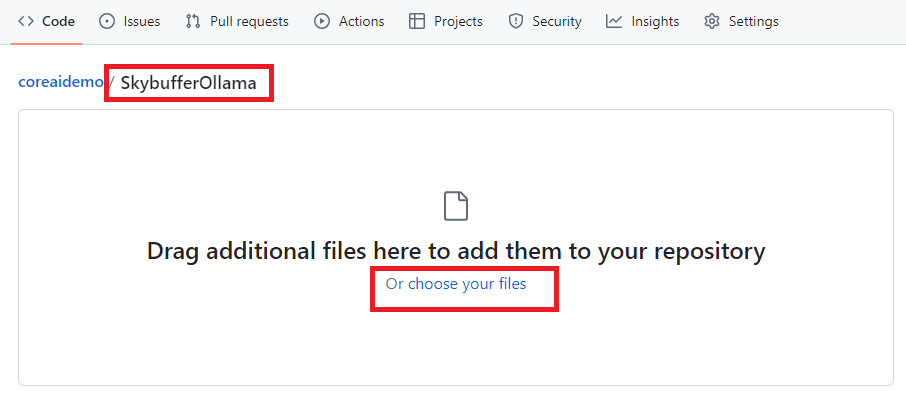
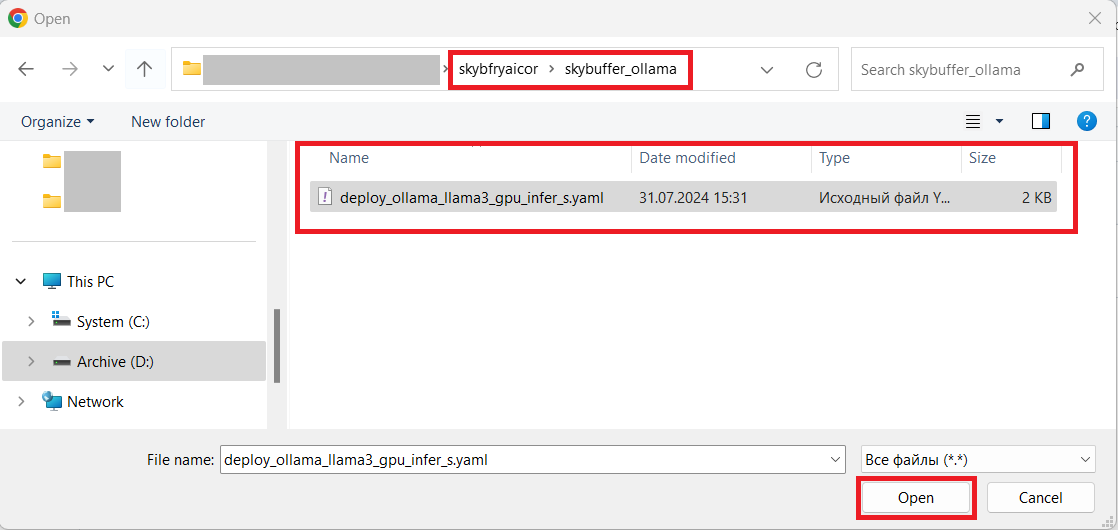
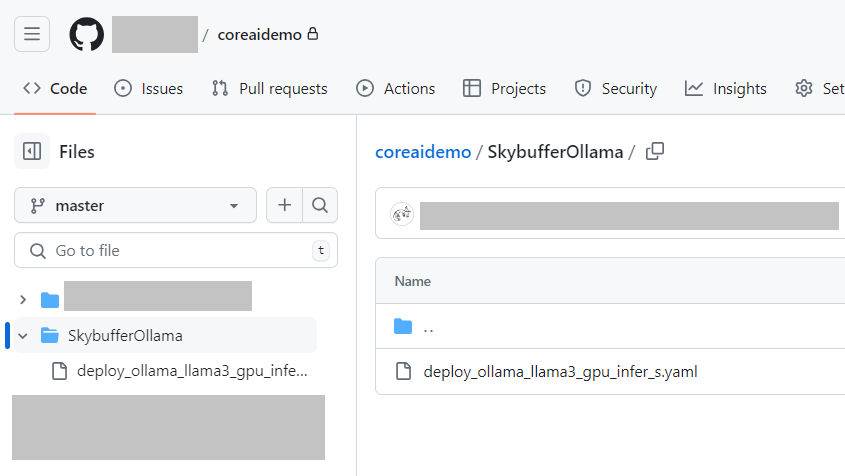
Upload the scenario files to the new folder. All files have *.yaml extension and must be taken from Skybuffer Official repository and downloaded to the local disk, for example in \skybfryaicor\skybuffer_ollama folder.
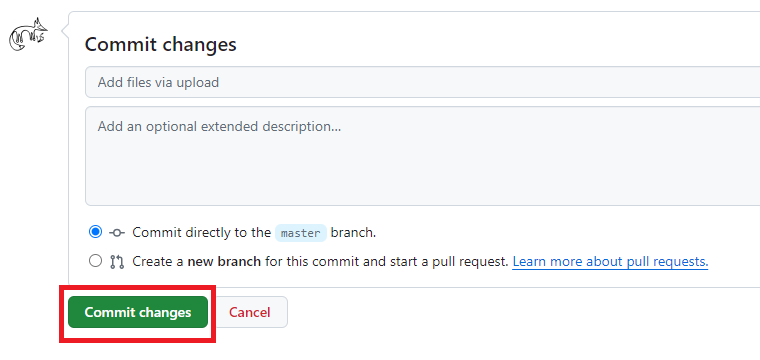
Remember to press button commit the changes.
After all the changes, you should have a new directory with at least 1 *.yaml files for GPU training.
Step 5. Create an SAP AI Core application to sync workflows with GitHub
Go to your SAP AI Launchpad.
In the AI Core Administration app, click Applications > Create.
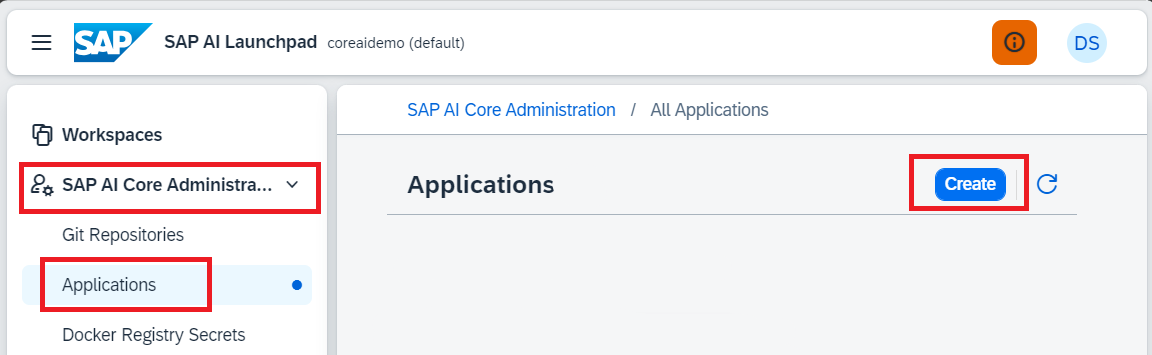
Specify the details of your application. This form will create your application on your SAP AI Launchpad.
Use the following as references:
- Application Name: ollamaserv.
- Repository: Select repository from the list.
- Path in Repository: SkybufferOllama.
- Revision: HEAD

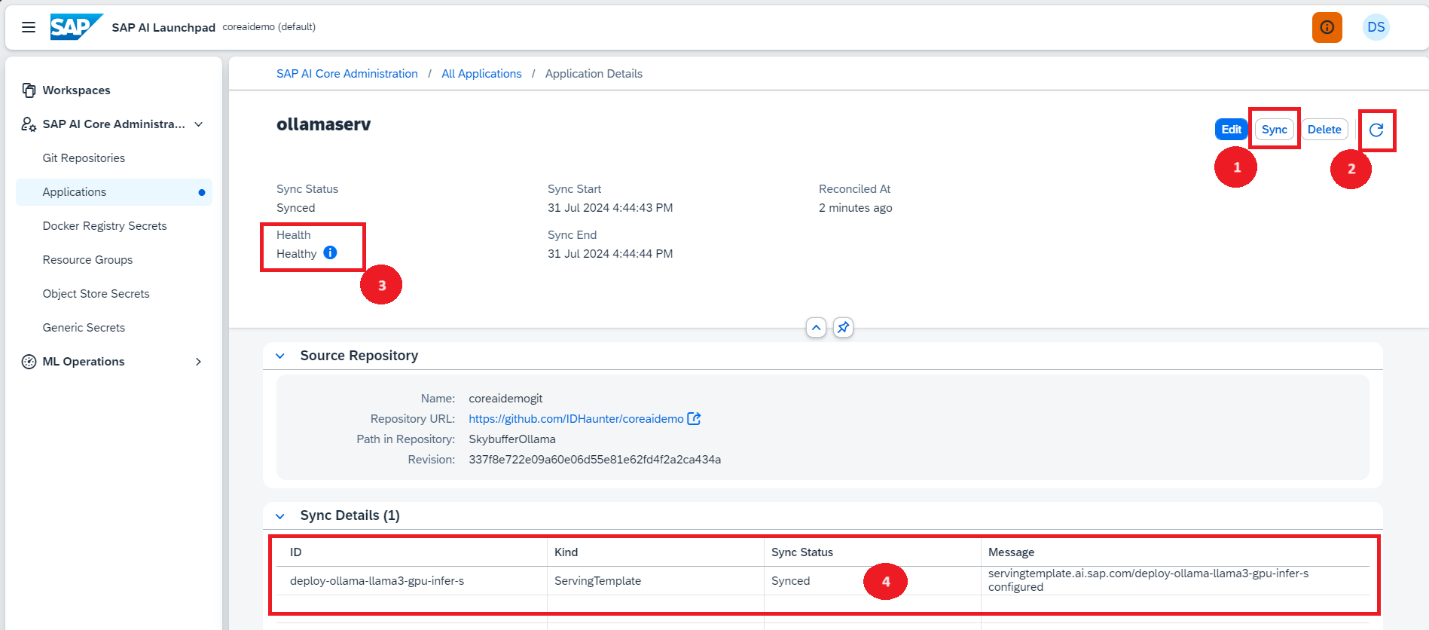
After successful creation, you will see your application in the Applications. Find it and press on it.

On the Application Details screen (Figure 40), first press on the Sync button (1), after synchronization is completed, press the refresh button (2). You will be able to see the Health status (3) and sync the details (4). The number of the deployment templates (scenarios) should be the same as the *.yaml files count at GitHub in the SkybufferOllama folder.
Step 6. Check Scenarios
Click ML Operation > Scenario to find all the scenarios from all the applications. Scenarios are automatically created from the details specified in the *.yaml files at your GitHub.
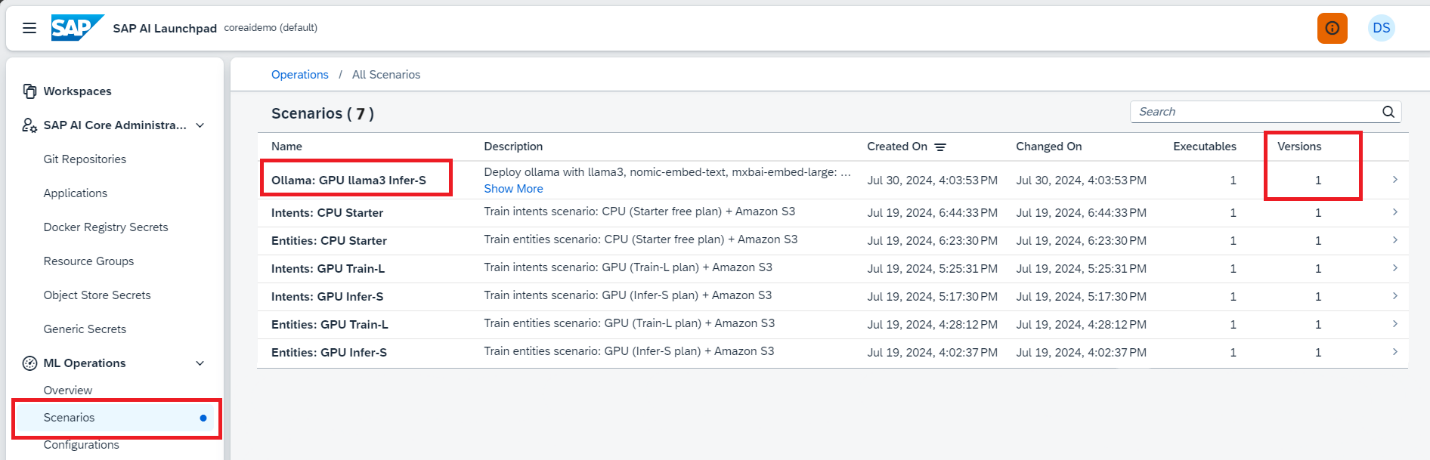
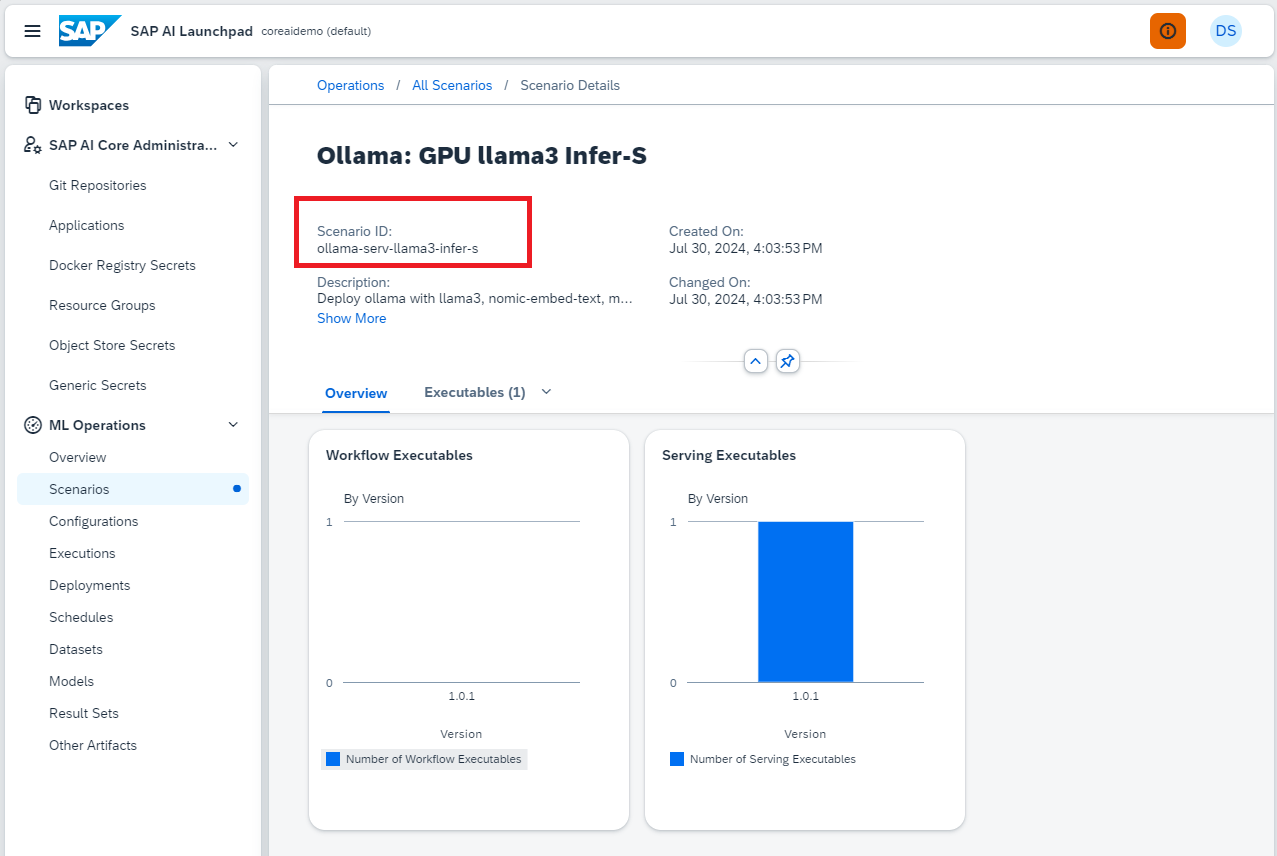
To view the details, click on the row in the scenarios and expand it. Here you can find Scenario ID, we will need this kind of information later when creating configuration for deployment.
Step 7. Integrate DockerHub repository into your workspace
This step is required once. Storing the Docker credentials enables SAP AI Core to pull (download) your Docker images from a private Docker repository of Skybuffer company.
NOTE: SAP AI Core does not verify your docker credentials, it is used for deploying the image to the corresponding Amazon service and will check it while deploying only. Please ensure that you are storing the correct credentials.
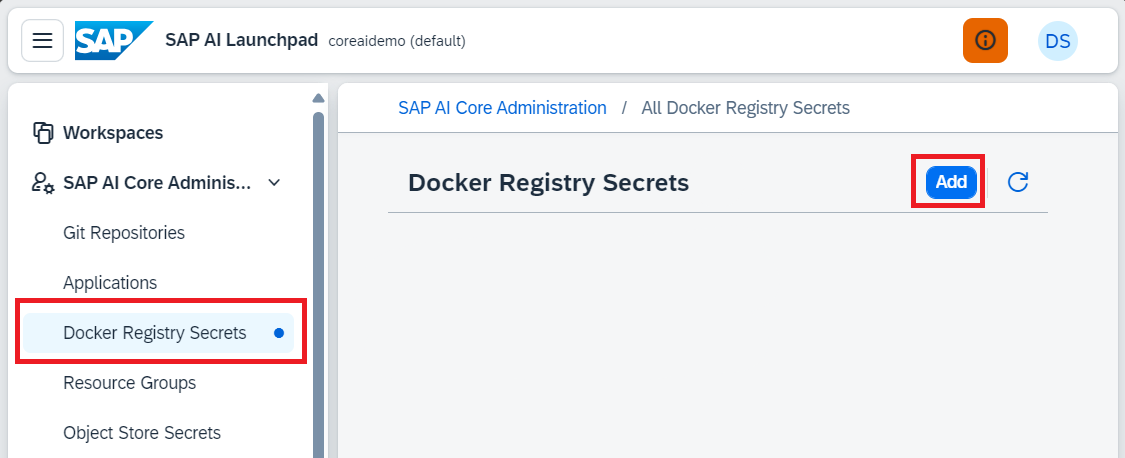
Click Docker Registry Secrets in the SAP AI Core Administration app. Click Add.
Use the following as references:
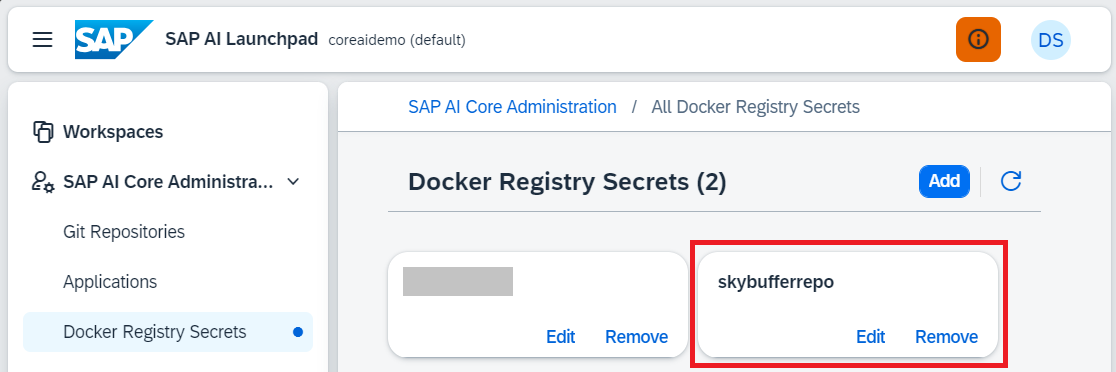
- Name: skybufferrepo.
- Secret: upload from file docker-token-skybuffer-{organization name}.txt (file must be taken from Skybuffer Official repository).

After successful creation, you will be able to see a new docker registry secret.
Step 8. Create configuration and run Ollama server
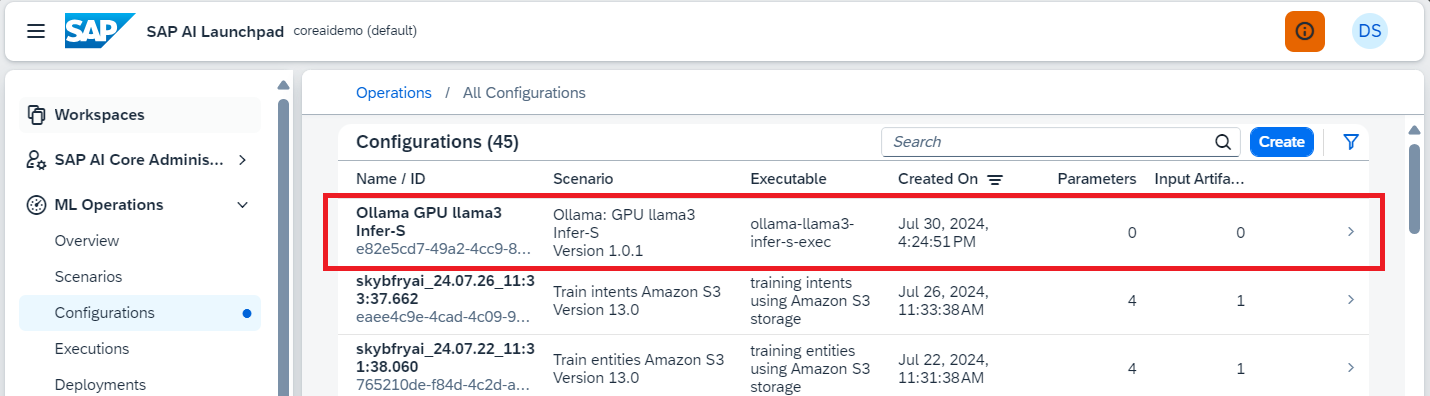
To launch the server, we need to create a configuration and perform deployment based on it. To create a configuration, select the item of Configurations inside the ML Operations.
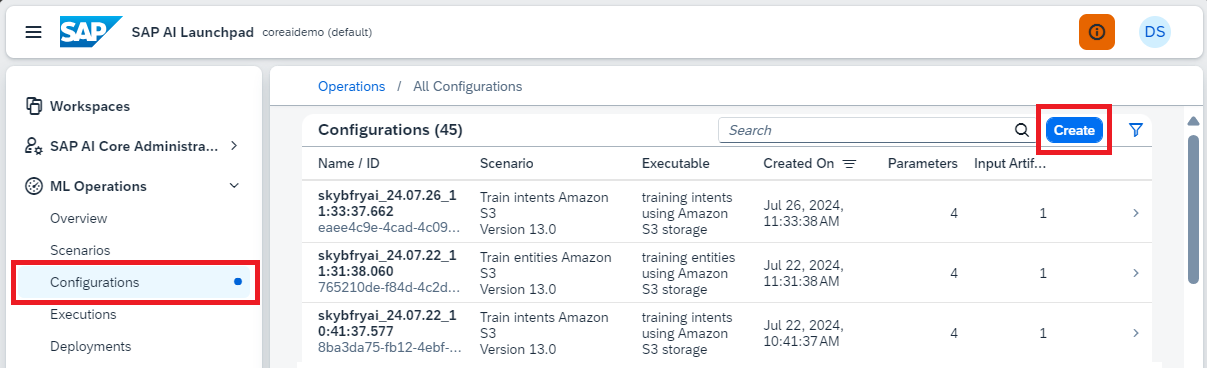
Use the following as references:
- Configuration Name: You can specify any, for example – Ollama GPU llama3 Infer-S.
- Scenario: Select the scenario from the list, for example – Ollama: GPU llama3 Infer-S.
- Version: Select the version from the list (there will be only one latest version).
- Executable: Select from the list (there will be only one).

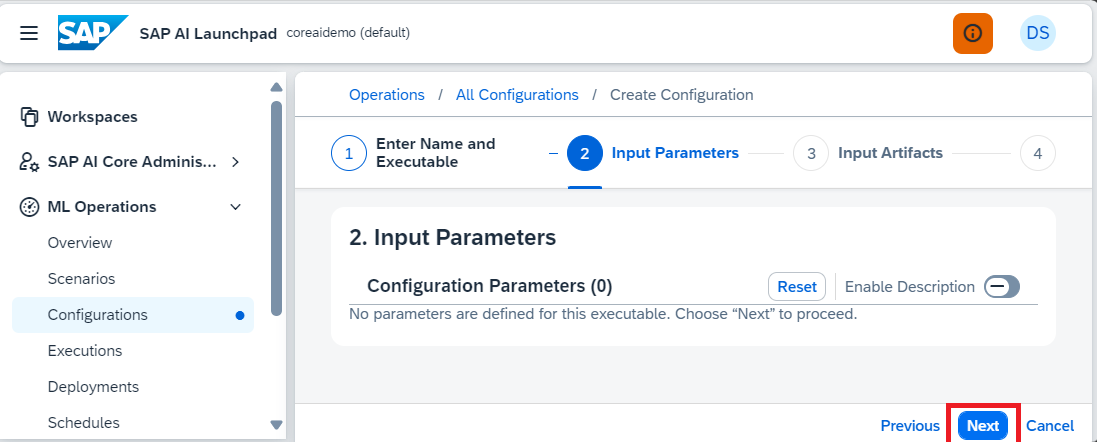
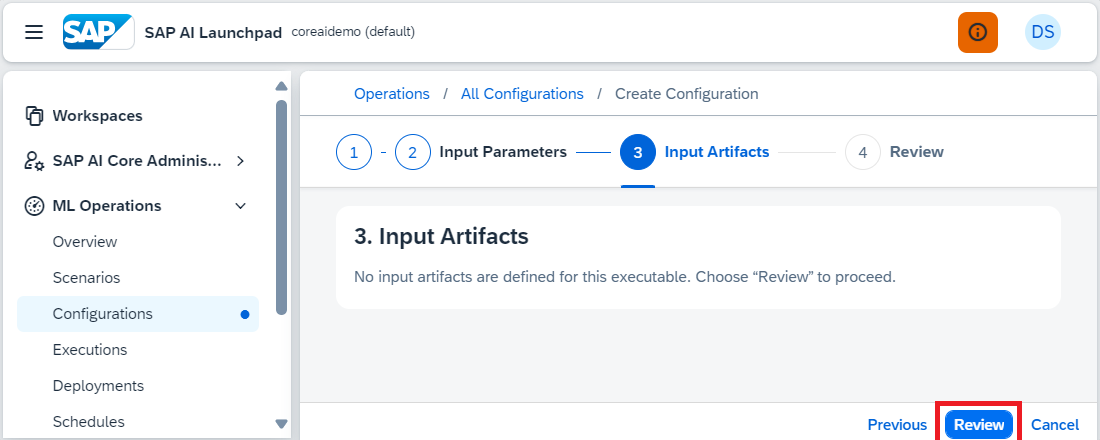
No further data entry is required, just follow the instructions as shown in the pictures below:
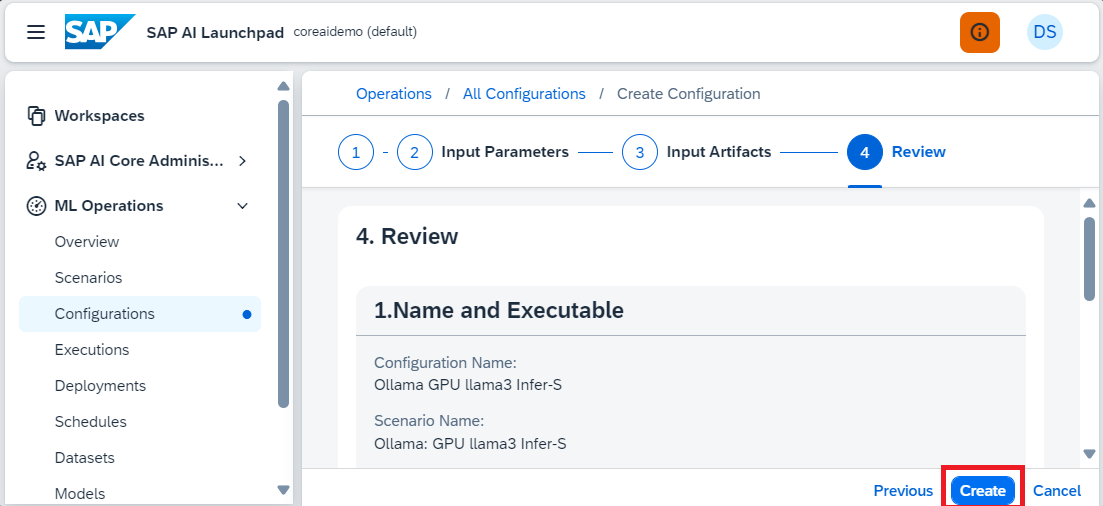
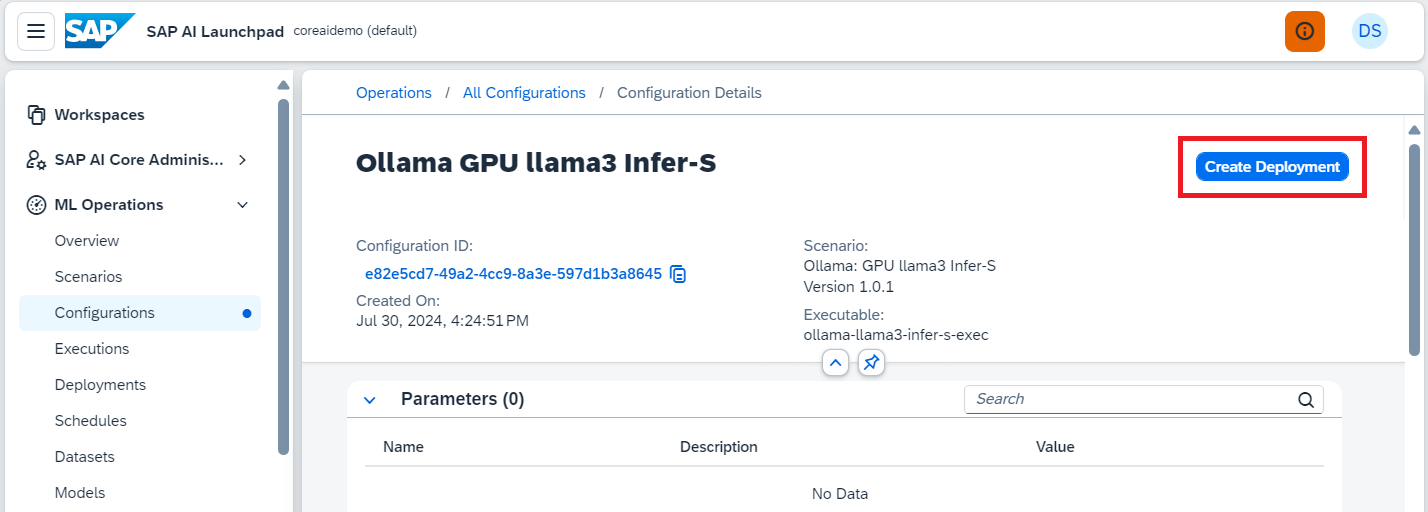
After successful creation, you will be able to see the new configuration . Find it and click on it, you will see the additional information and the button of Create Deployment, use it to start deployment.
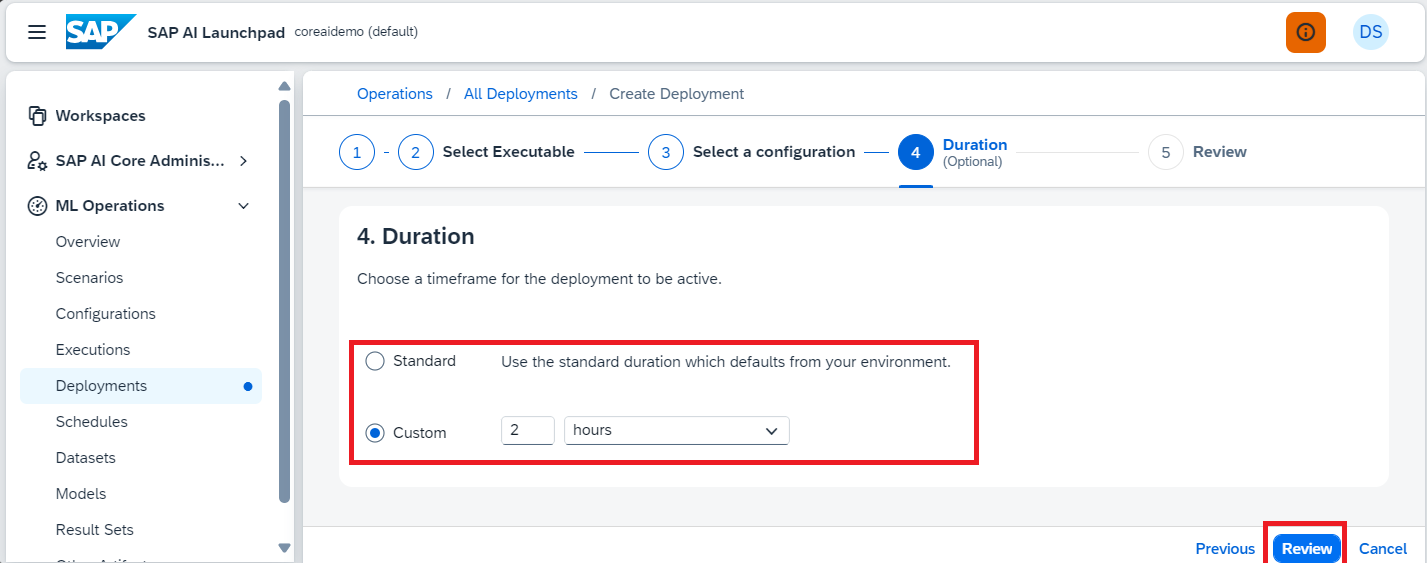
You can specify the duration of the server work time, or use the default value. Then click Review.
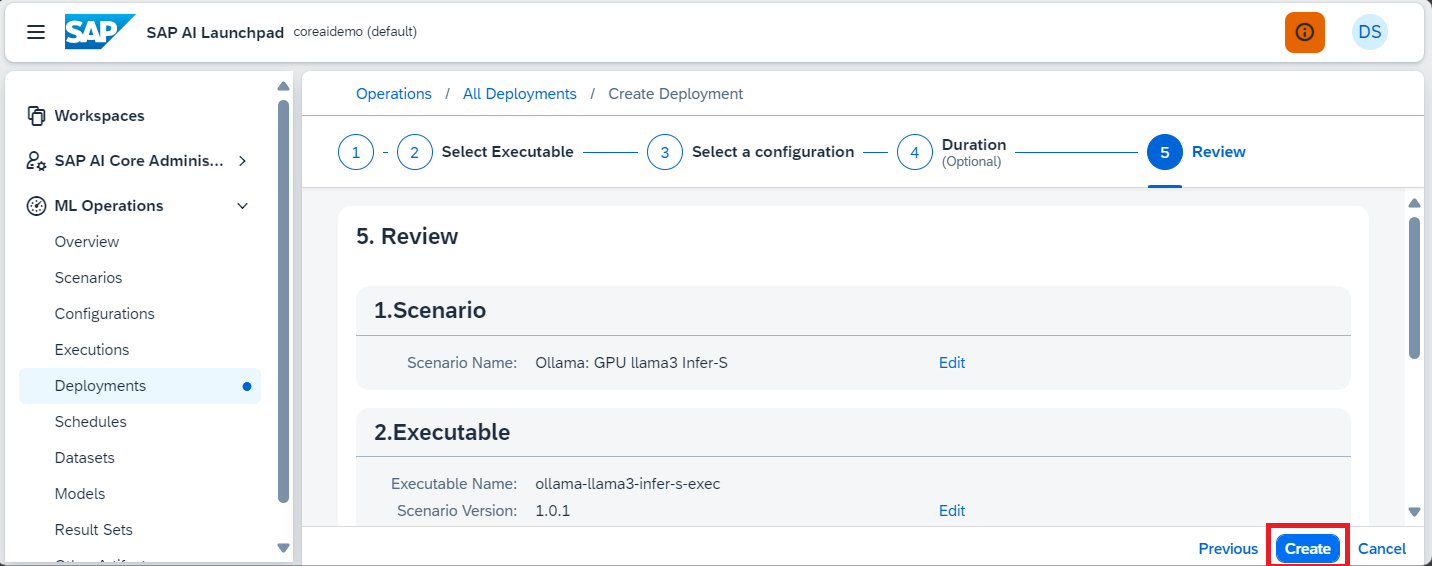
After creation, you will be automatically transferred to the Deployments tab and will see additional information about your deployment, in fact it is the Ollama server startup/operation status. To update the information on this screen, use a special button in the top right-hand corner.
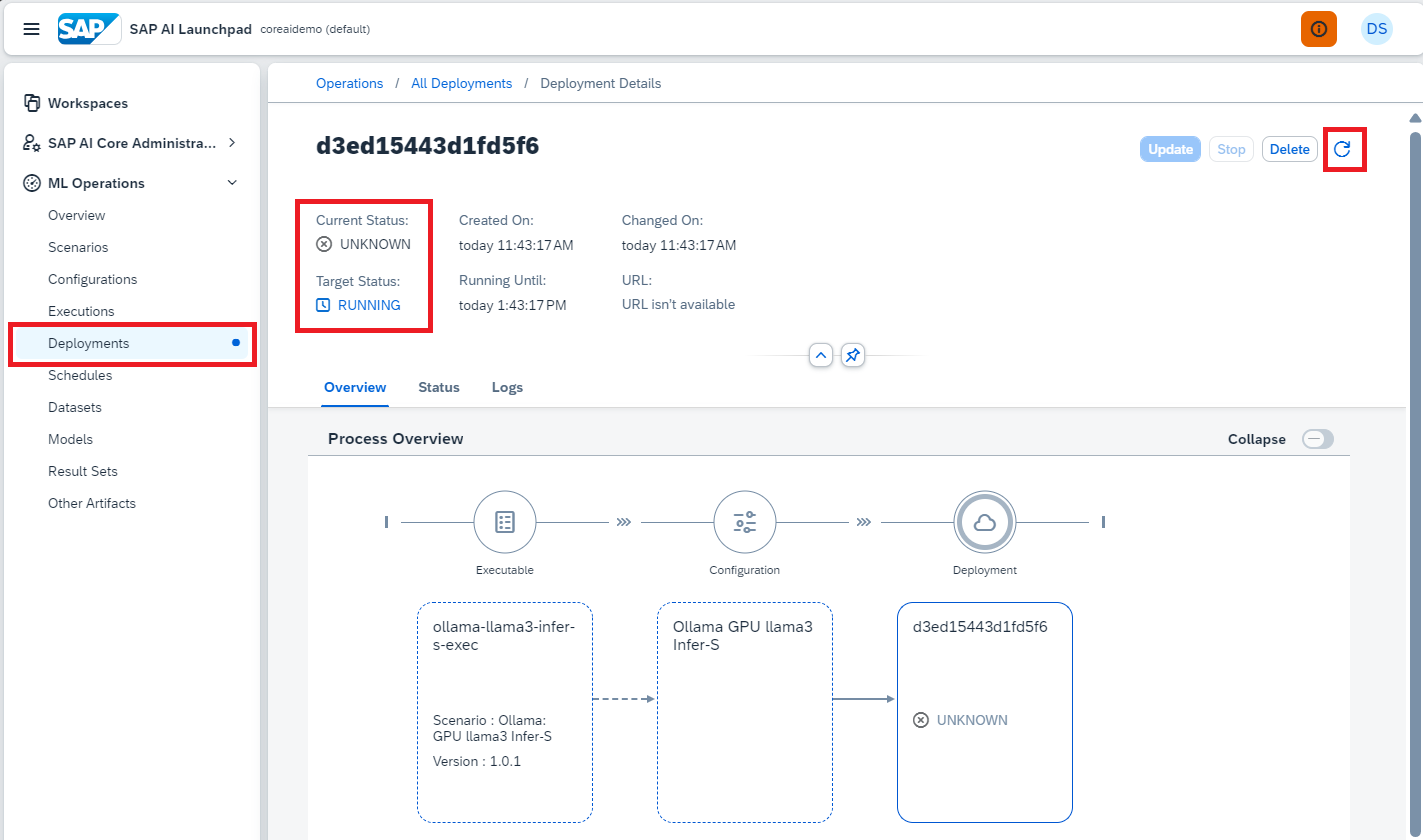
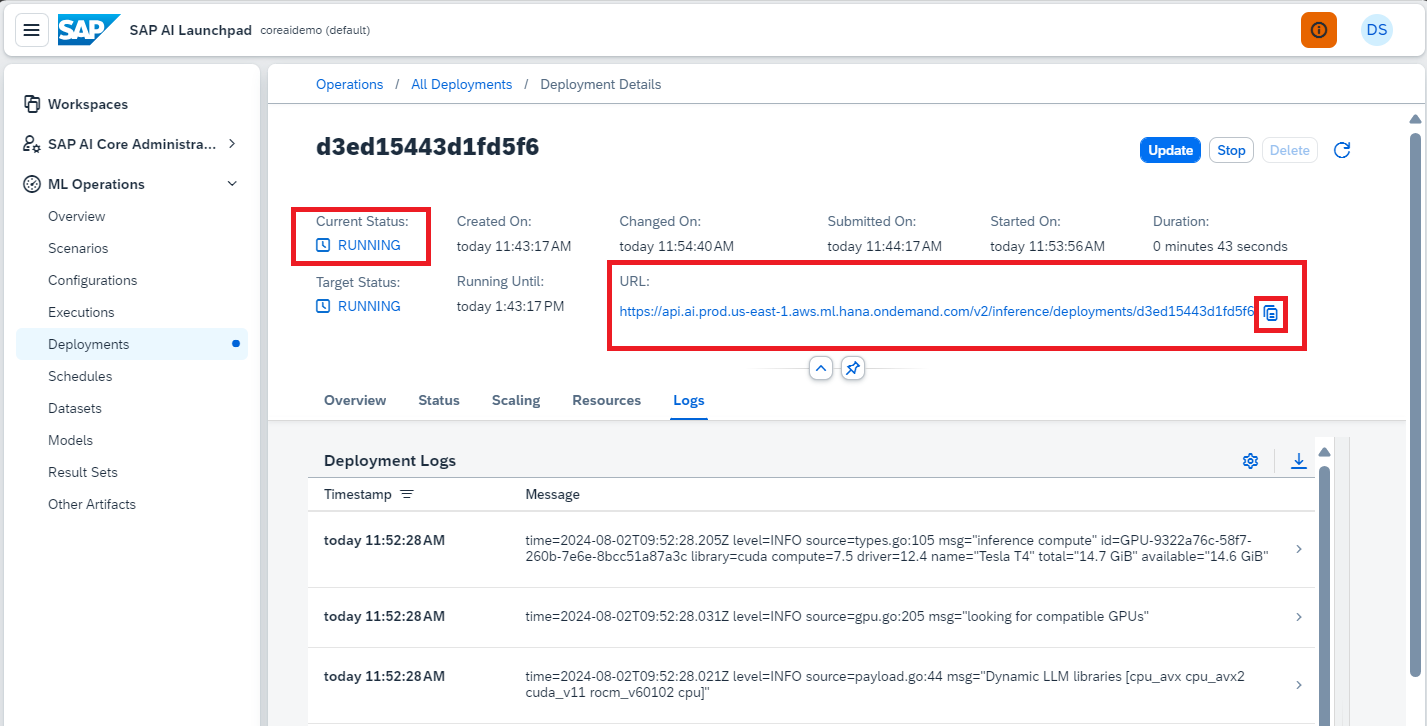
Once the server starts, you will see its status as RUNNING. You can also check some additional information using the Status and Logs tabs.
After successful launch, pay attention to the URL of the running service. We will need it to interact with the Ollama server.
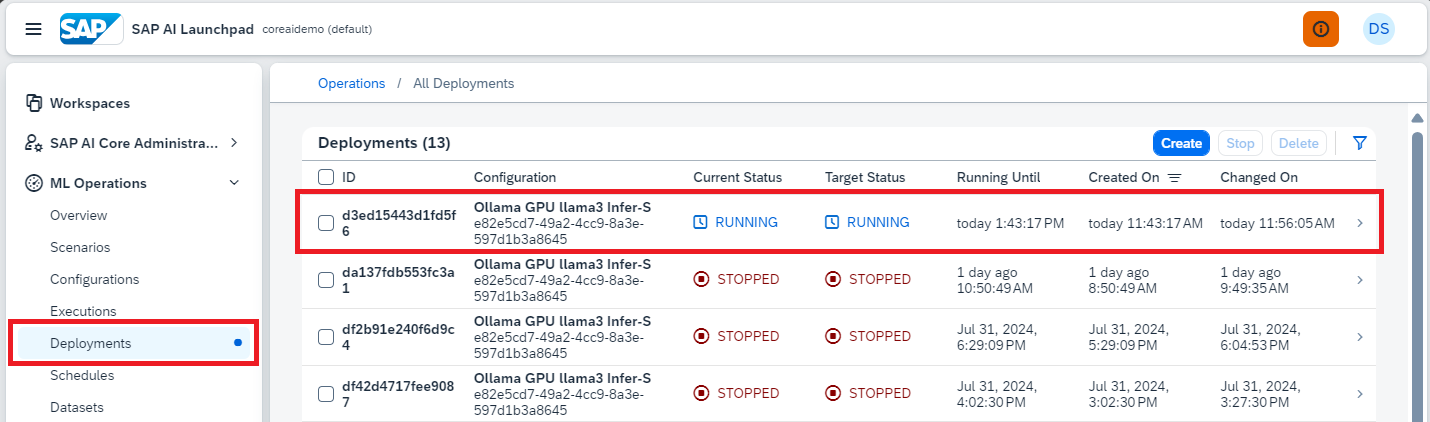
You can also simply switch to the Deployments tab and see the general list and statuses there. By clicking on any of the elements, you will return to the tab with additional information.
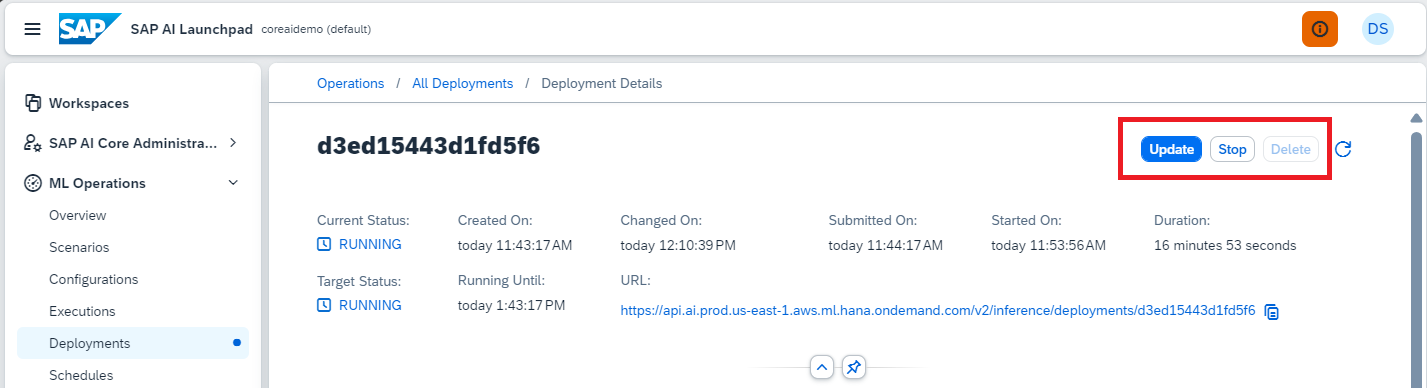
On the tab with additional information, you can manage the process, including stopping the deployment.
Step 9. Sending requests to Ollama server from postman
To send any requests to the Ollama server running in SAP AI Core, we will need to know the URL and the name of the resource group, as well as an authorization token obtained according to the OAuth 2.0 standard.
Let us consider an example for a request to generate a response to a question.
URL:
URL consists of 3 parts:
- URL of the running deployment {deployment_url}
- Prefix with the version number {prefix}
- Ollama regular endpoint {ollama_endpoint}
Generally, URL looks like this: {deployment_url}/{prefix}/{ollama_endpoint}
In our example:
- Deployment URL must be taken from the deployment information (Figure 56): https://api.ai.prod.us-east-1.aws.ml.hana.ondemand.com/v2/inference/deployments/d3ed15443d1fd5f6
- Prefix: v1
- Ollama endpoint: api/generate
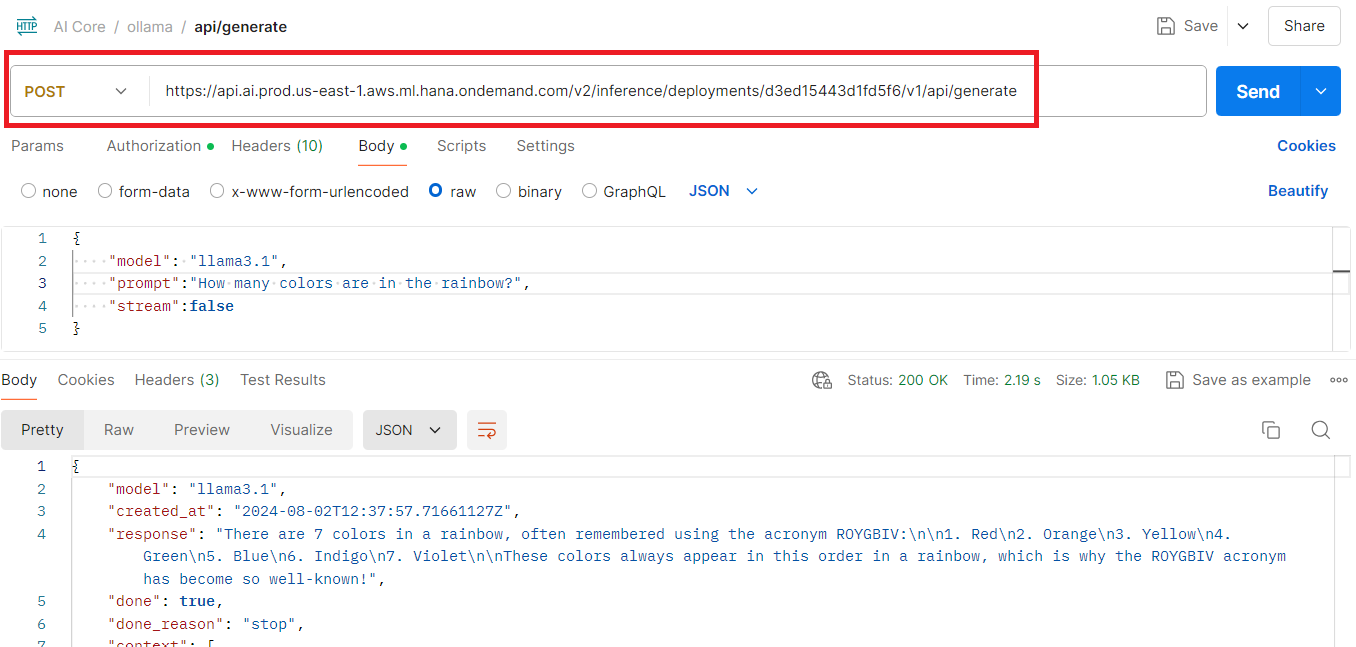
As a result, the full URL is: https://api.ai.prod.us-east-1.aws.ml.hana.ondemand.com/v2/inference/deployments/d3ed15443d1fd5f6/v1/api/generate
AI-Resource-Group header: should be taken from your workspace (Figure 16)
In our example: default
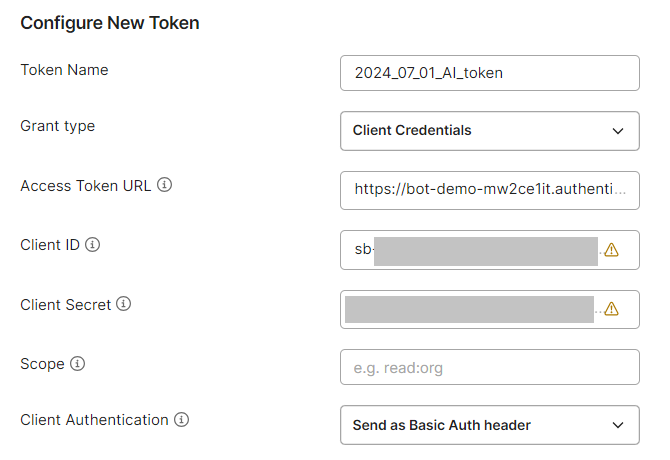
Authorization header: should be received using OAuth 2.0 standard using credentials of your SAP AI Core instance (Figure 9):
Body: {
“model”: “llama3.1”,
“prompt”:”How many colors are in the rainbow?”,
“stream”:false
}
Step 10. Check bindings in BTP account
Any application making requests to the Ollama server must receive access tokens and therefore require the AI_core service credentials. Therefore, they must be bound to this service either manually or automatically during the deployment process.
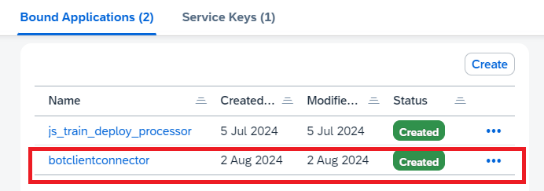
Let’s look at an example of checking the binding of the botclientconnector application and creating one.
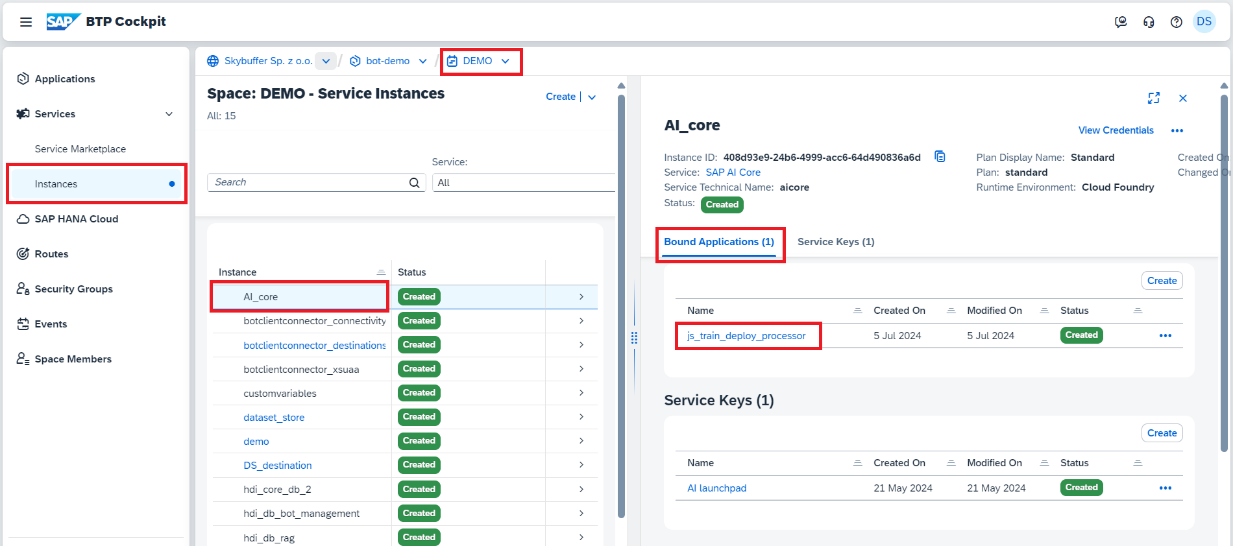
Find your service instance and click on it. You will see all the applications that are already bound. In our case there is no botclientconnector, so we must bind it.
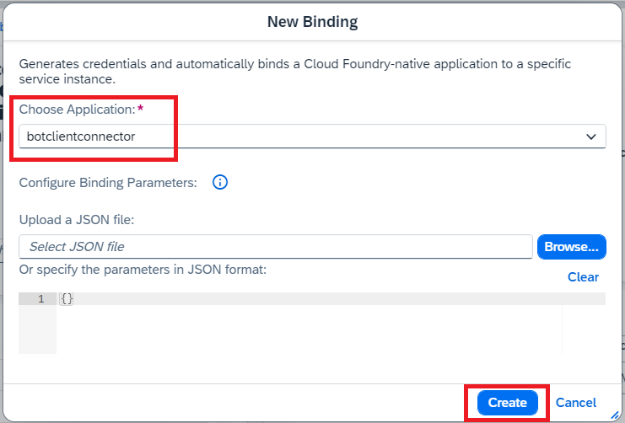
To bind an application, use the Create button.

Useful links:
SAP AI Core documentation: https://help.sap.com/docs/sap-ai-core/sap-ai-core-service-guide/what-is-sap-ai-core
SAP AI Launchpad documentation: https://help.sap.com/docs/ai-launchpad/sap-ai-launchpad/what-is-sap-ai-launchpad
Skybuffer Official repository (not public, credentials needed):
Git Repository – skybfryaicor < Github_neo < Skybuffer Sp. z o.o. – SAP BTP Cockpit (ondemand.com)
https://git.eu2.hana.ondemand.com/ofvwid1a4r/skybfryaicor
https://git.eu2.hana.ondemand.com/plugins/gitiles/ofvwid1a4r%2Fskybfryaicor