Document Grounding Action
This Action Type allows you to browse Vectorized files available in your system and retrieve text fragments corresponding to your question/query.
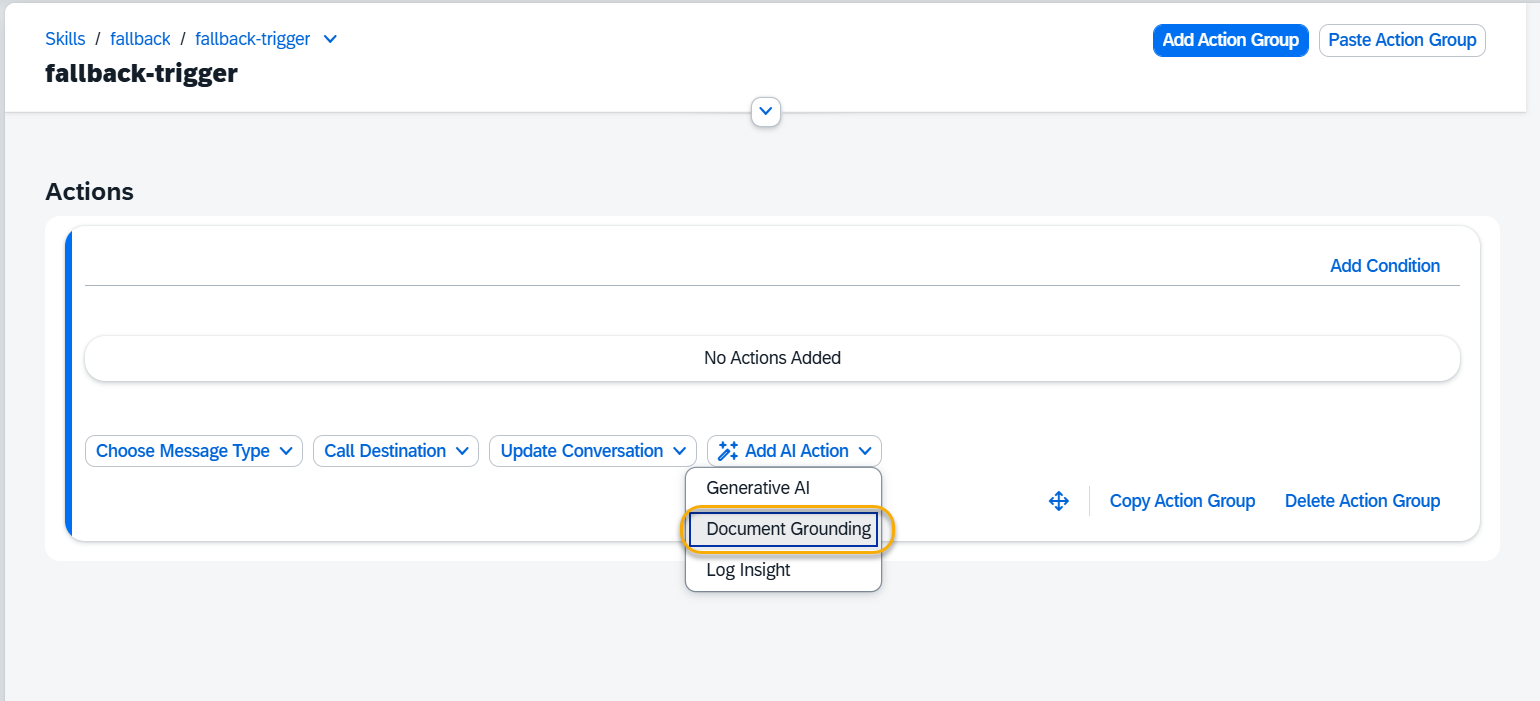
Step 1. Press the Document Grounding button at the bottom of an Action Group. New action will be created.
Step 2. Setup new action block step by step:

A – Help Dialog
For guidance on the action and some hints, click the Information Icon.
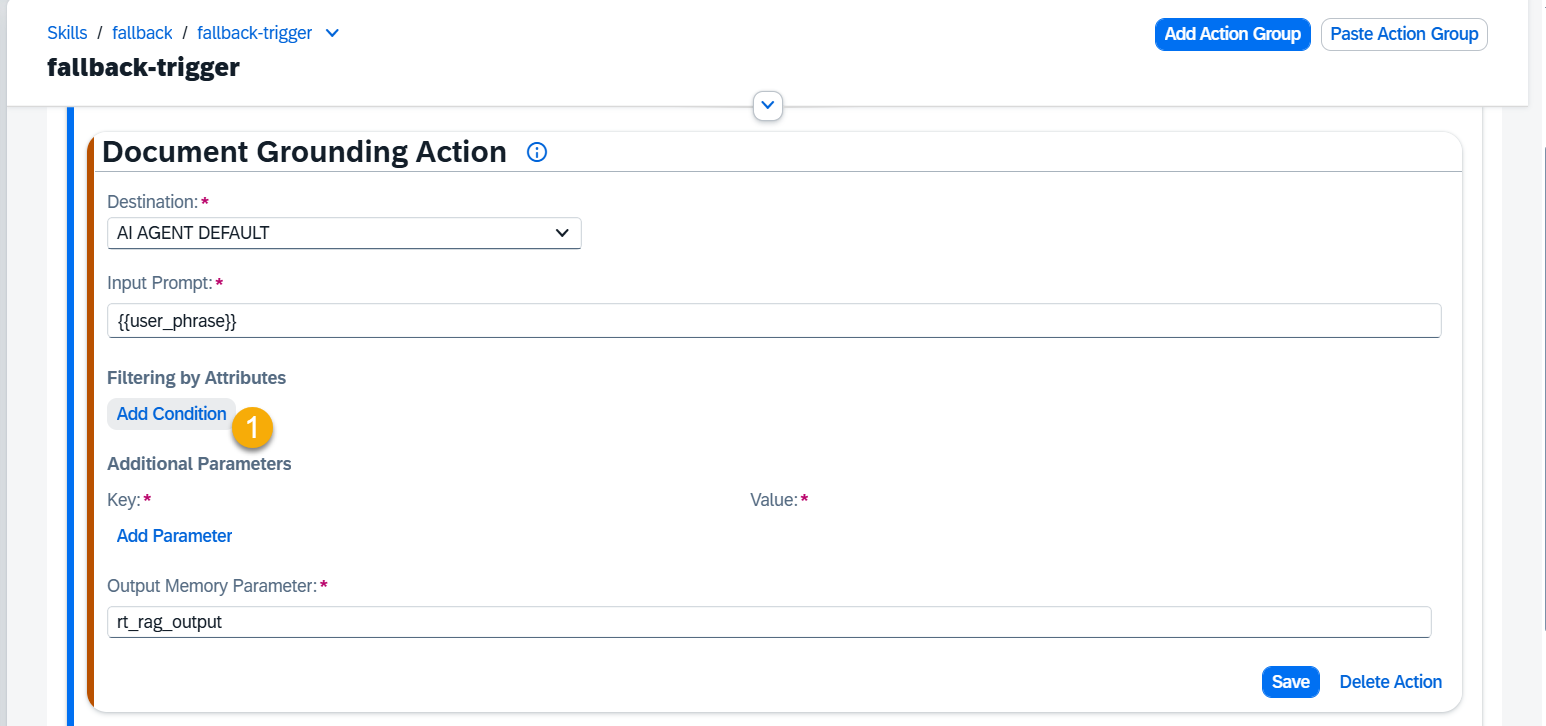
B – Document Grounding Destination
This field defines the AI model used to generate responses. By default, when you create an Action, it is set to use a hardcoded mask called “AI AGENT DEFAULT”. This is not the name of a specific model and does not exist in the model hub.
Instead, “AI AGENT DEFAULT” is a placeholder that always points to the current default Document Grounding model assigned to the AI Agent.
You can override this by selecting a specific model for your Action (e.g., Ollama). If you do, the Action will always use that model—even if the AI Agent’s default changes later.
C – Input Prompt
The Input Prompt is where you include the user phrase. You can enhance the {{user_phrase}} by adding additional text or memory parameters.
Example Input Prompt 1: {{user_phrase}}
Example Input Prompt 2: Answer this question: {{user_phrase}} in context of {{memory.rt_leave_request_type}}.
D. Filtering by Attributes
This feature allows you to limit the Grounded Search by specific attributes associated with the documents in the database. To filter by attributes, use the Add Condition button. You can also create advanced filtering by combining multiple conditions within Condition Sets.
NOTE: To select an attribute from the list, it must first be added to the corresponding Document Grounding model in the ML Models Hub application.
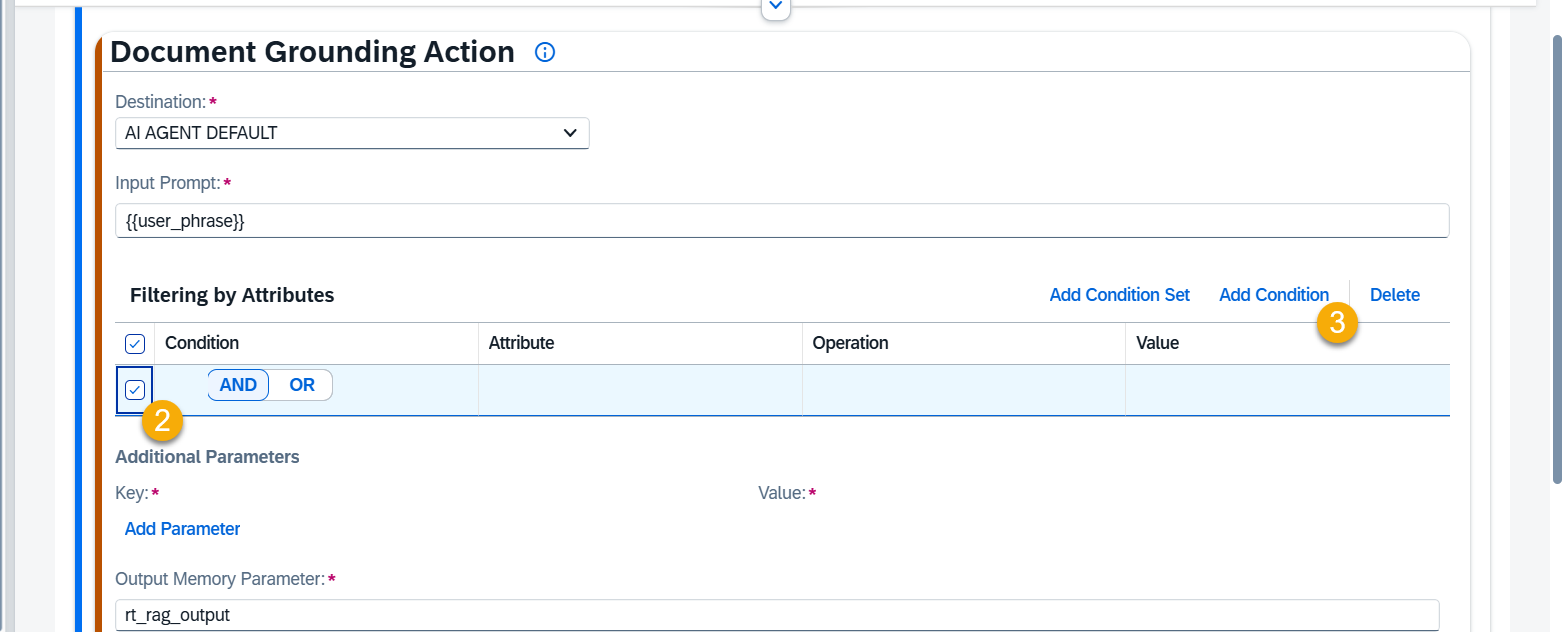
Press Add Condition button:
A table will appear with one row filled in. Mark the checkbox on the left of the first row with AND/OR, and press the Add Condition button.
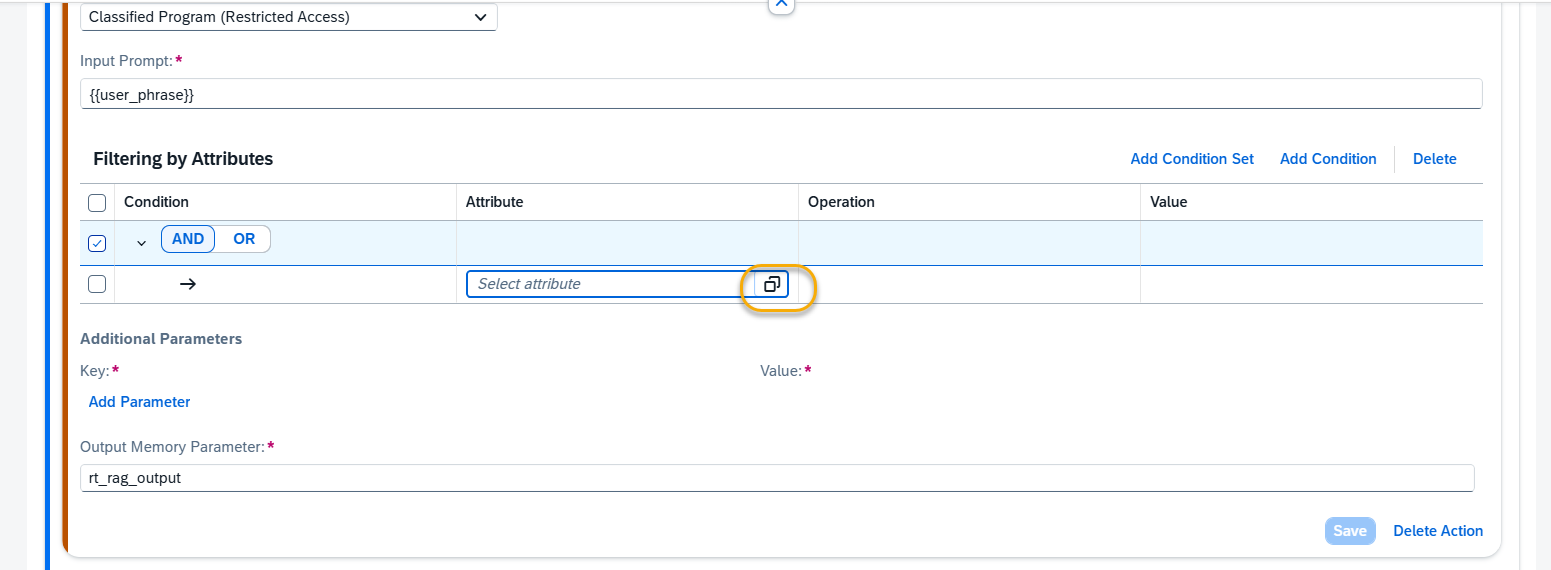
Select an Attribute, Operation, and Value from expandable lists.
You can select only Attributes and Values that are present in Document Grounding HUB application and correspond with existing files.
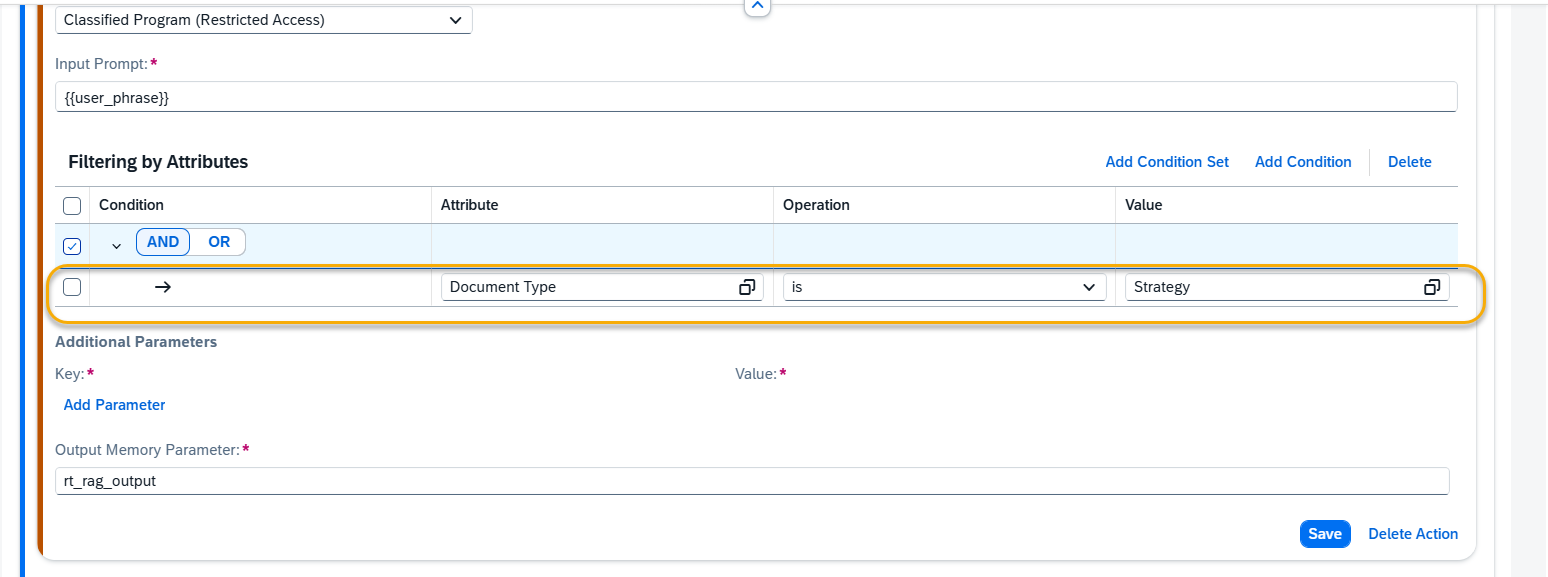
Example 1:
Use only documents that have:
“Document Type” Attribute equal to “Strategy” AND
“Project” Attribute equal to “Internal”:

E – Additional Parameters.
Parameters for the Destination are applied by default. You can view these parameters in the AI Agent Configurator application, in Document Grounding Settings section. To customize the AI’s behavior further, you can redefine existing parameters or add new ones using Add Parameter function.
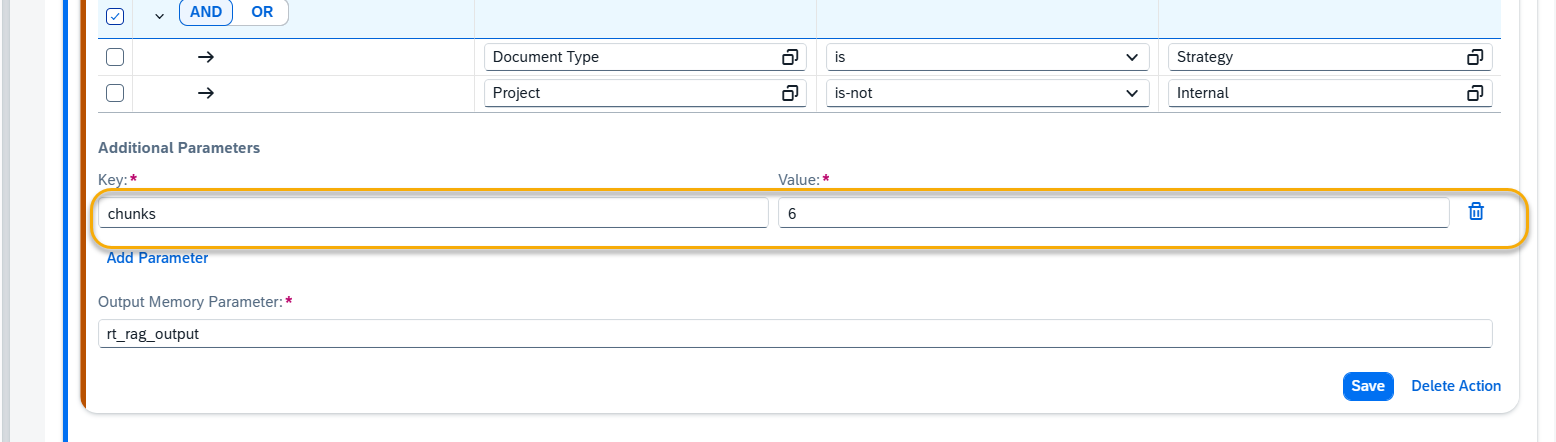
Available Parameters:
- chunks: sets the maximum number of text segments (chunks) that will be retrieved and used for generating a response to the user’s query. Expected Format: Integer (e.g., 3, 5)
- max_distance: sets the relevance threshold for how closely chunks must match the query. Lower values yield more precise results, higher values include broader context. Expected Format: Integer (e.g., 30, 10)
NOTE: Changing default parameters can significantly influence the AI Model’s performance and responses. Therefore, it is recommended to proceed with caution when making changes.
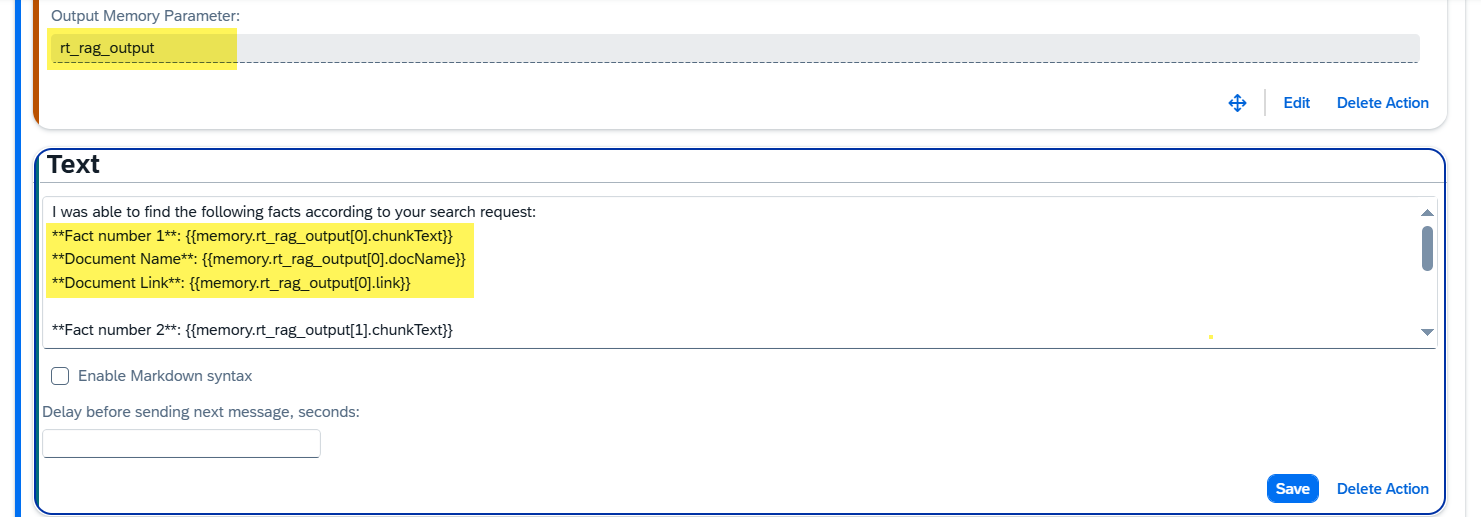
F- Output Memory Parameter
The result of Document Grounded search will be saved as the array structure in the memory parameter specified in the ‘Output Parameter’, rt_rag_output by default.
The Document Grounding reply structure:
[
    {
        "chunkText": "", // Extracted text segment (chunk) from the document matching the search criteria.
        "distance": "",  // Relevance score indicating how closely the chunk matches the search query (lower values = closer match).
        "docGUID": "",   // Unique identifier (GUID) of the document from which the chunk was extracted.
        "docName": "",   // Name of the document containing the extracted chunk.
        "link": "",      // URL or link to access the document directly.
        "ragGUID": "",   // Unique identifier (GUID) for the vectorized document representation in the Grounded Documents database.
        "startPos": ""   // Starting position of the extracted text chunk within the document, indicating where the relevant text begins.
    }
]
To refer to the Document Grounding reply structure, use the following syntax: {{memory.rt_rag_output[n].field_name}}, where n — ordinal number of element in the array starting from 0, field_name — name of the field of the array element.
Here we display the retrieved chunks in Text Action Block:
Step 3. Save your changes when done editing.
Postprocessing Hints:
What can you do with the generated response ?
1. Display Grounded Search response in message to user :
Create a Text Action, and print out “chunks” generated :
Example :
I was able to find the following facts according to your search request:
**Fact number 1**: {{memory.rt_rag_output[0].chunkText}}
**Document Name**: {{memory.rt_rag_output[0].docName}}
**Document Link**: {{memory.rt_rag_output[0].link}}
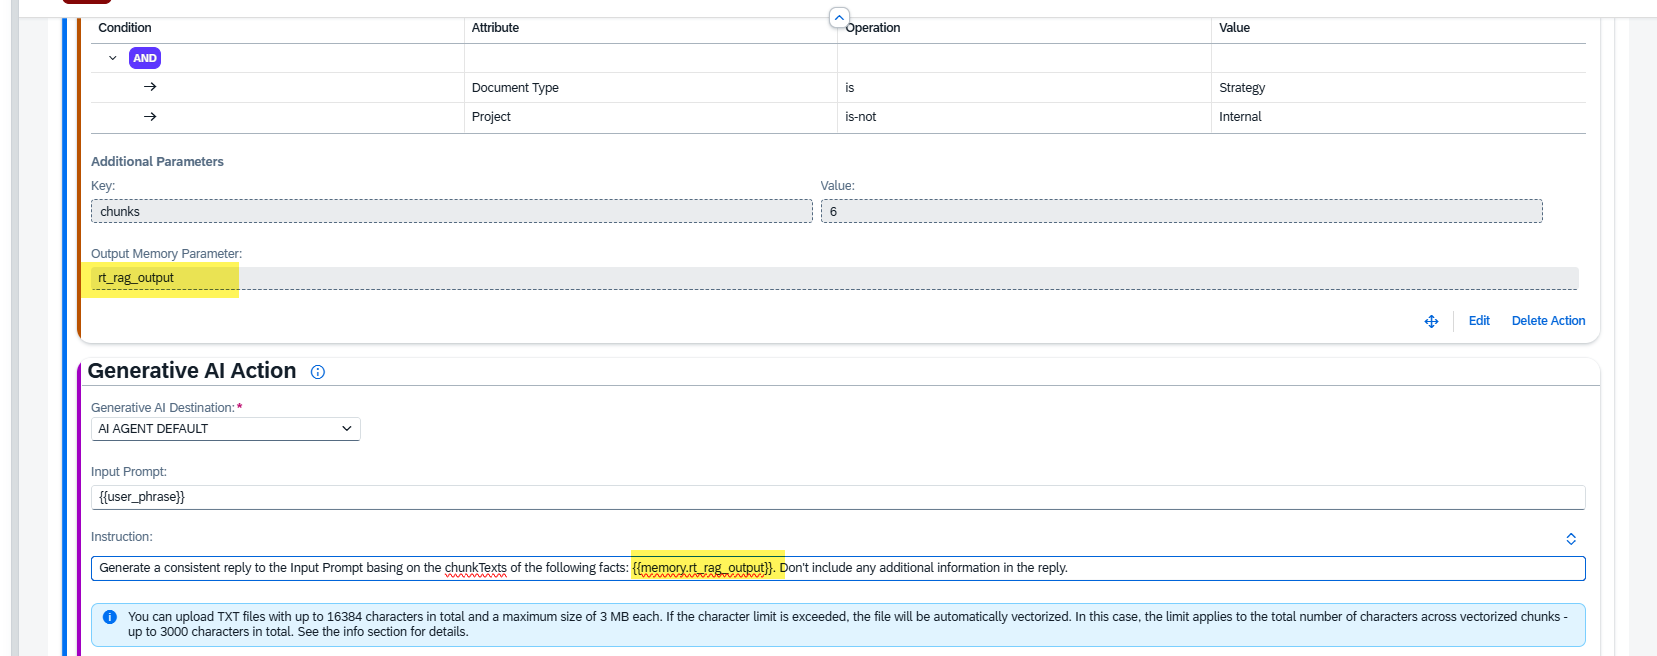
2. Grounded Search reply processing by Gen AI: use retrieved chunks as a source for Generative AI response.
- Add a Generative AI Action after your Grounded Search action.
- Add a Processing Instruction: In the Generative AI Action, include an instruction in the Instruction field to define how the Grounded Search results should be processed. Use the memory parameter {{memory.rt_rag_output}} to refer to those search results.
Instruction Template: If you need a starting point, use the template below as an example. Copy and paste it into the Instruction field of your Generative AI Action:
Template 1:
Please create a reply to the Input Prompt using the provided chunks and output them in the following structure:
**Fact number …**: [summary of each chunkText]
**Document Name**: [docName]
**Link**: [Link]
Start with some general phrase, like ‘Here are the facts according to your request’ or similar.
There should be as many facts, document names and links as chunkText elements. If no facts, reply that nothing was found according to the request.
Facts: {{memory.rt_rag_output}}
Template 2:
Generate a consistent reply to the Input Prompt based on the chunkTexts of the following facts: {{memory.rt_rag_output}}. Don’t include any additional information in the reply.
NOTE: You can customize the instruction to fit your specific needs. This template is just an example to help you get started.
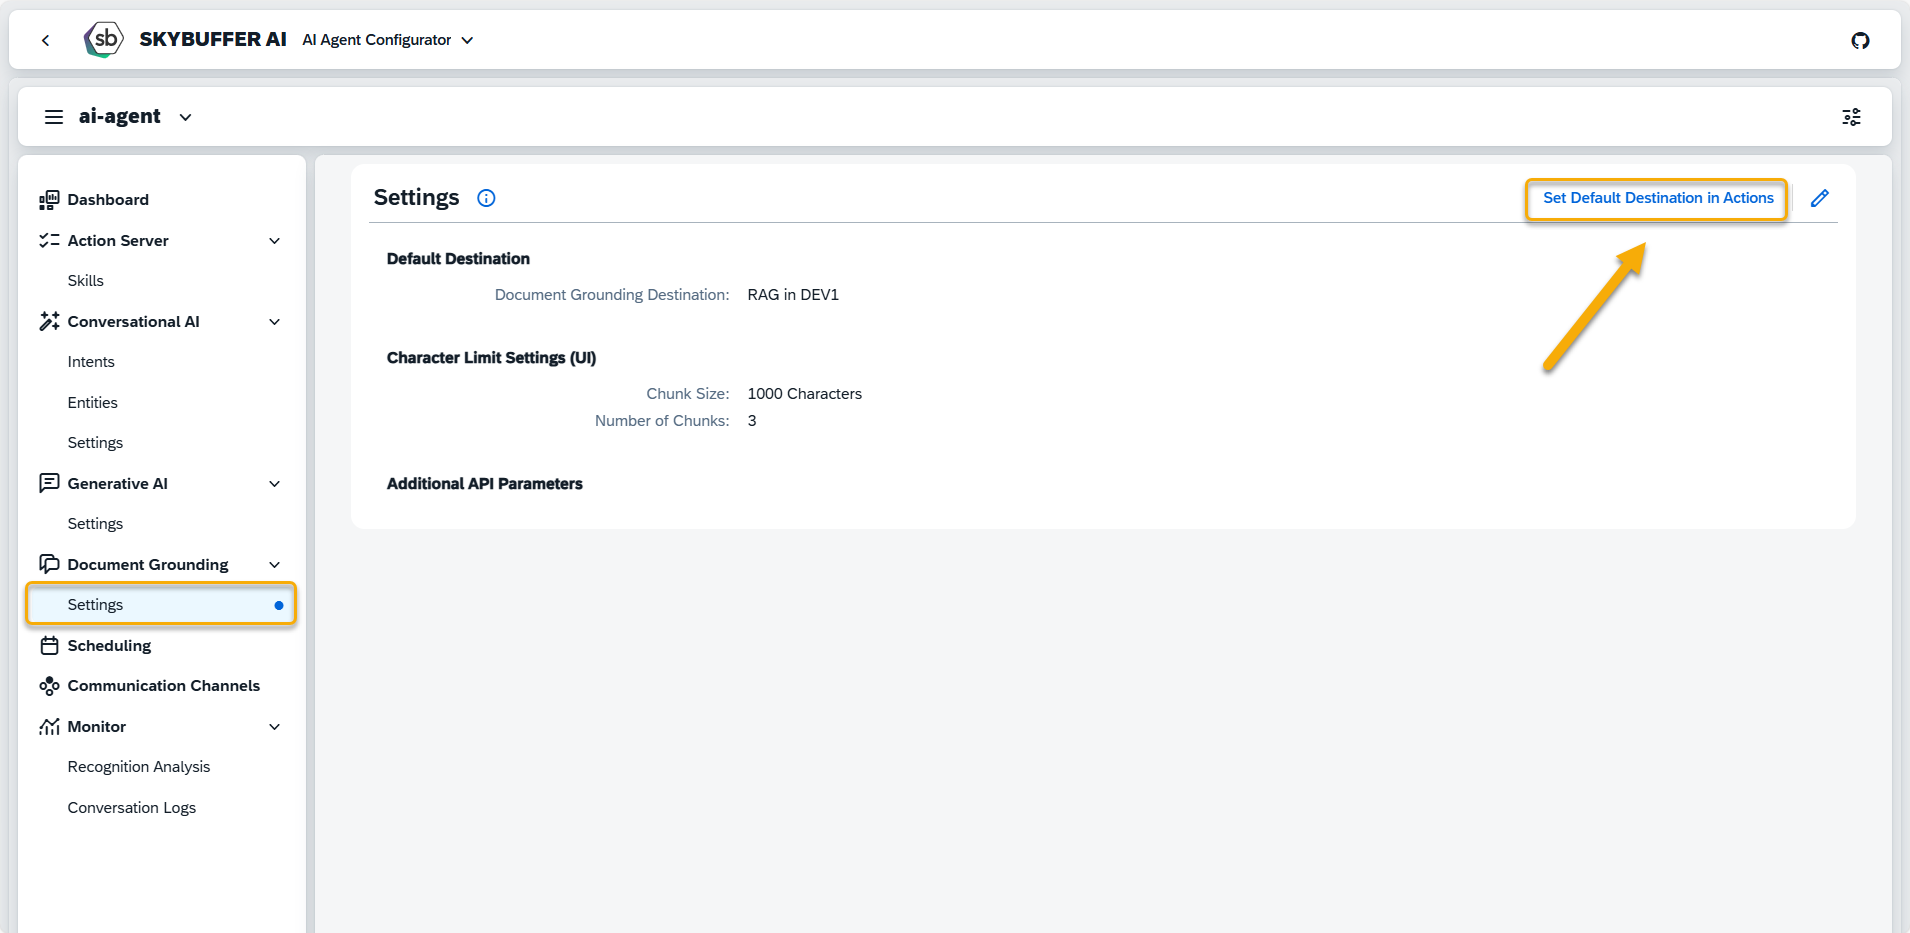
Step 4. Settings section
Set Default Destination in Actions
Here, you can set default destinations for all Document Grounding Actions by clicking Set Default Destination in Actions button.
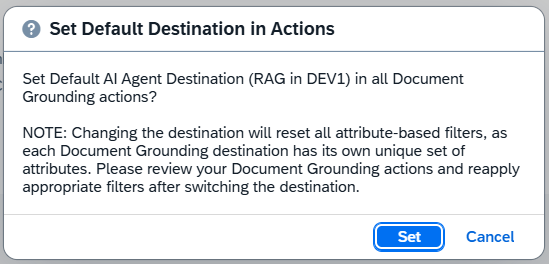
By clicking the Set button, you agree to apply the Default AI Agent Destination to all actions
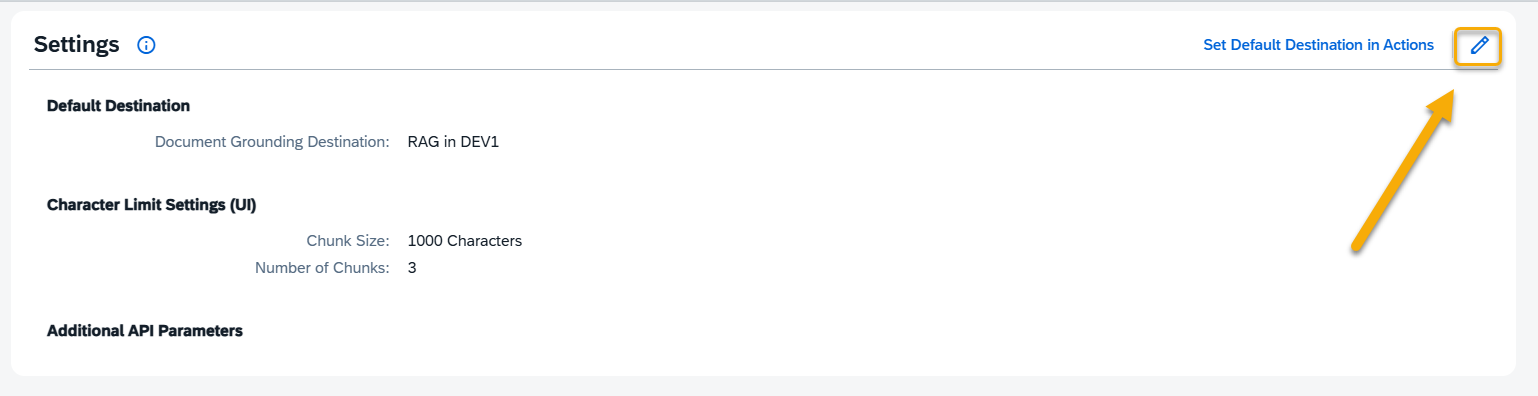
Edit Settings
To edit a parameter, click the pen icon to enter edit mode and make the desired changes.
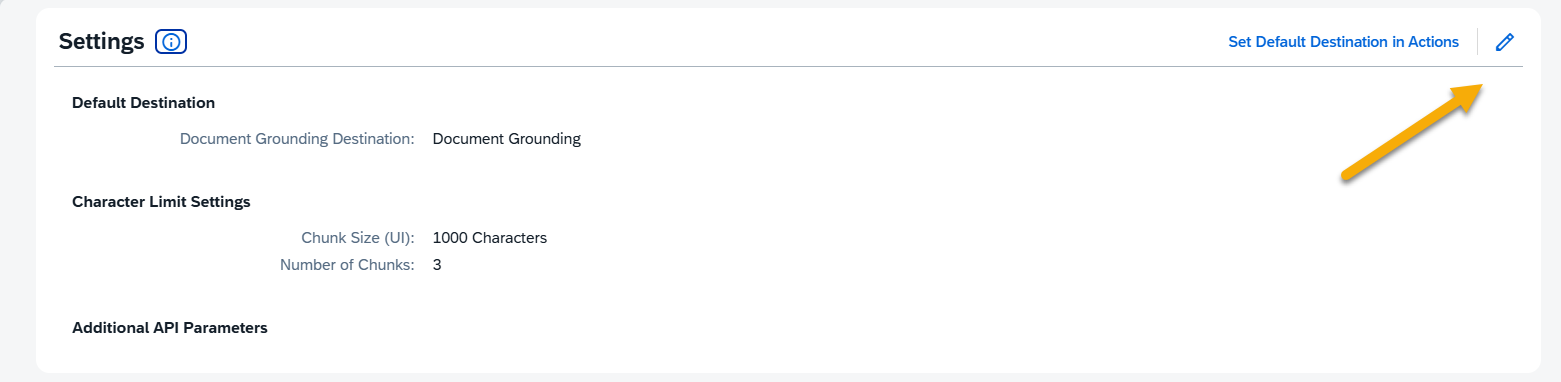
Document Grounding Destination refers to the available connections configured to access different Document Grounding spaces. These destinations are managed and set in the Models Hub application.
To assign or change the default Document Grounding Destination, select one from the available list.Character Limit Settings (UI)
Note: These parameters do not affect the response itself. They are used in the UI to calculate the character count of vectorized document chunks in the Document Grounding action type.
- Chunk Size (UI): In Document Grounding, chunk size is defined once during document conversion and cannot be influenced at runtime. This parameter is only used in the UI to calculate character-limit boundaries for the displayed results.
- Number of Chunks: Defines the maximum number of chunks the Document Grounding engine can return per request. Together with Chunk Size, this determines the total expected characters in the retrieved context for a Generative AI action.
Additional API Parameters
- max_distance: Relevance threshold for matching chunks to the query. Lower values = higher precision, higher values = broader context. Format: Integer (e.g., 10, 30).
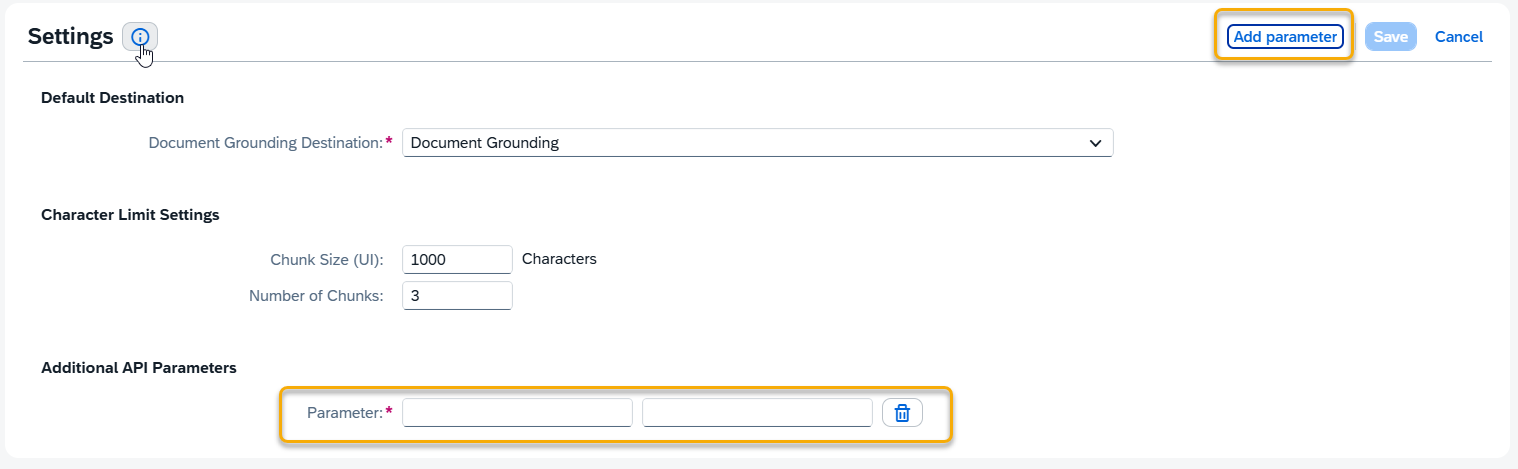
- chunks: Maximum number of text chunks to retrieve for generating a response. Format: Integer (e.g., 3, 5)
- max_distance: Relevance threshold for matching chunks to the query. lower values = higher precision; higher values = broader context. Format: Integer (e.g., 10, 30)
NOTE: Changing default parameters may significantly affect the AI Agent’s performance and the quality of responses. Proceed with caution.