Skills Orchestration Action
This action is used to detect user intention when it includes multiple requests or when the request is unclear and doesn’t directly match a specific skill.
Step 1. Create a Skill Orchestration Action by pressing the button at the bottom of an Action Group:

Step 2. A new Generative AI Action will appear and be ready to be filled in. Let’s set up this block step by step.
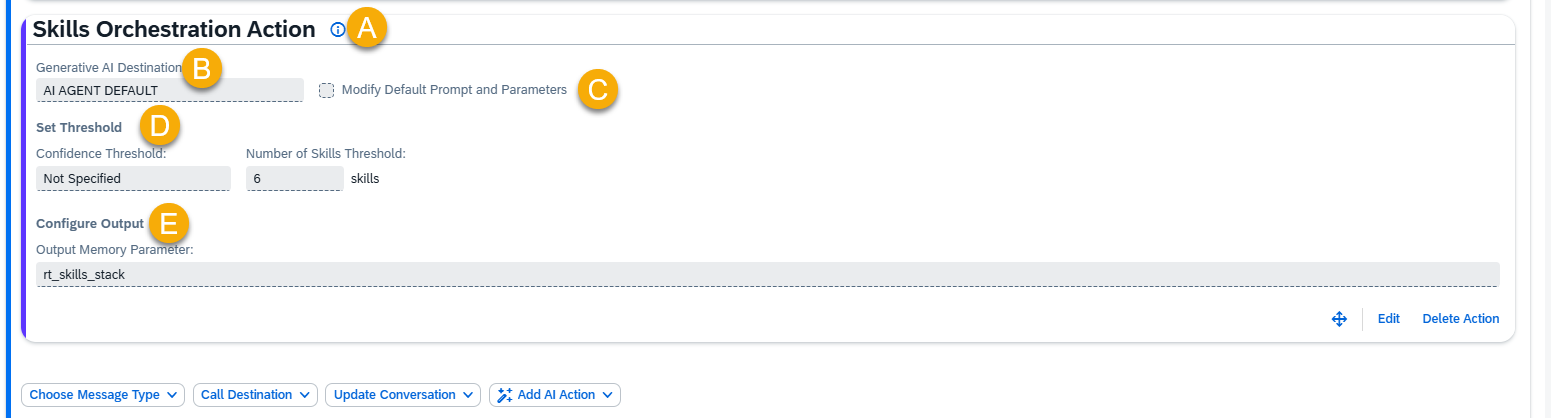
A – Help Dialog
For guidance on the action setup, click the Information Icon. A help dialogue with instructions and examples will appear.
B – Select the Generative AI Destination
This field defines the AI model used to generate responses. By default, when you create an Action, it is set to use a hardcoded mask called “AI AGENT DEFAULT”. This is not the name of a specific model and does not exist in the model hub.
Instead, “AI AGENT DEFAULT” is a placeholder that always points to the default AI model assigned to the AI Agent. In the picture, we see AI AGENT DEFAULT is selected, and it points to “Ollama” model that is marked as “System Default”.
You can override this by selecting a specific model for your Action (e.g., Ollama 70b). If you do, the Action will always use that model—even if the AI Agent’s default changes later.
C – Modify Default Prompt and Parameters
Adjust the default prompt, which includes Input Prompt, Skills Stack, and Instruction to guide Generative AI behavior.
NOTE: Modifications may cause unexpected behavior and should be done with caution.
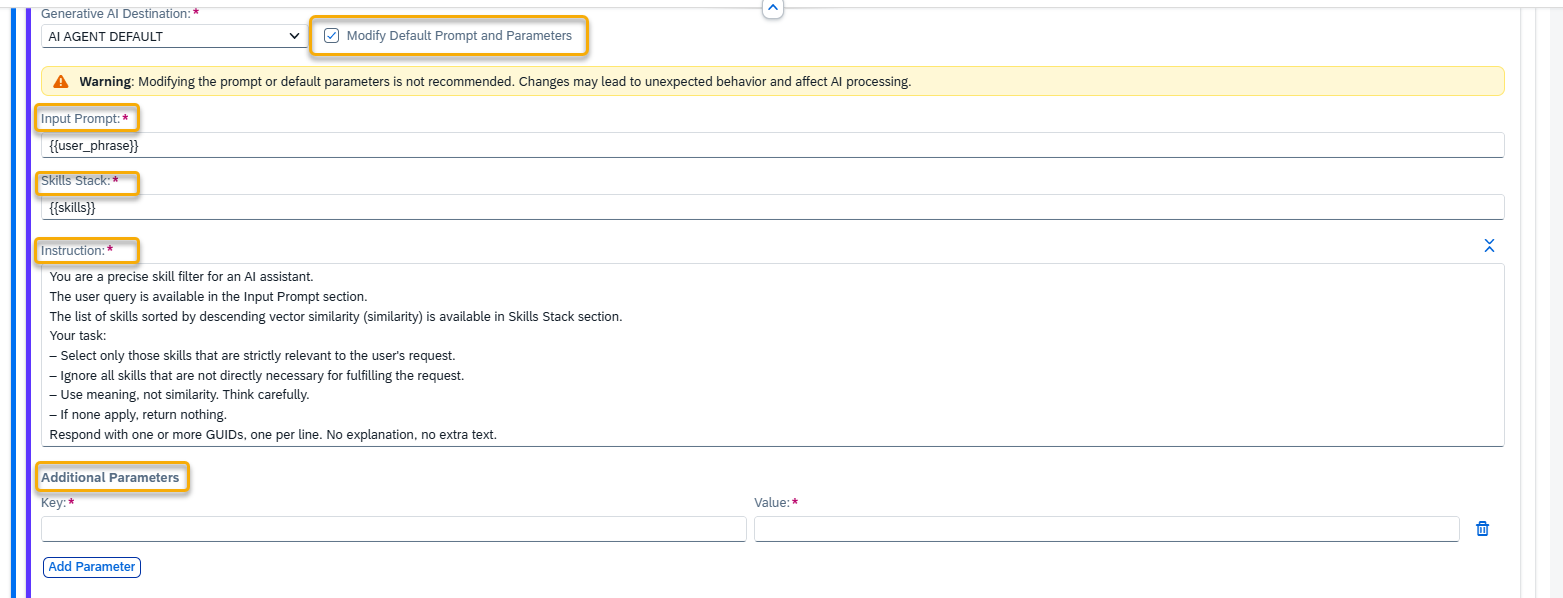
Input Prompt
Includes the user’s phrase and can be enhanced with text or memory parameters. If omitted, the response is based solely on instructions.
Examples:
- {{user_phrase}}
- Answer this question: {{user_phrase}} in context of {{memory.rt_leave_request_type}}
Skills Stack
A list of detected skills used to create context for the AI.
Examples:
- {{skills}}
- {{memory.rt_custom_skills_stack}}
Instruction
Provides direction to the AI. Together with the Input Prompt and Skills Stack, it defines the full context.
Recommended example:
You are a precise skill filter for an AI assistant.
The user query is available in the Input Prompt section.
The list of skills sorted by descending vector similarity (similarity) is available in Skills Stack section.
Your task:
- Select only those skills that are strictly relevant to the user’s request.
- Ignore all skills that are not directly necessary for fulfilling the request.
- Use meaning, not similarity. Think carefully.
- If none apply, return nothing.
Respond with one or more GUIDs, one per line. No explanation, no extra text.
Additional Parameters
Allows you to override or add parameters specific to the selected AI model.
Refer to model documentation for details:
NOTE: Changing default parameters affects AI performance. Proceed carefully.
D – Set Threshold
Confidence Threshold
Defines how closely the user request must match a skill. Options:
- Not Specified
- Wide
- Normal
- Strict
- Custom – set a value from 0 to 1 (0 = broader match, 1 = exact match)
Number of Skills Threshold
Sets the maximum number of skills that can be detected and considered in this action.
E – Configure Output
Output Memory Parameter
Specifies the memory parameter where the result of this action will be stored. The default parameter is rt_skills_stack. This value should be used as the source for generating the decision card message shown to the user after the action is completed.
The stored value follows the structure below:
Structure:
{
“rt_skills_stack”: {
“query”: “User’s original input”,
“skills”: [
{
“description”: “Explanation of what the skill does”,
“guid”: “Unique identifier of the skill”,
“name”: “Technical name of the trigger skill”,
“similarity”: “Confidence score based on relevance to the query”
}, …
]
}
}
Example:
{
“rt_skills_stack”: {
“query”: “I want to create a shopping cart and check the list of orders”,
“skills”: [
{
“description”: “Purchase Order List Display.”,
“guid”: “2d22bf856cb74f789a0627b46029a928”,
“name”: “zppp-po-list-display-trigger”,
“similarity”: 0.617
},
{
“description”: “Purchase Requisition Creation.”,
“guid”: “f487da50044a4a1b95c4438ed72e6e0d”,
“name”: “zppp-create-purchase-requisition-trigger”,
“similarity”: 0.523
}
]
}
}
Step 3. Remember to save your entries once you finish editing.
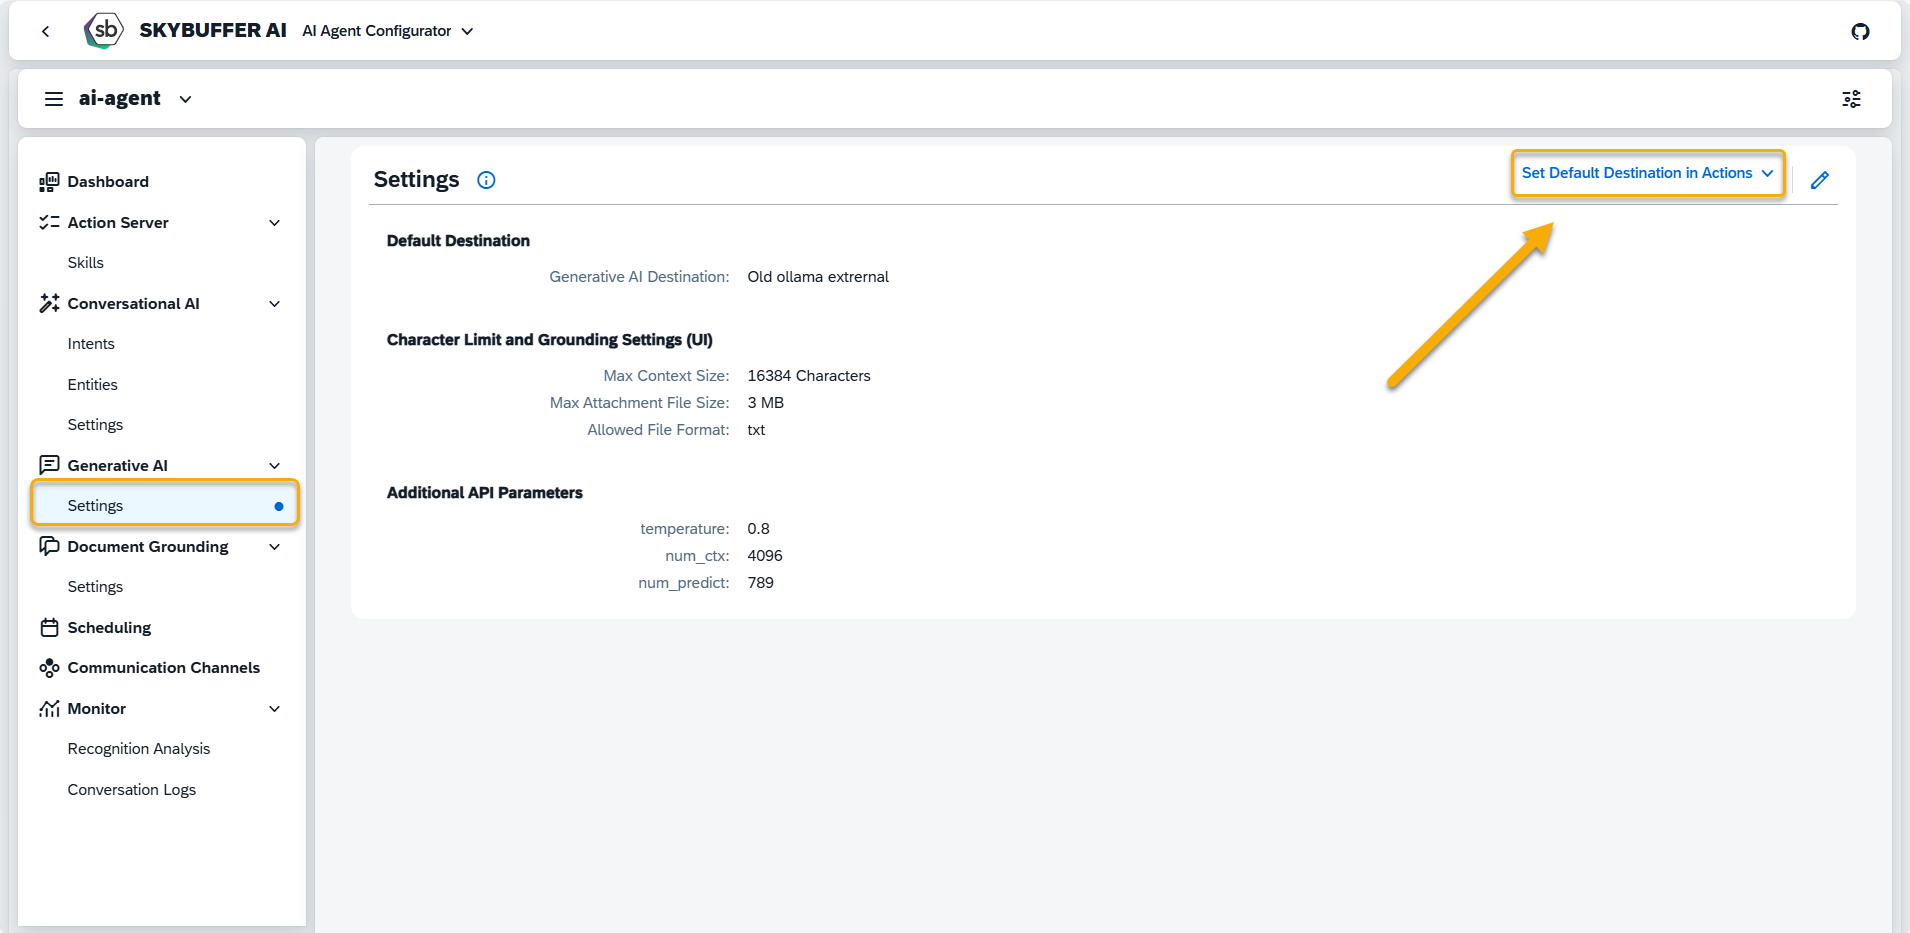
NOTE: In Generative AI Settings section you can set default destinations for all your AI Action at once.