Skill Creation and Management
What is a Skill?
A Skill is a set of no-code instructions that execute automatically when specific conditions are met. Each Skill is made up of two main components: the Triggers Tab and the Actions Tab.
- The Triggers Tab defines the conditions under which a Skill is activated. These conditions can be set using logical AND/OR statements.
- The Actions Tab contains the instructions that run once a Skill is triggered. Each instruction is called an Action—these are the basic building blocks of a Skill. Common actions include sending a text message, displaying an image, adding buttons, or executing a generative AI query.
- Actions can be grouped into Action Groups, which help users stay organized, especially in more complex Skills. While grouping doesn’t affect performance, it improves readability, makes navigation easier, and allows users to copy selected blocks without duplicating the entire Skill.
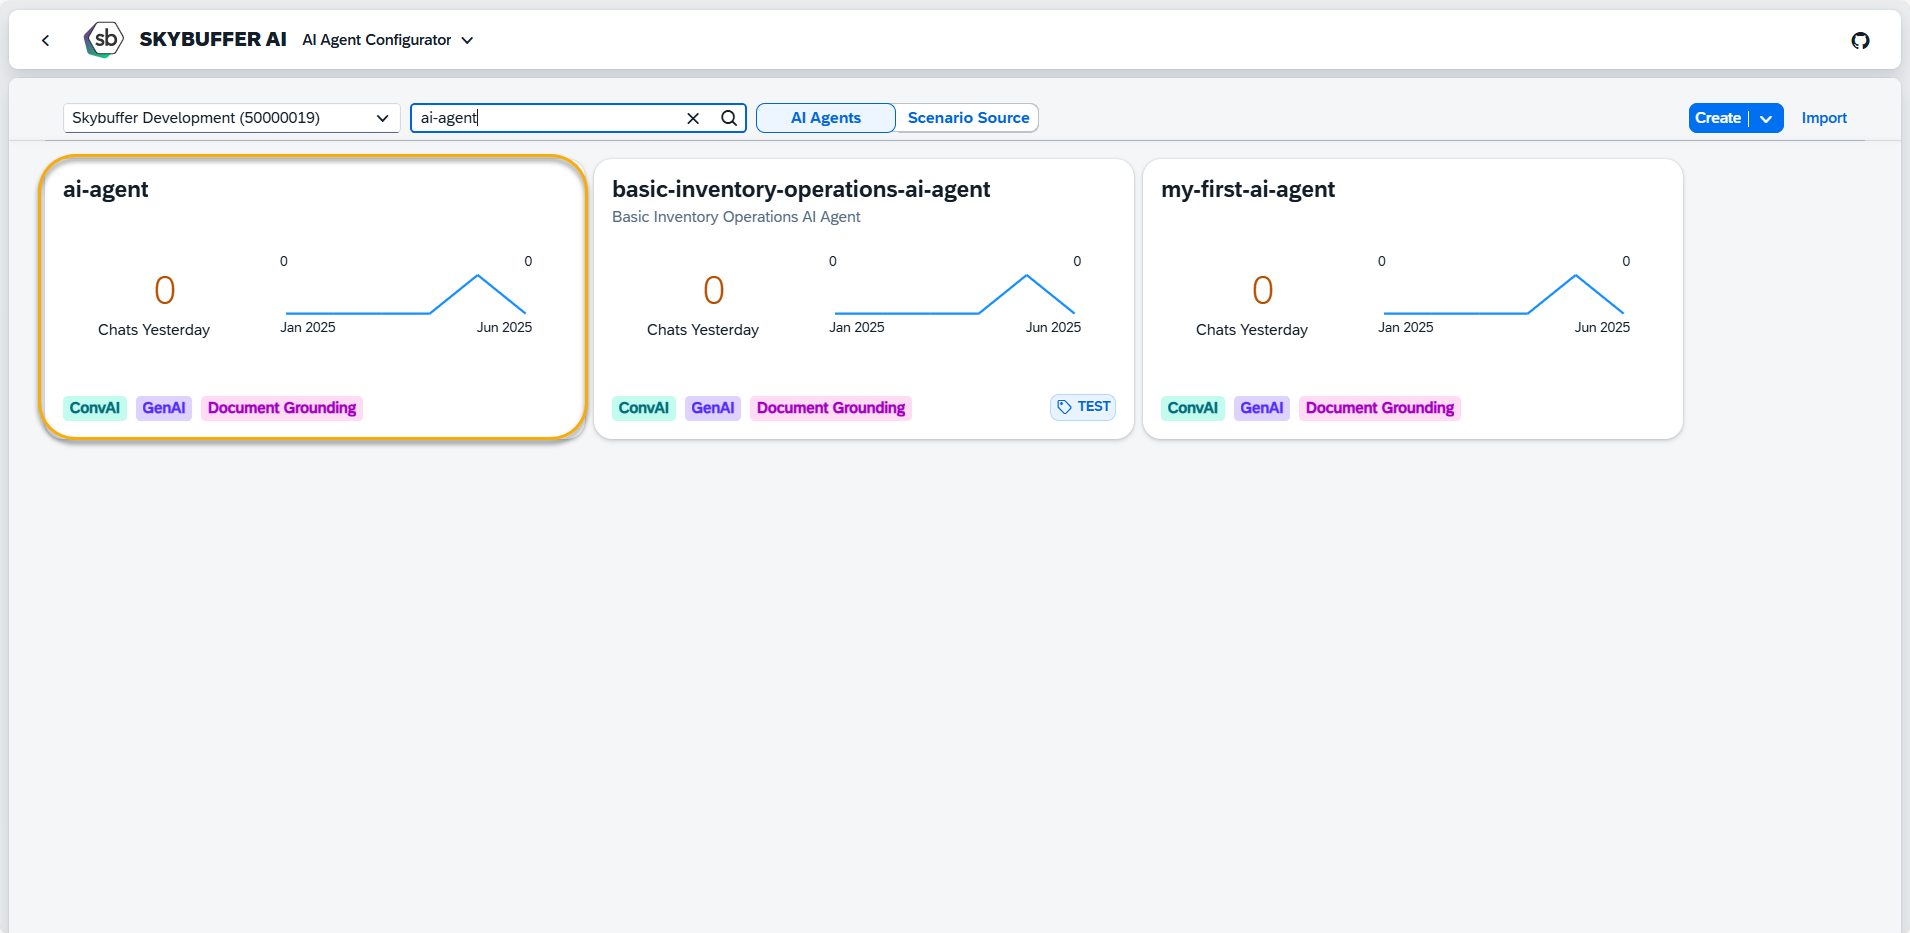
Step 1. Open AI Agent Configurator application, and press on the AI Agent you want to work with.
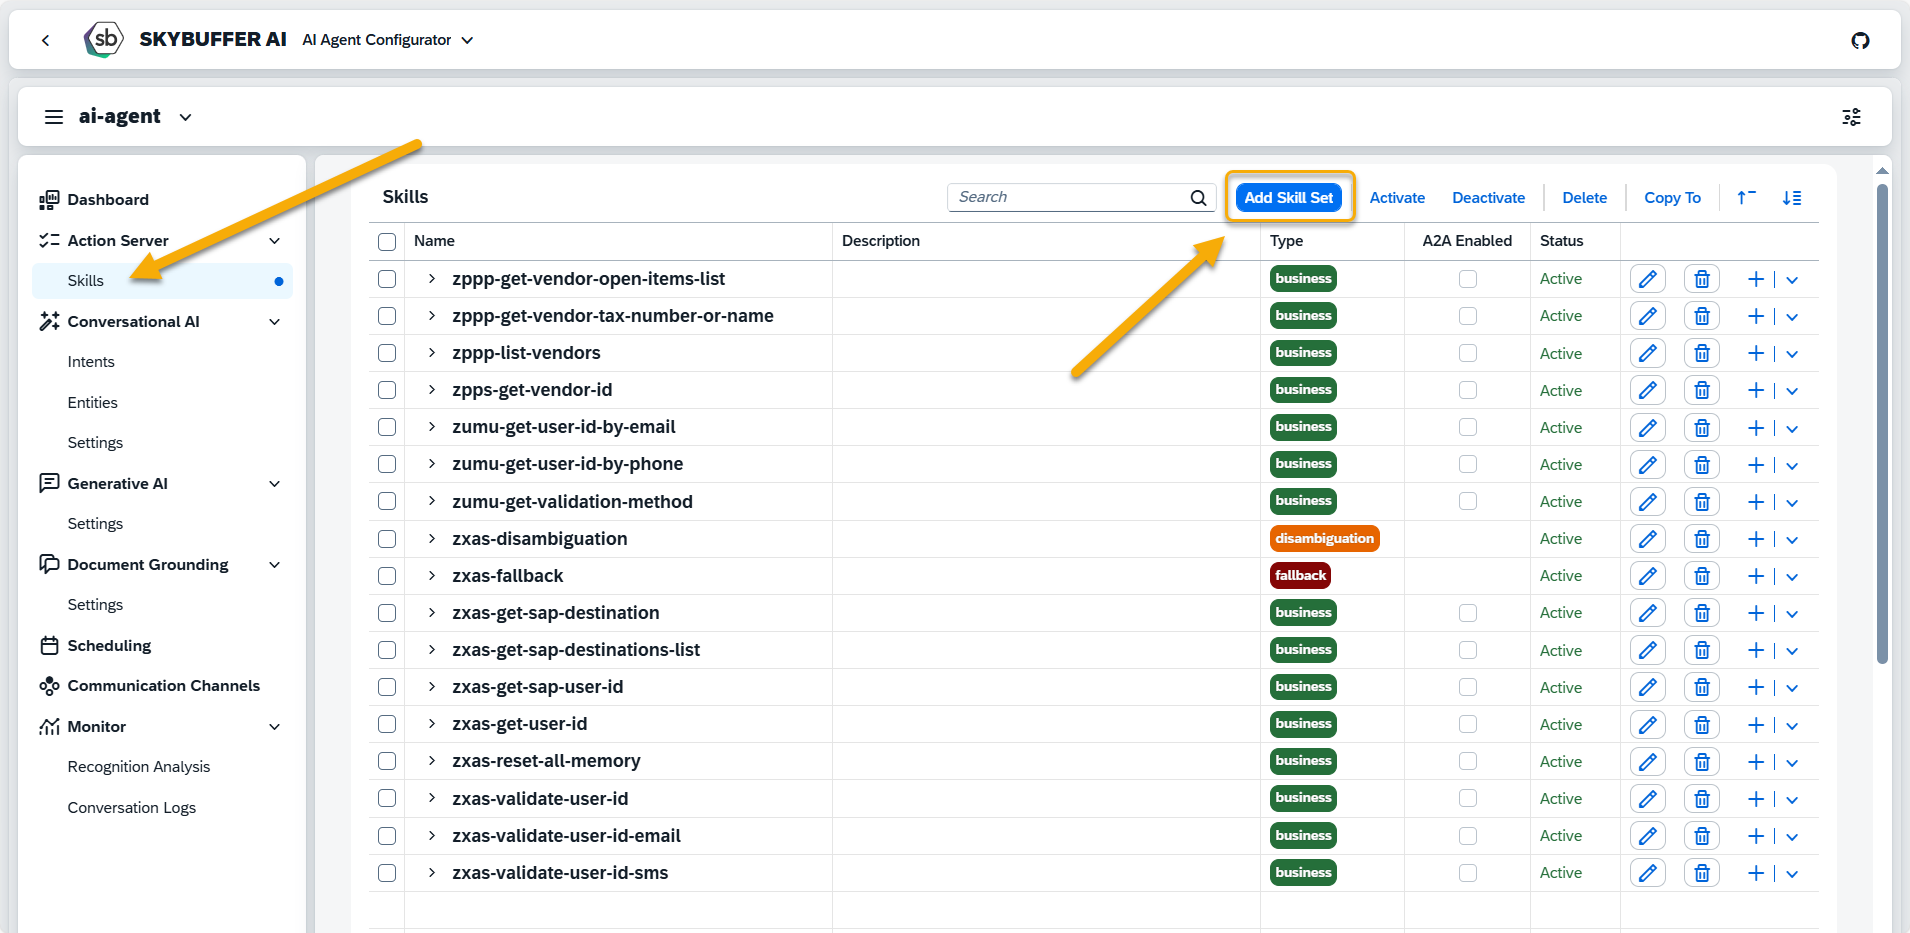
Navigate to Skills Section to create a new skill set, and press the Add Skill Set button.
Step 2. Add Skill Set
Use this form to create a new skill set that defines how a group of skills will behave and be used.

Name – Enter a clear and unique name for the skill set.
Description – Describe the purpose and functionality of the skill set. For Business skill sets, this field is used to allocate the skill set during Orchestration and Agent-to-Agent interaction. Be clear and concise when filling this field for Business skill sets. This field is mandatory for Business skill sets.
Type – Choose the type of skill set:
- Business – Main skill set used in business scenarios can be triggered by Intent or via Orchestration.
- Service – Supporting skill set, not triggered directly by user intents.
- Fallback – Used when no matching intent is found. Restriction: only one Fallback skill set is allowed per AI Agent.
- Initialize – Prepares session or context data. Restriction: only one Initialize skill set is allowed per AI Agent.
- Disambiguation – Used to clarify ambiguous input. Restriction: only one Disambiguation skill set is allowed per AI Agent.
- Orchestration – Used to detect and guide the conversation flow in case of uncertainty. Should contain AI Skills Orchestration action and follow-up processing logic. Typically supplied as part of the initial scenario setup.
Skill Set Content – Select the components the skill set includes:
- Input – accepts input
- Function – contains results output logic
- Trigger – can start a flow
Status – Set to Active or Inactive, depending on whether the skill set should be available.
A2A Enabled – Available for Business skill sets only. Enable this option if the skill set should be available for Agent-to-Agent (A2A) interactions. This allows it to be triggered in workflows where one agent communicates with another.
NOTE: Fallback, Initialize, and Disambiguation have only one type of skill content – trigger and can only be created in one instance.
Step 3. A new Skill Set has been successfully created.
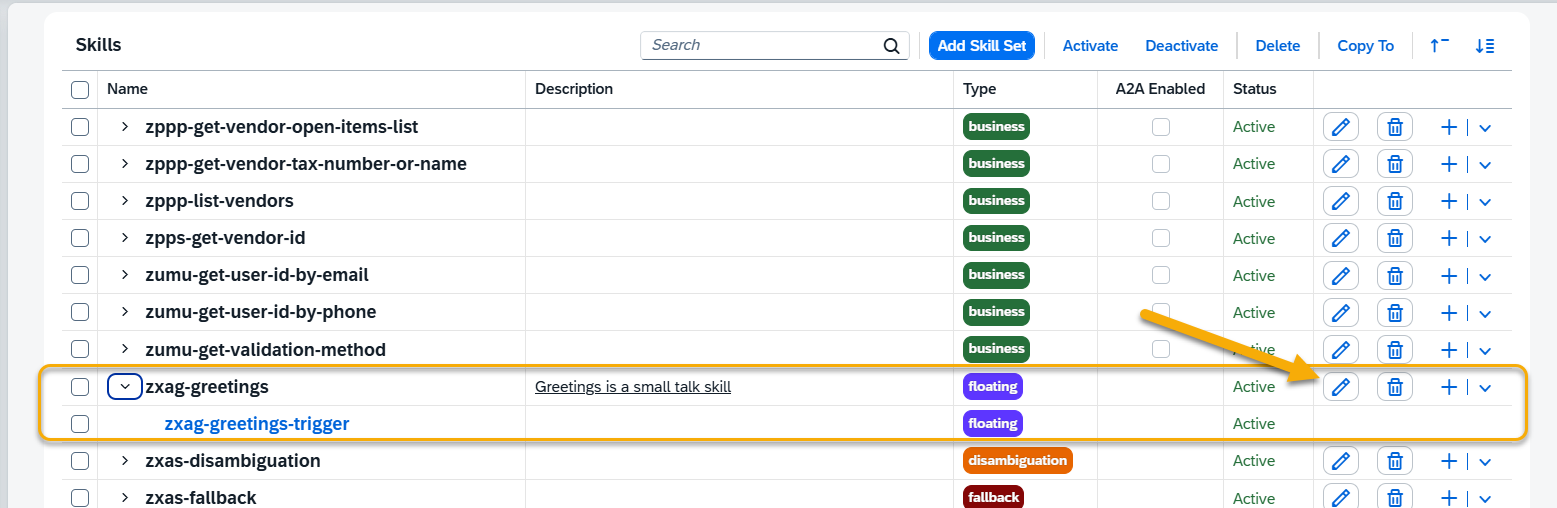
You can edit the data by using the Pen icon, e.g. change it’s name, add description or modify the type or you can delete the skill using the Bin icon.
NOTE: Adding proper skills descriptions is especially important in case of Business Skills as it can be later use in Skills Orchestration Action in oreder to detect user intention when it includes multiple requests or when the request is unclear and doesn’t directly match a specific skill.
Step 4. To edit triggers and actions of your skill, go to the appropriate tab and press the Edit button.
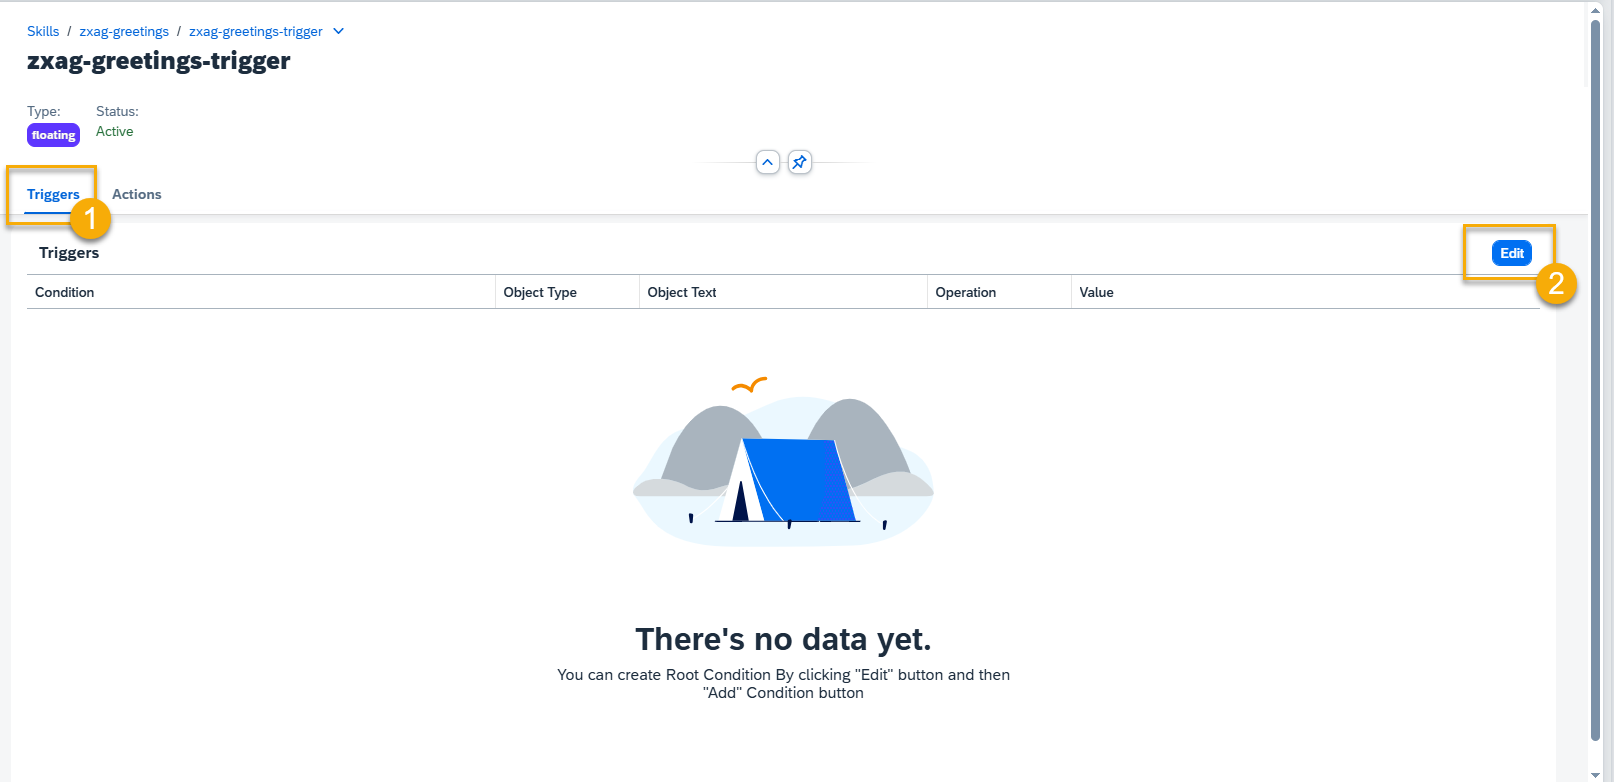
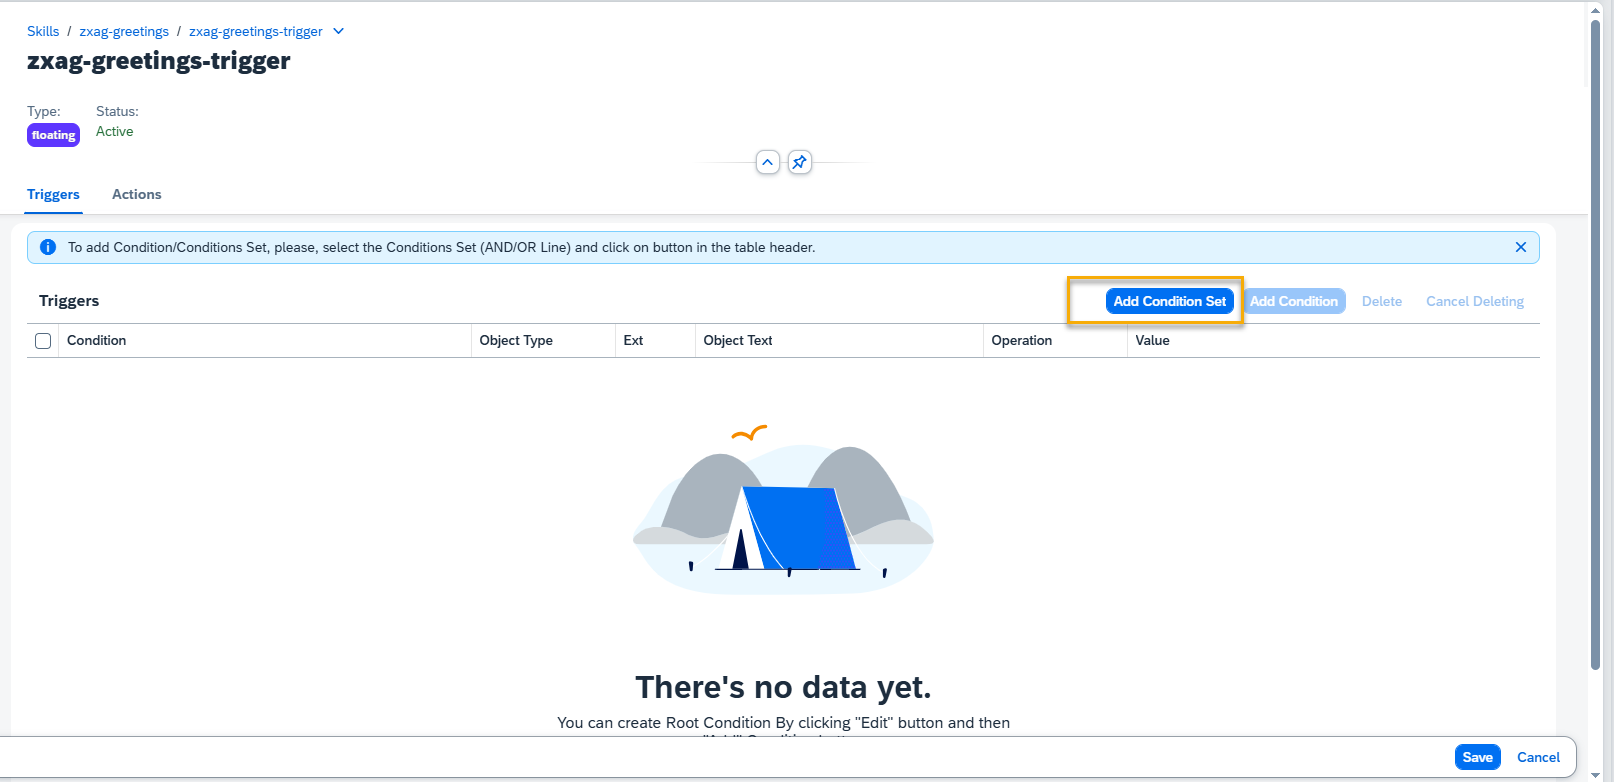
Step 5. Press the Add Condition Set button to add trigger conditions.
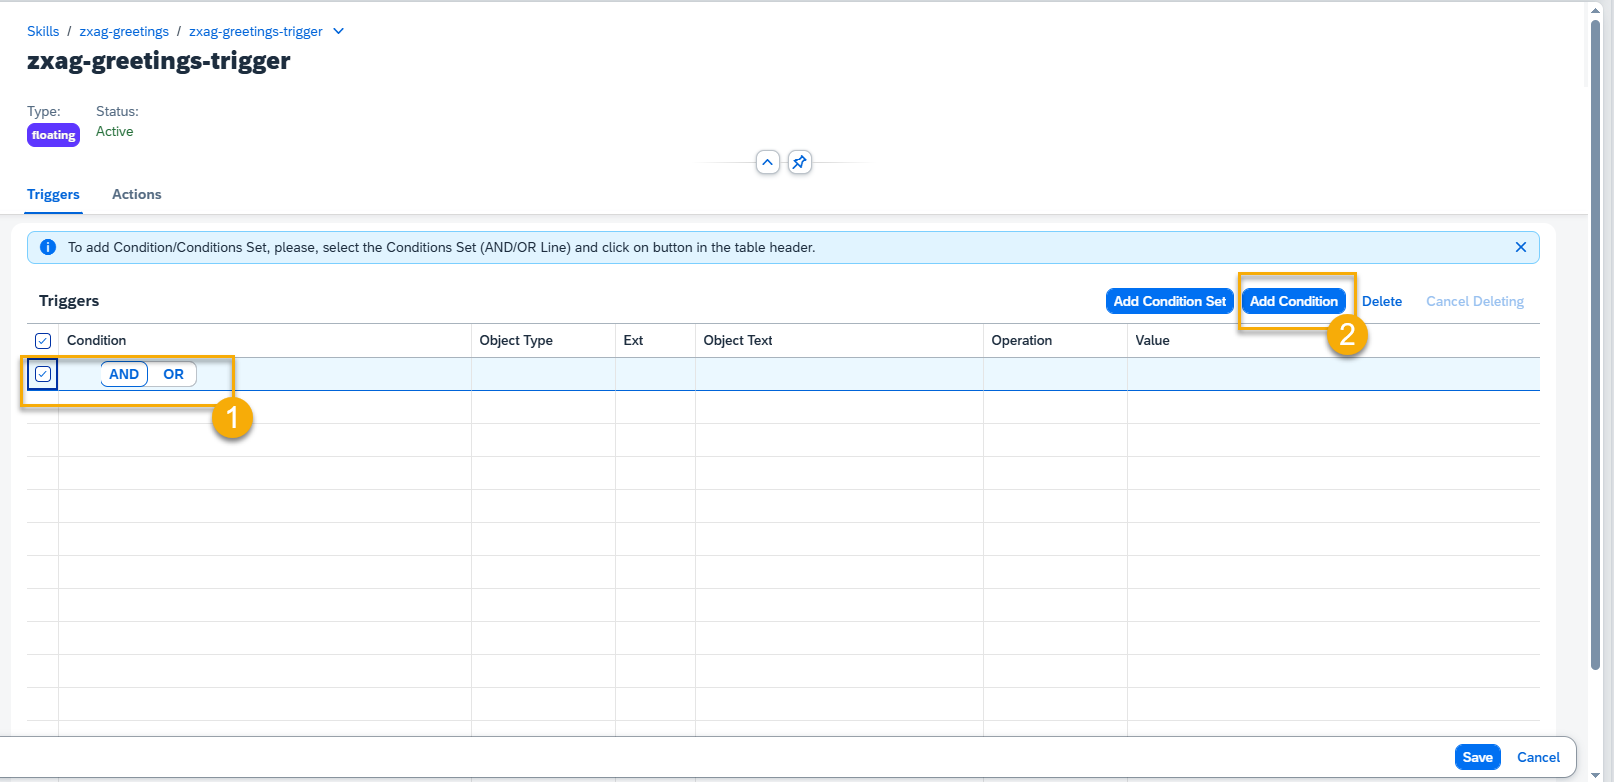
Step 6. To add Condition to Condition Set, select your condition, choose between AND/OR and press Add Condition button.
Step 7. Select the Object Type, Object Text, Operation, and add value if needed. Press the Save button.
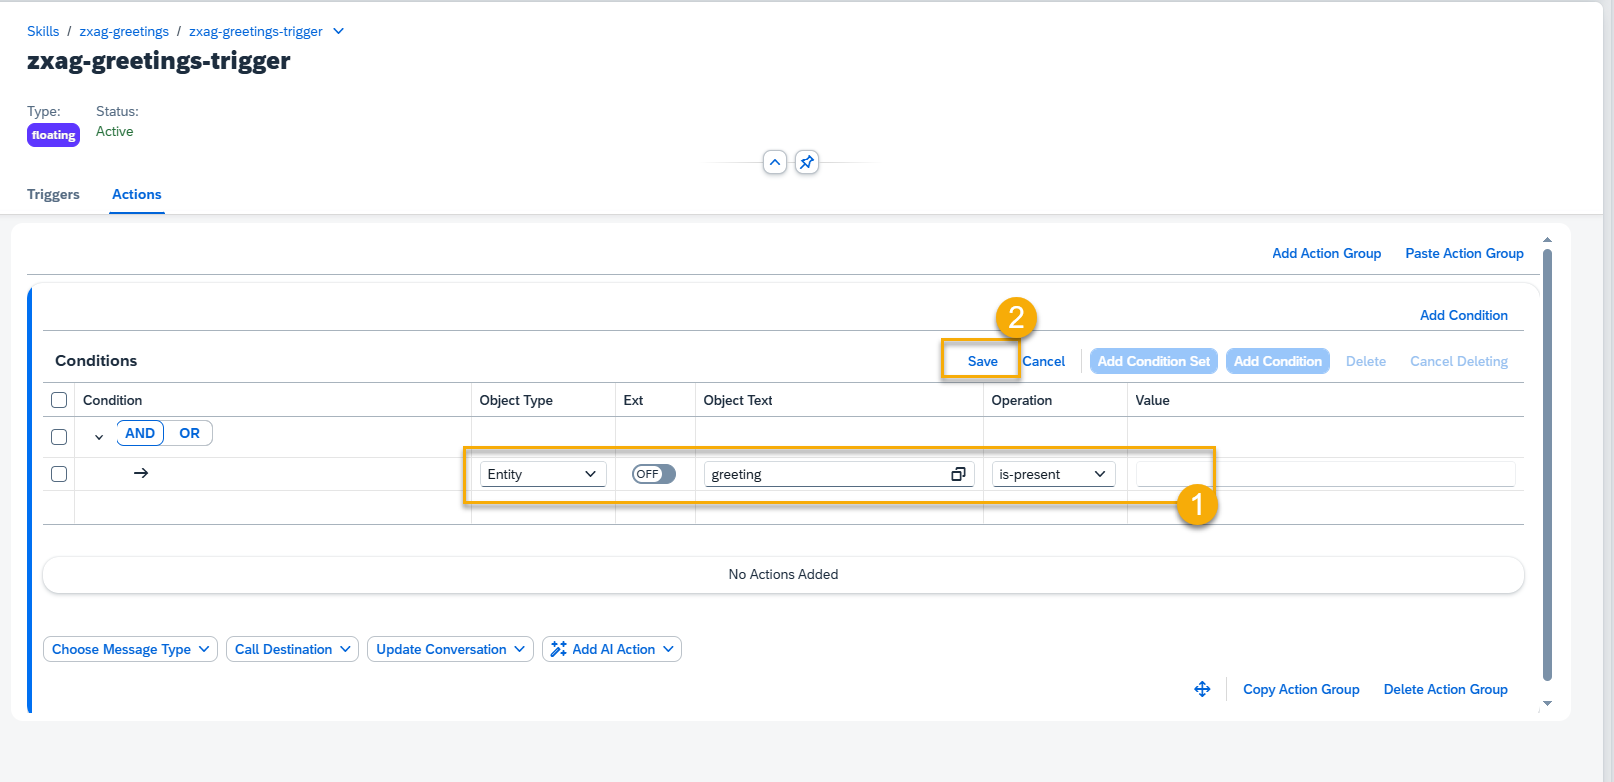
Object types to choose from: Entity, Intent, Memory, Sentiment.
NOTE: By default, Entity and Intent objects types should be selected from the list of existing ones. Switch the value in Ext field to On for manual data entry.
Sentiment object allows working with Negative, Positive, and Neutral sentiments.
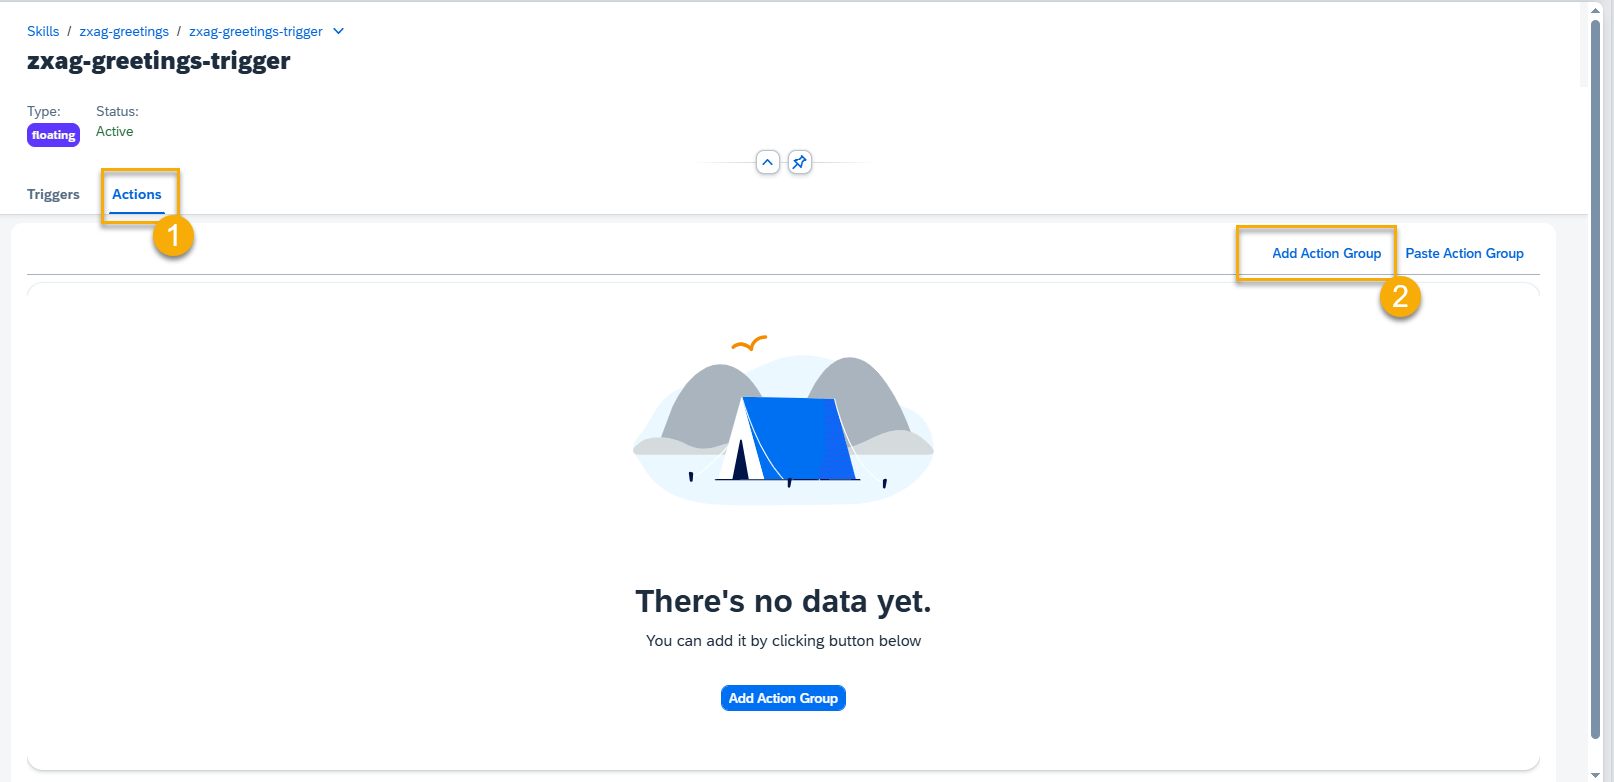
Step 8. Go to the Actions tab to create an action for your skill and press the Add Action Group button.
Step 9. Here you can add conditions to your Action Group and create different action types.
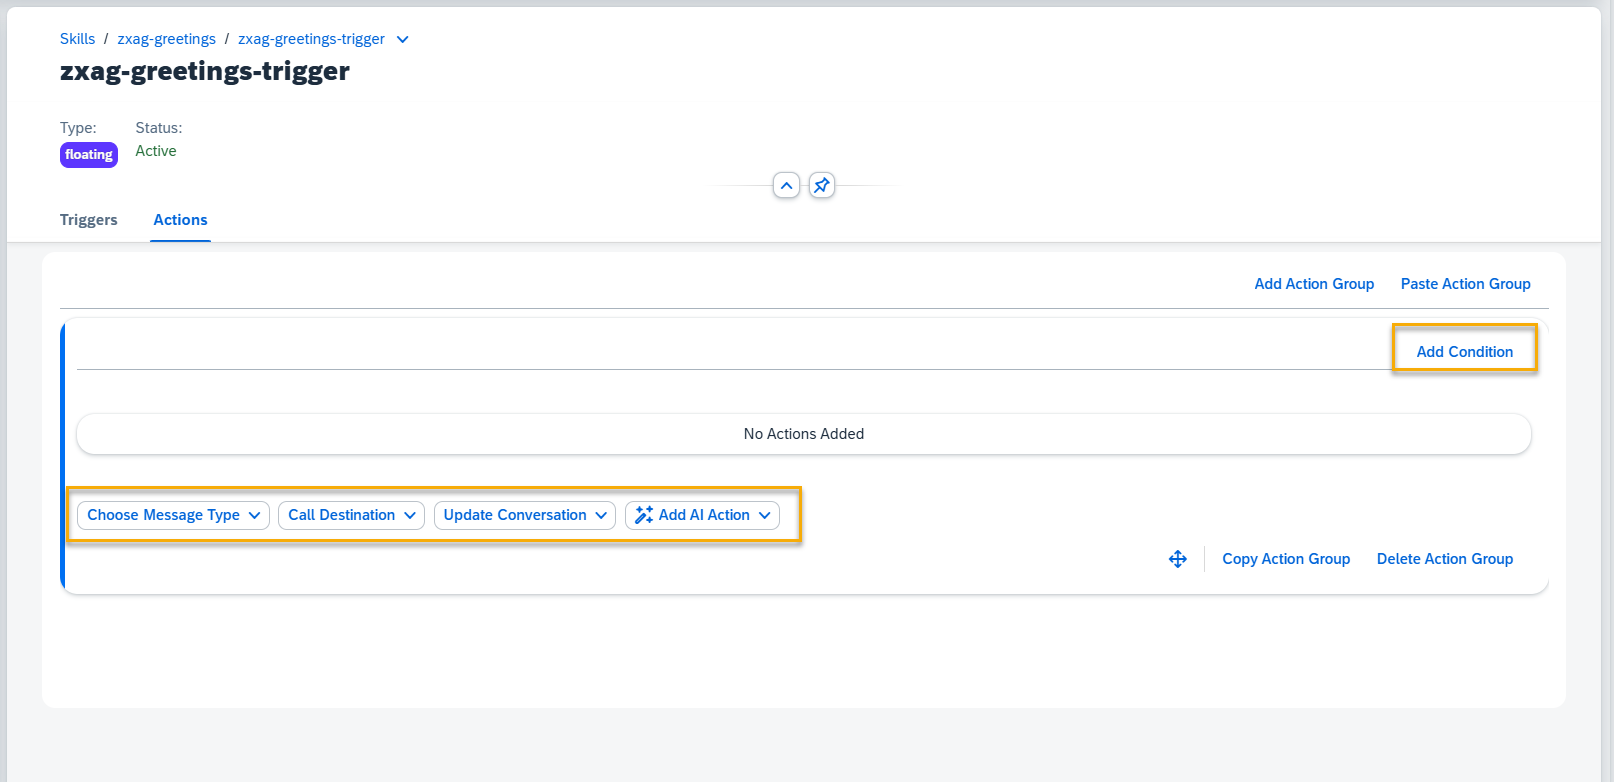
Visit the following sections to see how to add different types of actions:
Conversation Flow and Memory Actions
Step 10. Move, Edit, Delete Action
Use the Edit button to switch to the edit mode.

To move an Action within an Action Group, hold down the move button with the left mouse button and drag it to a new position.
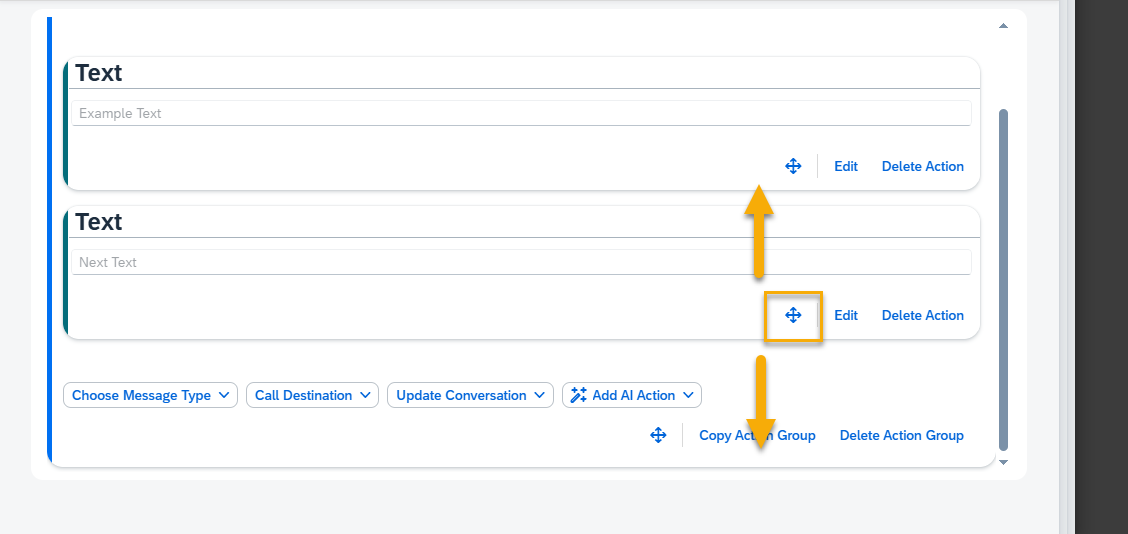
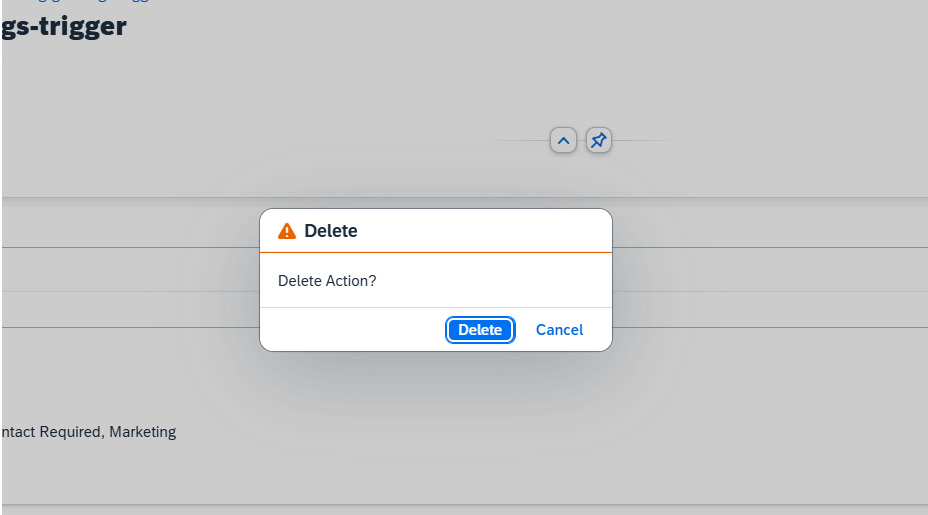
To delete the Action from the Action Group, press the Delete Action button and confirm.
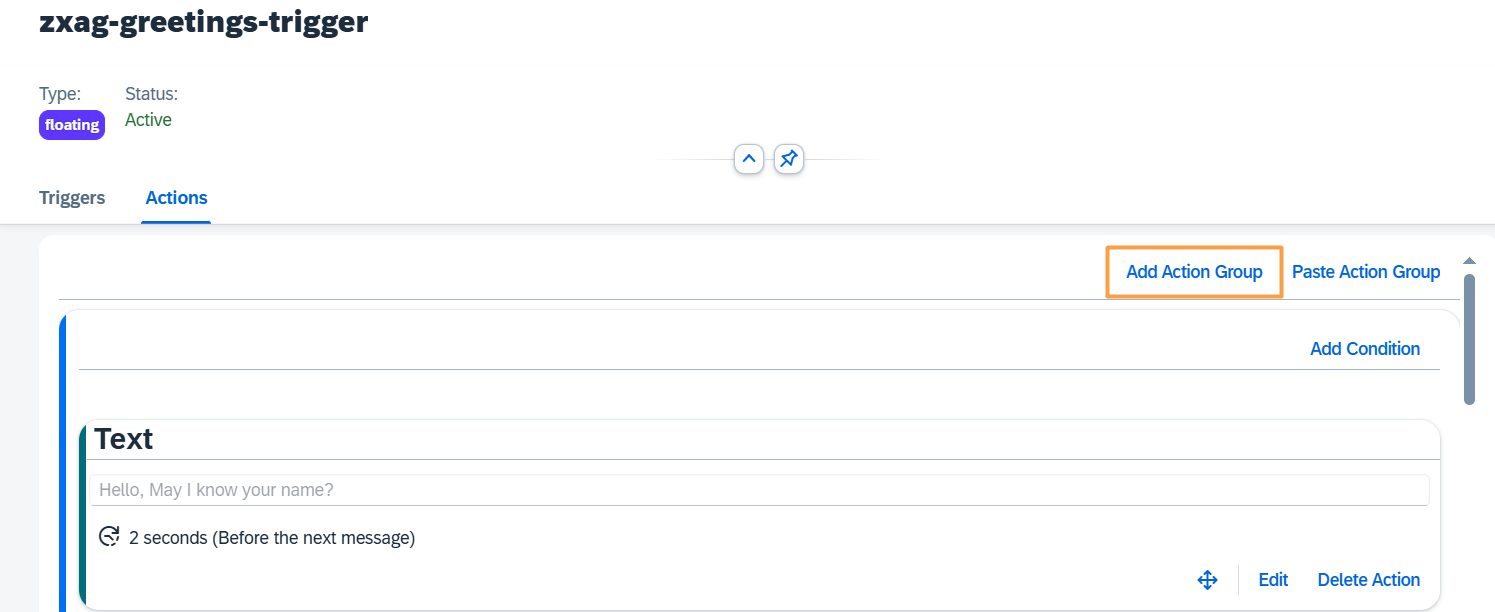
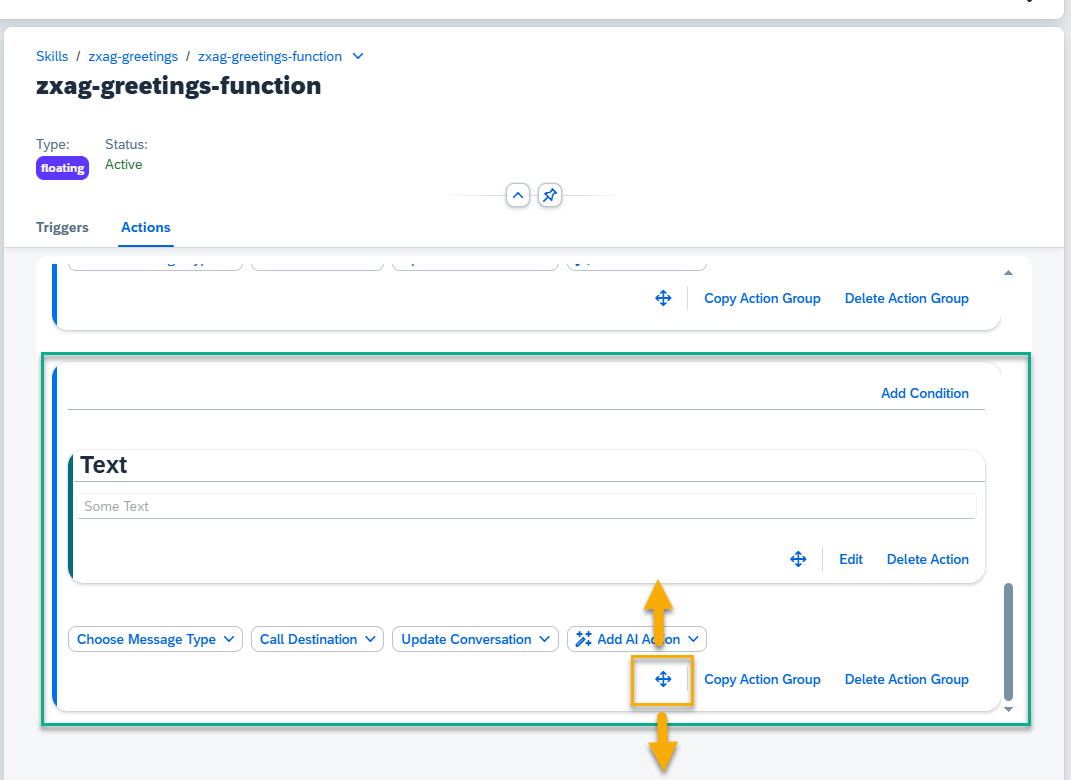
Step 11. Manage Action Group
To create a new Action Group, press the Add Action Group button on the top of the skill Actions tab.
At the bottom of each Action Group, there are buttons to Move, Copy Action Group and Delete Action Group.
Move Up/ Down – press the Move button, and drag the action group up or down. Hoover just over the top edge of the actions field to scroll up while dragging up. Similarly for scrolling down.
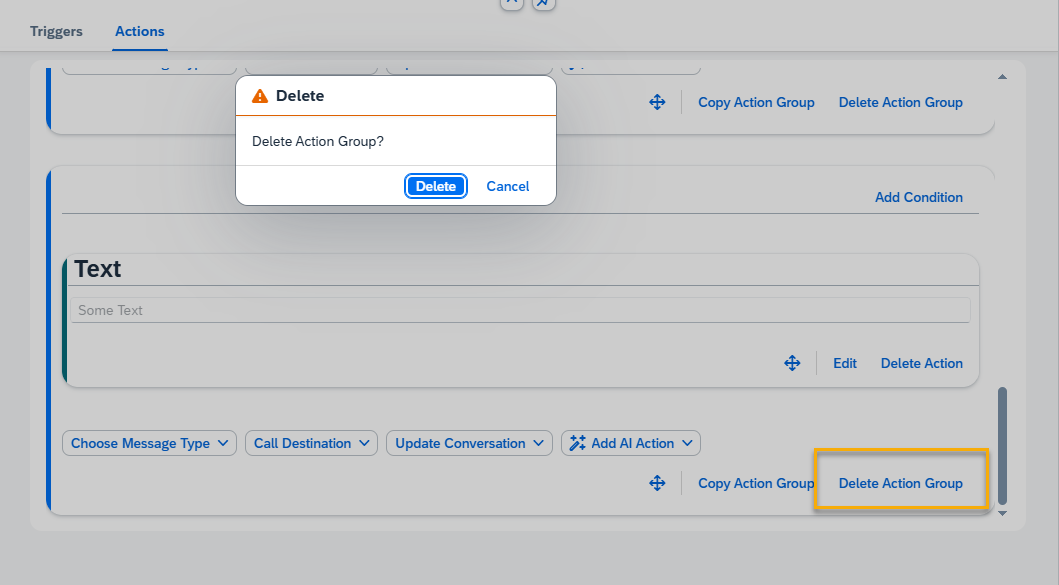
Delete Action Group – remove a complete action group, together with action blocks inside. Press the Delete button.
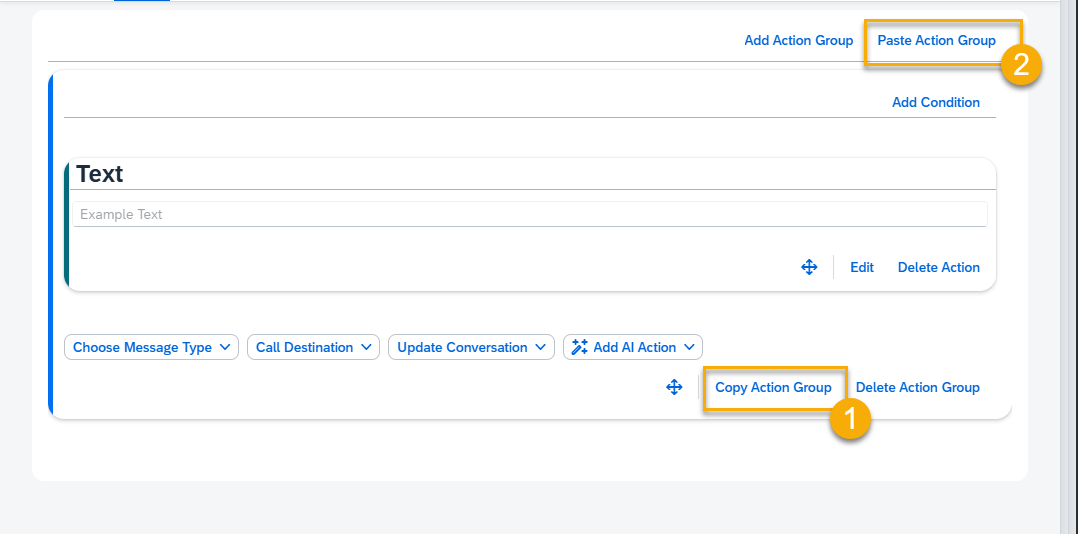
Copy Action Group – press the Copy button.
Next, press the Paste Action Group button located at the top. Now the copied group will appear at the bottom of the page.
Step 12. Handlebars
Handlebars helpers allow you to format and process data dynamically within skills. You can use them to perform calculations, adjust text, or compare values directly in messages and conditions.
Templates: https://help.sap.com/docs/conversational-ai/concepts-of-sap-conversational-ai/scripting-syntax
| Helper Name | Helper | Description |
| add | {{add valueA valueB}} | Returns a number after the execution of the arithmetic function. Add |
| multiply | {{multiply valueA valueB}} | Returns a number after the execution of the arithmetic function. Multiply |
| uppercase | {{uppercase string}} | Transforms all characters in the string to uppercase letters |
| lowercase | {{lowercase string}} | Transforms all characters in the string to lowercase letters. |
| occurrences | {{occurrences string substring}} | Searches for “substring” in “string” and returns the number of occurrences. |
| length | {{length string}} | Returns the length of the string. |
| eq | {{#eq valueA valueB}} … {{else}} … {{/eq}} | Evaluates if both values provided are equal (eq). |
| or | {{#or expressionA expressionB}} … {{/or}} | Returns the “…”-value if one of the given expressions is resolved to True. |
| and | {{#and expressionA expressionB}} … {{/and}} | Returns the “…”-value if both of the given expressions resolve to True. |
| not | {{#not expression}} … {{/not}} | Returns the “…”-value if no given expressions resolve to True. |
| compare | {{#compare valueA operator valueB}} … {{else}} … {{/compare}} | Compares “valueA” with “valueB” using a JavaScript operator as “operator” (for example, “===” or “<=”). |
| formatDate | {{formatDate date pattern timezone/utc-offset}} | The date helper returns the provided “date” formated with the provided “pattern” converted to the provided “timezone” or “utc-offset”. {{formatDate date pattern timezone/utc-offset}} The date value can have the following formats: /Date(1338282808000)/ 1992-01-01T00:00:00 2021-01-01T20:15:00+02:00 01-31-2000 (Month/Day/Year) Examples of date pattern: “DD-MM-YYYY” “MM-YYYYZ” “DD-MM-YYYY – HH:mm” “DD.MM.YYYY HH:mm Z” Example from action: {{formatDate memory.rt_date “DD-MM-YYYY”}} |
| parseArray | {{parseArray array}} | The parseArray helper in Handlebars is used to transform an array of elements into a single string. |
| gte | {{#gte valueA valueB}} … {{else}} … {{/gte}} | Evaluates if “valueA” greater than or equal to “valueB” (gte). |
| gt | {{#gt valueA valueB}} … {{else}} … {{/gt}} | Evaluates if “valueA” greater than “valueB” (gt). |
| lte | {{#lte valueA valueB}} … {{else}} … {{/lte}} | Evaluates if “valueA” is lower than or equal to “valueB” (lte). |
| lt | {{#lt valueA valueB}} … {{else}} … {{/lt}} | Evaluates if “valueA” is lower than “valueB” (lt). |
| modifyDate | {{modifyDate addYears/Months/Days/Hours/Minutes/Seconds=number}} | Modifies an existing date by either adding the number of seconds / minutes / hours / days / months or years. |
More information about handlebars: https://handlebarsjs.com/guide/