Office 365 Shared Mailboxes (IMAP) Integration
This guide describes how to integrate Office 365 inbound email with Skybuffer AI.
The guide covers all configuration steps required in Microsoft Entra ID (formerly Azure Active Directory) and Exchange Online to ensure that the application has access only to the mailboxes you explicitly authorize.
Prerequisites
Before starting the integration of Office 365 inbound email with Skybuffer AI, ensure the following requirements are met:
Microsoft 365 Tenant
You must have access to an active Microsoft 365 tenant with Exchange Online enabled.
Admin Permissions
You will need one of the following Microsoft 365 roles to complete the configuration steps:
- Global Administrator
- Exchange Administrator
- Azure AD Administrator
These permissions are required to register applications, assign permissions, and configure mailbox access policies.
Ability to Run Exchange Online PowerShell
Some parts of the configuration require running PowerShell commands. Make sure you can use the Exchange Online PowerShell module and authenticate with an admin account.
The setup uses the following commands:
- New-ApplicationAccessPolicy
- Test-ApplicationAccessPolicy
- Get-DistributionGroup
Identified Mailboxes for Integration
Decide which mailboxes (shared mailboxes or user mailboxes) the AI Agent should access.
These mailboxes will later be added to a dedicated security group.
IMAP Protocol Enabled (if applicable)
If IMAP will be used to retrieve emails, ensure that:
- IMAP is enabled at the tenant level
- IMAP is enabled for each mailbox you want to integrate
This can be verified in the Exchange Admin Center under mailbox settings.
Product Credentials
At the final step of the integration, you will need to provide the following values inside your product:
- Tenant ID
- Client ID
- Client Secret
- Mailbox address to be monitored
Step 1. Microsoft Entra ID (formerly Azure Active Directory) App Registration
Create a New Application
- Navigate to MS Entra ID
- Select App registrations.
- Click New registration.
- Enter a name (on this example: IMAP- test)
- Register the application.

Step 2. Assign Microsoft Graph API Permissions
Add Required Permissions
- In the application, go to API permissions.
- Click Add a permission.
- Select Microsoft Graph.
- Choose Application permissions.
- Add the necessary permissions.

In order to apply permissions click Grant admin consent for Skybuffer AS.
Step 3. Create a Client Secret
- Open the application you created.
- Select Certificates & secrets.
- Click New client secret.
- Save the generated secret value for later use.

Step 4. Create a Security Group for Allowed Mailboxes
Create the Group
- Go to Microsoft 365 Admin Center.
- Navigate to Groups.
- Click Add a group.
- Select Security group.
- Provide a group name (for example: Azur App Allow).
- Add a group email.


Step 4. Retrieve the Security Group SID and Create the Application Access Policy
Use Exchange Online PowerShell
Run the following command:
Get-DistributionGroup | Select-Object Name,Guid,SID
Locate your newly created group and copy its SID.
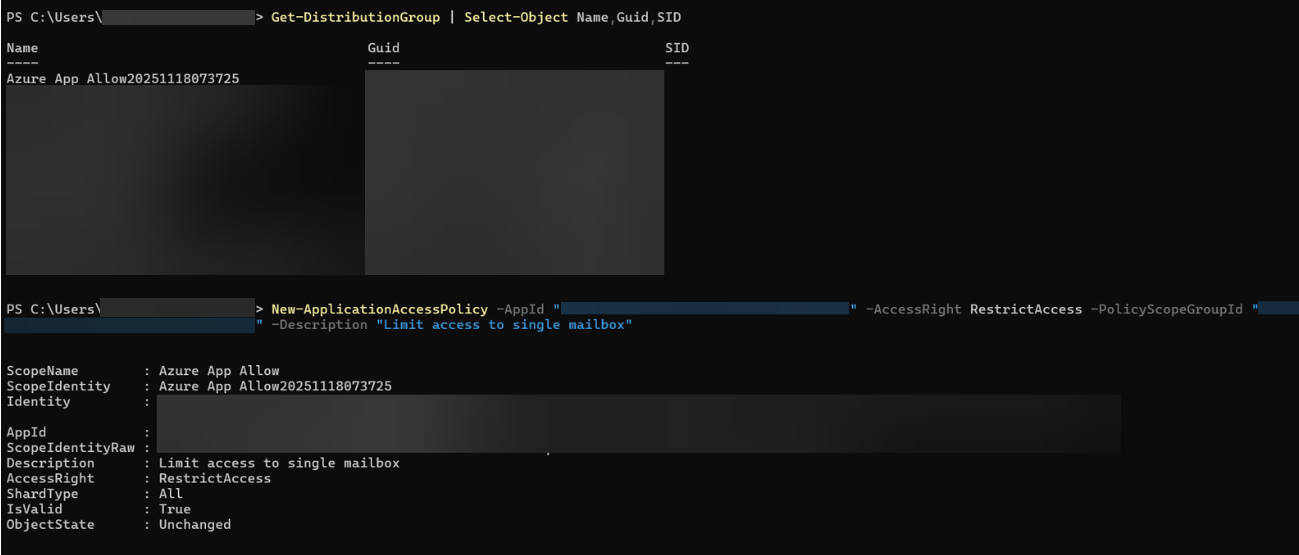
Create the Application Access Policy
Apply Access Restriction Policy
Replace:
- YOUR-APP-ID with the Azure AD Application Client ID
- YOUR-GROUP-SID with the SID of the security group
Run:
New-ApplicationAccessPolicy `
-AppId “YOUR-APP-ID” `
-AccessRight RestrictAccess `
-PolicyScopeGroupId “YOUR-GROUP-SID” `
-Description “Limit access to single mailbox”
This ensures the application can only access mailbox inside the designated group.
Step 6. Verify Mailbox Access
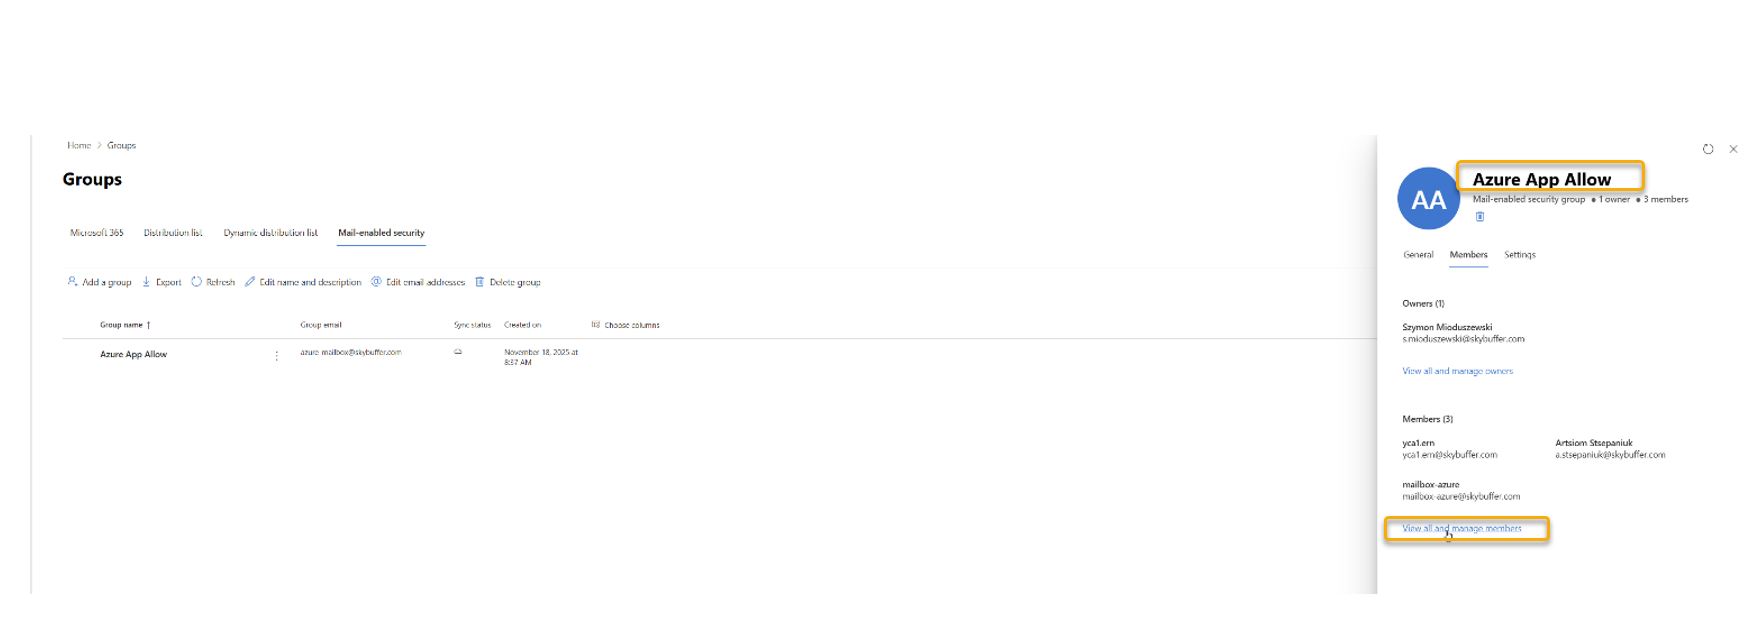
Return to your group Azure App Allowed and assign members by clicking Members -> View all and manage members
Test Access to a Mailbox
Use this command to verify access:
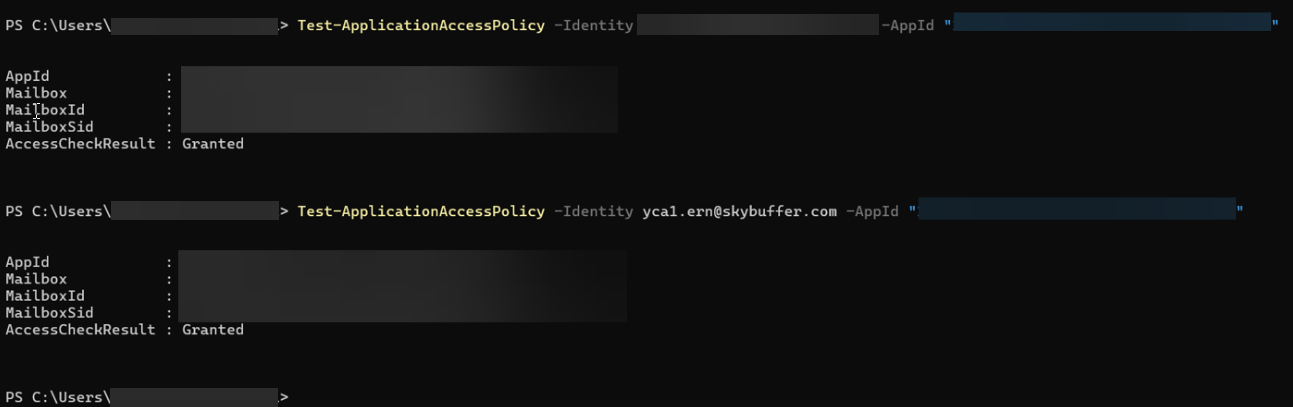
Test-ApplicationAccessPolicy `
-Identity mailbox@yourdomain.com `
-AppId “YOUR-APP-ID”
Expected result:
- Mailbox is in the security group: Granted
- Mailbox is not in the group: Denied
Step 6. Review Existing Policies
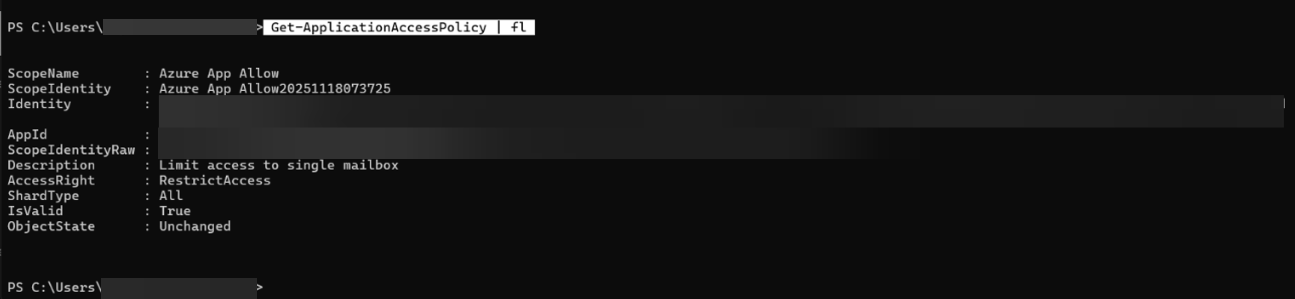
Use this command to see Application Access Policy:
Get-ApplicationAccessPolicy | FL
Step 7. Troubleshooting
Issue: Application cannot access a mailbox
- Ensure the mailbox is a member of the security group.
- Re-run Test-ApplicationAccessPolicy to confirm.
- Verify that IMAP is enabled for the mailbox.
Issue: Access Denied during IMAP login
- Confirm admin consent was granted for IMAP.AccessAsApp.
- Ensure the application’s client secret has not expired.
Issue: Policy not applied
- Confirm you used the correct group SID, not the GUID.
- Verify the AppId matches the Azure AD application’s Client ID.