The Fiori Launchpad Chat Plugin enhances the SAP Fiori Launchpad with an integrated AI-powered chat assistant.
Key Features
1. Custom UI Control
The plugin is built using a custom SAPUI5 control called AiDialog, located in the controls directory. This control is responsible for managing the chat interface and handling user interactions.
2. Dynamic Messaging
The chat supports both user-generated and AI-generated messages with flexible formatting options. It allows multiple message types, with text messages rendered via Markdown-to-HTML conversion and displayed using sap.m.FormattedText (htmlText).
Supported Markdown elements include headings, bold and italic text, links, inline code and code blocks, ordered and unordered lists, and line breaks.
Note: Markdown tables are not rendered as HTML tables—they appear as list items instead.
3. Cross-Application Navigation
The plugin enables navigation across SAP Fiori applications. URLs starting with # trigger internal navigation within the Launchpad (e.g. #SalesOrder-display?ObjectKey=123), while external URLs (without #) open in a new browser tab.
4. Adaptive Cards Support
The plugin supports Microsoft Adaptive Cards for rendering rich, structured messages. Cards are processed using the formatAdaptiveCard function and rendered via widgets:Card. This enables advanced UI elements such as forms, layouts, and interactive components.
Supported Message Types
The plugin currently supports the following message types:
- Text – Markdown-rendered messages displayed via sap.m.FormattedText
- Buttons – Supports multiple interaction types:
- web_url: internal navigation (URLs starting with #) or external links (open in a new tab)
- postback: sends predefined responses to the chatbot
- trigger_skill: triggers specific chatbot skills or workflows
- Media & Structured Content:
- picture: displays images
- quickReplies: provides selectable quick response options
- card: displays structured card content
- carousel: displays multiple cards in a scrollable view
- list: displays structured lists
- Client Data:
- client_data (adaptive_card): enables Adaptive Card rendering
- Adaptive Card – native support for Microsoft Adaptive Cards
Incomplete Message Type Support
The following message types are not yet implemented:
client_data: calendar, client_data: close_chat
Channel Creation
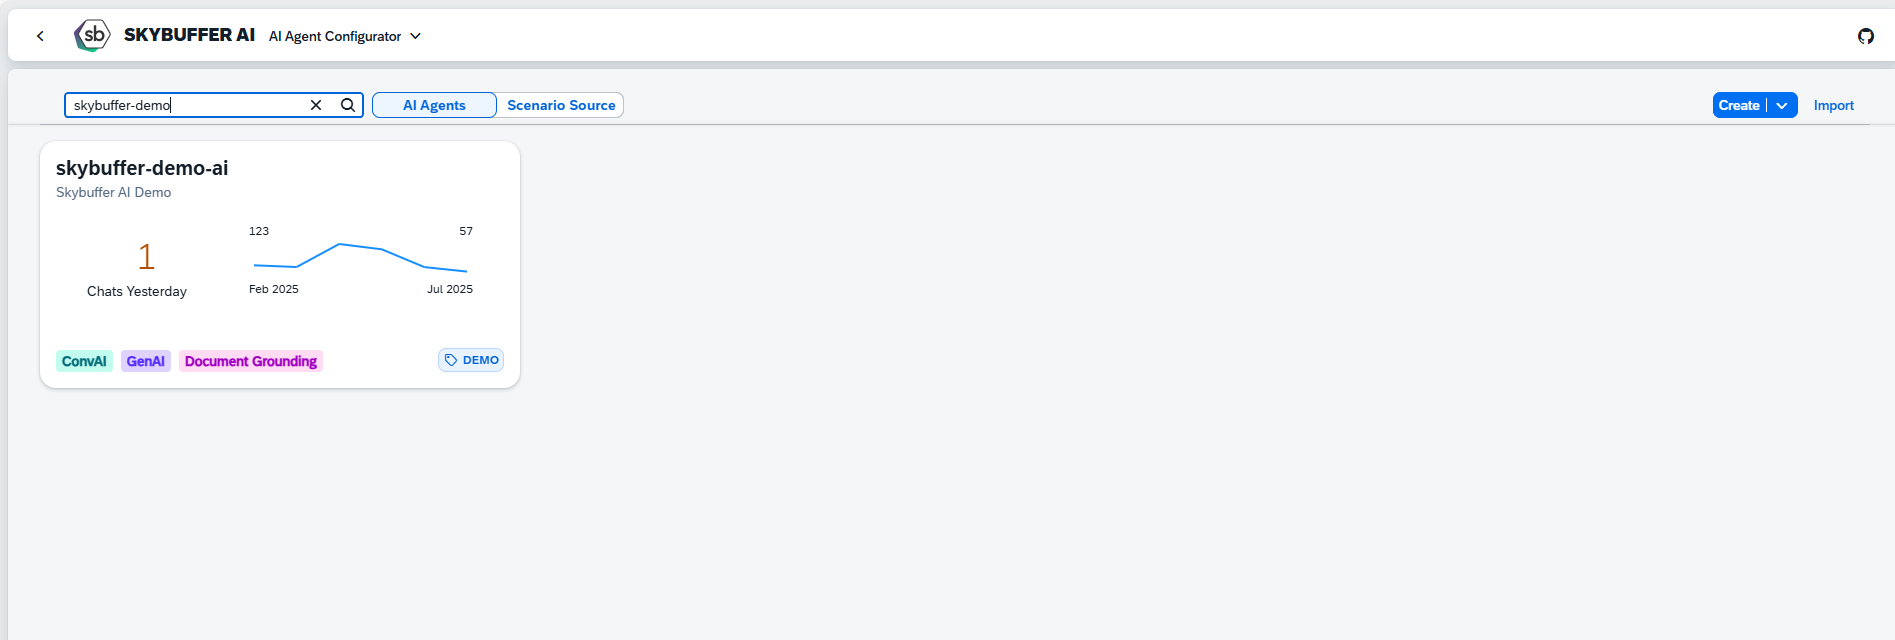
Step 1. Open the AI Agent Configurator application in the AI Agent group.

Step 2. After opening the application, you will see a screen displaying all available AI Agents. Each tile represents one Agent, including its name, description, and deployment status. Click on the Agent you want to work with to proceed.
Step 3. Open the Channel management application- Communication Channels.
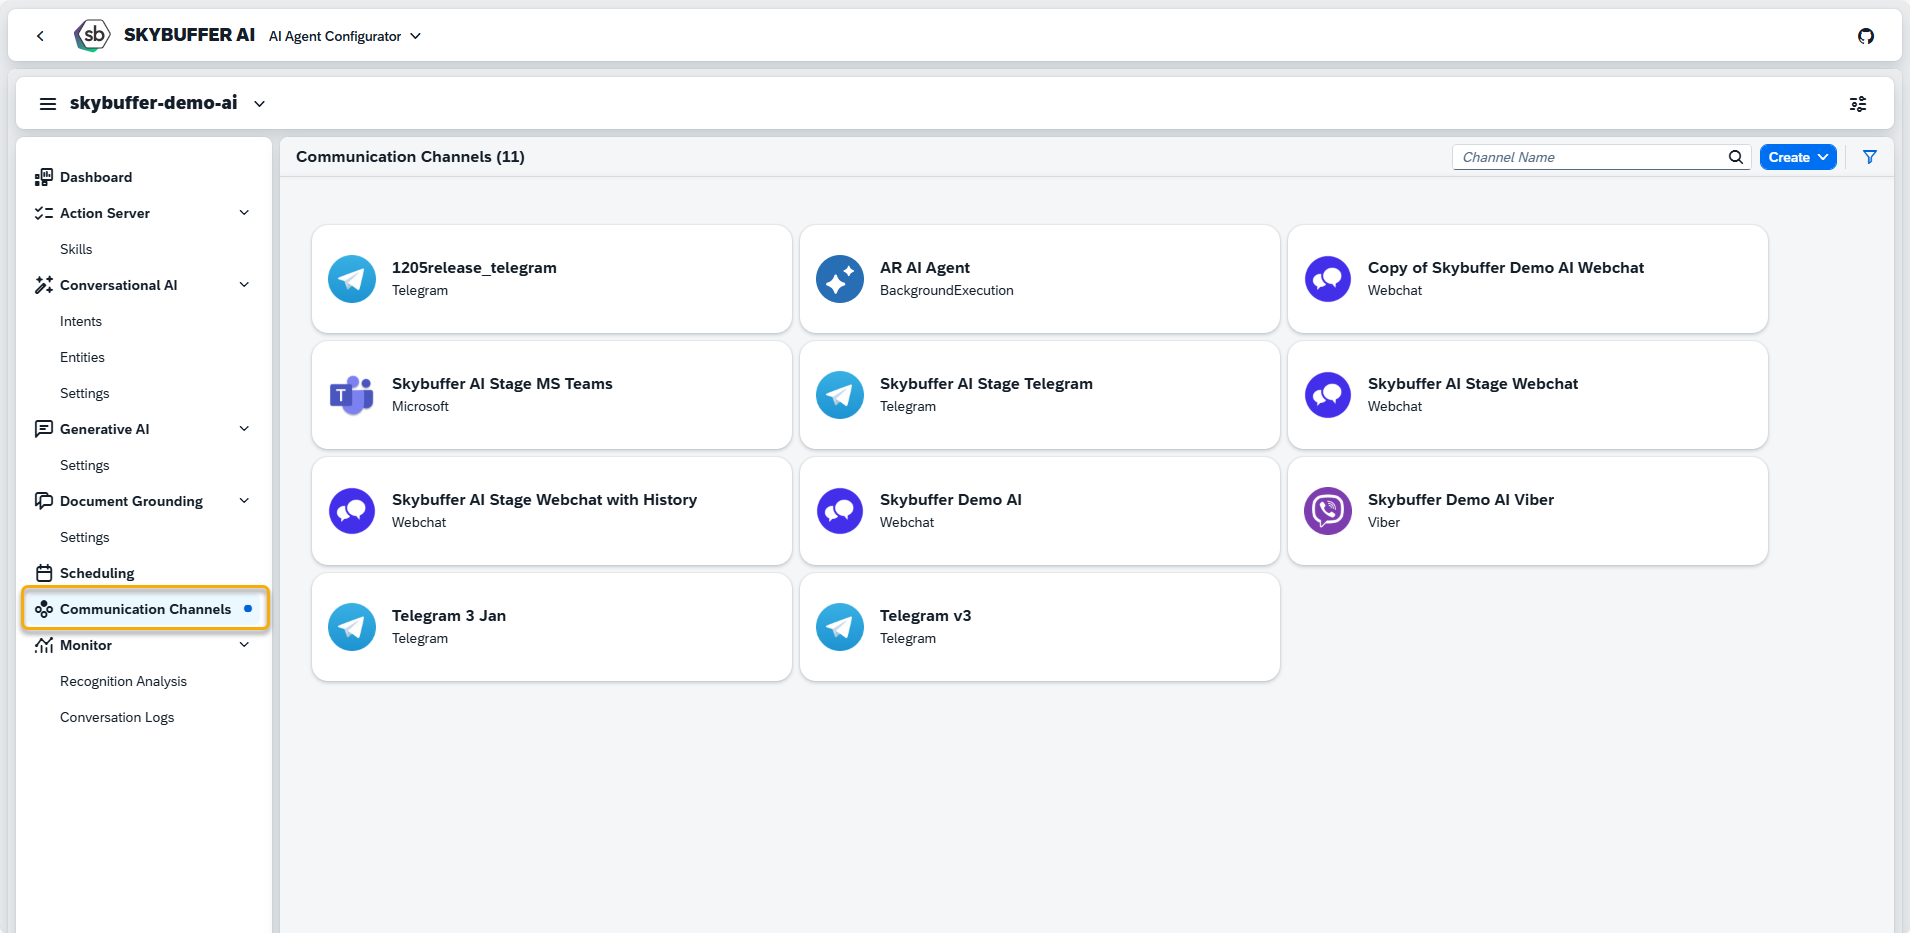
Step 4. Channel creation.
You can create a new Channel from scratch or Copy the Existing Channel.
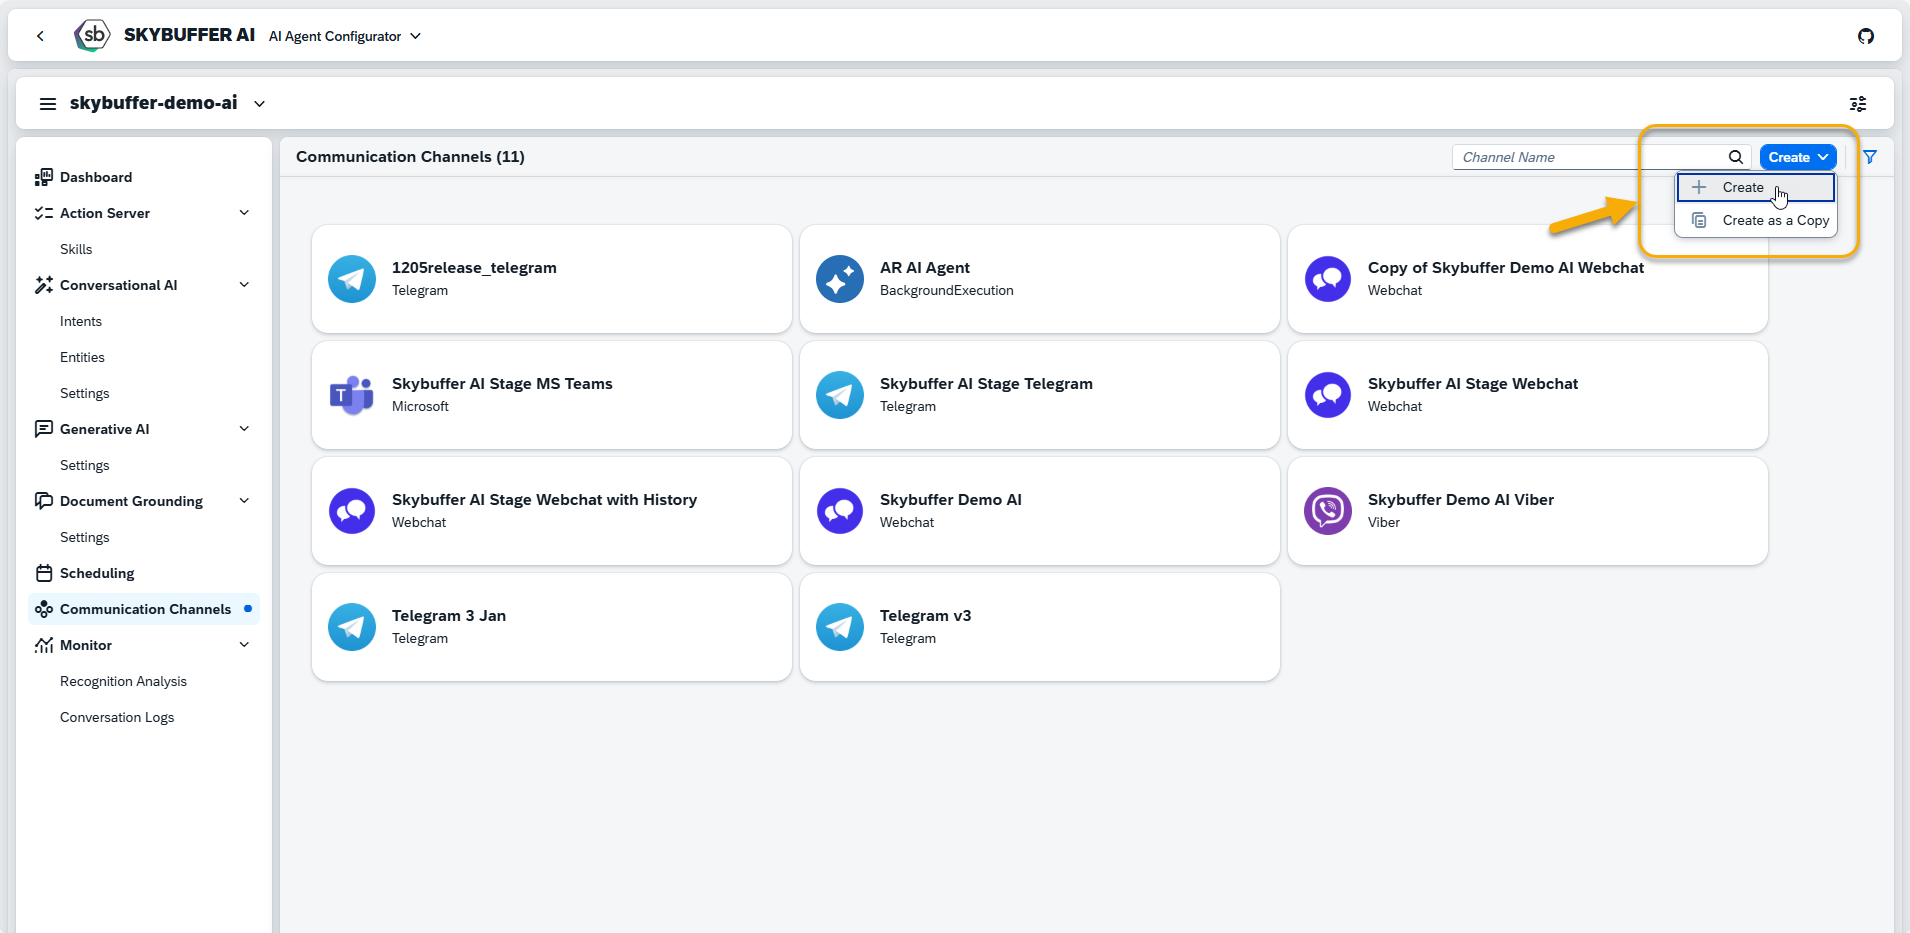
To create a new Channel, click the Create button:
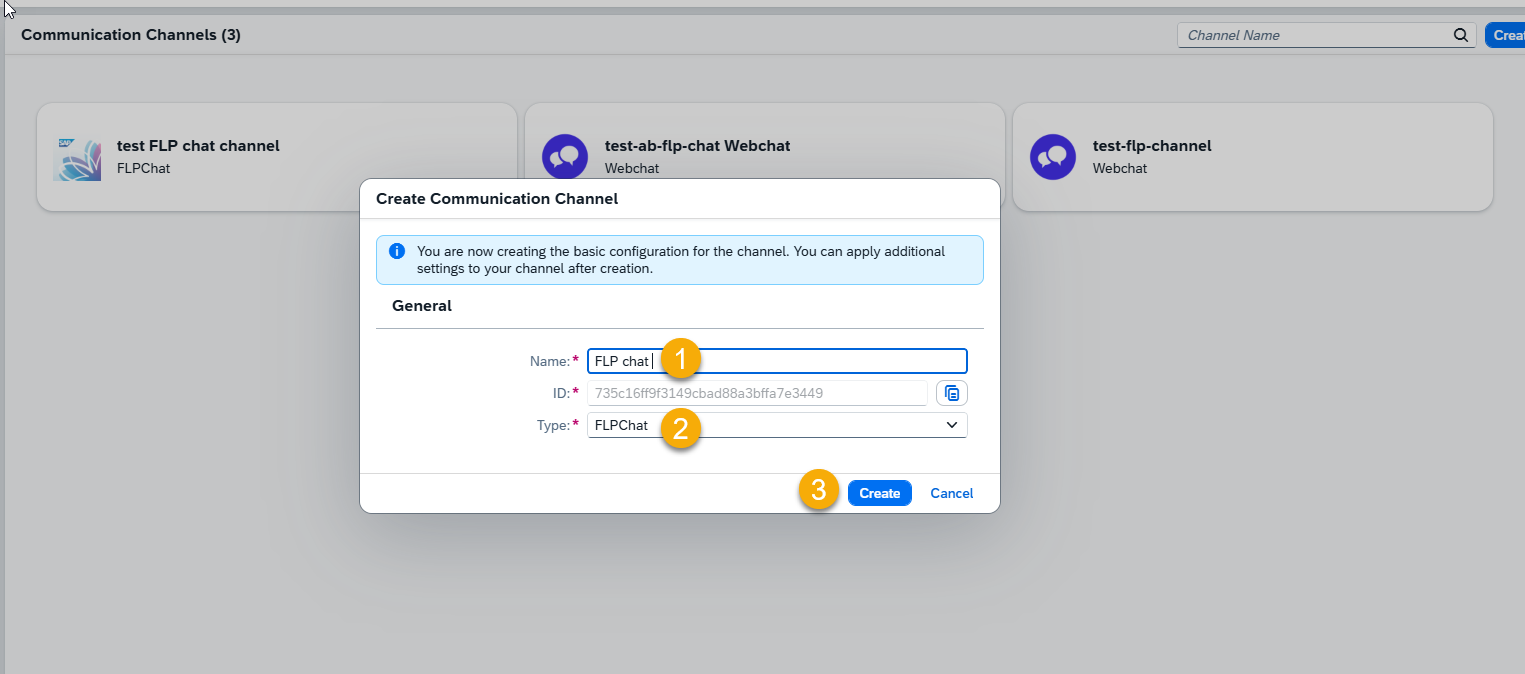
Step 5. Initial Parameters
Fill in the initial parameters for the new Channel. The form includes:
- Channel Name — follow your organization’s naming convention.
- Channel ID — this field is auto-generated.
- Channel Type — select from a list of available types (e.g., Webchat, Microsoft, Telegram).

Step 6. Channel Settings.
To configure additional Channel Settings for your FLP Chat Channel, click the Edit button.

Survey
Survey ID — select a previously created survey form from the drop-down menu.
NOTE: Surveys must be created in the Survey Craft application.
Send Survey Automatically — choose either Off or When chat ended.
Identity Provider
Identity Provider Application: choose the Identity Provider application from the list. This must be configured beforehand in the Identity Providers Application (see: Identity Providers)
Memory Retention Policy
Retention time — specify the number of days for which chat data will be stored. After this period, the system automatically deletes stored conversation data according to your retention rules.
Communication Protocol
FLP Chat uses WebSocket as its communication protocol to support real-time, bidirectional messaging between the Fiori Launchpad and the backend services.
NOTE: The WebSocket protocol is required for the FLP Chat channel and can only be used if the WebSocket server is running. Activate it by setting ‘Enable WebSocket Server’ to ‘X’ in the AI Connector Configurator and restarting the application.
Step 7. Tools Activation
Once your Channel is created, you can activate or deactivate tools defined within your AI Agent.
For more information, visit: Tools Activation.
Step 8. Destination Assignment
This setting allows you to assign destinations to tools that have backend-connected actions.
For more information, visit: Destination Assignment.
Step 9. Access Your FLP Chat
To access your FLP Chat, access your Fiori Launchpad.
After logging in, click the chat icon in the Fiori Launchpad to open the chat interface.

Setting Up the Connection to the AI Model
To enable the FLP Chat channel on the backend, you must maintain its configuration in the SAP Object Navigator.
Step 1. Open Object Navigator (SE80)

Step 2. Navigate to the configuration table: /SKYBFR/YAIC_LVL
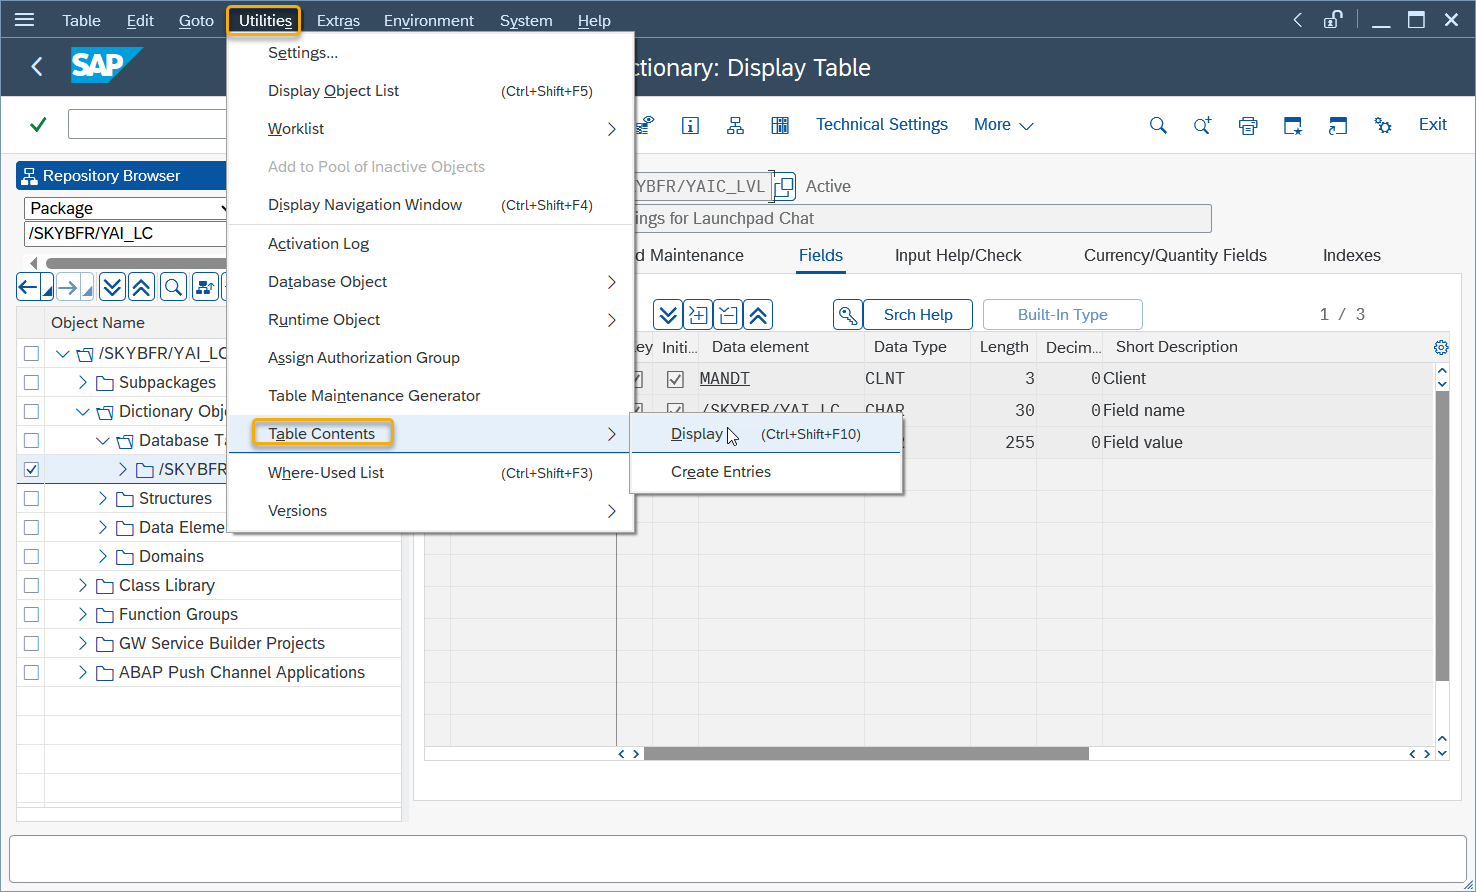
Step 3. Locate the row corresponding to your Channel ID

Maintain the following fields:
CHANNEL_ID — the identifier of the FLP Chat channel that you configured in the UI.
WSS_URL — the WebSocket Secure endpoint used for real-time communication.
This URL must point to the active WebSocket server instance.
The backend uses this entry to link the FLP chat front-end configuration with the WebSocket messaging infrastructure.
External API Integration
The plugin provides a public API that allows other Fiori applications to interact with the chat.
Key capabilities:
- Send messages to the chat from external applications
- Open or control the chat dialog programmatically
- React to chat lifecycle events via EventBus
The API is exposed via the global object: window.SkybufferAiChat
Post-Installation Activities
After transporting and configuring the Fiori Launchpad Chat Plugin and ABAP Push Channel, the following steps must be completed to ensure proper functionality.
Step 1. Activate Required Services
To enable the plugin and ensure correct backend communication, you must activate the necessary services in transaction SICF.
Activate the following services:
/sap/bc/ui5_ui5/skybfr/yai_lc
(UI5 application service)
/sap/bc/bsp/skybfr/yai_lc
(BSP application service)
/sap/bc/apc/skybfr/yai_lc_flp
(ABAP Push Channel WebSocket service)
Any additional services within the /skybfr namespace, depending on your specific implementation scenario
Activation Procedure.