Email Post-Processing Action
This action updates the status of processed emails, extracts selected properties into memory for further use, and can automatically notify the sender when processing is complete.
Step 1. Create a Email Post-Processing Action by pressing the button Process Data at the bottom of an Action Group:

Step 2. A new Email Post-Processing Action will appear and be ready to be filled in. Let’s set up this block step by step.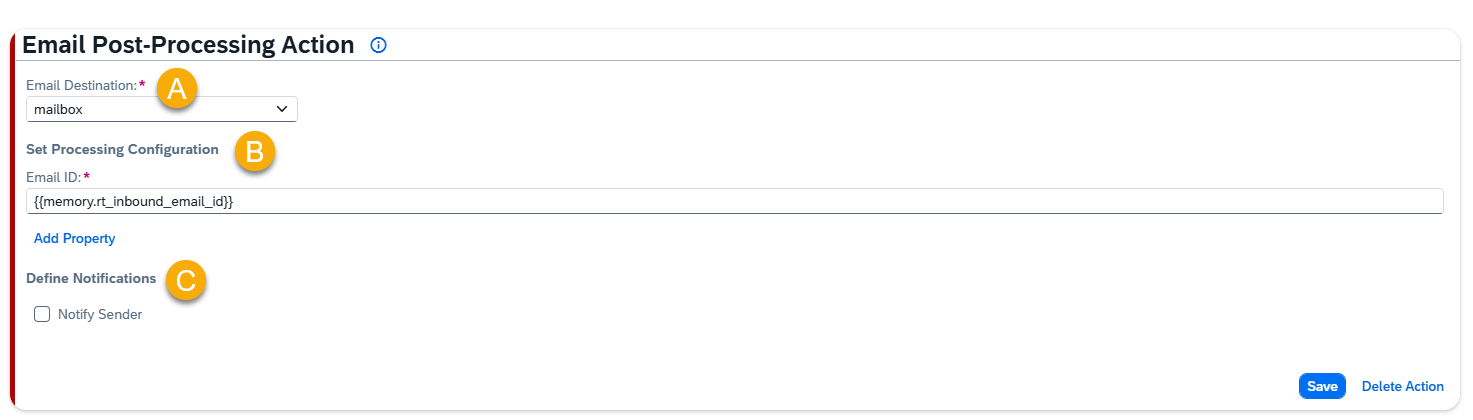
A – Email Destination
Select the Email Destination (created in Models Hub) to determine which emails will be post-processed.
B – Set Processing Configuration
Email ID
Select the memory parameter that contains the Email ID you want to post-process.
Use Add Property to create a new condition row.

Each row allows you to select a Property to be Updated, define its Property Requirement (whether the parameter is mandatory for setting the Processed status), and assign a Value where the extracted data will be stored for future processing.

Examples:
• Property: Object in SAP Type → Value: {{memory.rt_object_in_sap}}
• Property: Object ID → Value: {{memory.rt_object_id}}
• Property: DMS Link → Value: {{memory.rt_dms_link}}
NOTE: Each property type can be used only once.
C – Define Notifications
Define Notifications
Enable Notify Sender if the sender should receive an automated message after post-processing is complete.
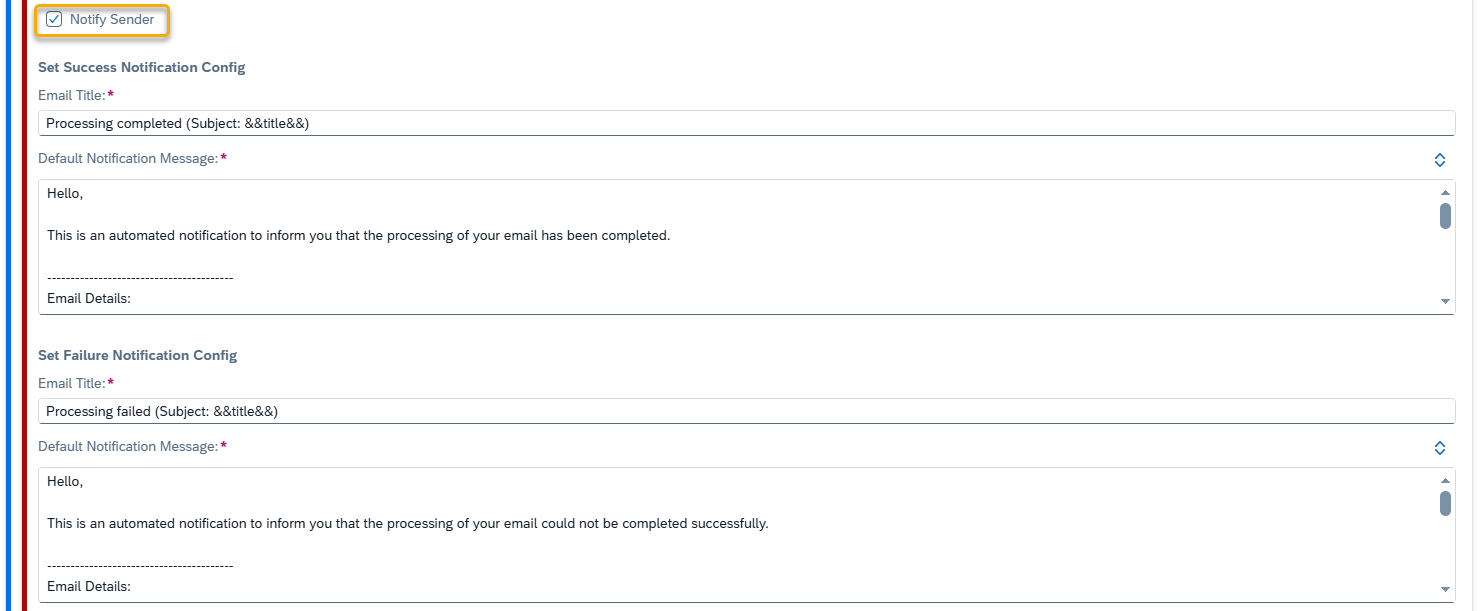
Set Success Notification Config
Email Title
Enter the subject line of the notification email. Supports variables such as &&referenceId&&.
Default Notification Message
This is the message body sent to the email sender.
Set Failure Notification Config
Email Title
Enter the subject line of the notification email. Supports variables such as &&referenceId&&.
Default Notification Message
This is the message body sent to the email sender.