These actions control how your AI Agent presents information and interacts with users – from simple text replies to dynamic cards, images, and lists that make conversations more interactive and intuitive.
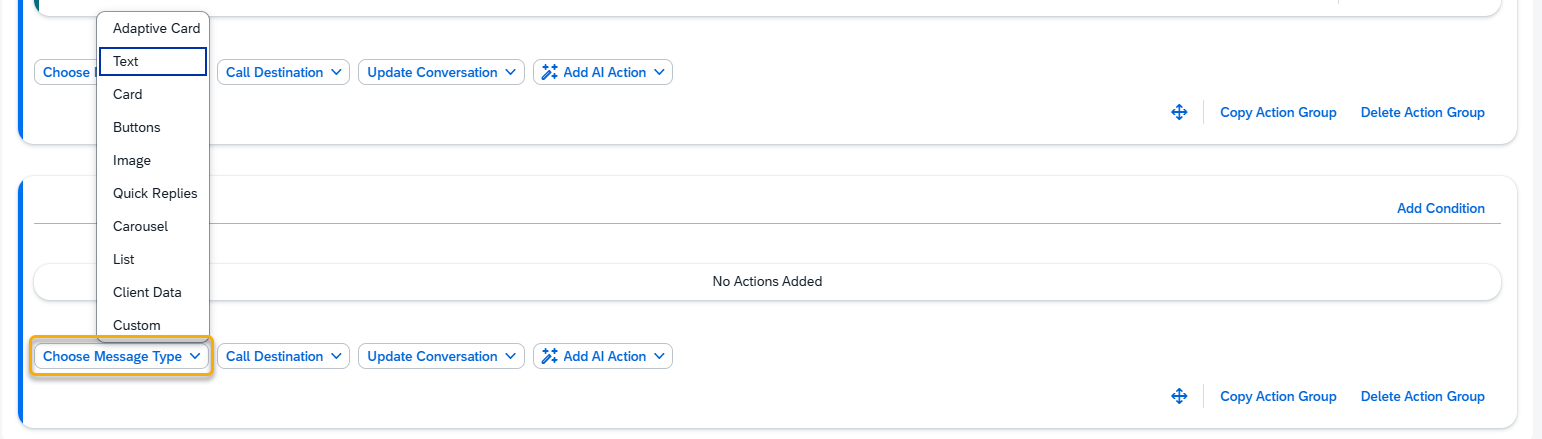
In order to work with actions from this section, press the Choose Message Type button and select the action you would like to add.
Text
The Text action allows you to display a simple text message within the conversation. It’s ideal for providing responses, instructions, or contextual information.
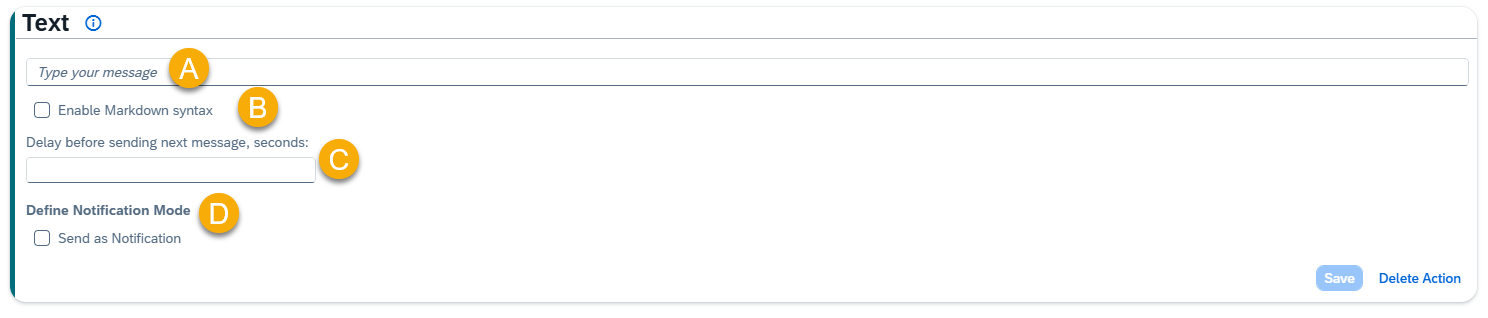
A – Type your message
B – Enable Markdown Syntax
Check this option if you would like to format your message using Markdown (e.g., bold, italics, links, or lists).
C – Delay Before Sending Next Message (seconds)
Specify how long the AI Agent should wait before sending this message to the user.
D – Define Notification Mode
Enable Send as Notification option if you want the message to be sent as a notification to a selected recipient.
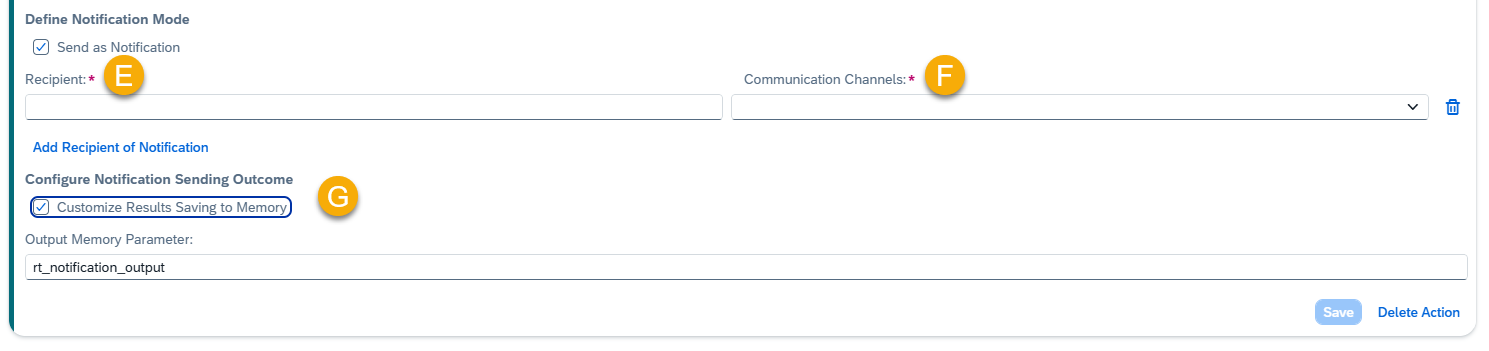
E – Recipient
Use a reference value that contains a recipients list. Example: {{memory.rt_recipients_list}}.
F – Communication Channels
Choose the channels through which the notification should be delivered.
G – Configure Notification Sending Outcome
Customize Results Saving to Memory – when selected, you can adjust the default memory parameters used to store the results.
Output Memory Parameter
Specifies the memory parameter where the result of sending the notification will be stored. The default parameter is rt_notification_output.
Card
The Card action enables you to create a rich, structured message that includes a header, optional image, and interactive buttons. Cards are commonly used for presenting information with quick actions.
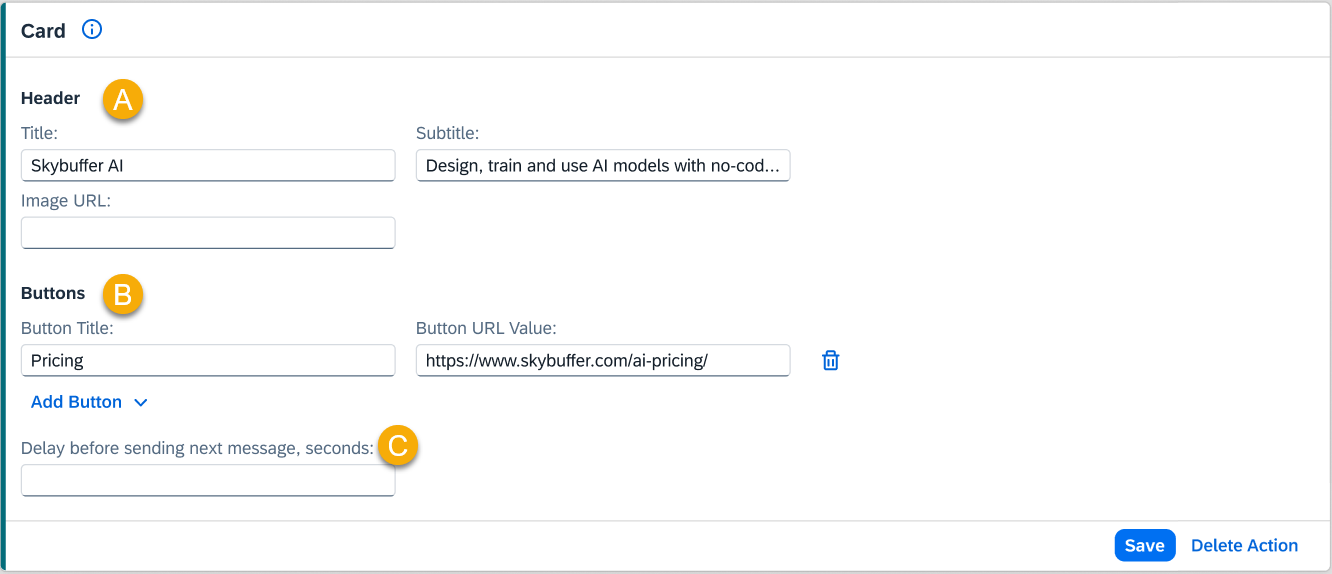
A – Header
Enter the title and subtitle of your card. You can also include an Image URL if you want to display a visual element alongside your message.
B– Buttons
You can add three types of buttons. Each button includes a Button Name and a corresponding action. Supported button types:
- Button URL Value – Redirects the user to an external link.
- Button Postback Value – Sends a hidden payload (data) back to the server or bot, triggering a specific backend response or action.
- Select Tool to Trigger – Redirects the user to another tool. Choose the tool from the list.
Note: The Trigger Tool button is only supported in Webchat and Microsoft Teams channels.
C – Delay Before Sending Next Message (seconds)
Specify how long the AI Agent should wait before sending this message to the user.
Buttons
The Buttons action allows you to display a message followed by a set of interactive buttons. It’s suitable for presenting multiple choice options or guiding the user through different conversational paths.

A – Type Your Message
Enter the message that will appear above the buttons as an introduction or context for the available options.
B – Enable Markdown Syntax
Enable this option to format your message using Markdown (bold, italics, lists, etc.).
C – Buttons
You can add three types of buttons. Each button includes a Button Name and a corresponding action. Supported button types:
- Button URL Value – Redirects the user to an external link.
- Button Postback Value – Sends a hidden payload (data) back to the server or bot, triggering a specific backend response or action.
- Select Tool to Trigger – Redirects the user to another tool. Choose the tool from the list.
Note: The Trigger Tool button is only supported in Webchat and Microsoft Teams channels.
D – Delay Before Sending Next Message (seconds)
Specify how long the AI Agent should wait before sending this message to the user.
Image
The Image action displays an image within the chat, often used to illustrate content, share visual updates, or accompany a message.
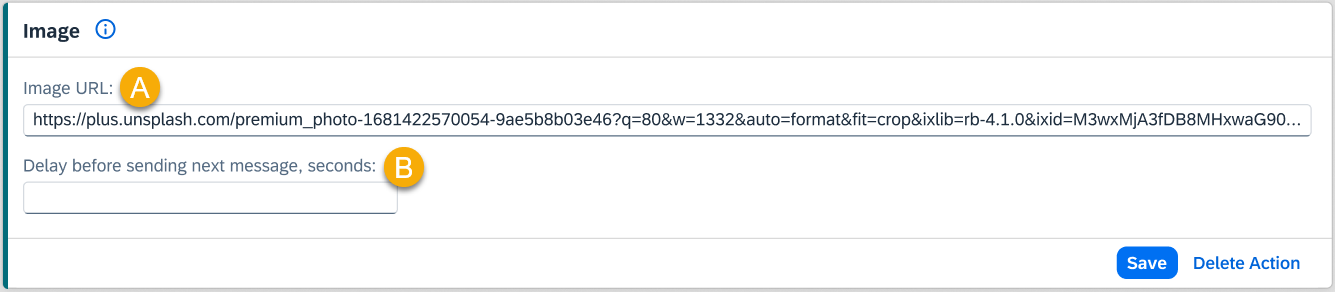
A – Image URL
Paste the full image URL here. The image will appear directly in the conversation.
B – Delay Before Sending Next Message (seconds)
Specify how long the AI Agent should wait before sending this message to the user.
Quick Replies
The Quick Replies action provides users with tappable response options that appear beneath a message. It allows for faster input and smoother conversation flow.

A – Type Your Message
Enter the message that introduces or explains the quick reply options (e.g., “Choose one of the following:”).
B – Add Quick Reply Title and Value
Define each quick reply option with a Title (visible to the user) and a Value (data sent back to the bot when the user selects it).
C – Enable Markdown Syntax
Check this option to enable Markdown formatting in your message.
D – Delay Before Sending Next Message (seconds)
Specify how long the AI Agent should wait before sending this message to the user.
Carousel
The Carousel action allows you to display a horizontal sequence of cards within the chat. Each card can include an image, title, subtitle, and buttons. Users can swipe through the cards, making this an ideal format for presenting multiple items such as products, services, or informational options without overwhelming the conversation flow.
Each carousel element is structured like a Card.
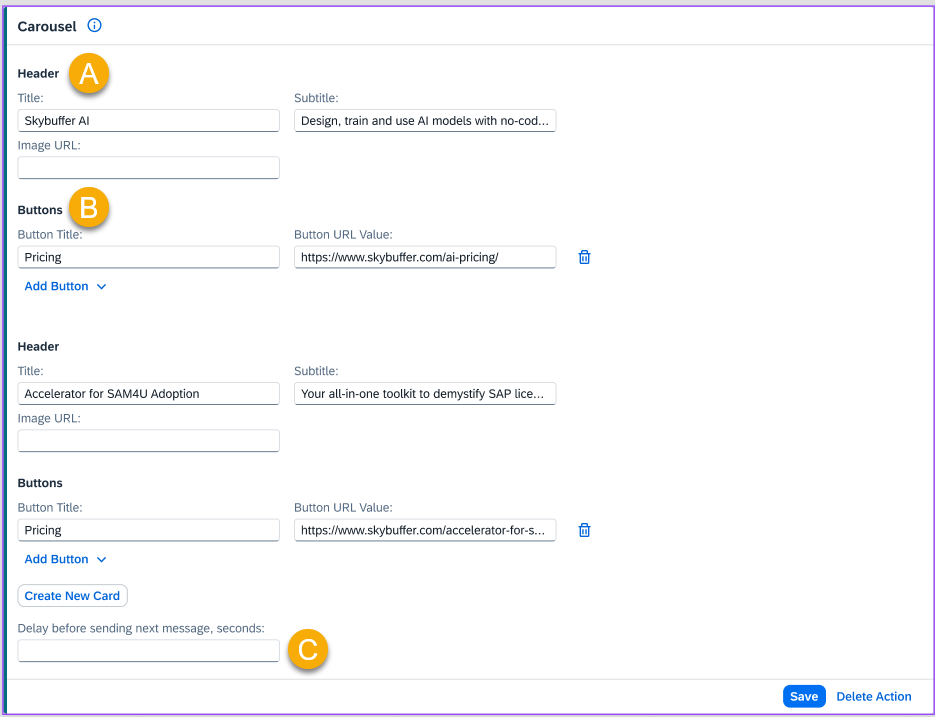
A – Header
Add a title, subtitle, and an optional Image URL to represent your content visually.
B – Buttons
You can add three types of buttons. Each button includes a Button Name and a corresponding action. Supported button types:
- Button URL Value – Redirects the user to an external link.
- Button Postback Value – Sends a hidden payload (data) back to the server or bot, triggering a specific backend response or action.
- Select Tool to Trigger – Redirects the user to another tool. Choose the tool from the list.
Note: The Trigger Tool button is only supported in Webchat and Microsoft Teams channels.
C – Delay Before Sending Next Message (seconds)
Specify how long the AI Agent should wait before sending this message to the user.
List
The List action organizes multiple content items into a vertical list. Each item behaves like a mini card with a title, subtitle, image, and optional buttons. This format is useful for presenting a set of related options or entries in a clean, scrollable layout.
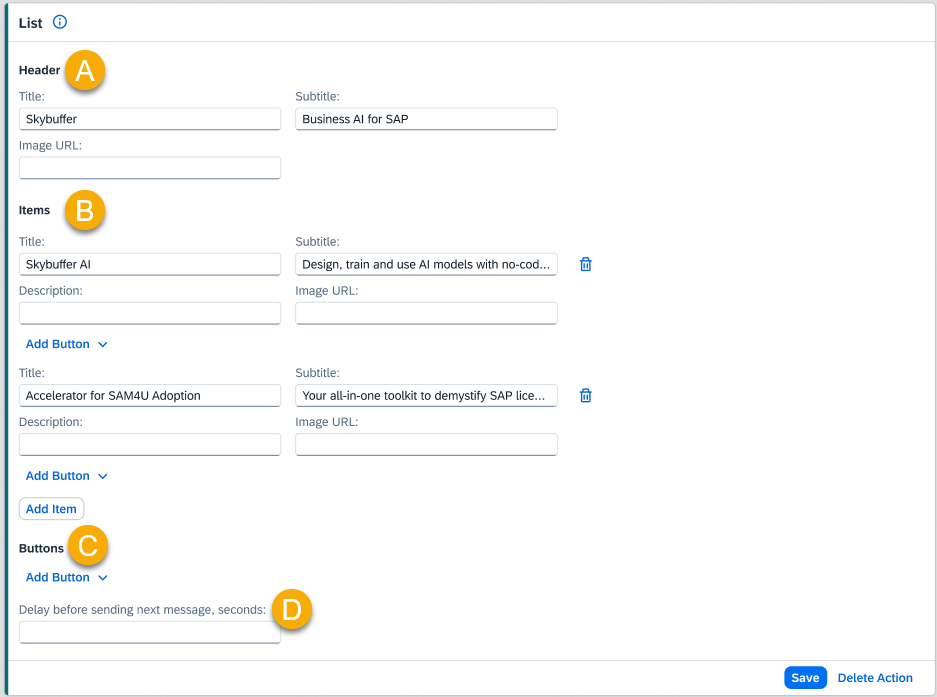
A – Header
Add the main list title, subtitle, and Image URL if you want a visual element to accompany the section.
B – Items
Each list item can include a Title, Subtitle, and Image URL.
You may also attach buttons to each item.
C – Buttons
You can add three types of buttons. Each button includes a Button Name and a corresponding action. Supported button types:
- Button URL Value – Redirects the user to an external link.
- Button Postback Value – Sends a hidden payload (data) back to the server or bot, triggering a specific backend response or action.
- Select Tool to Trigger – Redirects the user to another tool. Choose the tool from the list.
Note: The Trigger Tool button is only supported in Webchat and Microsoft Teams channels.
D – Delay Before Sending Next Message (seconds)
Specify how long the AI Agent should wait before sending this message to the user.
Client Data
The Client Data action allows you to send custom JSON key–value pairs to the client side. This is typically used to trigger client-specific actions or UI changes without displaying data directly to the user.
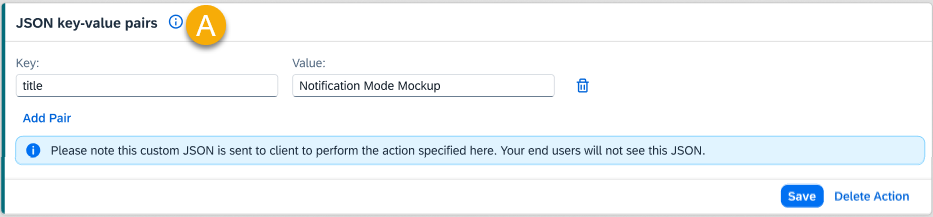
A – Custom JSON (Key–Value Pairs)
Enter the JSON object containing your desired key–value configuration.
Note: This JSON is sent silently to the client application for execution. End users will not see or interact with this data.
Custom
The Custom action enables you to define a fully customized message or behavior by selecting a message type and providing your own response script. This is useful when implementing advanced or non-standard responses that extend beyond built-in action types.
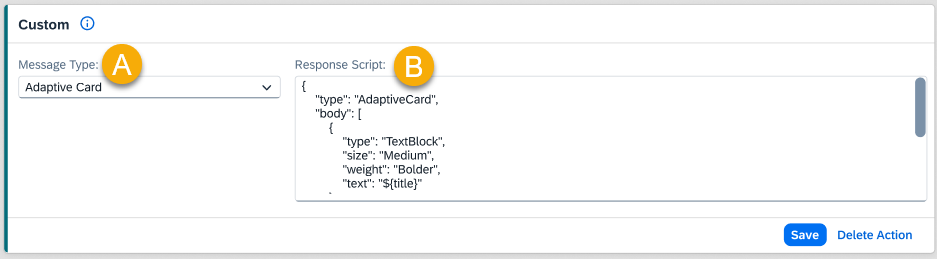
A – Message Type
Select the message type from the available list
B – Custom Script
Enter your custom response script or code snippet to control how the message behaves or appears.