Business AI Scenarios
The Business AI Scenarios application allows you to manage existing scenarios or create custom ones, organizing them into categories that can be easily added to your AI Agent.
To get started, navigate to the AI Agent group and click on the Business AI Scenarios application.

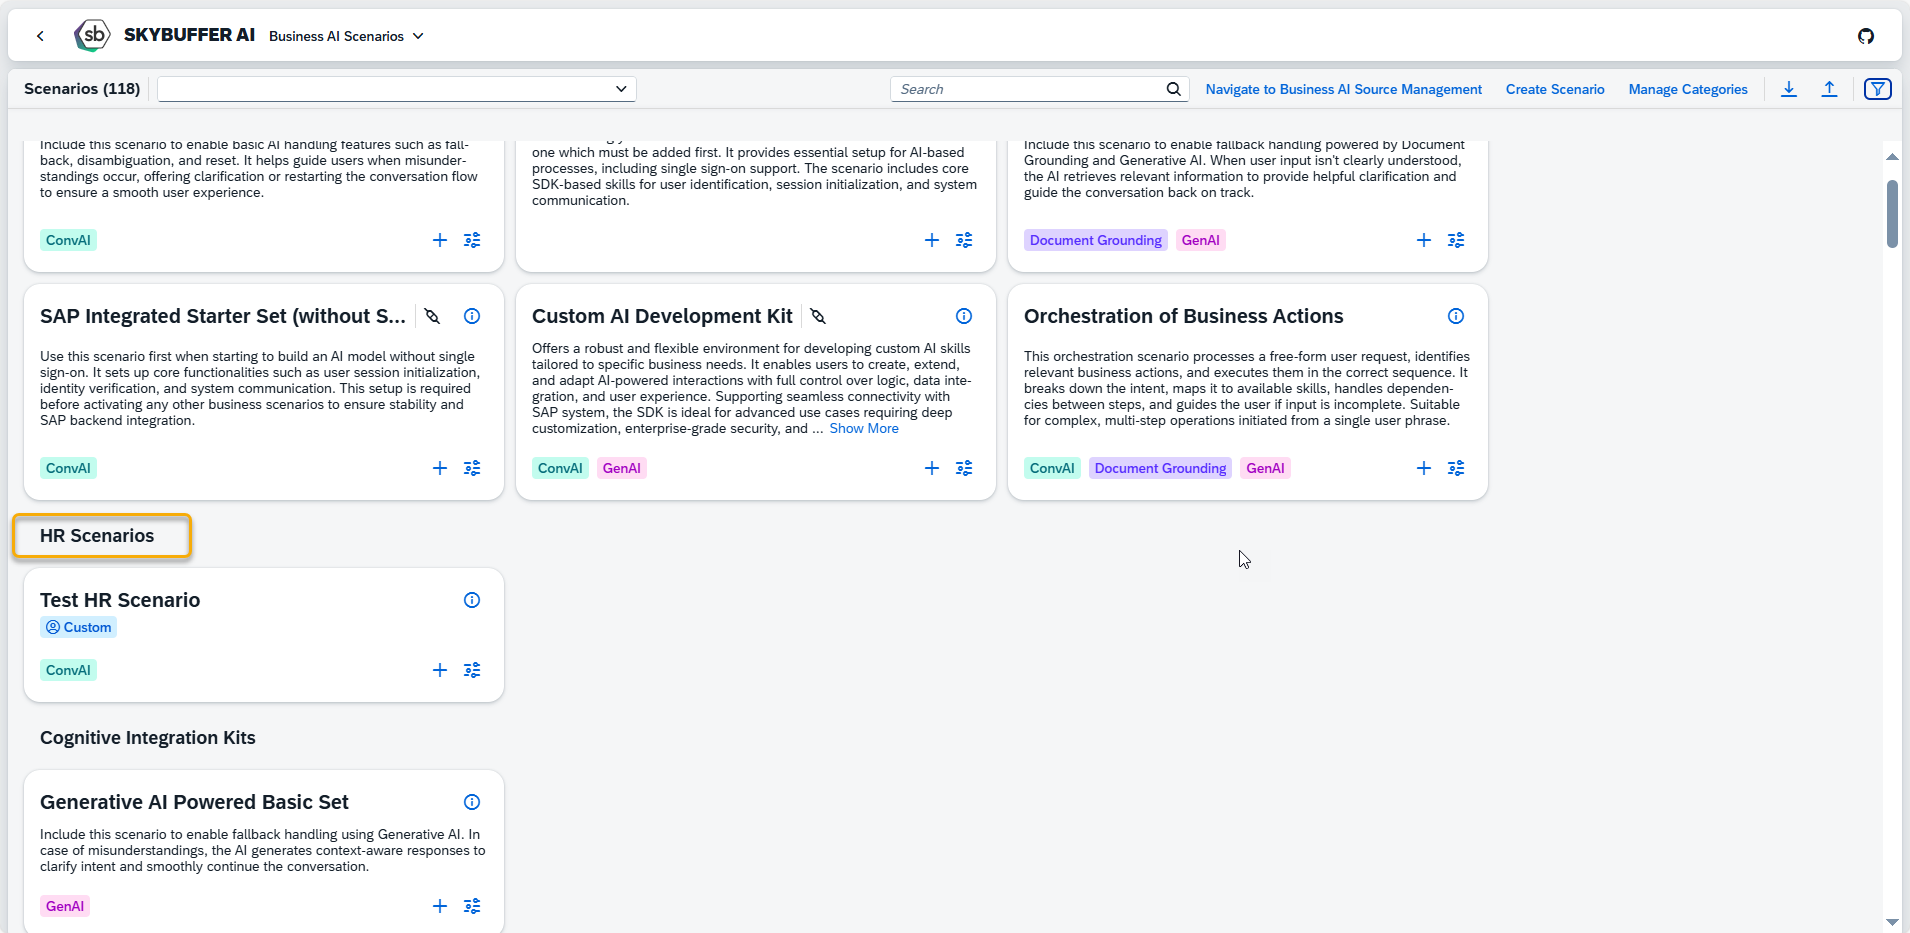
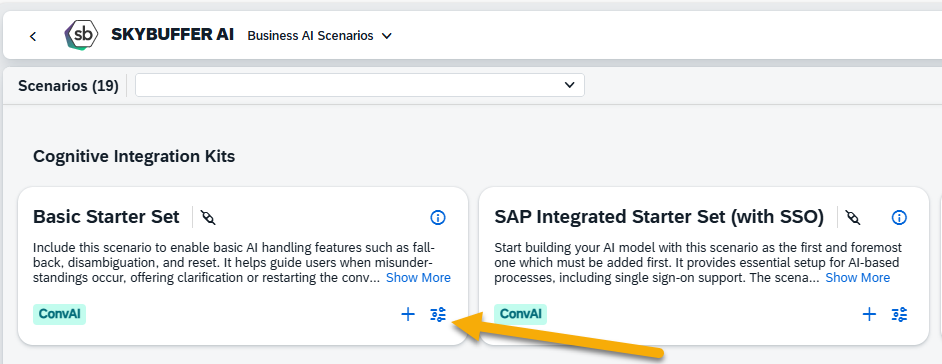
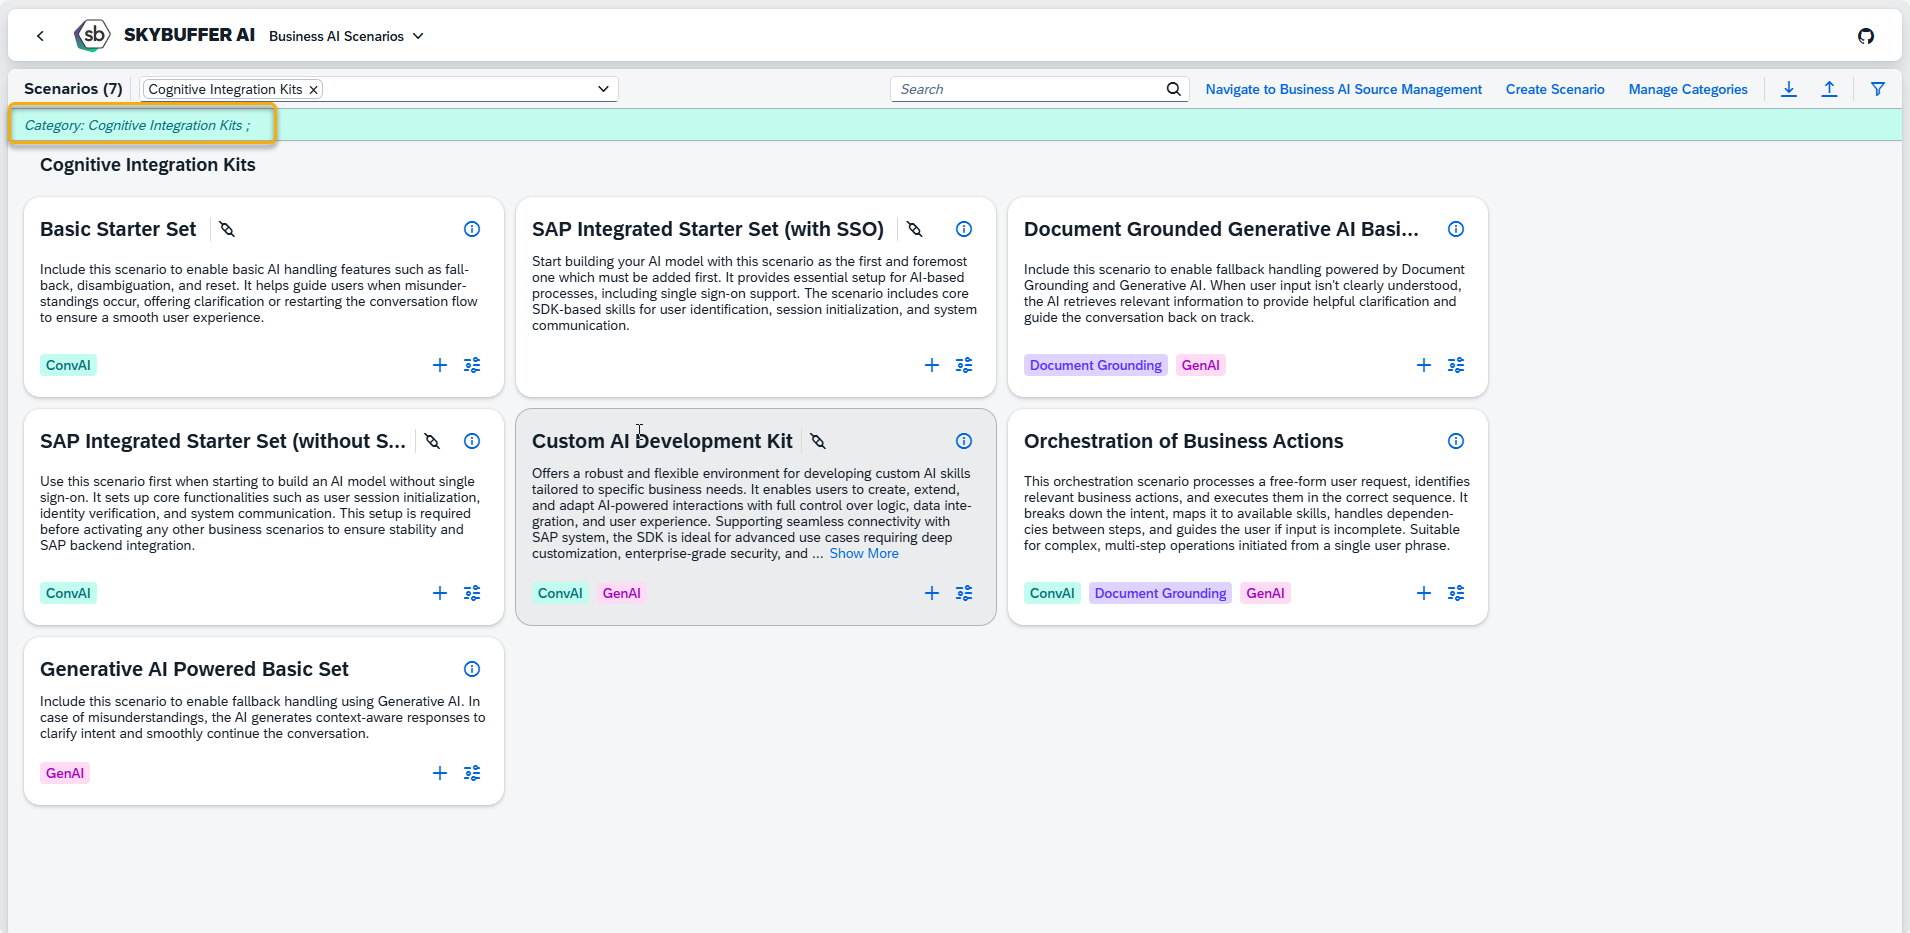
You will see the main page displaying all existing scenarios grouped into categories:
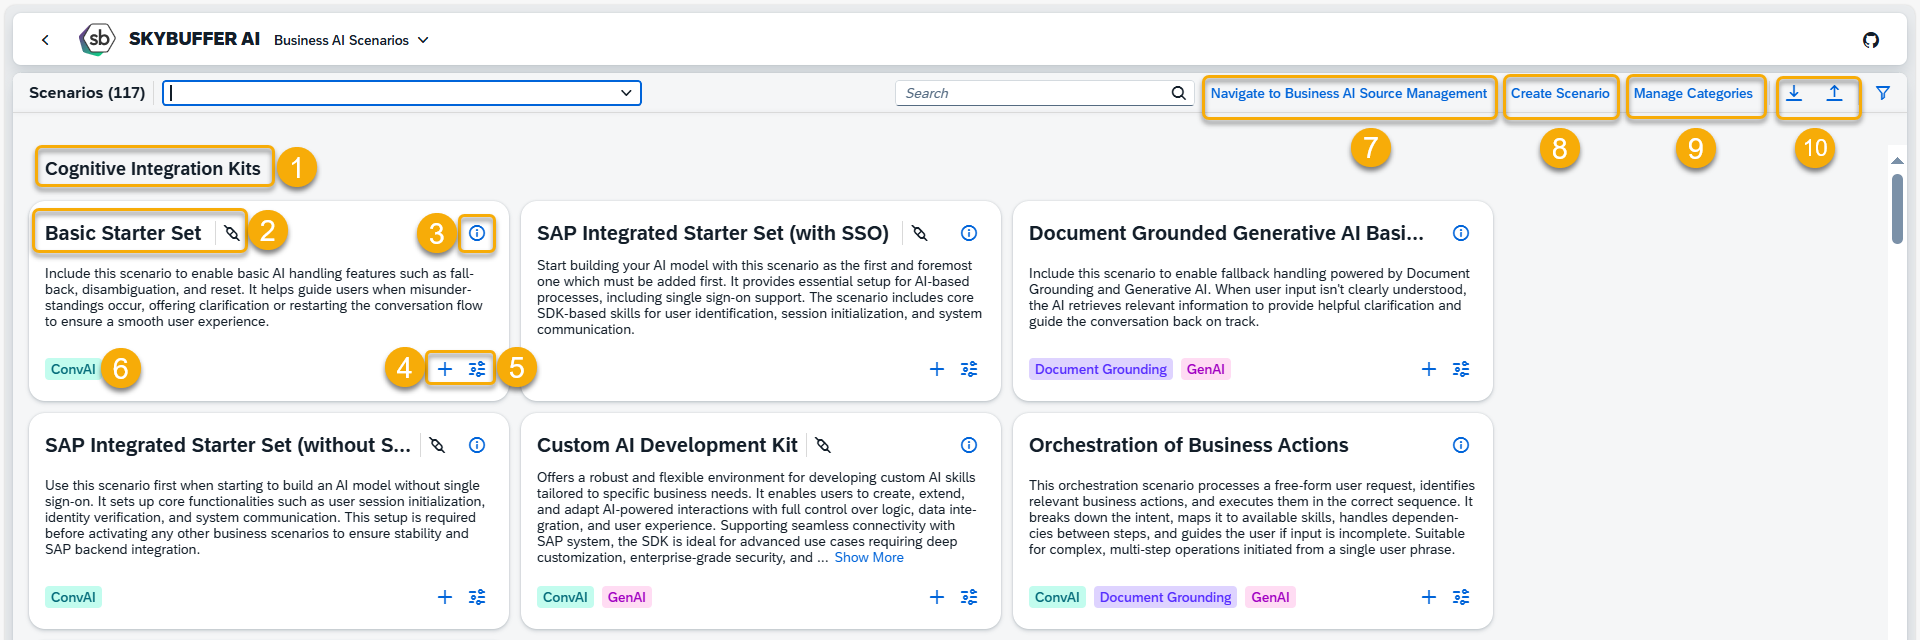
(1) Category Name
(2) Scenario Name
(3) Scenario Components – intents, tools, and entities are visible after clicking on the hint icon
(4) Plus button – adds a scenario to a specific AI Agent
(5) Customize button – opens the editing view
(6) Labels – help identify the scenario’s type or use
(7) Business AI Source Management – where you can access source AI Agents for creating new scenarios
(8) Create Scenarios – creats new Business AI Scenario
(9) Manage Categories – creates new categories and edits the existing ones
(9) Scenarios import/export – possibility to upload previously created scenarios or download the current ones
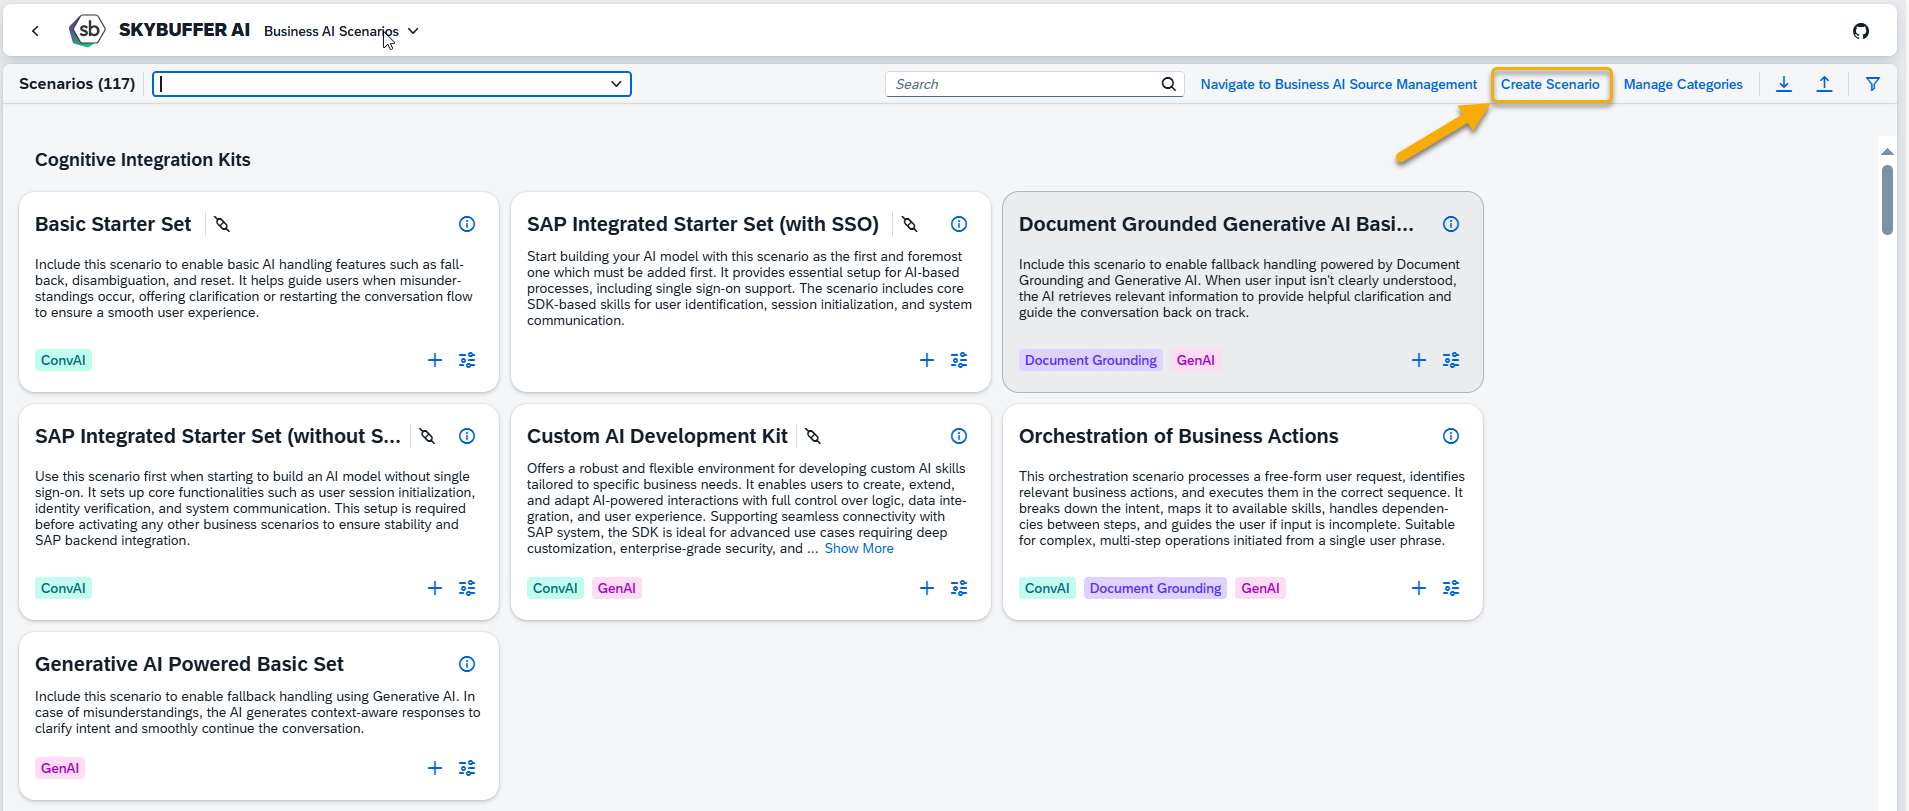
Step 1. Creating a Custom Business AI Scenario
To create a new scenario, click the Create Scenario button.
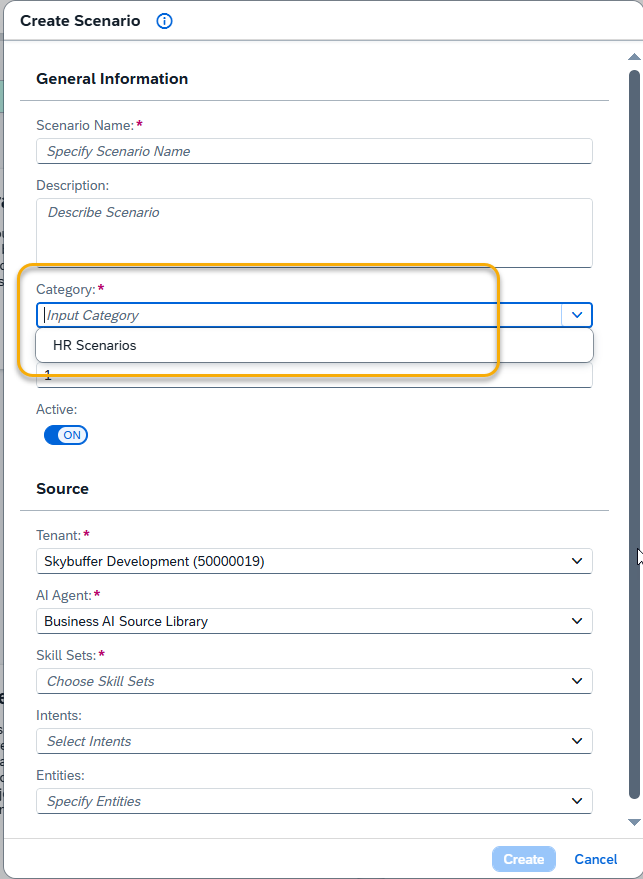
Then, fill in the necessary information to define your new Business AI scenario:
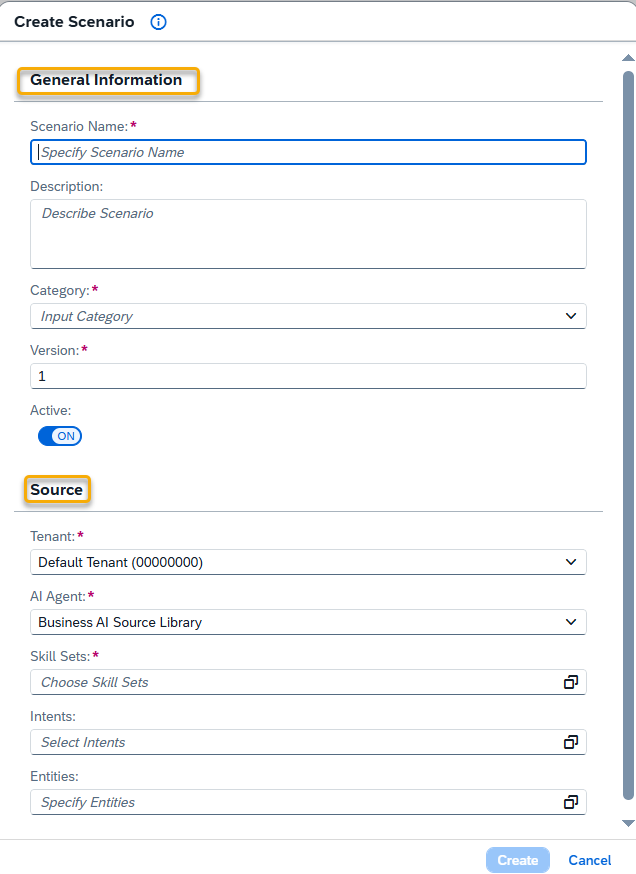
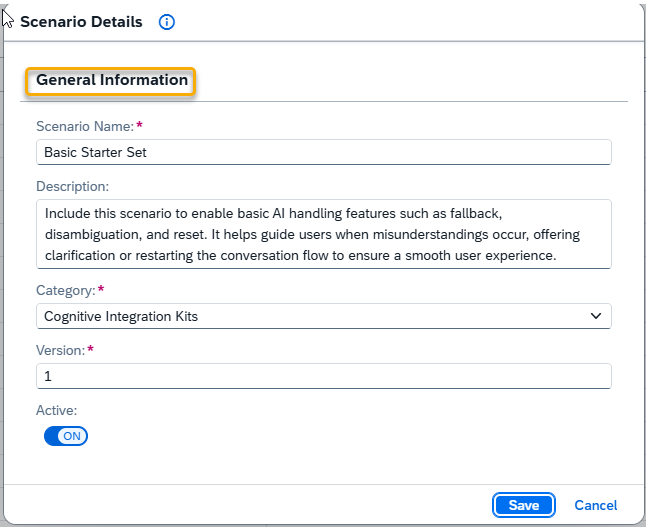
General Information
- Scenario Name: A unique internal name for the scenario
- Description: A short summary explaining the scenario’s purpose
- Category: Select a category for organizing the scenario
- Version: Specify a version number (e.g., 1.0)
- Active: Mark as active to make it available for AI Agents
Source
- Tenant: Select the tenant that hosts the AI Agent with the desired tools
- AI Agent: Choose the AI Agent providing the tools
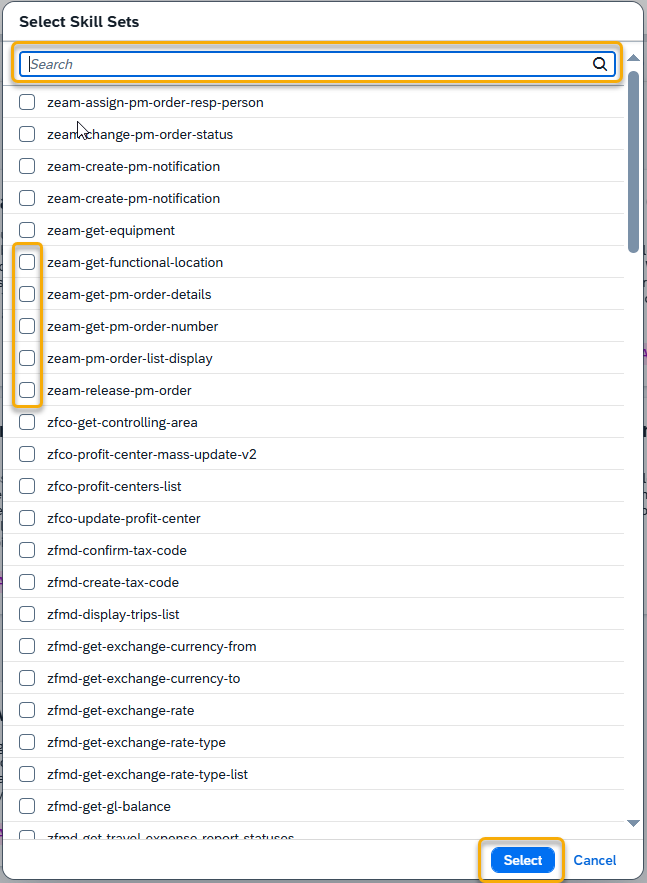
- Tools: Select relevant tools sets — these are collections of actions the AI Agent can perform.
- Intents: List the scenario’s supported intents (e.g., zxai-greetings-trigger)
- Entities: Select relevant tools — these are collections of actions the AI Agent can perform.
Once completed, click the Create button.
Your scenario will now be visible on the main page. Click on the tile with its name to view details, make edits, or add it to an AI Agent.
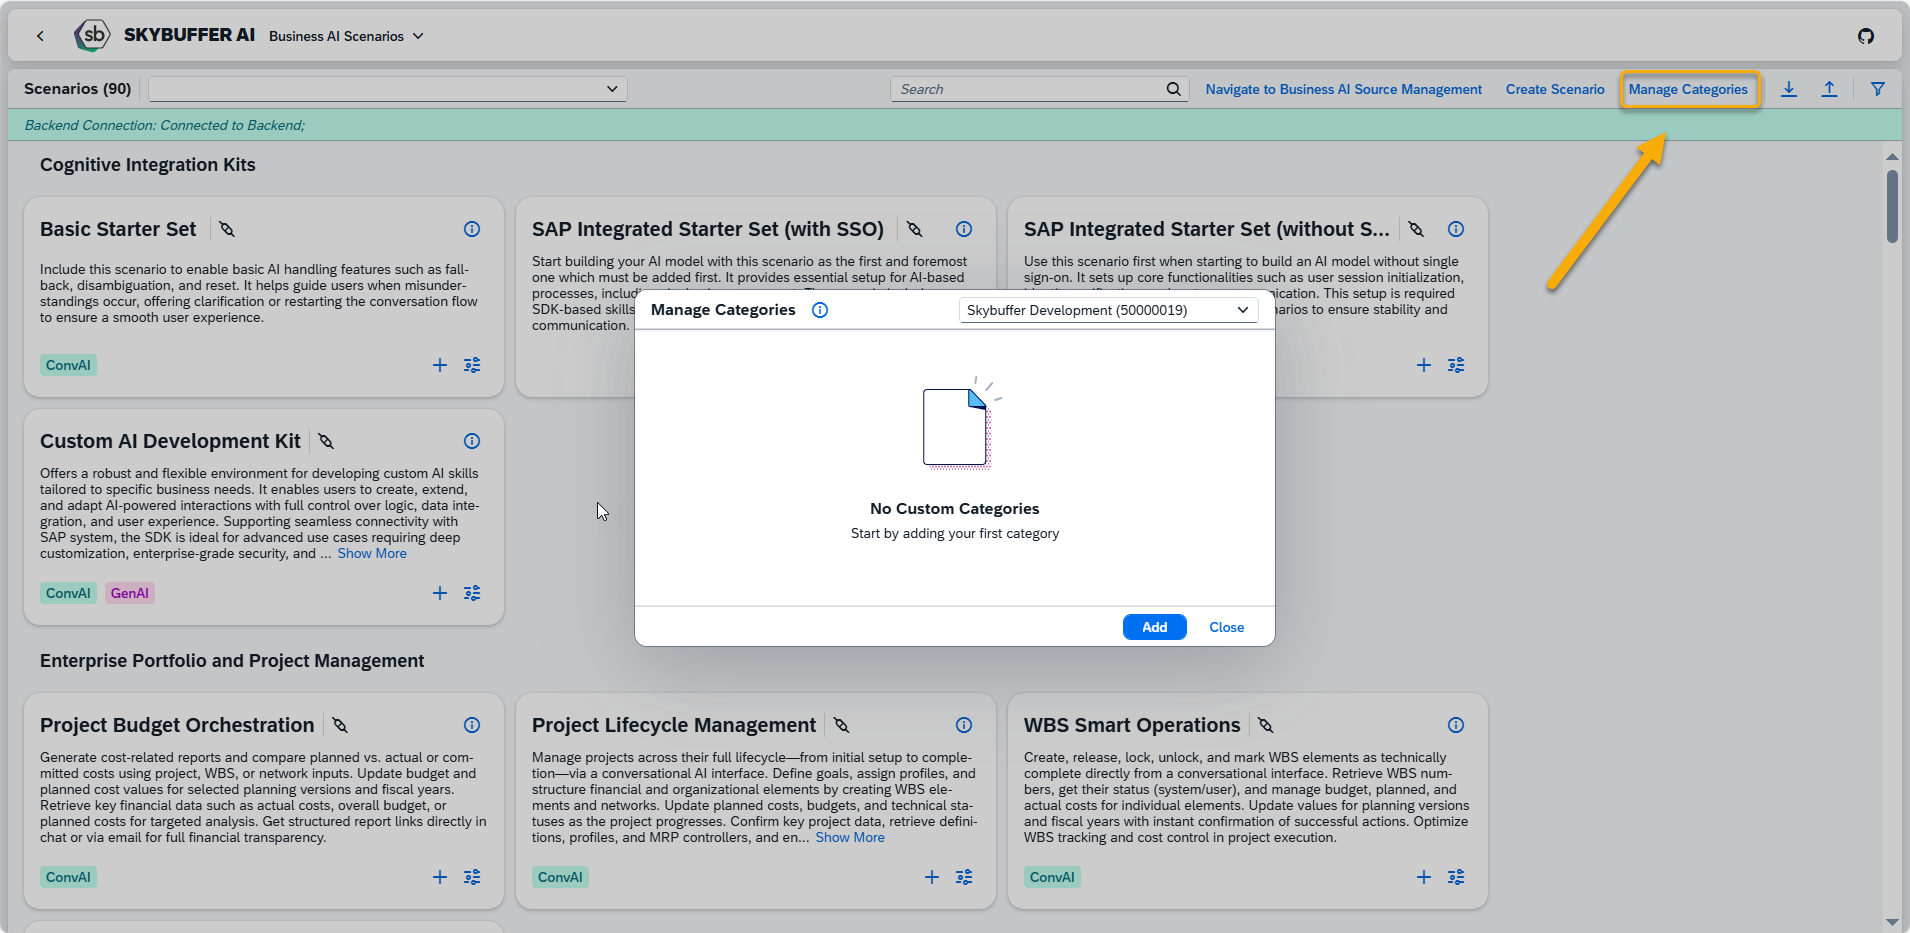
Step 2. Manage Categories
When creating your custom scenario, you can either use an existing category or create a new one. To create one, click the Manage Categories button and start by adding your first category.
Enter a name for your category and click the Add button. 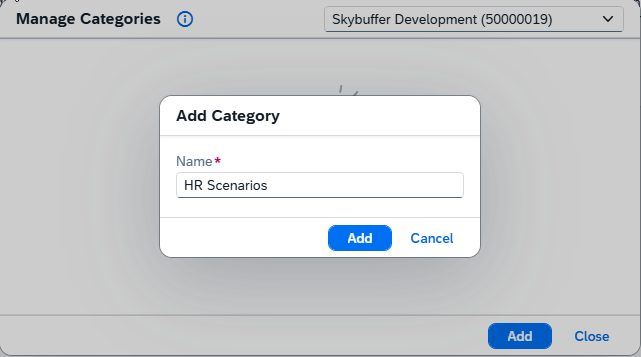
Once the category is created, you will see it listed. At this stage, there are no scenarios assigned to it yet.
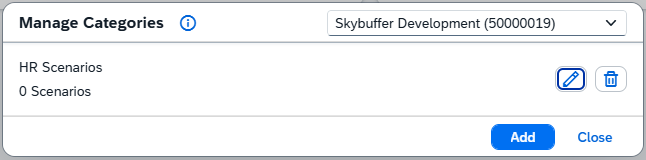
If needed, you can change the category name by clicking the pen icon, or remove it by clicking the delete icon.
NOTE: A category can only be deleted if no scenarios are assigned to it.
Your category will then be available when creating new scenarios, and you will also see it from the main page.
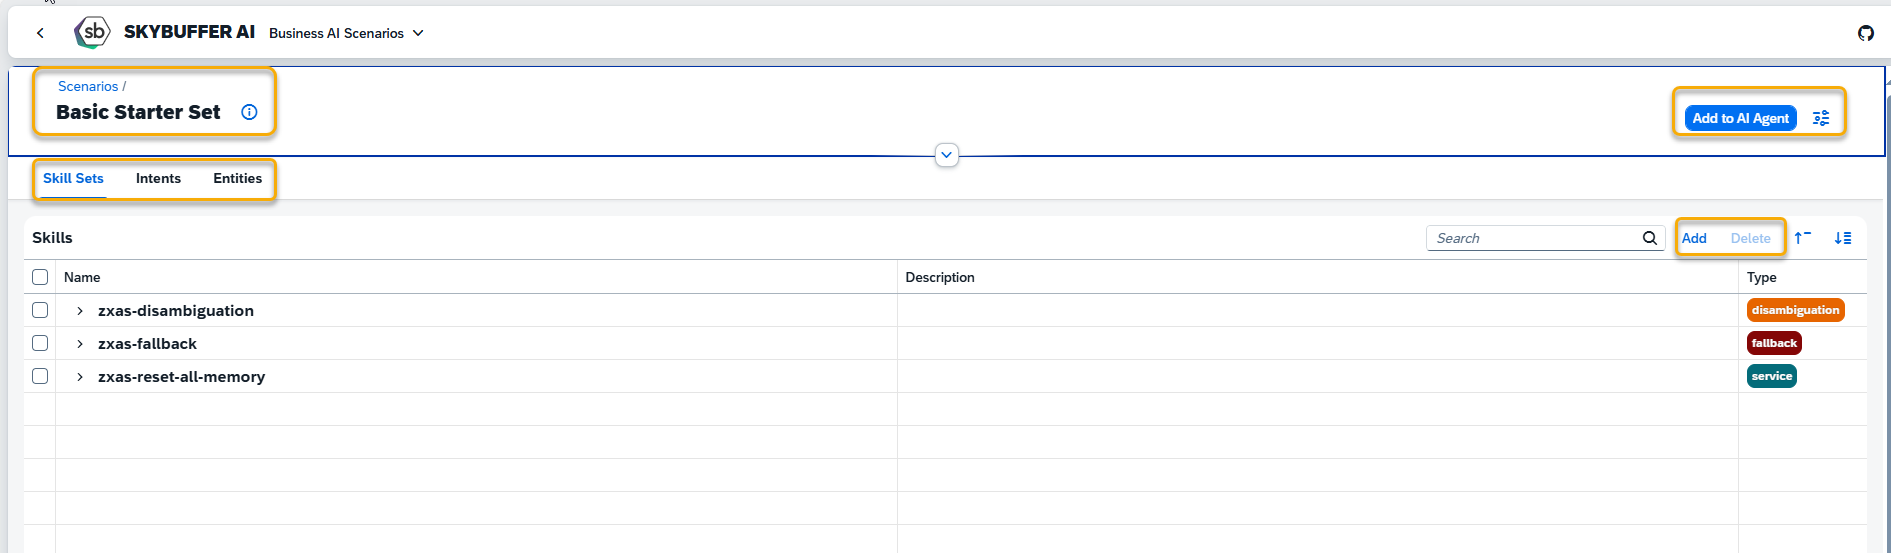
Step 3. Adding a Scenario to an AI Agent
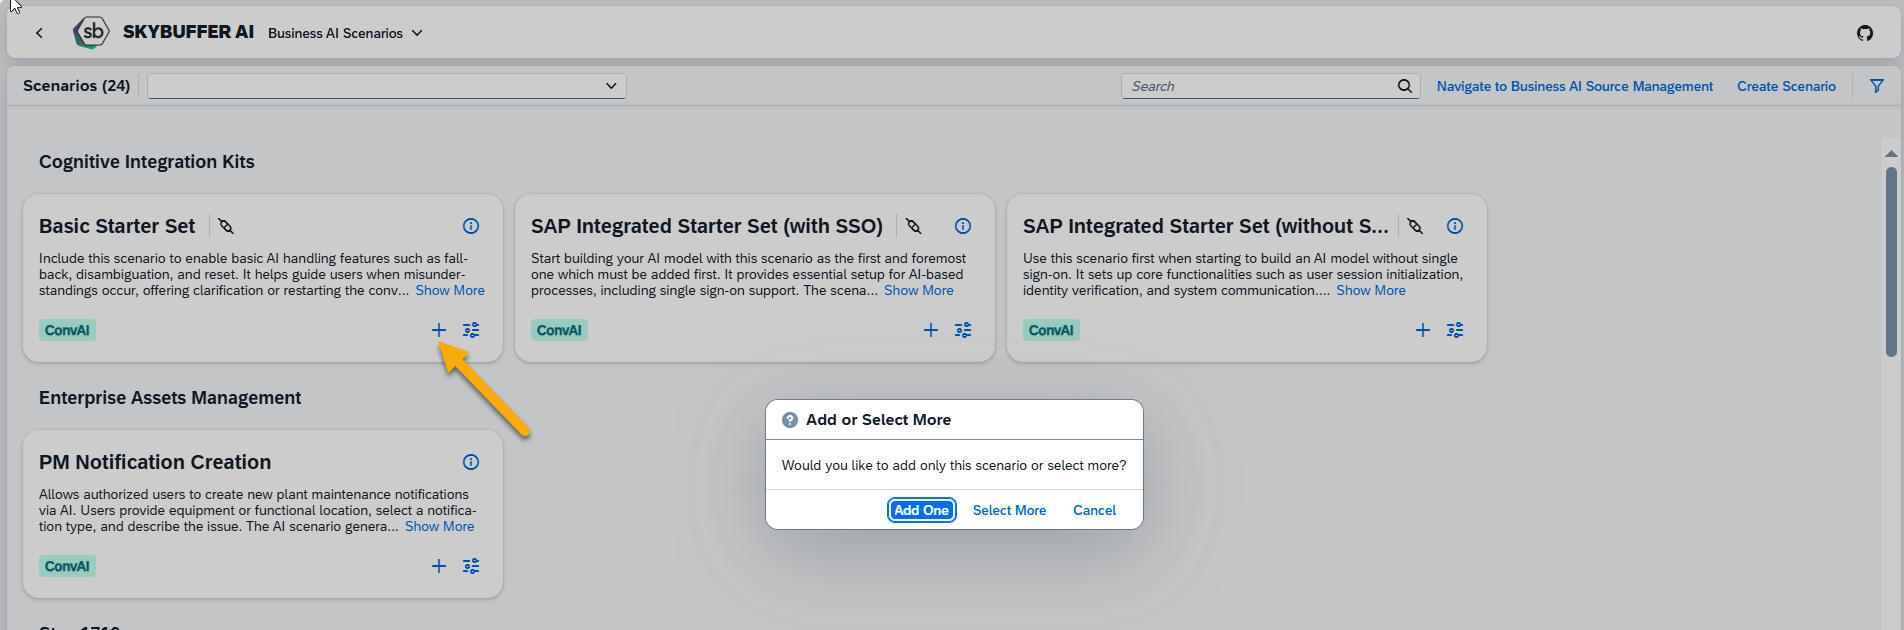
Once your scenario appears on the main page under its selected category, you can add it to an AI Agent.
Click the Plus button and choose whether you want to add just this scenario or select multiple.
Next, select the Tenant (if using more than one), and choose the AI Agent to which this scenario should be added. You will also see a list of Tools, Intents, and Entities that will be included.
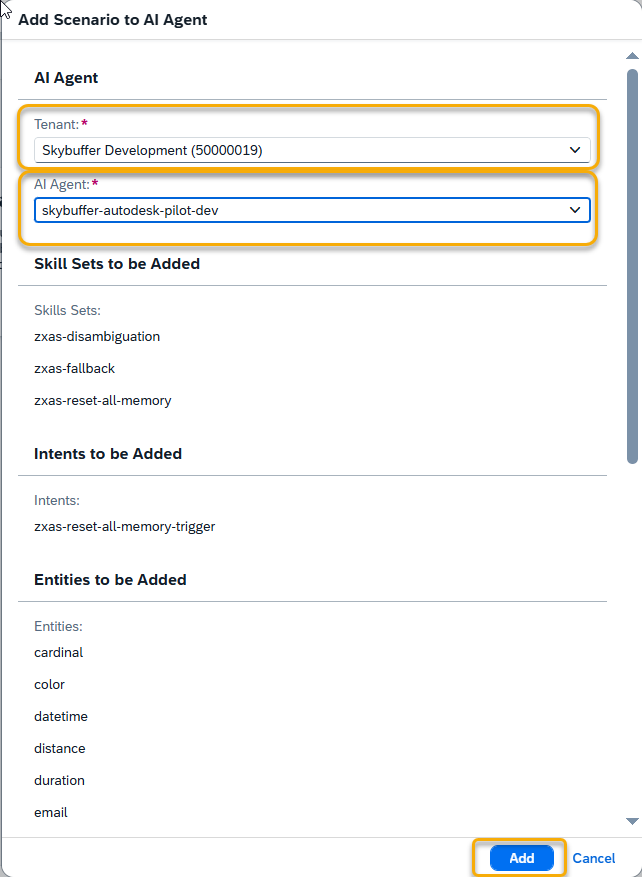
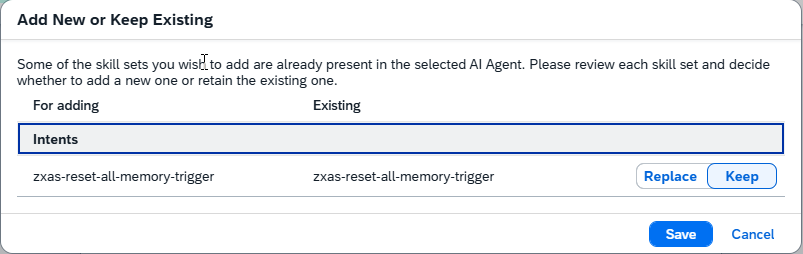
NOTE: If any of the Tools, Intents, or Entities already exist in your AI Agent, you will be prompted to either keep the existing ones or replace them with the new ones.
Step 4. Editing or Deleting a Business AI Scenario
To modify or remove an existing scenario, click the Customize button either from the main page or from the scenario’s detail page.
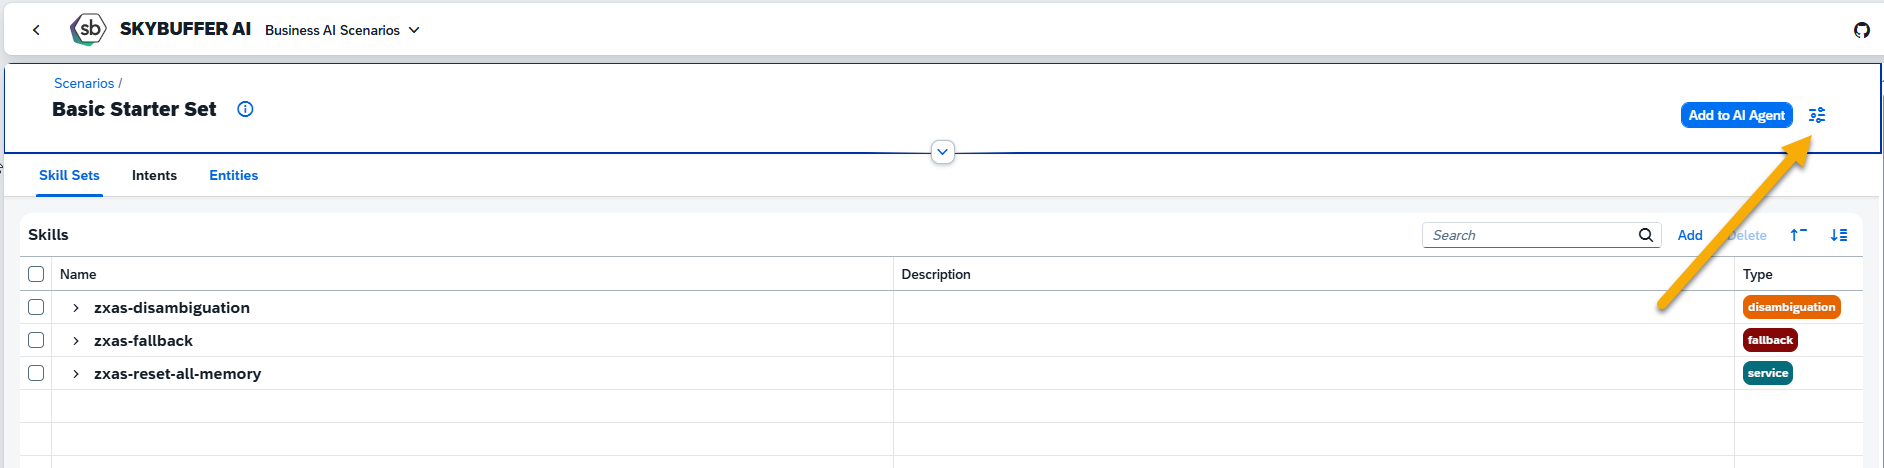
You will now see all the details for the selected scenario. To delete scenario, click the Delete Scenario button. To make changes, click the Edit button.

Use the form to update general information about the scenario:
General Information
- Scenario Name: Edit the name
- Description: Update the summary
- Category: Reassign for better organization
- Version: Change version number to reflect updates (e.g., 1.1)
- Active: Toggle to activate or deactivate the scenario
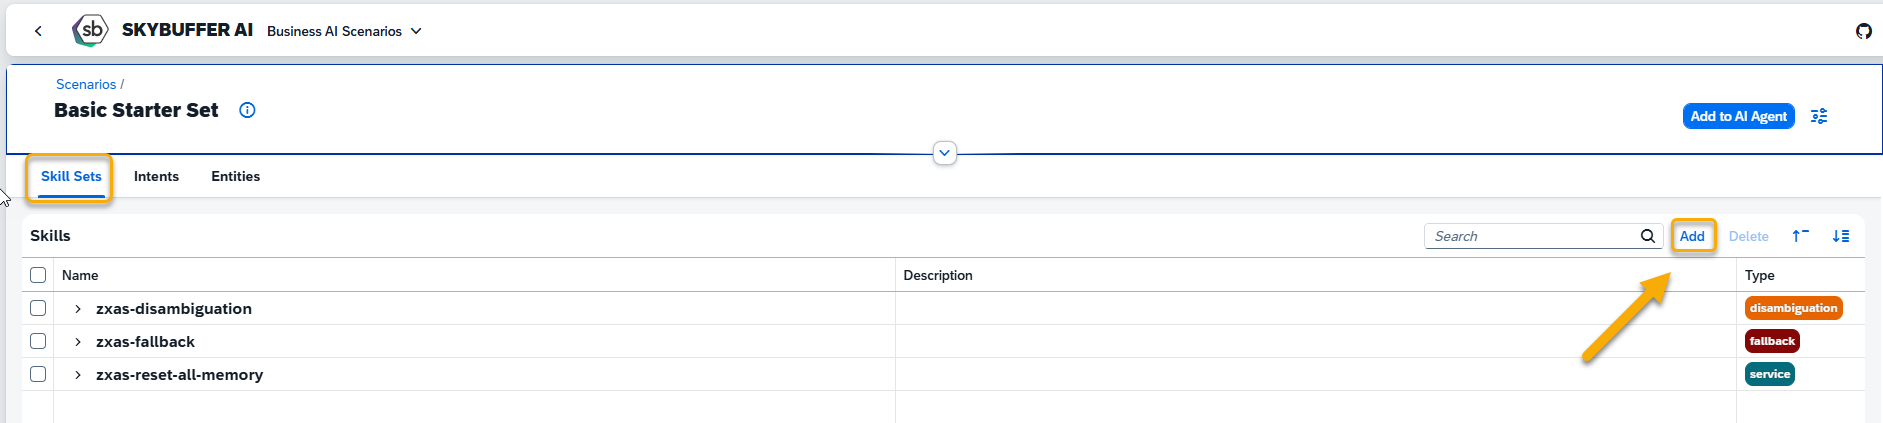
Editing Tools, Intents and Entities
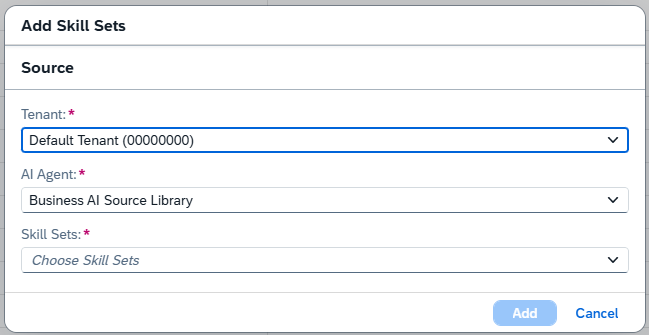
Enter the main page of the scenario you want to edit and select the desired section: Tools, Intents, or Entities. Click Add to create a new tool, or select an existing one and click Delete to remove it.
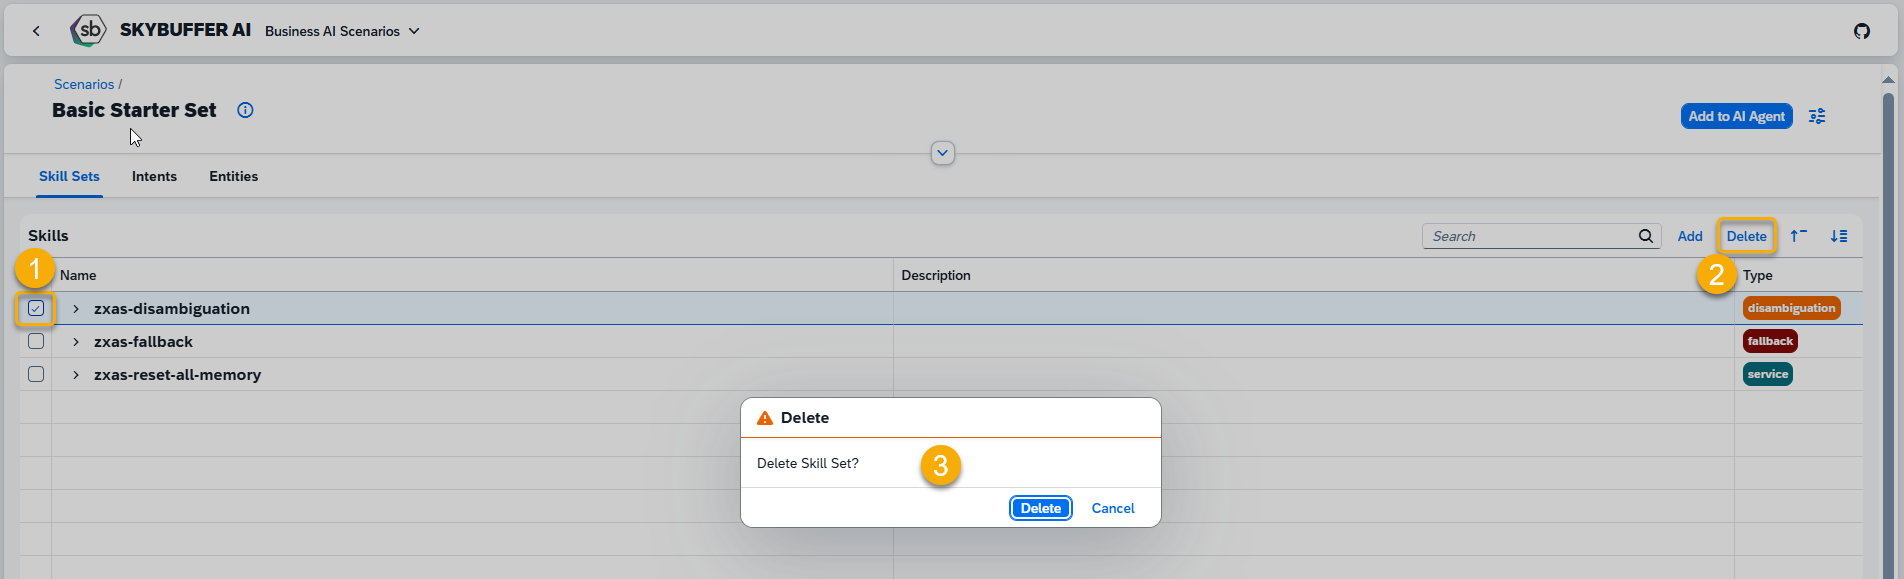
Repeat these steps in each section where you would like to make changes.
Step 5. Searching by Categories and Filtering
To find scenarios within specific categories, use the filtering tools.
Click the dropdown list and check the boxes next to the desired categories.
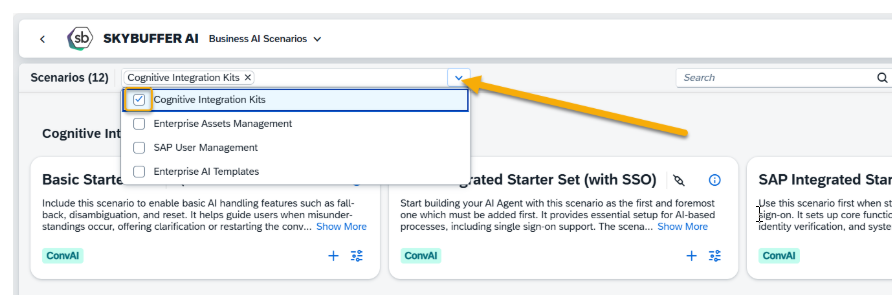
You will then see only scenarios from the selected category (e.g., Cognitive Integration Kits).
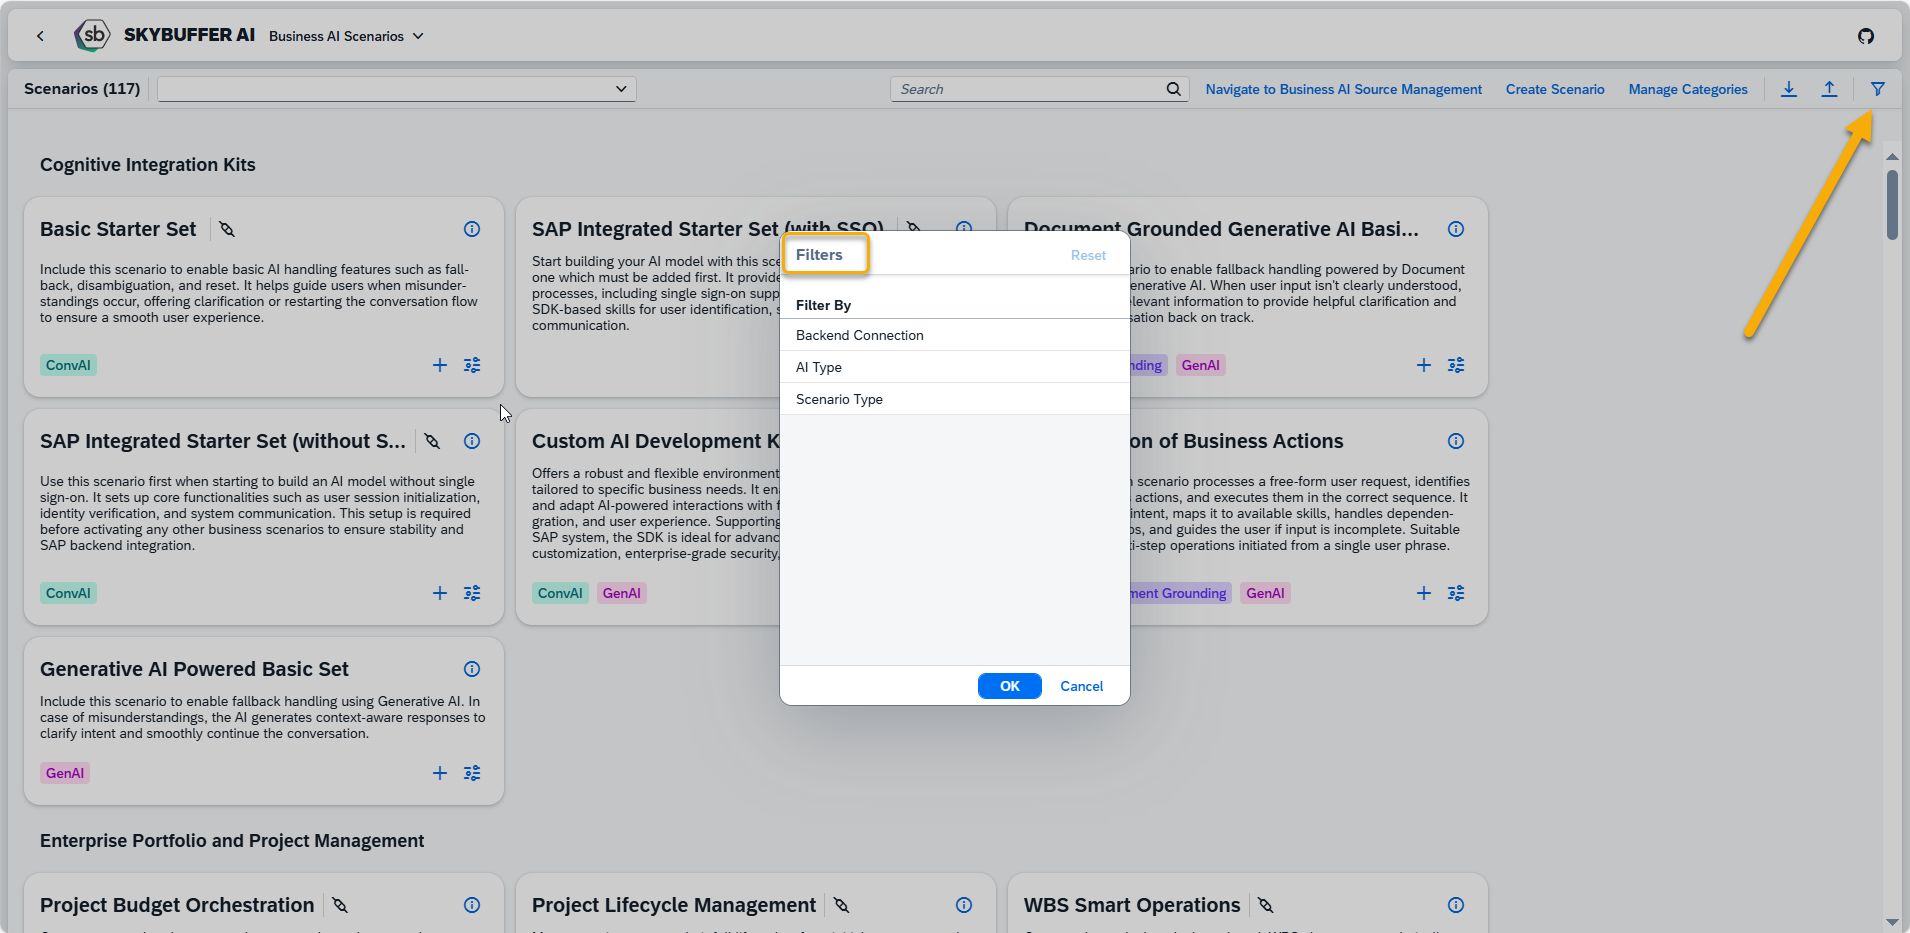
Additionally, you can apply filters to refine your search:
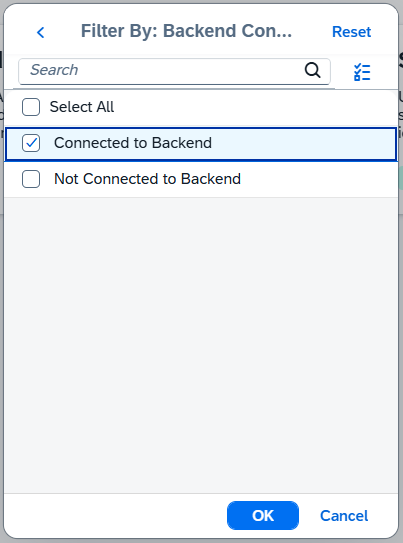
- Connection: Connected or not connected to a backend
- AI Type: Conversational AI, Generative AI, or RAG
- Scenario Type: Standard or Custom
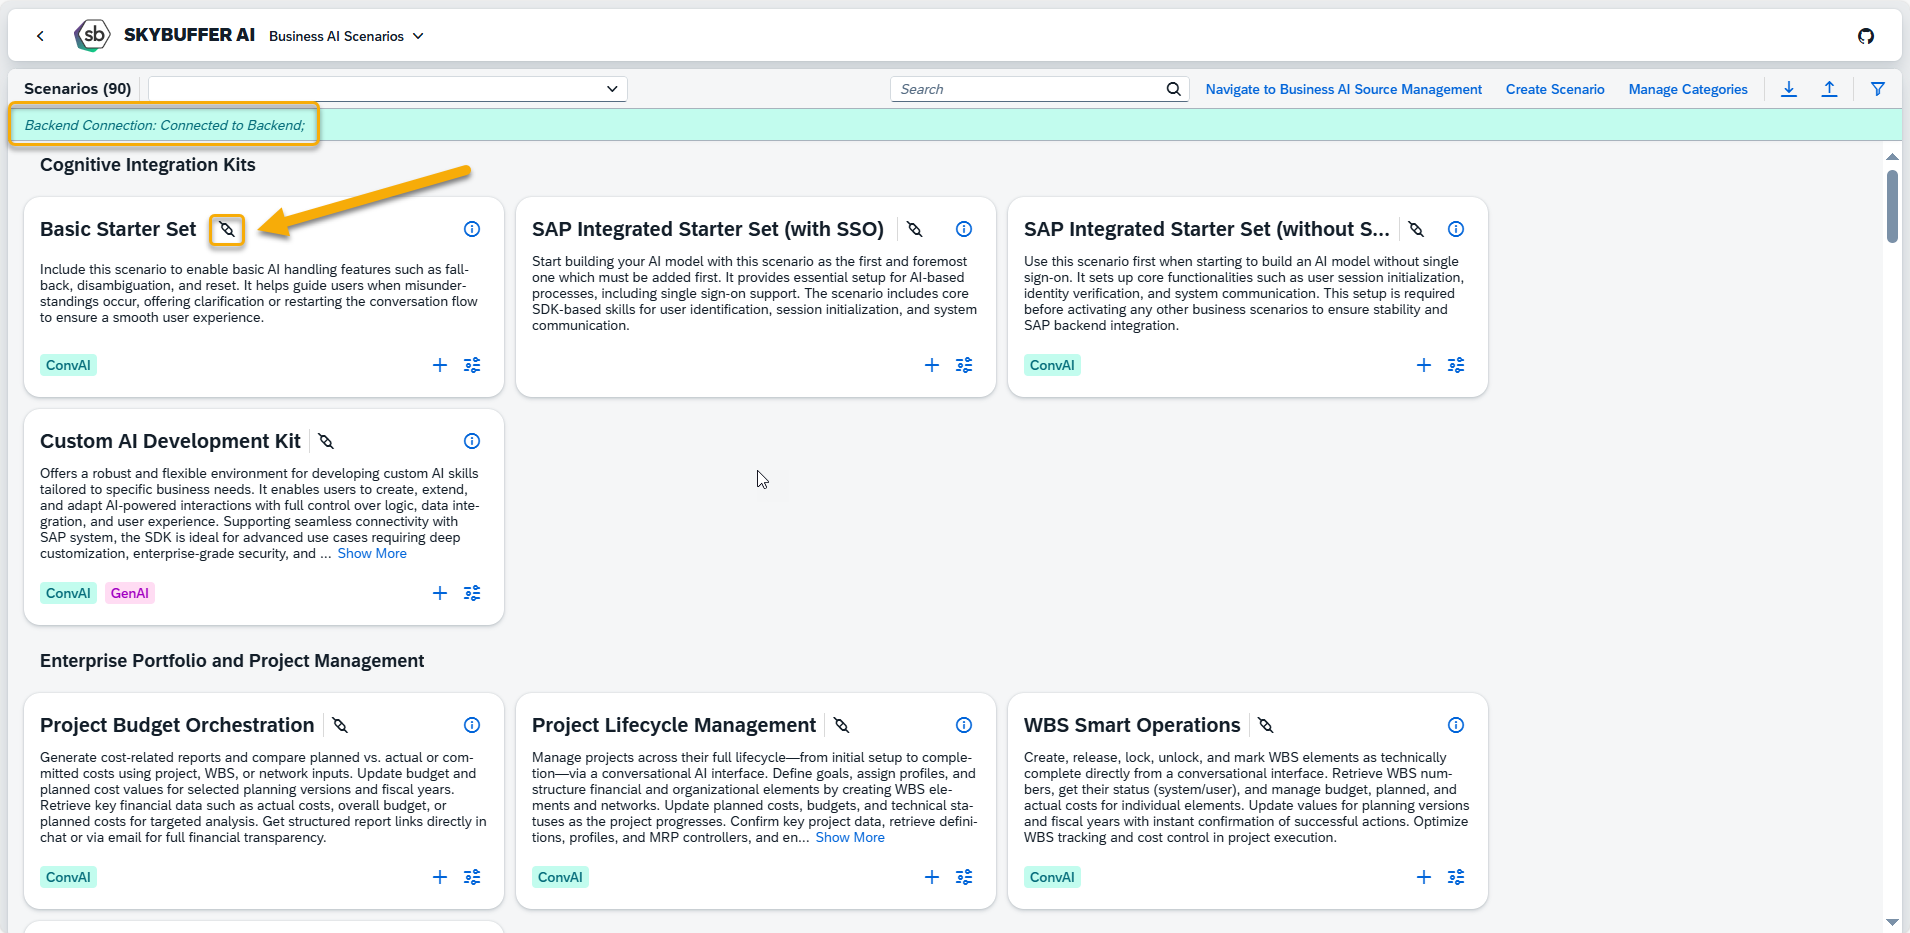
Now only scenarios that are connected to the Backend system are visible:
Step 6. Scenarios Export and Import
Scenarios Export
To export scenarios, click the Download button in the top-right corner and select the scenarios you want to include in the export package. You can also use the Select All Scenarios option if you want to download all scenarios from the application.
Once your selection is ready, click the Export Scenarios button.

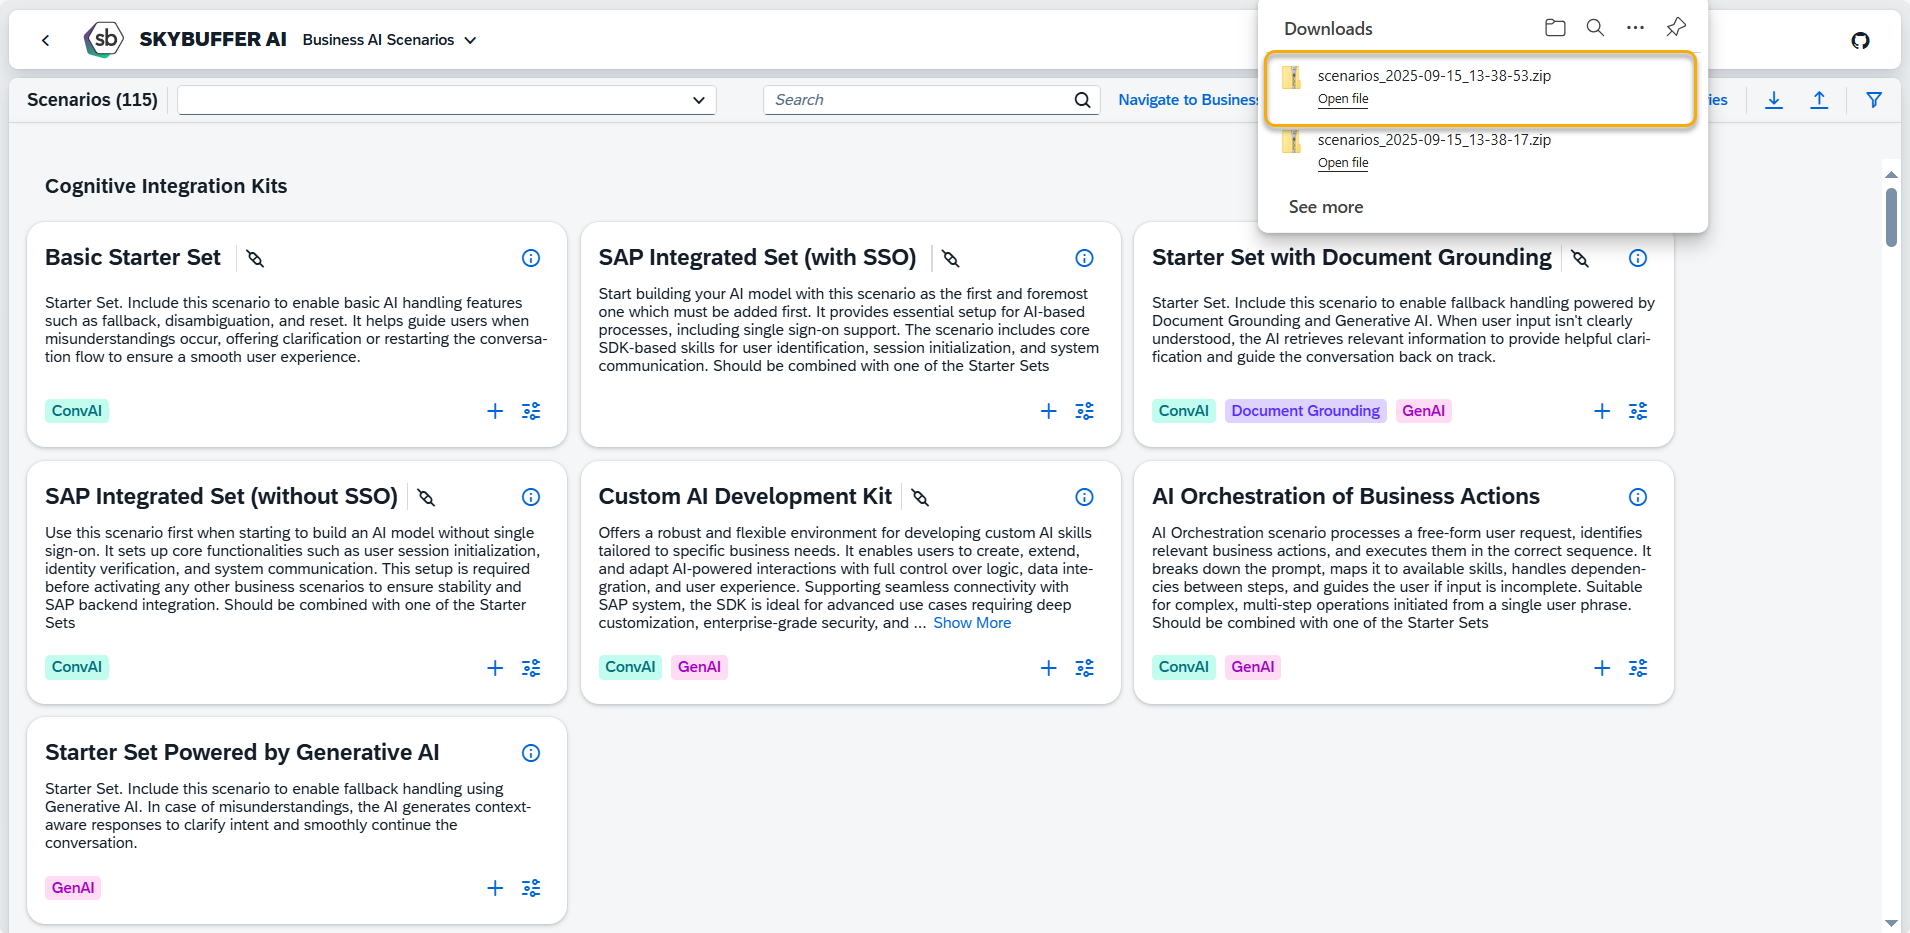
The exported scenarios will be available as a ZIP file in your Downloads folder.
Scenarios Import:
To import previously created and downloaded scenarios, click the Upload button and select the file you want to upload.
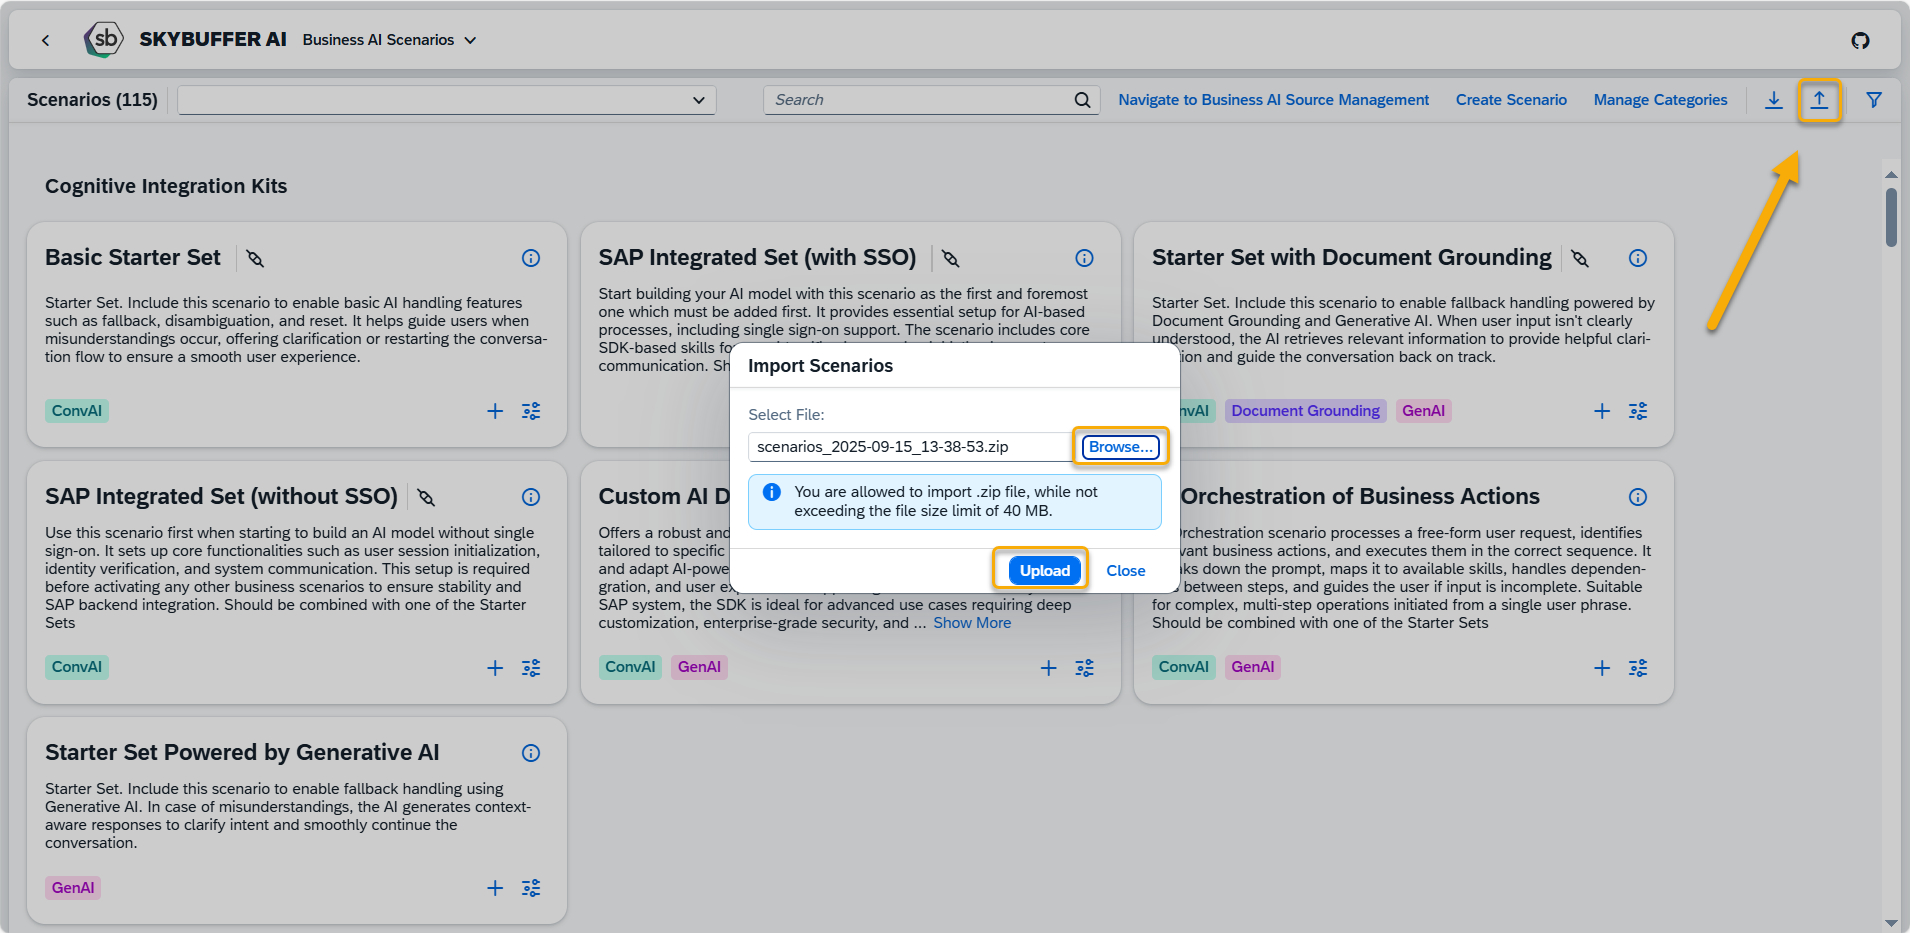
The new scenarios from your package will now be visible in the application.