Scheduling
The AI Agent Scheduling function enables automated execution of AI Agents based on a predefined schedule. Each scheduled execution runs in the background, automatically logging results. These logs can later be analyzed and used for follow-up actions via the AI-Powered Log Insight Action, ensuring efficient monitoring and process automation.
Prerequisites:
The AI Agent Scheduling feature uses a specific type of communication channel called Background Execution. For guidelines on this channel type, refer to the Communication Channels – Background Execution section.
Step 1. Open AI Agent Configurator, choose Scheduling, and press Add schedule button:

Step 2. Enter the necessary information and press the Add button.
- Name – Enter a descriptive name for the schedule to easily identify it.
- Scheduled Start – Specify the date and time when the AI Agent should begin execution.
- No Start After – Set the latest possible date and time for execution to ensure the schedule remains within a defined period.
- Frequency – Choose how often the AI Agent should run (e.g., hourly, daily, weekly).
Define execution triggers using a tool trigger or trigger phrase:
- Trigger Tool – Select the tool that will initiate the scheduled execution.
- Trigger Phrase – Define a custom phrase that can be used as an alternative trigger for execution.
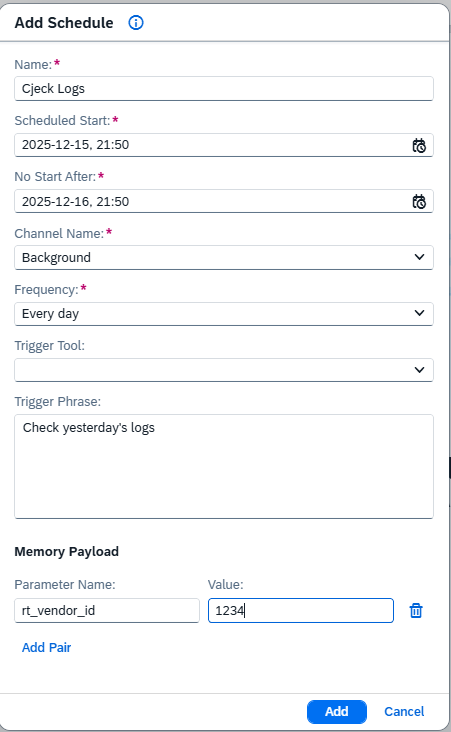
Memory Payload
Define the memory parameters that will be passed to the AI Agent when the scheduled tool is triggered.
Each parameter consists of a Parameter Name and a Value field.
These parameters allow you to predefine inputs for the scheduled scenario – for example, company code, date range – so that the tool can execute automatically without user interaction.
All defined parameters are stored in the AI Agent’s memory before execution begins and are available to all actions within the triggered tool.
Examples:
Parameter Name Value
rt_company_code 1000
rt_vendor_id 1234
rt_date_from 2025-10-01
rt_date_to 2025-10-31
NOTE: Ensure parameter names match those used in the tool logic and actions.
Dynamic values can be defined using Handlebars expressions, for example:
-
- rt_date_from → {{today ‘startOfMonth’}}
- rt_date_to → {{today ‘endOfMonth’}}
If no memory parameters are defined, the tool will run with its default memory settings.
Step 3. Schedule has been successfully saved.

Step 4. To edit, click the pencil icon at the right-hand corner of the screen next to the desired Schedule.
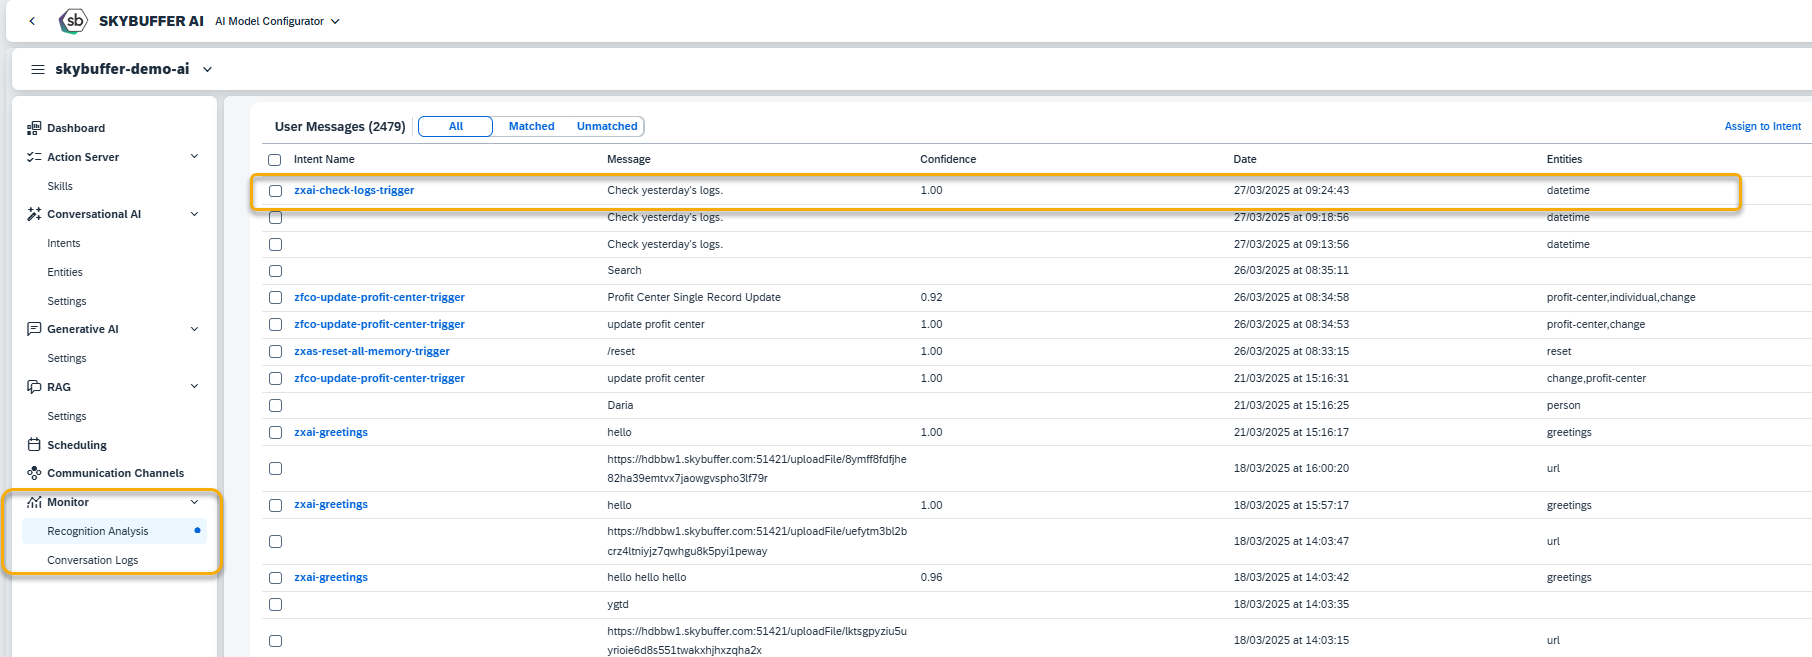
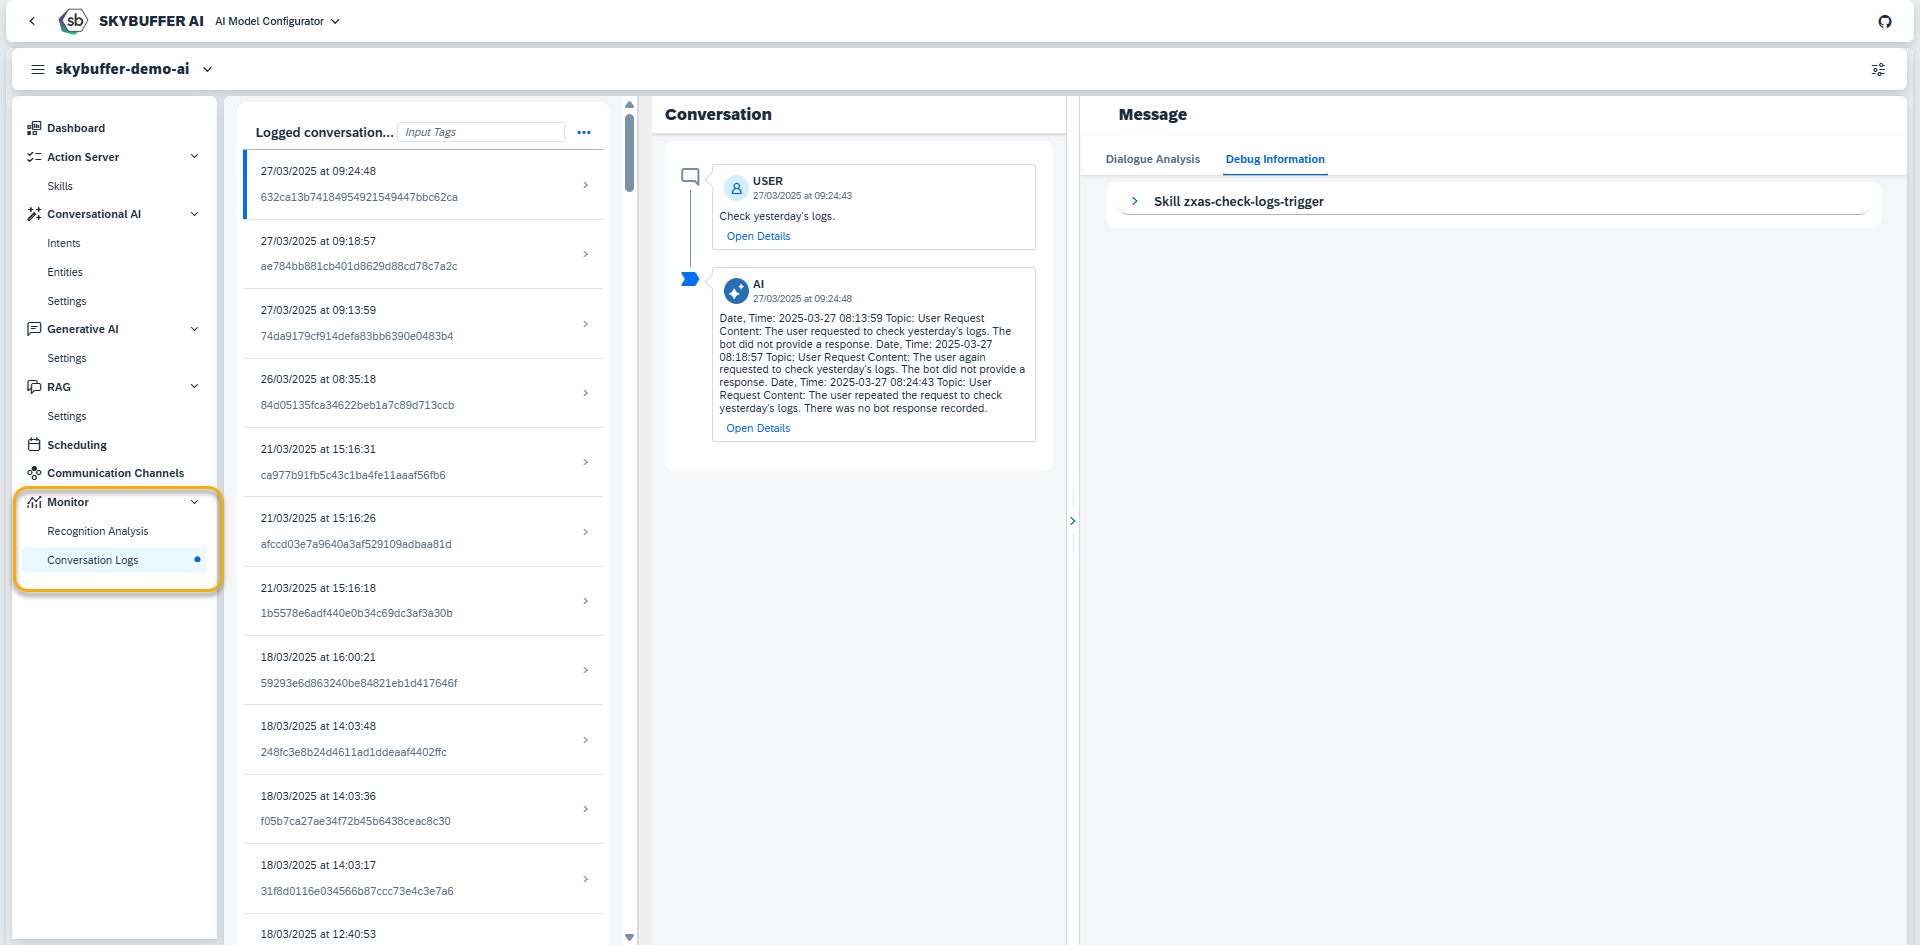
Step 5. To check the results of execution, go to Monitor and check the necessary logs. Please see Monitor Section for guidelines.