Instructions for creating Job Scheduler Services
Introduction
Job scheduler services are used to run processes by sending requests to the appropriate endpoints according to a specified schedule and frequency. This guide describes how to configure one instance of job scheduler service named job_scheduler_datasources with one job (SyncDataSources) needed to synchronize data from SAP system.
Prerequisites
- skybfrxts_*.mtar is installed in the organization and space you need
- skybfryai_*.mtar is installed and application js_bot_management is running
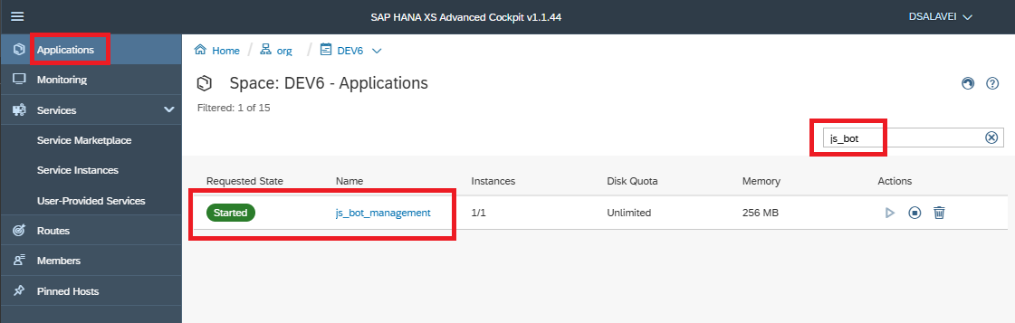
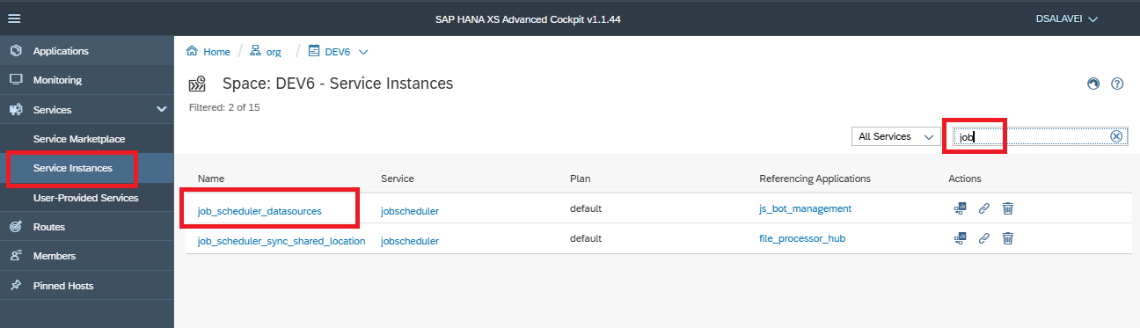
- The instance of the job_scheduler_datasources exists

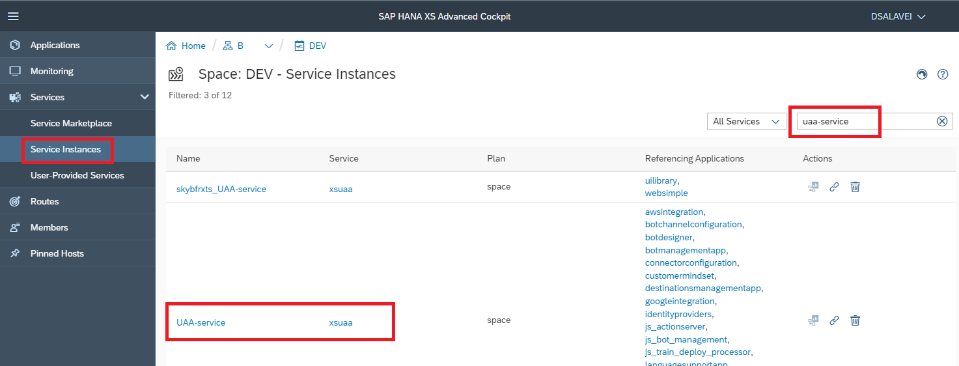
- The instance UAA-service of the xsuaa service exists
Sequence of actions before creating any Job with automatic authorization
The instance of job_scheduler_datasources was automatically created with parameter {“enable-xsuaa-support”: True} and the instance UAA-service was automatically created with specific parameters that are specified in the file xs_security.json while the skybfryai_*.mtar was installing. But since the sequence of creating these services and binding applications to them could be done not in correct order during installation, we need to manually rebind the services to the js_bot_management application. This guarantees us that authorization will work automatically in jobs.
Complete the following steps strictly in order:
- unbind js_bot_management from UAA-service
- unbind js_bot_management from job_scheduler_datasources
- bind js_bot_management with UAA-service
- bind js_bot_management with job_scheduler_datasources
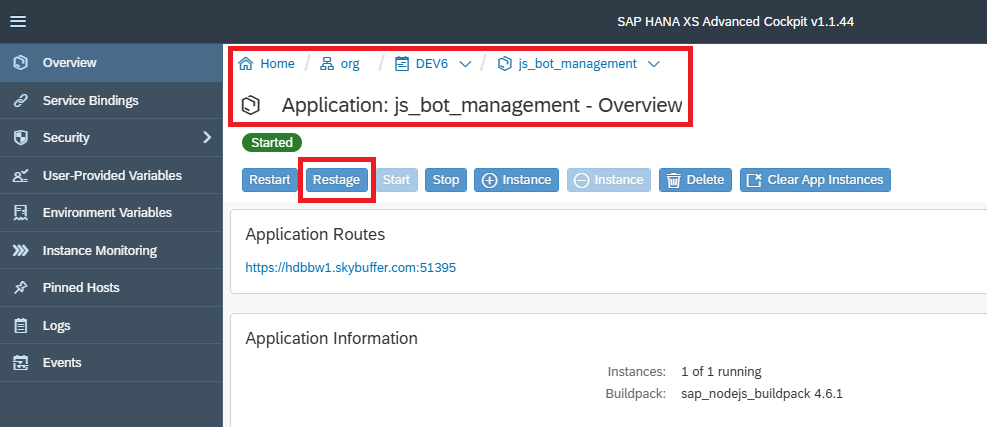
- restage js_bot_management
After completing this sequence, we can start creating jobs and schedules for them.
Creating jobs and schedules
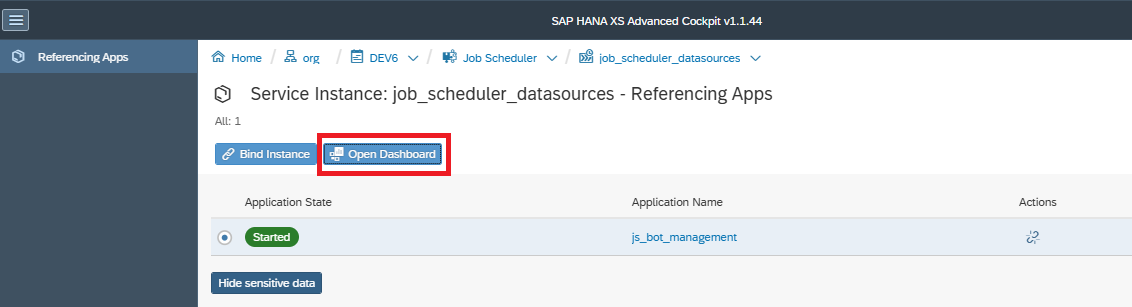
Find there job_scheduler_datasources instance and click it.
Click on Open Dashboard inside the instance
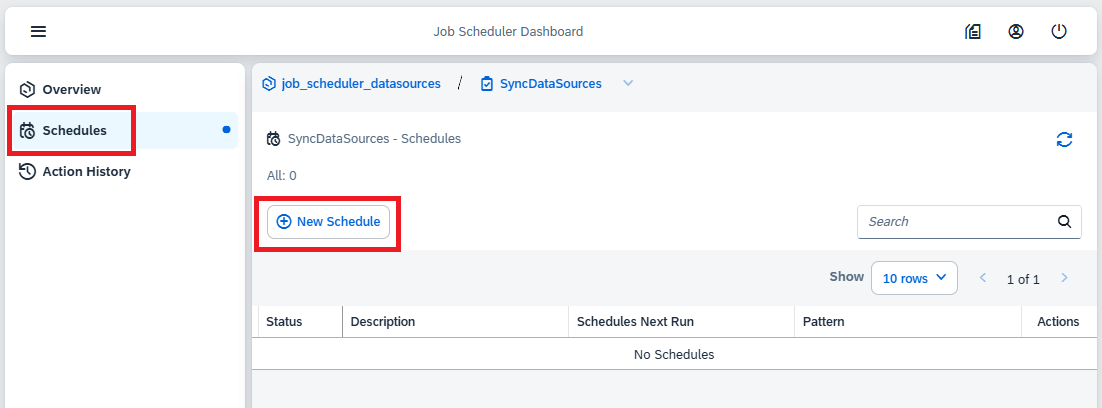
Here click Create button.

Here fill in the fields:
- Name choose the name, suggestion: SyncDataSources.
- Action as (js_bot_management application route)/xsjs/jobDatasoucesSync.xsjs”. Application route (protocol + host + port) you can find at js_bot_management section.
- HTTP Method select GET.
- Target application select js_bot_management

After the job has been created, we must create a schedule.
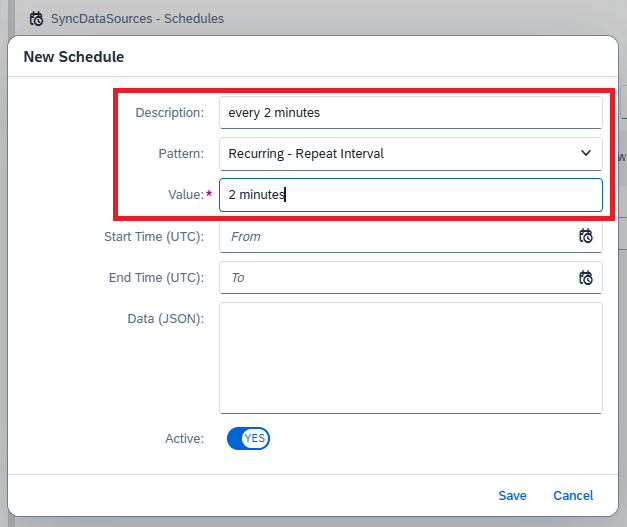
Fill in any description, select pattern as Recurring – Repeat Interval and set the value 2 minutes.
After completing the steps, you will have an active job as shown in the figure below.

You can see a list of logs for every scheduler.
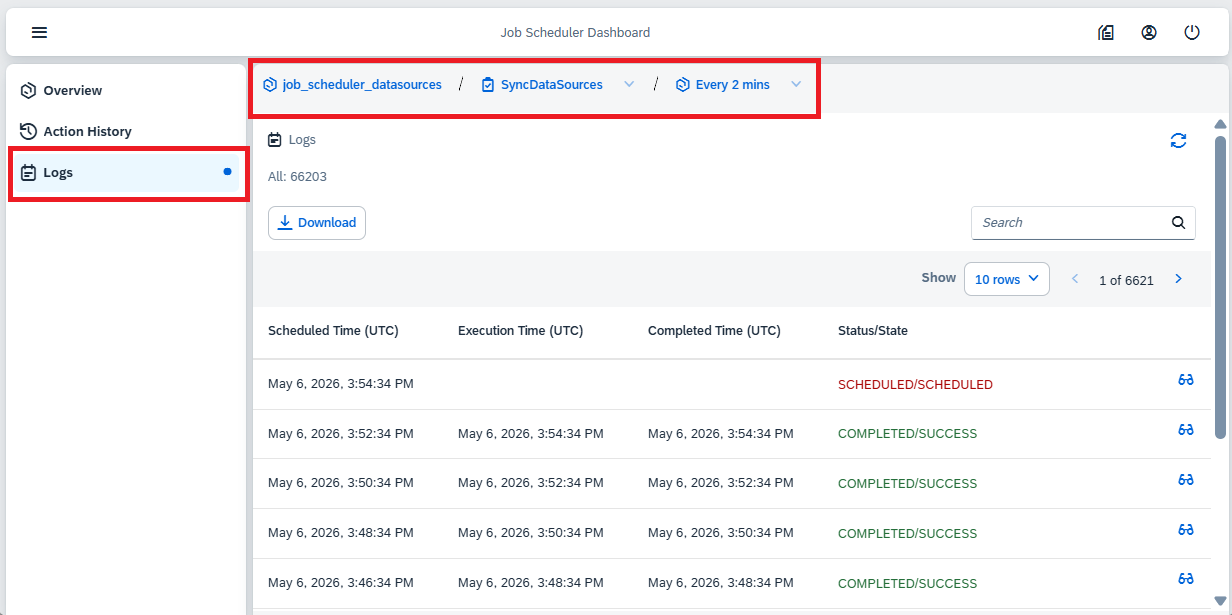
Also, you can see details for every job run.
